
Python OpenCV 指纹识别GUI界面窗体代码
C++ VS OpenGL绘制教室三维立体旋转图像如需安装运行环境或远程调试,可加QQ905733049,或QQ2945218359由专业技术人员远程协助!运行结果如下:
Python OpenCV Qt指纹识别GUI界面窗体代码
如需安装运行环境或远程调试,可加QQ905733049, 或QQ2945218359由专业技术人员远程协助!
运行结果如下:
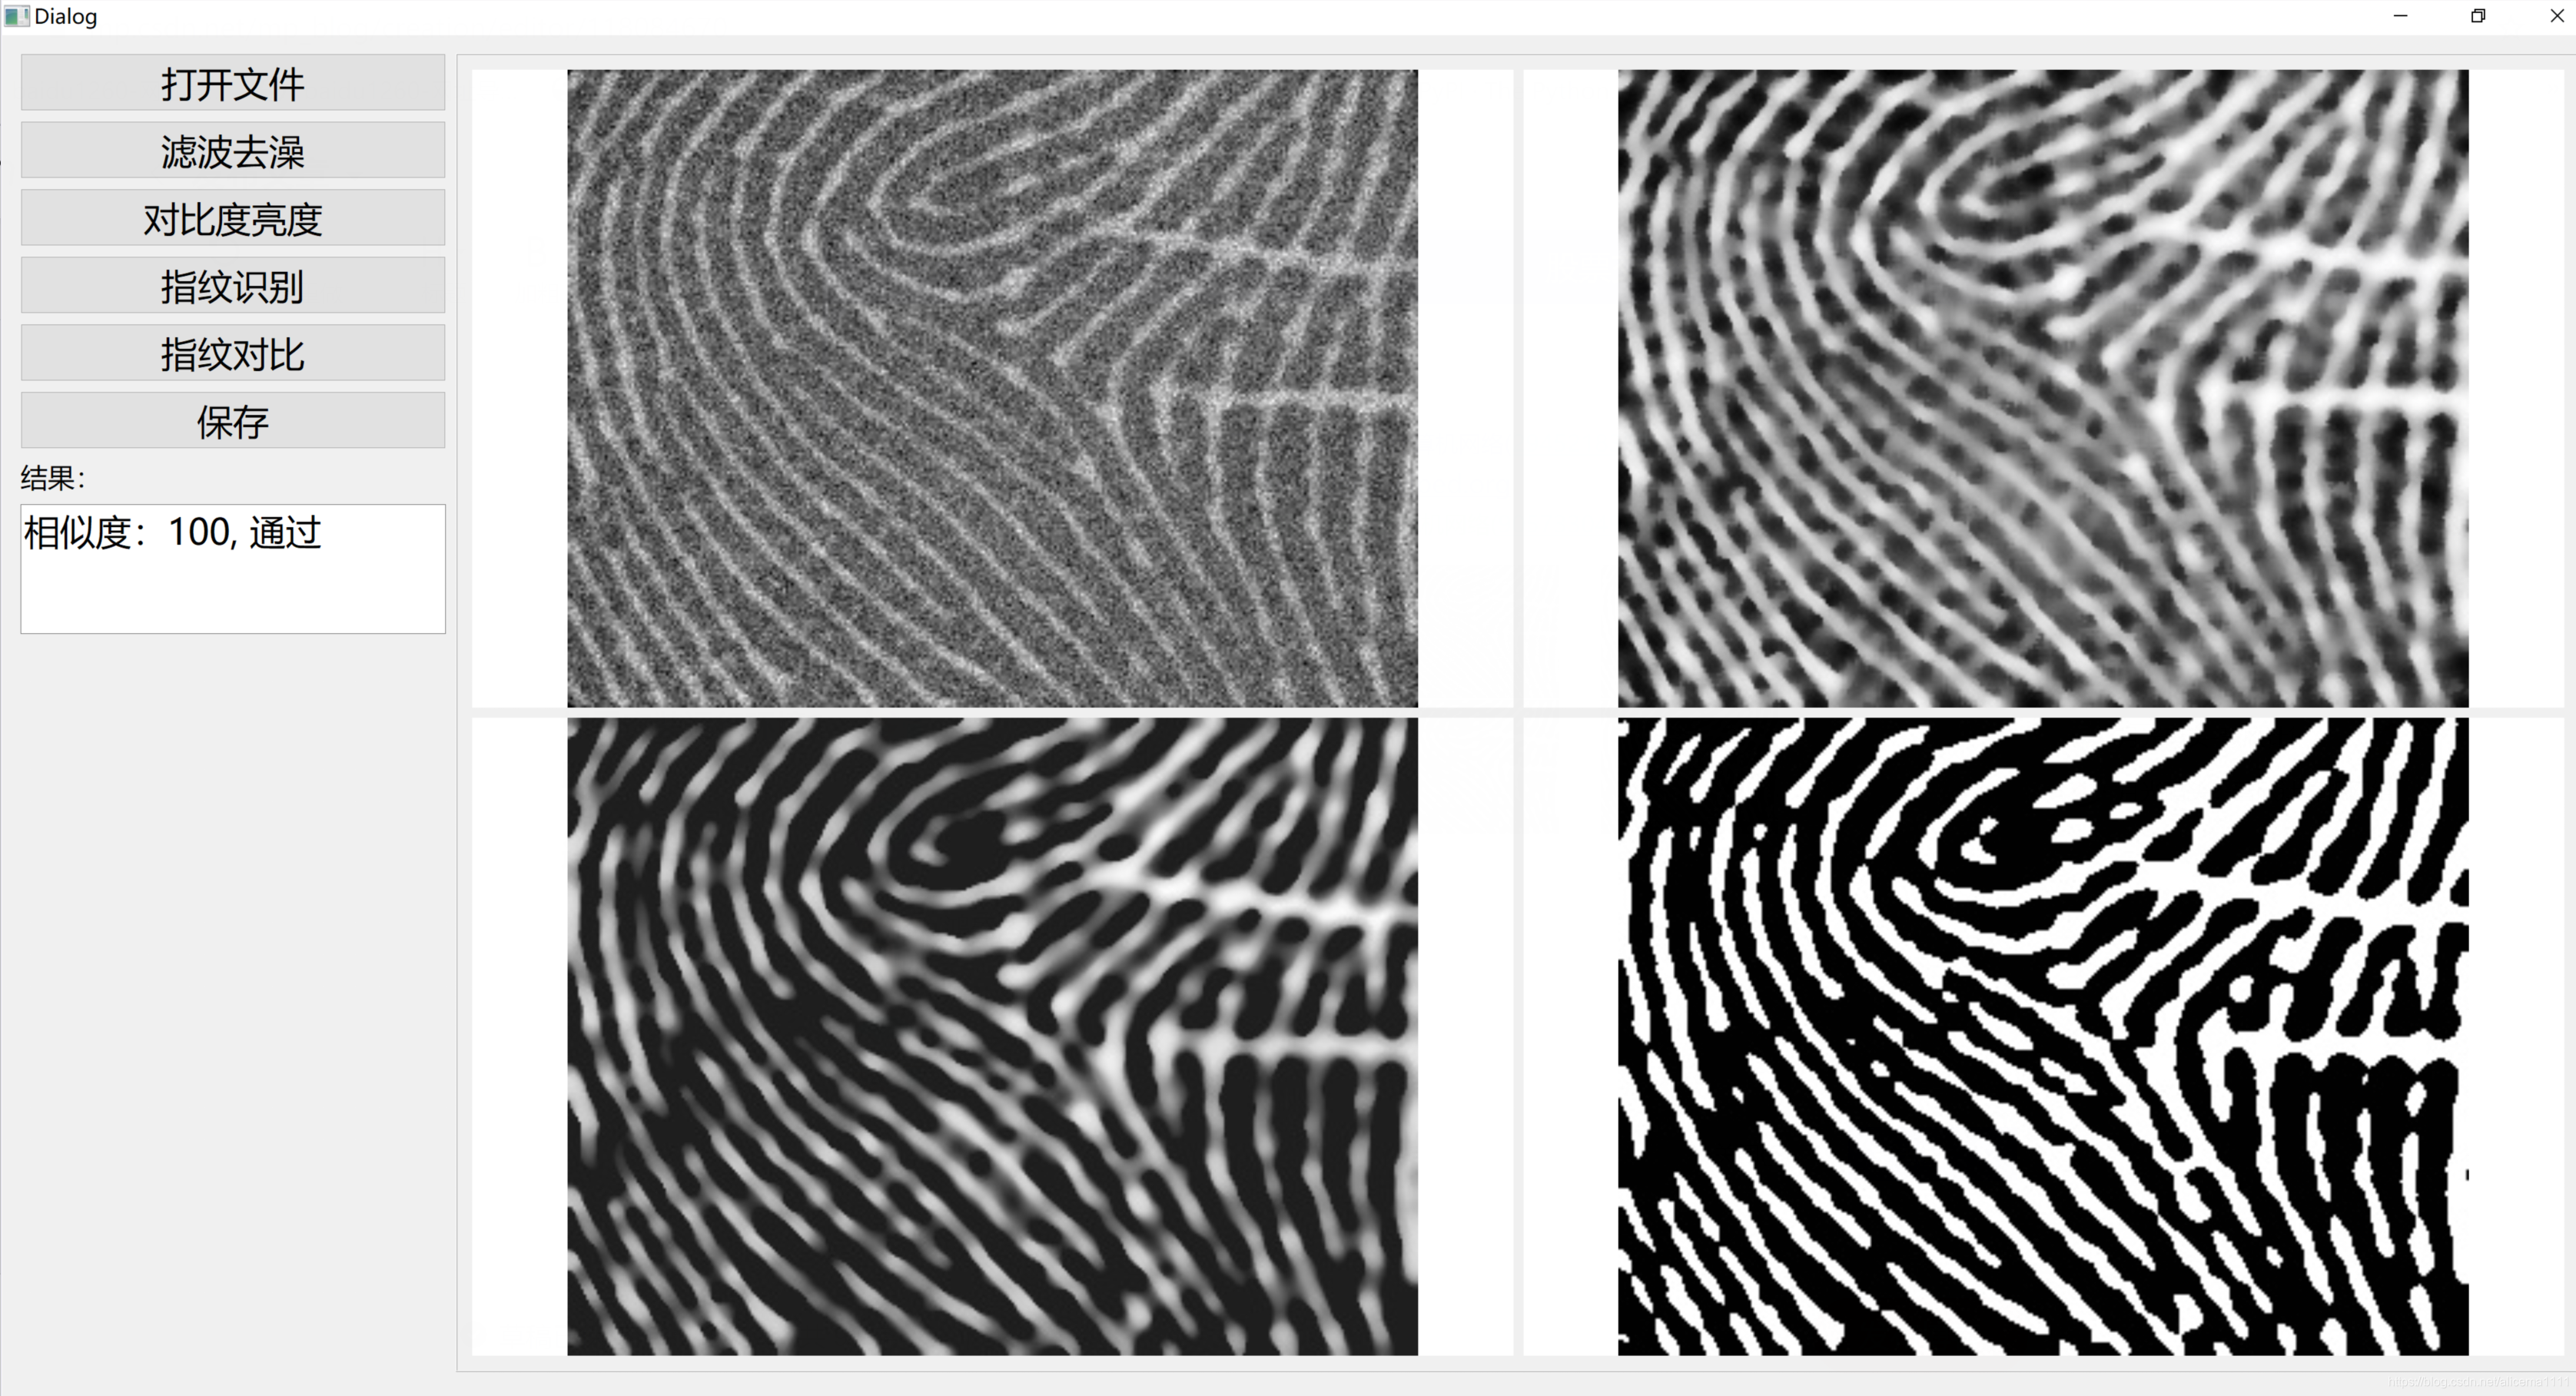
主要代码:
# coding:utf-8
import sys
#从转换的.py文件内调用类
import cv2
import numpy as np
from PyQt5 import QtWidgets


class myWin(QtWidgets.QWidget, Ui_Dialog):

    def __init__(self):
        super(myWin, self).__init__()
        self.setupUi(self)

    def openFileButton(self):
        imgName, imgType  = QFileDialog.getOpenFileName(self,"打开文件","./","files(*.*)")
        img = cv2.imread(imgName)
        cv2.imwrite("temp/original.jpg", img)
        print("rwidth-elif,rheight-elfi", rwidth, rheight)
        img2 = cv2.cvtColor(frame, cv2.COLOR_BGR2RGB)  # opencv读取的bgr格式图片转换成rgb格式
        _image = QtGui.QImage(img2[:], img2.shape[1], img2.shape[0], img2.shape[1] * 3, QtGui.QImage.Format_RGB888)
        jpg_out = QtGui.QPixmap(_image).scaled(rwidth, rheight) #设置图片大小
        self.label.setPixmap(jpg_out) #设置图片显示


    def recogResult(self):
        img = cv.imread("temp/original.jpg",0)
        # 去噪
        img = cv.bilateralFilter(img, 9, 75, 75)
        # cv.imshow('fil', img)
        # 改善对比度和亮度
        for y in range(img.shape[0]):
            for x in range(img.shape[1]):
                img[y, x] = np.clip(0.9 * img[y, x] + (-100), 0, 255)
        # cv.imshow('light', img)
        # cv.imshow('output', img)
        # 二值化
        img = cv.GaussianBlur(img, (3, 3), 0)
        ret1, img = cv.threshold(img, 50, 255, cv.THRESH_OTSU)
        print("cc")
        #cv2.namedWindow("Easmount-CSDN", 0)
        #cv2.imshow("Easmount-CSDN", img)
        #cv2.waitKey(0)

        jpg_out = QtGui.QPixmap(_image).scaled(rwidth, rheight) #设置图片大小
        self.label_2.setPixmap(jpg_out) #设置图片显示


    def deNoise(self):
        img = cv.imread("temp/original.jpg",0)
        # 去噪
        img = cv.medianBlur(img, 5)
        img = cv.equalizeHist(img)
        cv2.imwrite("save/denoise.jpg", img)
        #cv2.waitKey(0)
        jpg_out = QtGui.QPixmap(_image).scaled(rwidth, rheight) #设置图片大小
        self.label_5.setPixmap(jpg_out) #设置图片显示

    def contrastRatio(self):
        img = cv.imread("save/denoise.jpg",0)
        # 去噪
        img = cv.bilateralFilter(img, 9, 75, 75)
        # cv.imshow('fil', img)
        # 改善对比度和亮度
        for y in range(img.shape[0]):
            for x in range(img.shape[1]):
                img[y, x] = np.clip(0.9 * img[y, x] + (-100), 0, 255)
        # cv.imshow('light', img)
        cl = cv.createCLAHE(clipLimit=30, tileGridSize=(8, 8))
        img = cl.apply(img)
        #cv2.waitKey(0)
        jpg_out = QtGui.QPixmap(_image).scaled(rwidth, rheight) #设置图片大小
        self.label_4.setPixmap(jpg_out) #设置图片显示

    def fingerContrast(self):
        # 均值哈希算法
        def aHash(img):
            # 缩放为8*8
            img = cv2.resize(img, (8, 8), interpolation=cv2.INTER_CUBIC)
            # 转换为灰度图
            gray = cv2.cvtColor(img, cv2.COLOR_BGR2GRAY)
            # s为像素和初值为0,hash_str为hash值初值为''
            s = 0


        # 差值感知算法
        def dHash(img):
            # 缩放8*8
            img = cv2.resize(img, (9, 8), interpolation=cv2.INTER_CUBIC)
            # 转换灰度图
            hash_str = ''
            # 每行前一个像素大于后一个像素为1,相反为0,生成哈希
            for i in range(8):
                for j in range(8):
                    if gray[i, j] > gray[i, j + 1]:
                        hash_str = hash_str + '1'
                    else:
                        hash_str = hash_str + '0'
            return hash_str

        # Hash值对比
        def cmpHash(hash1, hash2):
            n = 0
            # hash长度不同则返回-1代表传参出错
            if len(hash1) != len(hash2):
                return -1
            # 遍历判断
            for i in range(len(hash1)):
                # 不相等则n计数+1,n最终为相似度
                if hash1[i] != hash2[i]:
                    n = n + 1
            return n

        img1 = cv2.imread('save/recogResult.jpg')
        img2 = cv2.imread('originalFinger/originalFinger.jpg')

        print(hash1)
        print(hash2)
        n = cmpHash(hash1, hash2)
        print("n",n)
        print('差值哈希算法相似度:' + str(n))
        result='相似度:' + str(100-n)+", 通过"


if __name__=="__main__":
    app=QtWidget.QApplication(sys.arg)
    Widget=myWin()
    sys.exit(app.exec_())
运行结果如下:
Python学习参考实例:
Python相片更换背景颜色qt窗体程序:
https://blog.csdn.net/alicema1111/article/details/106919140
OpenCV汽车识别检测数量统计:
https://blog.csdn.net/alicema1111/article/details/106597260
OpenCV视频识别检测人数跟踪统计:
https://blog.csdn.net/alicema1111/article/details/106113042
OpenCV人脸检测打卡系统:
https://blog.csdn.net/alicema1111/article/details/105315066
Python+Opencv识别视频统计人数:
https://blog.csdn.net/alicema1111/article/details/103804032
Python+OpenCV图像人脸识别人数统计:
https://blog.csdn.net/alicema1111/article/details/105378639
python人脸头发身体部位识别人数统计:
https://blog.csdn.net/alicema1111/article/details/116424942
python opencv人脸识别考勤系统:

技术共进,成长同行——讯飞AI开发者社区
更多推荐
 1
1 0
0- 0


 已为社区贡献19条内容

所有评论(0)