
【AI智能体】新手教程-通过 Chat SDK 搭建网页在线客服
本文介绍如何通过扣子平台的ChatSDK快速部署网页版AI客服。首先需在扣子平台创建客服智能体并发布为ChatSDK,然后通过JavaScript代码将SDK集成到网站中。系统支持个性化配置,包括对话界面UI、悬浮窗样式等,并提供24/7的即时响应和个性化服务。部署步骤涵盖智能体发布、SDK安装、访问令牌获取和界面配置,最后可通过Playground进行可视化调试。该方案适用于提升网站用户体验和运
通过扣子搭建的智能体可以一键发布为 Chat SDK,快速部署到你的自建网站中,作为在线智能客服面向网站的用户提供 AI 答疑服务。本文档介绍通过 Chat SDK 搭建网页版在线客服的详细操作步骤。
场景说明
网站作为企业和组织与用户互动的重要平台,其用户体验和运营效率至关重要。AI 客服作为一种强大的工具,能够显著提升网站的功能性和用户体验。
- 即时响应:AI 客服能够实时回答用户的问题,提供 24/7 的即时帮助。
- 个性化服务:通过分析用户的历史对话数据,AI 客服可以提供个性化的推荐和服务。例如,推荐符合用户兴趣的产品或内容,提供定制化的购物建议等。
扣子现已推出 Chat SDK 帮助你搭建网页版在线客服。Chat SDK 是一个 JavaScript 库,集成了扣子 OpenAPI 的对话、文件上传等能力,便于开发者高效、便捷、快速地搭建一个网页版聊天应用。集成扣子 Chat SDK 之后,用户可通过网页悬浮窗方式与 AI 客服对话。

步骤一:搭建并发布客服智能体
在扣子平台中搭建一个客服智能体,并将其发布为 Chat SDK。
- 搭建一个客服智能体。
这里我们以扣子平台的智能客服扣子助手为例。注意智能客服通常需要上传知识库,作为客服智能体的私有数据来源,帮助智能体学习非公开的专有领域知识。这里我们上传扣子文档做为扣子助手
你可以参考教程搭建你的第一个 AI Bot完成搭建,也可以从扣子模板库中直接复制一个智能客服模板,例如扣子智能客服。

- 将智能体发布为 Chat SDK。
在编排页面右上角单击发布,并选择 Chat SDK 渠道,并单击发布。
未发布为 Chat SDK 的智能体,使用 Chat SDK 时会报错,提示:智能体已经被解绑。

- 确认审核通过。
你可以在发布历史页面查看每次发布的审核结果,审核通过后才能执行后续操作安装 Chat SDK。
步骤二:安装 Chat SDK
进入发布页面复制 SDK 安装代码。
- 在智能体的编排页面,单击发布,进入发布页面。
- 在发布页面,点击安装。
页面将展示安装代码,安装代码中默认使用最新版本的 Chat SDK 配置。复制此代码,此代码将在后续的配置中使用。

- 安装 SDK。
你可以直接在页面中通过 script 标签的形式加载 Chat SDK 的 js 代码,将步骤二中复制好的安装代码粘贴到网页的 <body> 区域中即可。
步骤二中复制好的安装代码示例如下:
<script src="https://lf-cdn.coze.cn/obj/unpkg/flow-platform/chat-app-sdk/1.1.0-beta.0/libs/cn/index.js"></script>步骤三:获取访问令牌
访问令牌用于 Chat SDK 鉴权。
- 如果要实现不同业务侧用户的会话隔离,即每个用户只能看到自己和智能体的对话历史,你需要将鉴权方式配置为 OAuth JWT 鉴权,通过 session_name 参数实现会话隔离,具体请参见如何实现会话隔离。
- 测试场景中可以使用个人访问令牌以快速跑通整体流程,线上应用禁止使用个人访问令牌,应使用 OAuth 方式获取访问令牌,Chat SDK 场景下通常使用 JWT Token,关于 JWT Token 的获取方式可参考OAuth JWT 授权(开发者)。
本文档以个人访问令牌为例进行演示。
在个人访问令牌页面,根据页面提示添加一个新令牌,注意需要添加完整的权限,具体权限清单可参考权限要求。

步骤四:配置聊天界面
安装 Chat SDK 后,您现在可以初始化客户端。在页面中通过调用 CozeWebSDK.WebChatClient 来生成聊天框,当前页面中聊天框包括 PC 和移动端两种布局样式。在 PC 端中,聊天框位于页面右下角,移动端聊天框会铺满全屏。
基础配置
调用 CozeWebSDK.WebChatClient 时,必选参数如下:
|
参数 |
是否必选 |
数据类型 |
描述 |
|
|
config |
type |
必选 |
String |
Chat SDK 调用的对象。 在调用智能体时,该参数保持默认值 bot。 |
|
botId |
必选 |
String |
智能体的 ID。在智能体编排页面的 URL 中,查看 bot 关键词之后的字符串就是智能体 ID。例如https://www.coze.cnwww.coze.com/space/341****/bot/73428668*****,智能体ID 为 73428668*****。 |
|
|
auth |
必选 |
String |
表示鉴权方式。当未配置此参数时表示不鉴权。 为了账号安全,建议配置鉴权,请将 auth.type 设置为 token,在 token 参数中指定相应的访问密钥,并通过 onRefreshToken 监听获取新的密钥,当 token 中设置的访问密钥失效时,Chat SDK 能够自动重新获取新的密钥。 调试场景可以直接使用个人访问密钥,快速体验 Chat SDK 的效果;正式上线时建议通过 OAuth 实现鉴权逻辑,并将获取的 OAuth 访问密钥填写在此处。 |
|
示例如下:
const cozeWebSDK = new CozeWebSDK.WebChatClient({
  config: {
      // Agent ID
    botId: '740849137970326****',
    isIframe: false,
  },
  auth:  {
      // Authentication methods, the default type is 'unauth', which means no authentication is required; it is recommended to set it to 'token', indicating authentication through PAT (Personal Access Token) or OAuth
    type: 'token',
     // When the type is set to 'token', it is necessary to configure a PAT (Personal Access Token) or OAuth access token for authentication.
    token: 'pat_zxzSAzxawer234zASNElEglZxcmWJ5ouCcq12gsAAsqJGALlq7hcOqMcPFV3wEVDiqjrg****',
    // When the access token expires, use a new token and set it as needed.
    onRefreshToken: () => 'pat_zxzSAzxawer234zASNElEglZxcmWJ5ouCcq12gsAAsqJGALlq7hcOqMcPFV3wEVDiqjrg****',
  }
});
高级配置
扣子 Chat SDK 支持多种属性配置,开发者可以按需调整对话框的多种展示效果,例如展示的用户信息、对话框 UI 效果、悬浮球展示、底部文案等。
你可以在 WebChatClient 方法中添加各种属性,实现对应的效果。目前支持的全部属性可参考步骤五:配置属性。本文档以常见的属性配置为例进行演示。
设置小助手图标
ui.base 参数用于添加聊天窗口的整体 UI 效果,包括应用图标参数 icon。icon 为 String 类型的可选参数,必须是一个可访问的公开 URL 地址,用于设置对话页面中的小助手头像。
扣子企业版支持将 icon 修改为自定义的品牌 Logo,扣子团队版和个人版不支持自定义品牌。
在本示例中,可以设置为扣子小助手的图标。
隐藏顶部标题栏
默认展示顶部标题栏。通过 ui.header 参数可以指定是否展示顶部标题栏(不包括关闭按钮)。设置为 false 即可隐藏标题栏。
设置聊天框标题、位置容器
chatBot 参数用于控制聊天框的 UI 和基础能力,包括标题、大小、位置等基本属性。
小助手在顶部导航栏的默认名称为 Coze Bot,我们需要通过 chatBot.title 参数将其改为扣子小助手。
另外,还可以通过 chatBot.el 设置聊天框放置位置的容器(Element)。
- 开发者应自行设置聊天框高度、宽度,聊天框会占满整个元素空间。
- Chat SDK 会自动控制聊天框的显示隐藏,但是对于宿主的 element 元素不会做控制,开发者按需在 onHide、onShow 回调时机中来控制宿主元素的显示隐藏。
相关回调:
- onHide:当聊天框隐藏的时候,会回调该方法。
- onShow: 当聊天框显示的时候,会回调该方法。
- onBeforeShow: 聊天框显示前调用,如果返回了 false,则不会显示。支持异步函数。
- onBeforeHide: 聊天框隐藏前调用,如果返回了 false,则不会隐藏。支持异步函数。
设置效果:

示例代码:

设置底部文案
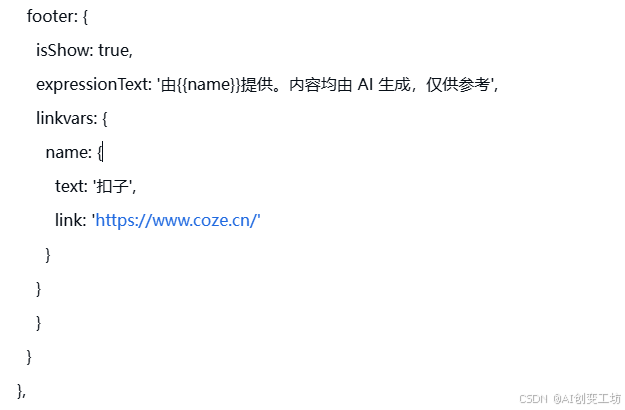
底部文案指小助手聊天框底部一行版权文案,展示对话服务的提供方信息,默认为Powered by coze. AI-generated content for reference only.。你可以通过 footer 参数隐藏此文案或改为其他文案,支持在文案中设置超链接。
我们可以将其设置为中文文案 由扣子提供。内容均由 AI 生成,仅供参考。
设置效果:

示例代码:
可视化调试
了解基础的参数设置之后,你可以通过扣子 Playground 可视化调试你的网页客服小助手。
进入扣子 Chat SDK Playground,在 index.js 文件中添加步骤四中编写好的配置,并单击运行。
页面右下角会展示扣子图标,单击图标即可与你的客服小助手实时对话,查看聊天界面的各项配置是否生效。调试完毕后,将 js 代码添加到网站的前端页面上,就完成了小助手的前端部署。

示例代码
以本文档中调试的扣子小助手为例,完整的 html 示例代码如下:
<!doctype html>
<html lang="en">
<head>
    <style>
        /* 自定义悬浮入口的位置 */
        #position_demo {
            position: absolute;
            right: 10px;
            bottom: 20px;
        }
    </style>
</head>
<body>
<h1>Hello World</h1>
<div id="position_demo"></div>
    <script src="https://lf-cdn.coze.cn/obj/unpkg/flow-platform/chat-app-sdk/1.1.0-beta.0/libs/cn/index.js"></script>
    <script>
    new CozeWebSDK.WebChatClient({
  /**
  * Agent or app settings
  * for agent
  * @param config.bot_id - Agent ID.
  * for app
  * @param config.type - To integrate a Coze app, you must set the value to app.
  * @param config.appInfo.appId - AI app ID.
  * @param config.appInfo.workflowId - Workflow or chatflow ID.
  */
  config: {
    bot_id: '7493834003054297088',
  },
  /**
  * The auth property is used to configure the authentication method.
  * @param type - Authentication method, default type is 'unauth', which means no authentication is required; it is recommended to set it to 'token', which means authentication is done through PAT (Personal Access Token) or OAuth.
  * @param token - When the type is set to 'token', you need to configure the PAT (Personal Access Token) or OAuth access key.
  * @param onRefreshToken - When the access key expires, a new key can be set as needed.
  */
  auth:  {
    type: 'token',
    token: 'pat_RFT35rMlSTdzMUcv9ZzhCyfI2Ge0R8XR1zKLuZYuoYy96ysgBSBmnnk5tq4VnbDx',
    onRefreshToken: async () => '',
  },
  /**
  * The userInfo parameter is used to set the display of agent user information in the chat box.
  * @param userInfo.id - ID of the agent user.
  * @param userInfo.url - URL address of the user's avatar.
  * @param userInfo.nickname - Nickname of the agent user.
  */
  userInfo: {
    id: 'user',
    url: 'https://lf-coze-web-cdn.coze.cn/obj/coze-web-cn/obric/coze/favicon.1970.png',
    nickname: 'UserA',
  },
  ui: {
    /**
    * The ui.base parameter is used to add the overall UI effect of the chat window.
    * @param base.icon - Application icon URL.
    * @param base.layout - Layout style of the agent chat box window, which can be set as 'pc' or'mobile'.
    * @param base.lang - System language of the agent, which can be set as 'en' or 'zh-CN'.
    * @param base.zIndex - The z-index of the chat box.
    */
    base: {
      icon: 'https://lf-coze-web-cdn.coze.cn/obj/coze-web-cn/obric/coze/favicon.1970.png',
      layout: 'pc',
      lang: 'en',
      zIndex: 1000,
    },
    /**
    * Control the UI and basic capabilities of the chat box.
    * @param chatBot.title - The title of the chatbox
    * @param chatBot.uploadable - Whether file uploading is supported.
    * @param chatBot.width - The width of the agent window on PC is measured in px, default is 460.
    * @param chatBot.el - Container for setting the placement of the chat box (Element).
    */
    chatBot: {
      title: '扣子小助手',
      uploadable: true,
      width: 390
    },
    /**
    * Controls whether to display the floating ball at the bottom right corner of the page.
    */
    asstBtn: {
      isNeed: true,
    },
    /**
    * The ui.footer parameter is used to add the footer of the chat window.
    * @param footer.isShow - Whether to display the bottom copy module.
    * @param footer.expressionText - The text information displayed at the bottom.
    * @param footer.linkvars - The link copy and link address in the footer.
    */
    footer: {
      isShow: true,
      expressionText: '由{{name}}提供。内容均由 AI 生成,仅供参考',
      linkvars: {
        name: {
          text: '扣子',
          link: 'https://www.coze.cn/'
        }
      }
    }
  },
});
</script>
</body>
</html>
技术共进,成长同行——讯飞AI开发者社区
更多推荐

 10
10 0
0- 0


 已为社区贡献12条内容

所有评论(0)