
使用cv2.dnn实现GoogleNet图像分类
使用cv2.dnn实现GoogleNet图像分类
·
文章目录
1.深度学习网路模型
https://mydreamambitious.blog.csdn.net/article/details/125459959
拓展:
YOLO-V3实时检测实现:https://mydreamambitious.blog.csdn.net/article/details/125503943
YOLO-V3实时检测实现(opencv+python实现)——改进——>更加的易懂:
https://mydreamambitious.blog.csdn.net/article/details/125520487
2.GoogleNet网络模型
https://mydreamambitious.blog.csdn.net/article/details/124237000
3.下载GoogleNetcaffe模型文件
http://dl.caffe.berkeleyvision.org/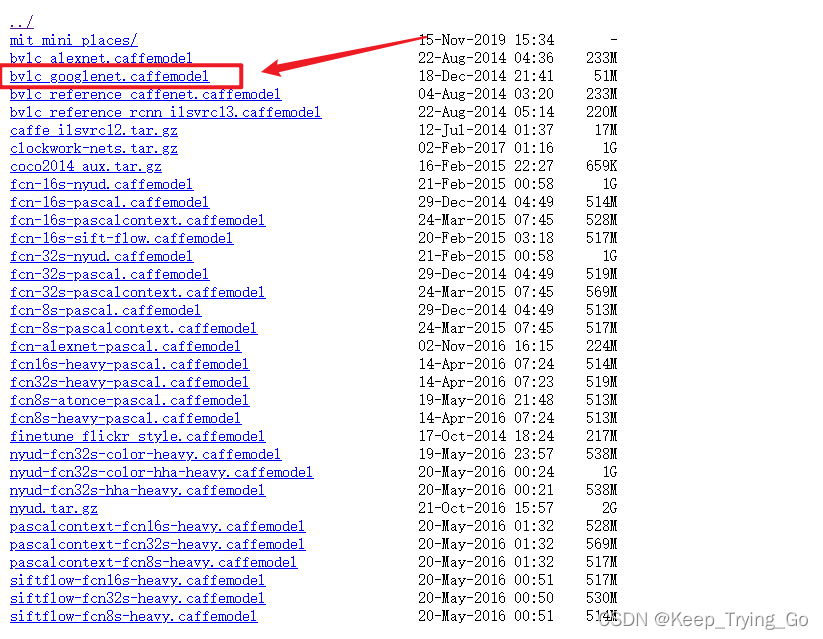
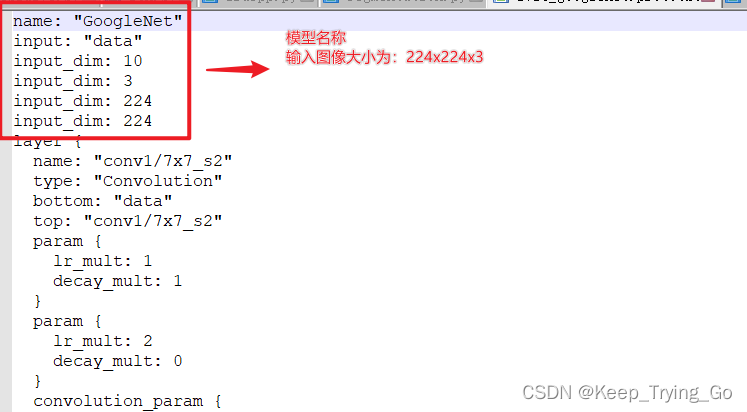
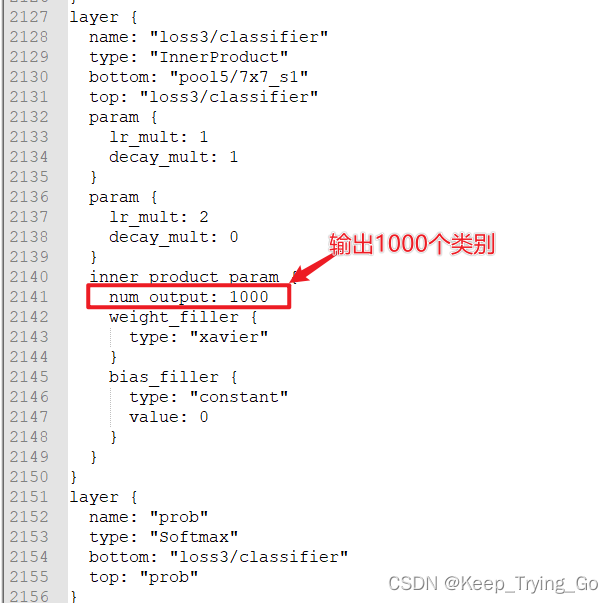
4.模型的描述文件和分类文件
注:虽然我们这里使用的python中的opencv来实现GoogleNet图像分类,可是我们需要GoogleNet模型的描述文件和分类文件,所以我们这里需要下载Opencv-3-3-0,从里面获取描述文件和分类文件:
https://www.raoyunsoft.com/opencv/opencv-3.3.0/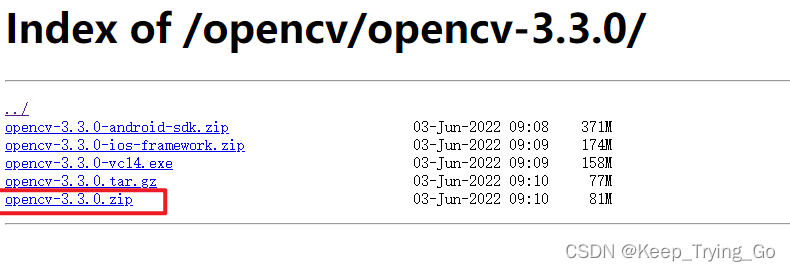
下载好Opencv-3-3-0压缩包之后,解压,打开以下路径即可找到GoogleNet描述文件和分类文件。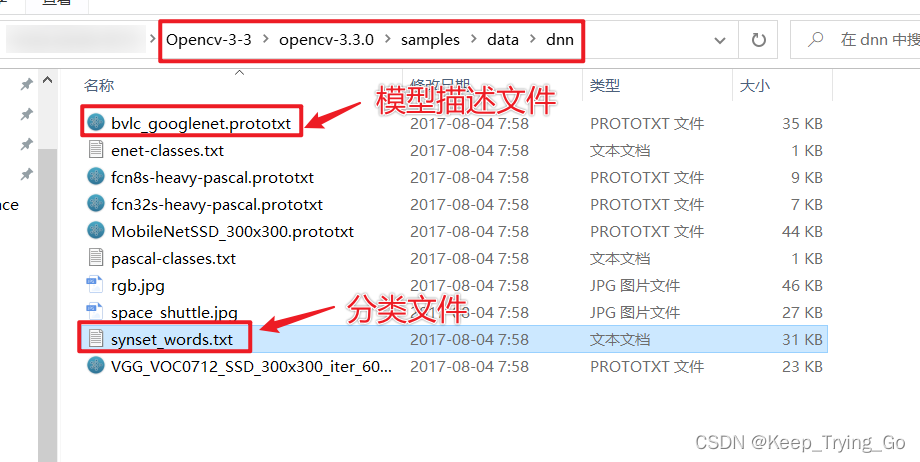
5.正文
(1)读取文件
import os
import cv2
import numpy as np

#使用Googlenet的caffe模型和描述文件
net=cv2.dnn.readNetFromCaffe(prototxt='model//bvlc_googlenet.prototxt',
                             caffeModel='model//bvlc_googlenet.caffemodel')
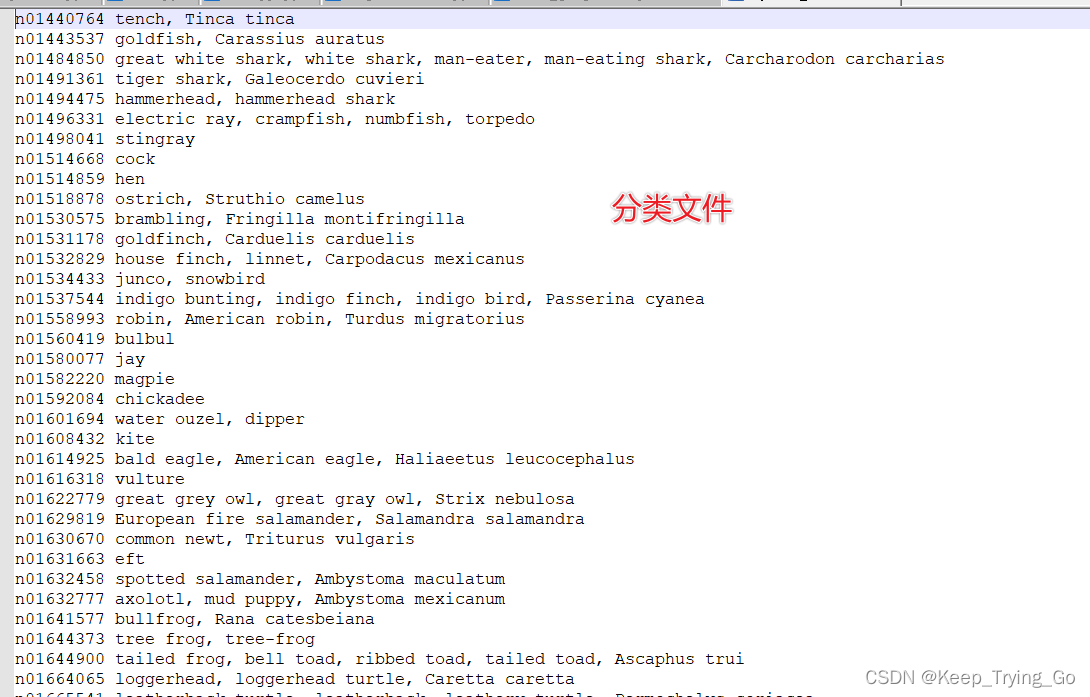
(2)读取类别文件并进行一定的处理
#读取类别文件
def readClasses():
    classes=[]
    with open('model//synset_words.txt','r') as fp:
        readlines=fp.read().strip().split('\n')
        #遍历每一行
        for line in readlines:
            #读取编号后面的类别名
            classes.append(line[line.find(' ')+1:].split(',')[0])

    # for i in classes:
    #     print(i)
    # print(len(classes))
    return classes
(3)图像预处理和网络的前向推断
def processImageForward(img):
    # 对图像进行预处理
    blob = cv2.dnn.blobFromImage(img, scalefactor=1.0,
                                 size=(224, 224), mean=(104, 117, 123),
                                 swapRB=False, crop=False)

    # 图像的输入网络
    net.setInput(blob)
    # 进行前向推理
    prediction = net.forward()

    # 获取预测的概率的最大值的索引
    classes = readClasses()
    index = np.argmax(prediction[0])
    pred_name = classes[index]
    confid = round(prediction[0][index] * 100, 2)
    return pred_name,confid
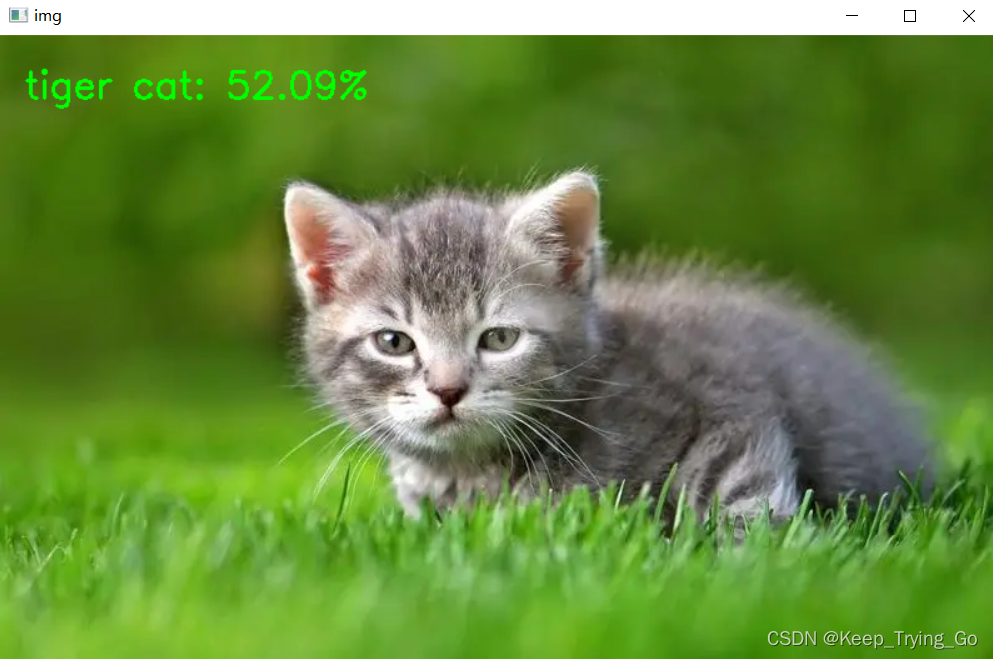
(4)预测单张图像并显示图像
def ClasfiferSignal():
    # 读取图片
    img = cv2.imread('images//6.png')
    # 将图像缩放至224x224
    imgSize = cv2.resize(src=img, dsize=(224, 224))

    pred_name,confid=processImageForward(imgSize)

    text=pred_name+': '+str(confid)+'%'
    cv2.putText(img=img,text=text,org=(20,50),
                fontFace=cv2.FONT_HERSHEY_SIMPLEX,
                fontScale=1.0,color=(0,255,0),thickness=2)

    cv2.imshow('img',img)
    cv2.waitKey(0)
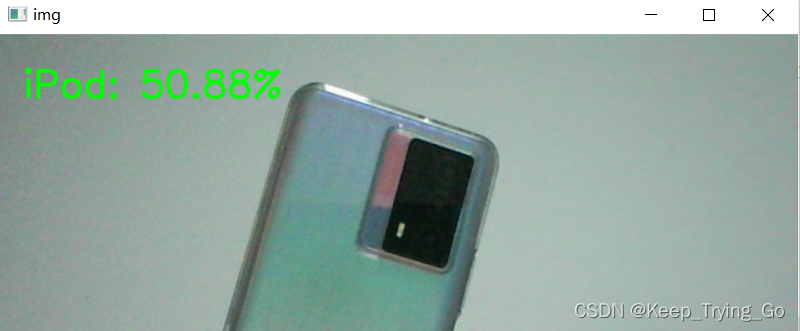
(5)实时检测
def detectTime():
    cap=cv2.VideoCapture(0)
    classes=readClasses()
    while cap.isOpened():
        # 读取图片
        ret,frame=cap.read()
        #flipCode大于0,表示水平翻转,由于opencv读取的图像和正常的是反转的
        frame=cv2.flip(src=frame,flipCode=2)
        #对图像的预处理及前向推断
        pred_name,confid=processImageForward(frame)

        text = pred_name + ': ' + str(confid) + '%'
        cv2.putText(img=frame, text=text, org=(20, 50),
                    fontFace=cv2.FONT_HERSHEY_SIMPLEX,
                    fontScale=1.0, color=(0, 255, 0), thickness=2)

        cv2.imshow('img', frame)
        key=cv2.waitKey(1)
        if key==27:
            break
    cap.release()
cv2.destroyAllWindows()
if __name__ == '__main__':
    print('Pycharm')
    # ClasfiferSignal()
    detectTime()
6.检测结果

技术共进,成长同行——讯飞AI开发者社区
更多推荐


 1
1 0
0- 0


 已为社区贡献34条内容

所有评论(0)