
Linux服务器使用mihomo
Linux服务器使用mihomo
目录
5.1 报错 Can't find MMDB, start download
5.2 can't open cache file: timeout
1 引言
在linux服务器上执行git clone有时候会失败,还有就是有时候一个大型的构建工程里面,内部脚本可能会默认执行一些wget的命令,这时候也会失败,于是花点时间看看怎么在linux服务器上面配置xxxx的问题。
2 下载mihomo
在服务器上创建个自己的文件夹,虽然一般是让在~./config文件夹下,但是由于这是服务器,很多人用,所以最好在自己的目录下创建个单独的文件夹。
wget -q -O mihomo.gz \
https://github.com/MetaCubeX/mihomo/releases/download/v1.19.10/mihomo-linux-amd64-compatible-v1.19.10.gz
用上面的命令下载mihomo,如果失败(大概率是失败的),就把下面的命令复制到浏览器中,手动下载后上传到服务器总。
https://github.com/MetaCubeX/mihomo/releases/download/v1.19.10/mihomo-linux-amd64-compatible-v1.19.10.gz
3 解压与测试
# 解压并赋予执行权限
gunzip mihomo.gz
chmod +x mihomo

# 测试版本是否可执行
./mihomo -v如果返回了类似mihomo version 1.19.10 说明下载成功了。
4 下载订阅配置
curl -sSL "你的订阅链接" -o config.yaml这里解释一下,这个订阅链接就是在xxxx里面的那个链接,这个链接网址打开之后就是一堆配置内容(是你的配置文件,里面包含服务器、端口、协议等信息。),如果这个命令执行失败,那么就把你的订阅链接复制到浏览器中,然后把内容全选然后复制到你新建的一个config.yaml中。
注意,为了安全,要把第一行的allow-lan: true改为下面内容!!!!!!!!
allow-lan: false
bind-address: 127.0.0.1
external-controller: 127.0.0.1:9090
5 启动mihomo
./mihomo -f config.yaml &
export http_proxy="http://127.0.0.1:9981" #这里的9981要和你的config.yaml中的端口一致。
export https_proxy="http://127.0.0.1:9981"
export all_proxy="socks5://127.0.0.1:9981"
可以把上面的四行写到一个start.sh脚本中,并用source start.sh 执行(不能直接./start.sh执行)
#!/bin/bash

# 启动 mihomo
./mihomo -f ./config.yaml > mihomo.log  &

# 等待几秒确保进程启动
sleep 2

# 设置代理环境变量(记得根据 config.yaml 实际端口修改)
export http_proxy="http://127.0.0.1:9981"
export https_proxy="http://127.0.0.1:9981"
export all_proxy="socks5://127.0.0.1:9981"

echo "[✔] Proxy started. Environment variables set."
上面如果正常那就可以直接用了,如果报下面的三个错误,可以按照下面的方法解决。
5.1 报错 Can't find MMDB, start download
执行上面的命令的过程中可能会报错,
Start initial configuration in progress
INFO[2025-06-16T11:16:31.313964446+08:00] Geodata Loader mode: memconservative
INFO[2025-06-16T11:16:31.314121577+08:00] Geosite Matcher implementation: succinct
INFO[2025-06-16T11:16:31.316158334+08:00] Can't find MMDB, start download
那么就手动下载这个什么mmdb然后上传到服务器上:
https://github.com/Dreamacro/maxmind-geoip/releases/latest/download/Country.mmdb
5.2 can't open cache file: timeout
如果报下面的错误,那说明前面测试的时候启动过一次了,然后端口可能备战用了,杀掉之前的进程。
INFO[2025-06-16T11:30:50.357102256+08:00] Start initial configuration in progress
INFO[2025-06-16T11:30:50.377978651+08:00] Geodata Loader mode: memconservative
INFO[2025-06-16T11:30:50.378042131+08:00] Geosite Matcher implementation: succinct
INFO[2025-06-16T11:30:50.394285669+08:00] Initial configuration complete, total time: 36ms
ERRO[2025-06-16T11:30:50.397397361+08:00] Start Mixed(http+socks) server error: listen tcp :9981: bind: address already in use
WARN[2025-06-16T11:30:51.365584628+08:00] [CacheFile] can't open cache file: timeout
^C
5.3 设置了还是不能用
问题可能是export的时候后面用的端口号和config.yaml里面的端口号不一致。
6 执行你想要的下载以及编译操作
前面已经配置好xxxx了,接下来你可以执行你的各种操作了,比如git clone,比如curl,比如编译你的大型工程等。
7 关闭mihomo
由于这个是在服务器上,使用完之后把进程关掉,用下面的命令。
#杀掉进程
pkill mihomo
#或者用ps -ef | grep mihomo查看进程号,然后kill掉。

#清除代理设置
unset http_proxy
unset https_proxy
unset all_proxy
可以把上面的四行写到一个stop.sh脚本中,并用source stop.sh 执行(不能直接./stop.sh执行)
8 附:怎么看release的问题
中间安装的时候,最开始打开github的 https://github.com/MetaCubeX/mihomo/,我都没看到nohomo的release在哪里,
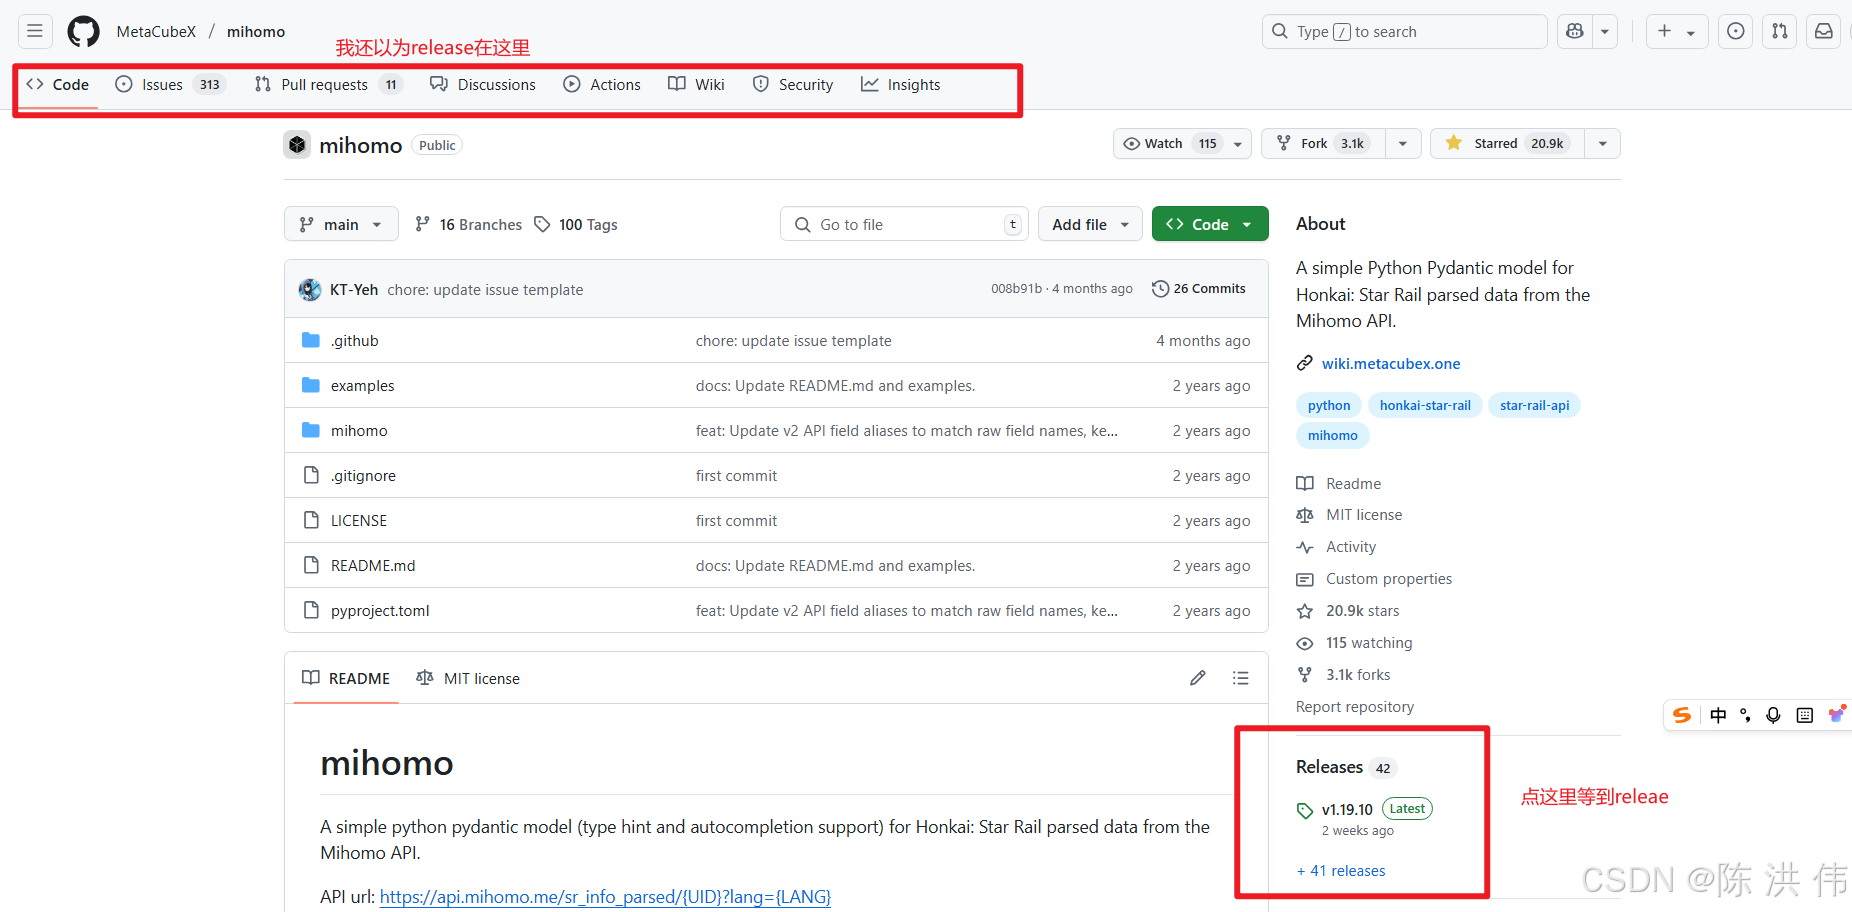
或者在https://github.com/MetaCubeX/mihomo/ 后面加上releases变成https://github.com/MetaCubeX/mihomo/releases 也是可以打开的。
9 参考文献:

技术共进,成长同行——讯飞AI开发者社区
更多推荐
 14
14 0
0- 0


 已为社区贡献23条内容

所有评论(0)