
Cloudera集群运维手册-集群安装篇
本文详细演示了CDP7.3的安装过程
[前]关于本文
CDP7.3已经发布,和之前的版本已经CDH相比,安装步骤上有一些变化如:
- CDH7.3不再提供Redhat7的安装包,您需要Redhat8或者Redhat9的操作系统
- 从CDH7.1.9版本开始,YARN Queue Manager 用户必须将YARN Queue Manager配置到一个外部的PostgreSQL数据库
- 从Cloudera Manager 7.7.3版本开始,Cloudera Manager需要依赖python3.8或python3.9环境运行
- CDP 7.1.8 及更高版本中的 Hue,使用 Python 3.8。在安装 Cloudera Manager 后,并在将这些服务添加到集群之前,您必须在运行受影响服务的所有主机上安装 Python 3.8。
因此本文详细介绍了当前最新版本Cloudera Manager 7.13.1+CDP Privae Cloud Base 7.3.1的安装步骤
[一]安装前准备
集群组件版本汇总
| 服务 | 版本 |
| Cloudera Manager | 7.13.1 |
| CDP Privae Cloud Base | 7.3.1 |
| Mysql | 8.0.17 for Linux on x86_64 |
| Python | Python 3.9.19 |
CDP7.3中的组件版本信息
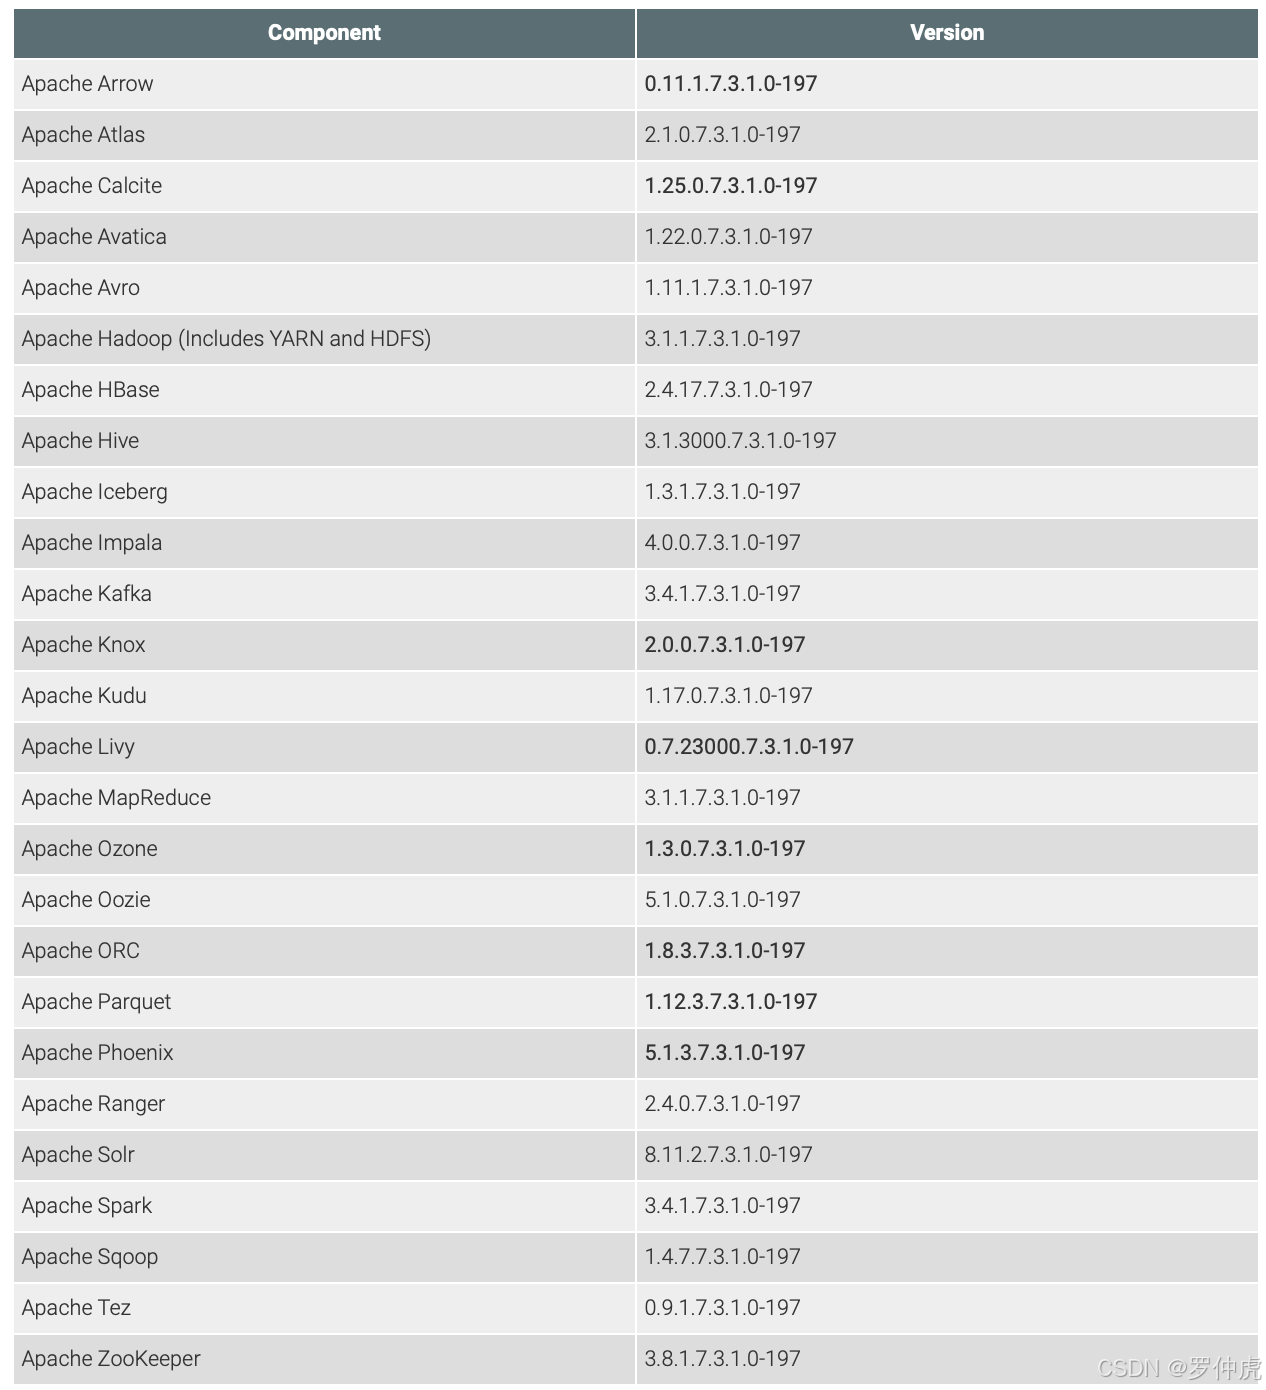

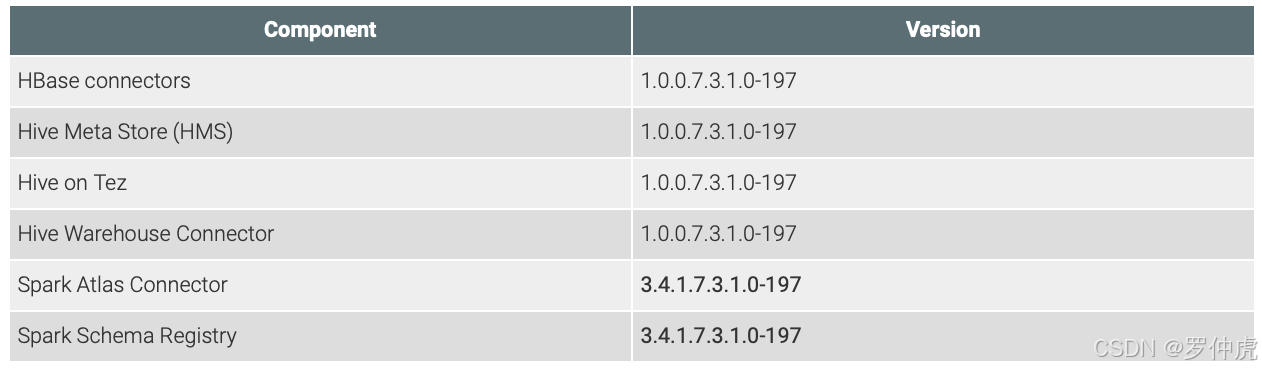
【重要提示】具提使用的CDP版本和Cloudera Manager的产品兼容性信息,请您安装前一定使用https://supportmatrix.cloudera.com工具进行确认
Python支持信息

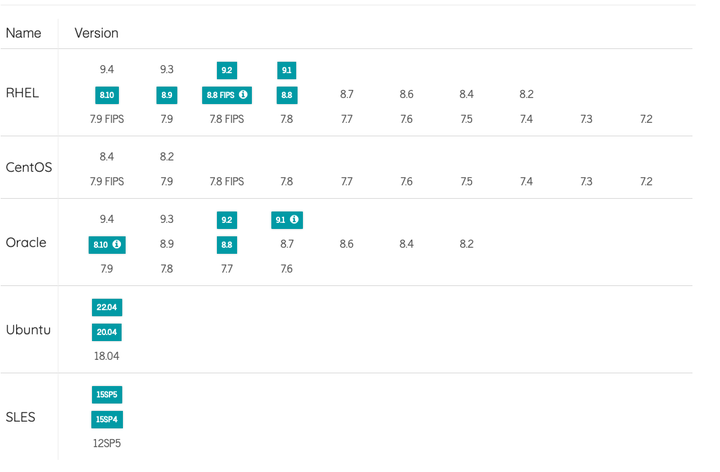
操作系统支持信息
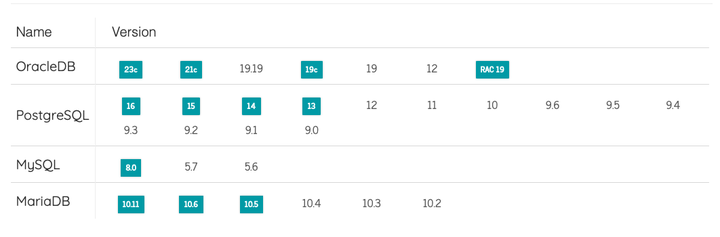
数据库支持信息
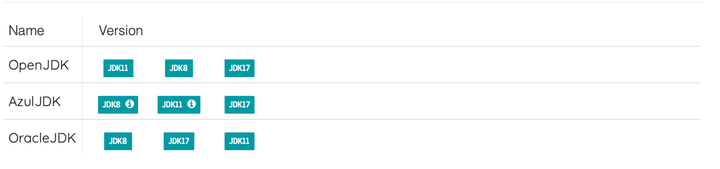
JDK支持信息
处理器支持信息

[二]集群主机准备
|
主机名 |
操作系统 |
内存 |
CPU |
磁盘 |
|---|---|---|---|---|
| 192.168.0.171 | Redhat8.10 | 32 | 6 | 1 |
| 192.168.0.172 | Redhat8.10 | 32 | 6 | 1 |
| 192.168.0.173 | Redhat8.10 | 32 | 6 | 1 |
| 192.168.0.174 | Redhat8.10 | 64 | 12 | 2 |
| 192.168.0.175 | Redhat8.10 | 64 | 12 | 2 |
| 192.168.0.176 | Redhat8.10 | 64 | 12 | 2 |
配置ssh免密登录
【一般提示】配置免密只是为了执行批量命令方便,Cloudera Manager及CDP组价并不要求主机之间必须有免密登录才能正常运行
- 生成ssh秘钥
[root@CDP73-1 ~]# ssh-keygen Generating public/private rsa key pair. Enter file in which to save the key (/root/.ssh/id_rsa): Created directory '/root/.ssh'. Enter passphrase (empty for no passphrase): Enter same passphrase again: Your identification has been saved in /root/.ssh/id_rsa. Your public key has been saved in /root/.ssh/id_rsa.pub. The key fingerprint is: SHA256:P0RtVJ3f5xIYeHqtWg/kiR+pBIdCR7d62RqUIjf0BGk root@CDP73-1.test.com The key's randomart image is: +---[RSA 3072]----+ | .+oo......| | ..E+.=o ..| | ..o+.*oo+ o| | .oo*o++ o +| | .So==.+ o.| | +ooO . .| | .+= + . | | o.. . | | | +----[SHA256]-----+ [root@CDP73-1 ~]# - 配置171到所有主机的免密登录
[root@CDP73-1 ~]$ ssh-copy-id 192.168.0.172
/usr/bin/ssh-copy-id: INFO: Source of key(s) to be installed: "/root/.ssh/id_rsa.pub"
The authenticity of host '192.168.0.172 (192.168.0.172)' can't be established.
ECDSA key fingerprint is SHA256:lk1SGXWCxWIiyLlSCWVt0UWKvUl0laeSAUnQoEv4ka4.
Are you sure you want to continue connecting (yes/no/[fingerprint])? yes
/usr/bin/ssh-copy-id: INFO: attempting to log in with the new key(s), to filter out any that are already installed
/usr/bin/ssh-copy-id: INFO: 1 key(s) remain to be installed -- if you are prompted now it is to install the new keys
root@192.168.0.102's password:

Number of key(s) added: 1

Now try logging into the machine, with:   "ssh '192.168.0.172'"
and check to make sure that only the key(s) you wanted were added.
---后重复省略
配置Redhat8的repo源
[root@cdp73-1 yum.repos.d]# cat   /etc/yum.repos.d/Centos-Base.repo
[BaseOS]
name=BaseOS
baseurl=https://mirrors.tuna.tsinghua.edu.cn/centos-vault/8.0.1905/BaseOS/$basearch/os/
gpgcheck=0
enabled=1
gpgkey=https://mirrors.tuna.tsinghua.edu.cn/centos/RPM-GPG-KEY-CentOS-Official

[AppStream]
name=AppStream
baseurl=https://mirrors.tuna.tsinghua.edu.cn/centos-vault/8.0.1905/AppStream/$basearch/os/
gpgcheck=0
enabled=1
gpgkey=https://mirrors.tuna.tsinghua.edu.cn/centos/RPM-GPG-KEY-CentOS-Official

[PowerTools]
name=PowerTools
baseurl=https://mirrors.tuna.tsinghua.edu.cn/centos-vault/8.0.1905/PowerTools/$basearch/os/
gpgcheck=0
enabled=1
gpgkey=https://mirrors.tuna.tsinghua.edu.cn/centos/RPM-GPG-KEY-CentOS-Official

[extras]
name=extras
baseurl=https://mirrors.tuna.tsinghua.edu.cn/centos-vault/8.0.1905/extras/$basearch/os/
gpgcheck=0
enabled=1
gpgkey=https://mirrors.tuna.tsinghua.edu.cn/centos/RPM-GPG-KEY-CentOS-Official

[centosplus]
name=centosplus
baseurl=https://mirrors.tuna.tsinghua.edu.cn/centos-vault/8.0.1905/centosplus/$basearch/os/
gpgcheck=0
enabled=1
gpgkey=https://mirrors.tuna.tsinghua.edu.cn/centos/RPM-GPG-KEY-CentOS-Official
[root@cdp73-1 yum.repos.d]#
[三]配置服务器
配置网络名
【重要提示】Cloudera 运行时需要 IPv4。不支持 IPv6。
【一般提示】在绑定时,请使用 bond0 的 IP 地址,因为它代表所有聚合的链路。
【重要提示】
- /etc/hosts 文件中每个主机的规范名称必须是完全限定域名(FQDN)(例如 myhost-1.example.com),而不是非限定主机名(例如 myhost-1)。规范名称是 IP 地址后的第一个条目。
- 无论在 /etc/hosts 文件中还是在配置 DNS 时,都不要使用别名。
- 在一个 Cloudera Manager 实例中,非限定主机名(短名称)必须是唯一的。例如,您不能让同一台 Cloudera Manager Server 管理 host01.example.com 和 host01.standby.example.com 这两个域名。
【重要提示】合法的 FQDN
host-name.bigdatacdp.comnode-1.example.comserver01.company-name.org【重要提示】非法的 FQDN
-hostname.example.com(主机名不能以-开头)hostname-.example.com(主机名不能以-结尾)host_name.example.com(_是非法字符)hostname..example.com(不能有连续的点号)
- 配置数据的主机名
#在6台主机上分别执行以下命令 sudo hostnamectl set-hostname cdp73-1.test.com sudo hostnamectl set-hostname cdp73-2.test.com sudo hostnamectl set-hostname cdp73-3.test.com sudo hostnamectl set-hostname cdp73-4.test.com sudo hostnamectl set-hostname cdp73-5.test.com sudo hostnamectl set-hostname cdp73-6.test.com - 编辑所有主机的/etc/hosts和下面相同
[root@cdp73-1 ~]$ cat /etc/hosts 127.0.0.1 localhost localhost.localdomain localhost4 localhost4.localdomain4 ::1 localhost localhost.localdomain localhost6 localhost6.localdomain6 192.168.0.171 cdp73-1.test.com cdp73-1 192.168.0.172 cdp73-2.test.com cdp73-2 192.168.0.173 cdp73-3.test.com cdp73-3 192.168.0.174 cdp73-4.test.com cdp73-4 192.168.0.175 cdp73-5.test.com cdp73-5 192.168.0.176 cdp73-6.test.com cdp73-6 [root@cdp73-1 yum.repos.d]$ for i in $(seq 2 6);do scp /etc/hosts cdp73-$i:/etc/;done hosts 100% 392 327.6KB/s 00:00 hosts 100% 392 299.2KB/s 00:00 hosts 100% 392 208.5KB/s 00:00 hosts 100% 392 468.6KB/s 00:00 hosts 100% 392 323.5KB/s 00:00 [root@cdp73-1 yum.repos.d]# - 编辑所有主机/etc/sysconfig/network
[root@cdp73-1 yum.repos.d]$ cat /etc/sysconfig/network # Created by anaconda HOSTNAME=cdp73-1.test.com [root@cdp73-1 yum.repos.d]$ for i in $(seq 2 6);do scp /etc/sysconfig/network cdp73-$i:/etc/sysconfig/network;done network 100% 48 40.4KB/s 00:00 network 100% 48 46.8KB/s 00:00 network 100% 48 36.9KB/s 00:00 network 100% 48 49.3KB/s 00:00 network 100% 48 43.1KB/s 00:00 [root@cdp73-1 yum.repos.d]$ for i in $(seq 2 6); do ssh cdp73-$i 'sudo sed -i "s/^HOSTNAME=.*/HOSTNAME=\\$(hostname)/" /etc/sysconfig/network'; done [root@cdp73-1 yum.repos.d]$ for i in $(seq 2 6);do ssh cdp73-$i "cat /etc/sysconfig/network";done # Created by anaconda HOSTNAME=p73-2.test.com # Created by anaconda HOSTNAME=p73-3.test.com # Created by anaconda HOSTNAME=p73-3.test.com # Created by anaconda HOSTNAME=p73-5.test.com # Created by anaconda HOSTNAME=p73-6.test.com [root@cdp73-1 yum.repos.d]# - 用uname -a命令确认每台主机的主机名
[root@cdp73-1 yum.repos.d]# for i in $(seq 1 6);do ssh cdp73-$i "uname -a ";done Linux cdp73-1.test.com 4.18.0-553.el8_10.x86_64 #1 SMP Fri May 10 15:19:13 EDT 2024 x86_64 x86_64 x86_64 GNU/Linux Linux cdp73-2.test.com 4.18.0-553.el8_10.x86_64 #1 SMP Fri May 10 15:19:13 EDT 2024 x86_64 x86_64 x86_64 GNU/Linux Linux cdp73-3.test.com 4.18.0-553.el8_10.x86_64 #1 SMP Fri May 10 15:19:13 EDT 2024 x86_64 x86_64 x86_64 GNU/Linux Linux cdp73-3.test.com 4.18.0-553.el8_10.x86_64 #1 SMP Fri May 10 15:19:13 EDT 2024 x86_64 x86_64 x86_64 GNU/Linux Linux cdp73-5.test.com 4.18.0-553.el8_10.x86_64 #1 SMP Fri May 10 15:19:13 EDT 2024 x86_64 x86_64 x86_64 GNU/Linux Linux cdp73-6.test.com 4.18.0-553.el8_10.x86_64 #1 SMP Fri May 10 15:19:13 EDT 2024 x86_64 x86_64 x86_64 GNU/Linux [root@cdp73-1 yum.repos.d]# - 用/sbin/ifconfig命令确认主机网卡IP
[root@cdp73-1 yum.repos.d]$ for i in $(seq 1 6);do ssh cdp73-$i "/sbin/ifconfig ens33";done ens33: flags=4163<UP,BROADCAST,RUNNING,MULTICAST> mtu 1500 inet 192.168.0.171 netmask 255.255.255.0 broadcast 192.168.0.255 inet6 fe80::250:56ff:feac:25a1 prefixlen 64 scopeid 0x20<link> ether 00:50:56:ac:25:a1 txqueuelen 1000 (Ethernet) RX packets 174787 bytes 38551628 (36.7 MiB) RX errors 0 dropped 0 overruns 0 frame 0 TX packets 106713 bytes 42841658 (40.8 MiB) TX errors 0 dropped 0 overruns 0 carrier 0 collisions 0 ens33: flags=4163<UP,BROADCAST,RUNNING,MULTICAST> mtu 1500 inet 192.168.0.172 netmask 255.255.255.0 broadcast 192.168.0.255 inet6 fe80::250:56ff:feac:df98 prefixlen 64 scopeid 0x20<link> ether 00:50:56:ac:df:98 txqueuelen 1000 (Ethernet) RX packets 119223 bytes 10674106 (10.1 MiB) RX errors 0 dropped 12 overruns 0 frame 0 TX packets 19857 bytes 1702795 (1.6 MiB) TX errors 0 dropped 0 overruns 0 carrier 0 collisions 0 ens33: flags=4163<UP,BROADCAST,RUNNING,MULTICAST> mtu 1500 inet 192.168.0.173 netmask 255.255.255.0 broadcast 192.168.0.255 inet6 fe80::250:56ff:feac:6405 prefixlen 64 scopeid 0x20<link> ether 00:50:56:ac:64:05 txqueuelen 1000 (Ethernet) RX packets 103500 bytes 9545903 (9.1 MiB) RX errors 0 dropped 12 overruns 0 frame 0 TX packets 5164 bytes 373618 (364.8 KiB) TX errors 0 dropped 0 overruns 0 carrier 0 collisions 0 ens33: flags=4163<UP,BROADCAST,RUNNING,MULTICAST> mtu 1500 inet 192.168.0.174 netmask 255.255.255.0 broadcast 192.168.0.255 inet6 fe80::250:56ff:feac:6f59 prefixlen 64 scopeid 0x20<link> ether 00:50:56:ac:6f:59 txqueuelen 1000 (Ethernet) RX packets 79898 bytes 6211145 (5.9 MiB) RX errors 0 dropped 0 overruns 0 frame 0 TX packets 13934 bytes 1486683 (1.4 MiB) TX errors 0 dropped 0 overruns 0 carrier 0 collisions 0 ens33: flags=4163<UP,BROADCAST,RUNNING,MULTICAST> mtu 1500 inet 192.168.0.175 netmask 255.255.255.0 broadcast 192.168.0.255 inet6 fe80::250:56ff:feac:6205 prefixlen 64 scopeid 0x20<link> ether 00:50:56:ac:62:05 txqueuelen 1000 (Ethernet) RX packets 13902 bytes 1315614 (1.2 MiB) RX errors 0 dropped 0 overruns 0 frame 0 TX packets 1397 bytes 202027 (197.2 KiB) TX errors 0 dropped 0 overruns 0 carrier 0 collisions 0 ens33: flags=4163<UP,BROADCAST,RUNNING,MULTICAST> mtu 1500 inet 192.168.0.176 netmask 255.255.255.0 broadcast 192.168.0.255 inet6 fe80::250:56ff:feac:19ec prefixlen 64 scopeid 0x20<link> ether 00:50:56:ac:19:ec txqueuelen 1000 (Ethernet) RX packets 102469 bytes 9450038 (9.0 MiB) RX errors 0 dropped 12 overruns 0 frame 0 TX packets 5514 bytes 386363 (377.3 KiB) TX errors 0 dropped 0 overruns 0 carrier 0 collisions 0 [root@cdp73-1 yum.repos.d]# - 使用host -v -t A $(hostname)命令确认数据的主机名和IP和上面两步骤相符
[root@cdp73-1 yum.repos.d]$ for i in $(seq 1 6);do ssh  cdp73-$i "host -v -t A \$(hostname)";done
Trying "cdp73-1.test.com"
;; ->>HEADER<<- opcode: QUERY, status: NOERROR, id: 53134
;; flags: qr rd ra; QUERY: 1, ANSWER: 1, AUTHORITY: 0, ADDITIONAL: 0

;; QUESTION SECTION:
;cdp73-1.test.com.		IN	A

;; ANSWER SECTION:
cdp73-1.test.com.	2699	IN	A	69.167.164.199

Received 50 bytes from 192.168.1.1#53 in 1 ms
Trying "cdp73-2.test.com"
;; ->>HEADER<<- opcode: QUERY, status: NOERROR, id: 43617
;; flags: qr rd ra; QUERY: 1, ANSWER: 1, AUTHORITY: 0, ADDITIONAL: 0

;; QUESTION SECTION:
;cdp73-2.test.com.		IN	A

;; ANSWER SECTION:
cdp73-2.test.com.	2715	IN	A	69.167.164.199

Received 50 bytes from 192.168.1.1#53 in 2 ms
Trying "cdp73-3.test.com"
;; ->>HEADER<<- opcode: QUERY, status: NOERROR, id: 52973
;; flags: qr rd ra; QUERY: 1, ANSWER: 1, AUTHORITY: 0, ADDITIONAL: 0

;; QUESTION SECTION:
;cdp73-3.test.com.		IN	A

;; ANSWER SECTION:
cdp73-3.test.com.	2714	IN	A	69.167.164.199

Received 50 bytes from 192.168.1.1#53 in 1 ms
Trying "cdp73-4.test.com"
;; ->>HEADER<<- opcode: QUERY, status: NOERROR, id: 51973
;; flags: qr rd ra; QUERY: 1, ANSWER: 1, AUTHORITY: 0, ADDITIONAL: 0

;; QUESTION SECTION:
;cdp73-4.test.com.		IN	A

;; ANSWER SECTION:
cdp73-4.test.com.	2714	IN	A	69.167.164.199

Received 50 bytes from 192.168.1.1#53 in 2 ms
Trying "cdp73-5.test.com"
;; ->>HEADER<<- opcode: QUERY, status: NOERROR, id: 10476
;; flags: qr rd ra; QUERY: 1, ANSWER: 1, AUTHORITY: 0, ADDITIONAL: 0

;; QUESTION SECTION:
;cdp73-5.test.com.		IN	A

;; ANSWER SECTION:
cdp73-5.test.com.	2714	IN	A	69.167.164.199

Received 50 bytes from 192.168.1.1#53 in 2 ms
Trying "cdp73-6.test.com"
;; ->>HEADER<<- opcode: QUERY, status: NOERROR, id: 53400
;; flags: qr rd ra; QUERY: 1, ANSWER: 1, AUTHORITY: 0, ADDITIONAL: 0

;; QUESTION SECTION:
;cdp73-6.test.com.		IN	A

;; ANSWER SECTION:
cdp73-6.test.com.	2714	IN	A	69.167.164.199

Received 50 bytes from 192.168.1.1#53 in 1 ms
[root@cdp73-1 yum.repos.d]#
设置SELinux模式
【一般提示】CDP Private Cloud Base(除Cloudera Navigator Encrypt外)支持在启用并处于强制模式的Security-Enhanced Linux(SELinux)平台上运行。Cloudera不负责SELinux策略的开发、支持或执行。如果您在启用SELinux的情况下运行Cloudera软件时遇到问题,请联系您的操作系统提供商寻求帮助。如果您正在使用处于强制模式的SELinux,Cloudera支持团队可能会要求您禁用SELinux或将模式更改为宽容模式,以便在调查报告的问题时排除SELinux作为影响因素。
- 确认当前模式
[root@cdp73-1 yum.repos.d]$ for i in $(seq 1 6);do ssh cdp73-$i "getenforce";done Enforcing Enforcing Enforcing Enforcing Enforcing Enforcing [root@cdp73-1 yum.repos.d]$ - 如果输出是“Permissive”或“Disabled”,您可以跳过此任务,并继续执行“禁用防火墙”步骤,以在您集群中的每个主机上禁用防火墙。如果输出是“enforcing”,请继续执行下一步。
- 修改SELINUX模式为permissive,使其开机生效
[root@cdp73-1 yum.repos.d]$ for i in $(seq 1 6); do ssh cdp73-$i 'sudo sed -i "s/^SELINUX=.*/SELINUX=permissive/" /etc/sysconfig/selinux'; done [root@cdp73-1 yum.repos.d]# for i in $(seq 1 6); do ssh cdp73-$i 'cat /etc/sysconfig/selinux|grep "SELINUX="'; done # SELINUX= can take one of these three values: SELINUX=permissive # SELINUX= can take one of these three values: SELINUX=permissive # SELINUX= can take one of these three values: SELINUX=permissive # SELINUX= can take one of these three values: SELINUX=permissive # SELINUX= can take one of these three values: SELINUX=permissive # SELINUX= can take one of these three values: SELINUX=permissive [root@cdp73-1 yum.repos.d]# - 修改SELINUX模式为permissive,使其当前生效
[root@cdp73-1 yum.repos.d]$ for i in $(seq 1 6); do     ssh cdp73-$i 'setenforce 0'; done
[root@cdp73-1 yum.repos.d]$ for i in $(seq 1 6); do     ssh cdp73-$i 'getenforce'; done
Permissive
Permissive
Permissive
Permissive
Permissive
Permissive
[root@cdp73-1 yum.repos.d]#
配置防火墙
关闭防火墙并取消开机自启
[root@cdp73-1 yum.repos.d]$ for i in $(seq 1 6); do     ssh cdp73-$i 'systemctl stop  firewalld'; done
[root@cdp73-1 yum.repos.d]$ for i in $(seq 1 6); do     ssh cdp73-$i 'systemctl disable  firewalld'; done
Removed /etc/systemd/system/multi-user.target.wants/firewalld.service.
Removed /etc/systemd/system/dbus-org.fedoraproject.FirewallD1.service.
Removed /etc/systemd/system/multi-user.target.wants/firewalld.service.
Removed /etc/systemd/system/dbus-org.fedoraproject.FirewallD1.service.
Removed /etc/systemd/system/multi-user.target.wants/firewalld.service.
Removed /etc/systemd/system/dbus-org.fedoraproject.FirewallD1.service.
Removed /etc/systemd/system/multi-user.target.wants/firewalld.service.
Removed /etc/systemd/system/dbus-org.fedoraproject.FirewallD1.service.
Removed /etc/systemd/system/multi-user.target.wants/firewalld.service.
Removed /etc/systemd/system/dbus-org.fedoraproject.FirewallD1.service.
Removed /etc/systemd/system/multi-user.target.wants/firewalld.service.
Removed /etc/systemd/system/dbus-org.fedoraproject.FirewallD1.service.
[root@cdp73-1 yum.repos.d]#
配置NTP服务
【重要提示】您应该验证 ntpd 或 chronyd 是否已经安装并且正在运行。如果 ntpd 或 chronyd 已经安装并且正在运行,那么您可以跳过启用 NTP 服务的步骤。
【提示】 如果您使用 ntpd 来同步主机时钟,但同时 chronyd 也在运行,那么 Cloudera Manager 会依赖 chronyd 来验证时间同步,即使它并没有正确地进行同步。这可能会导致 Cloudera Manager 报告时钟偏移错误,即使时间是正确的。为了解决这个问题,您可以配置并使用 chronyd,或者禁用它并从主机中移除。
- 安装chrony服务
[root@cdp73-1 yum.repos.d]$ for i in $(seq 1 6); do ssh cdp73-$i 'dnf install chrony'; done Updating Subscription Management repositories. Unable to read consumer identity This system is not registered with an entitlement server. You can use subscription-manager to register. Last metadata expiration check: 1:06:19 ago on Sun 15 Dec 2024 07:52:55 PM EST. Package chrony-4.5-1.el8.x86_64 is already installed. Dependencies resolved. Nothing to do. Complete! Updating Subscription Management repositories. Unable to read consumer identity --后省略 - 配置chrony服务,修改/etc/chrony.conf中server ntp.ntsc.ac.cn, ntp.ntsc.ac.cn可被替换为您可用的其他ntp服务器
[root@cdp73-1 yum.repos.d]$ cat /etc/chrony.conf |grep -vE "#|^$" server ntp.ntsc.ac.cn driftfile /var/lib/chrony/drift makestep 1.0 3 rtcsync keyfile /etc/chrony.keys leapsectz right/UTC logdir /var/log/chrony [root@cdp73-1 yum.repos.d]$ for i in $(seq 2 6); do scp -r /etc/chrony.conf cdp73-$i:/etc/chrony.conf; done chrony.conf 100% 1106 1.1MB/s 00:00 chrony.conf 100% 1106 1.0MB/s 00:00 chrony.conf 100% 1106 679.2KB/s 00:00 chrony.conf 100% 1106 787.2KB/s 00:00 chrony.conf 100% 1106 960.7KB/s 00:00 [root@cdp73-1 yum.repos.d]$ - 启动NTP服务,并设置开机自启
[root@cdp73-1 ~]$ for i in $(seq 1 6); do ssh cdp73-$i 'systemctl enable chronyd'; done [root@cdp73-1 ~]$ for i in $(seq 1 6); do ssh cdp73-$i 'systemctl restart chronyd'; done [root@cdp73-1 ~]$ - 查看NTP服务状态
[root@cdp73-1 ~]$ for i in $(seq 1 6); do     ssh cdp73-$i 'systemctl enable chronyd'; done
[root@cdp73-1 ~]$ for i in $(seq 1 6); do     ssh cdp73-$i 'systemctl restart chronyd'; done
[root@cdp73-1 ~]$
配置swappiness
[root@cdp73-1 ~]$ for i in $(seq 1 6); do ssh cdp73-$i 'echo "1" > /proc/sys/vm/swappiness'; done
[root@cdp73-1 ~]$ for i in $(seq 1 6); do ssh cdp73-$i 'echo "vm.swappiness=1" >> /etc/sysctl.conf'; done
[root@cdp73-1 ~]$ for i in $(seq 1 6); do ssh cdp73-$i 'sysctl -p'; done
vm.swappiness = 1
vm.swappiness = 1
vm.swappiness = 1
vm.swappiness = 1
vm.swappiness = 1
vm.swappiness = 1
[root@cdp73-1 ~]$
配置透明大页面
[root@cdp73-1 ~]$ cat  /etc/rc.local
#!/bin/bash
# THIS FILE IS ADDED FOR COMPATIBILITY PURPOSES
#
# It is highly advisable to create own systemd services or udev rules
# to run scripts during boot instead of using this file.
#
# In contrast to previous versions due to parallel execution during boot
# this script will NOT be run after all other services.
#
# Please note that you must run 'chmod +x /etc/rc.d/rc.local' to ensure
# that this script will be executed during boot.

touch /var/lock/subsys/local

#Add for Cloudera manager Cluster
echo never > /sys/kernel/mm/transparent_hugepage/defrag
echo never > /sys/kernel/mm/transparent_hugepage/enabled
[root@cdp73-1 ~]$ chmod +x /etc/rc.local
[root@cdp73-1 ~]$ for i in $(seq 2 6); do rsync -av /etc/rc.local cdp73-$i:/etc/rc.local; done
sending incremental file list

sent 55 bytes  received 12 bytes  134.00 bytes/sec
total size is 13  speedup is 0.19
sending incremental file list

sent 55 bytes  received 12 bytes  44.67 bytes/sec
total size is 13  speedup is 0.19
sending incremental file list

sent 55 bytes  received 12 bytes  134.00 bytes/sec
total size is 13  speedup is 0.19
sending incremental file list

sent 55 bytes  received 12 bytes  134.00 bytes/sec
total size is 13  speedup is 0.19
sending incremental file list

sent 55 bytes  received 12 bytes  44.67 bytes/sec
total size is 13  speedup is 0.19
[root@cdp73-1 ~]$
[四]配置数据库
【重要提示】当您重启进程时,每个服务的配置都会使用保存在Cloudera Manager数据库中的信息重新部署。如果这些信息不可用,您的集群将无法启动或无法正常运行。您必须安排并定期备份Cloudera Manager数据库,以便在数据库丢失的情况下恢复集群。
【重要提示】对于Schema Registry数据库,您必须将排序规则设置为区分大小写。
【提示】Cloudera Manager Server - 包含您已配置的服务及其角色分配、所有配置历史记录、命令、用户和正在运行的进程的所有信息。这个相对较小的数据库(小于100 MB)是最重要的备份对象。
安装Mysql server
[root@cdp73-1 ~]$ sudo yum install mysql-server -y
Updating Subscription Management repositories.
Unable to read consumer identity

---中省略

Installed:
  mariadb-connector-c-config-3.0.7-1.el8.noarch                    mecab-0.996-1.module_el8.0.0+41+ca30bab6.9.x86_64                mysql-8.0.17-3.module_el8.0.0+181+899d6349.x86_64         mysql-common-8.0.17-3.module_el8.0.0+181+899d6349.x86_64
  mysql-errmsg-8.0.17-3.module_el8.0.0+181+899d6349.x86_64         mysql-server-8.0.17-3.module_el8.0.0+181+899d6349.x86_64         protobuf-lite-3.5.0-7.el8.x86_64

Complete!
[root@cdp73-1 ~]$修改配置文件
[root@cdp73-1 ~]$ cat  /etc/my.cnf
[mysqld]
datadir=/var/lib/mysql
socket=/var/lib/mysql/mysql.sock
transaction-isolation = READ-COMMITTED
# Disabling symbolic-links is recommended to prevent assorted security risks;
# to do so, uncomment this line:
symbolic-links = 0

key_buffer_size = 32M
max_allowed_packet = 16M
thread_stack = 256K
thread_cache_size = 64
max_connections = 550

#expire_logs_days = 10
#max_binlog_size = 100M

#log_bin should be on a disk with enough free space.
#Replace '/var/lib/mysql/mysql_binary_log' with an appropriate path for your
#system and chown the specified folder to the mysql user.
log_bin=/var/lib/mysql/mysql_binary_log

#In later versions of MySQL, if you enable the binary log and do not set
#a server_id, MySQL will not start. The server_id must be unique within
#the replicating group.
server_id=1

binlog_format = mixed

read_buffer_size = 2M
read_rnd_buffer_size = 16M
sort_buffer_size = 8M
join_buffer_size = 8M

# InnoDB settings
innodb_file_per_table = 1
innodb_flush_log_at_trx_commit  = 2
innodb_log_buffer_size = 64M
innodb_buffer_pool_size = 4G
innodb_thread_concurrency = 8
innodb_flush_method = O_DIRECT
innodb_log_file_size = 512M

[mysqld_safe]
log-error=/var/log/mysqld.log
pid-file=/var/run/mysqld/mysqld.pid

sql_mode=STRICT_ALL_TABLES

[root@cdp73-1 ~]#
启动并设置开启自启
[root@cdp73-1 ~]$ sudo systemctl enable mysqld
Created symlink /etc/systemd/system/multi-user.target.wants/mysqld.service → /usr/lib/systemd/system/mysqld.service.
[root@cdp73-1 ~]$ sudo systemctl start mysqld
[root@cdp73-1 ~]$
初始化安全
[root@cdp73-1 ~]$ /usr/bin/mysql_secure_installation

Securing the MySQL server deployment.

Connecting to MySQL using a blank password.
The 'validate_password' component is installed on the server.
The subsequent steps will run with the existing configuration
of the component.
Please set the password for root here.

New password:

Re-enter new password:

Estimated strength of the password: 100
Do you wish to continue with the password provided?(Press y|Y for Yes, any other key for No) : y
By default, a MySQL installation has an anonymous user,
allowing anyone to log into MySQL without having to have
a user account created for them. This is intended only for
testing, and to make the installation go a bit smoother.
You should remove them before moving into a production
environment.

Remove anonymous users? (Press y|Y for Yes, any other key for No) : y
Success.


Normally, root should only be allowed to connect from
'localhost'. This ensures that someone cannot guess at
the root password from the network.

Disallow root login remotely? (Press y|Y for Yes, any other key for No) : y
Success.

By default, MySQL comes with a database named 'test' that
anyone can access. This is also intended only for testing,
and should be removed before moving into a production
environment.


Remove test database and access to it? (Press y|Y for Yes, any other key for No) : y
 - Dropping test database...
Success.

 - Removing privileges on test database...
Success.

Reloading the privilege tables will ensure that all changes
made so far will take effect immediately.

Reload privilege tables now? (Press y|Y for Yes, any other key for No) : y
Success.

All done!
[root@cdp73-1 ~]#
安装JDBC
[root@cdp73-1 ~]$ wget https://dev.mysql.com/get/Downloads/Connector-J/mysql-connector-java-8.0.22.tar.gz
--2024-12-15 21:46:16--  https://dev.mysql.com/get/Downloads/Connector-J/mysql-connector-java-8.0.22.tar.gz
Resolving dev.mysql.com (dev.mysql.com)... 104.86.42.97, 2600:140b:c000:181::2e31
Connecting to dev.mysql.com (dev.mysql.com)|104.86.42.97|:443... connected.
HTTP request sent, awaiting response... 302 Moved Temporarily
Location: https://cdn.mysql.com//archives/mysql-connector-java-8.0/mysql-connector-java-8.0.22.tar.gz [following]
--2024-12-15 21:46:17--  https://cdn.mysql.com//archives/mysql-connector-java-8.0/mysql-connector-java-8.0.22.tar.gz
Resolving cdn.mysql.com (cdn.mysql.com)... 2.19.153.220, 2600:140b:2c00:aac::1d68, 2600:140b:2c00:aa8::1d68
Connecting to cdn.mysql.com (cdn.mysql.com)|2.19.153.220|:443... connected.
HTTP request sent, awaiting response... 200 OK
Length: 3974002 (3.8M) [application/x-tar-gz]
Saving to: ‘mysql-connector-java-8.0.22.tar.gz’

mysql-connector-java-8.0.22.tar.gz                              100%[======================================================================================================================================================>]   3.79M  1.87MB/s    in 2.0s

2024-12-15 21:46:20 (1.87 MB/s) - ‘mysql-connector-java-8.0.22.tar.gz’ saved [3974002/3974002]

[root@cdp73-1 ~]$ tar zxvf mysql-connector-java-8.0.22.tar.gz
[root@cdp73-1 ~]$ sudo mkdir -p /usr/share/java/
[root@cdp73-1 ~]$ cd mysql-connector-java-8.0.22
[root@cdp73-1 mysql-connector-java-8.0.22]$ sudo cp mysql-connector-java-8.0.22.jar /usr/share/java/mysql-connector-java.jar
[root@cdp73-1 mysql-connector-java-8.0.22]$ for i in $(seq 2 6); do     ssh cdp73-$i 'mkdir -p /usr/share/java/ '; done
[root@cdp73-1 mysql-connector-java-8.0.22]$ for i in $(seq 2 6); do scp -r /usr/share/java/mysql-connector-java.jar   cdp73-$i:/usr/share/java/mysql-connector-java.jar; done
mysql-connector-java.jar                                                                                                                                                                                                     100% 2333KB 202.9MB/s   00:00
mysql-connector-java.jar                                                                                                                                                                                                     100% 2333KB 192.1MB/s   00:00
mysql-connector-java.jar                                                                                                                                                                                                     100% 2333KB 179.2MB/s   00:00
mysql-connector-java.jar                                                                                                                                                                                                     100% 2333KB 191.0MB/s   00:00
mysql-connector-java.jar                                                                                                                                                                                                     100% 2333KB 195.1MB/s   00:00
[root@cdp73-1 mysql-connector-java-8.0.22]$
创建必要的数据库及用户
CREATE DATABASE scm DEFAULT CHARACTER SET utf8 DEFAULT COLLATE utf8_general_ci;
CREATE USER 'scm'@'%' IDENTIFIED WITH mysql_native_password BY '!edc4rfVscm';
GRANT ALL PRIVILEGES ON scm.* TO 'scm'@'%';

CREATE DATABASE rm DEFAULT CHARACTER SET utf8 DEFAULT COLLATE utf8_general_ci;
CREATE USER 'rm'@'%' IDENTIFIED WITH mysql_native_password BY '!edc4rfVrm';
GRANT ALL PRIVILEGES ON rm.* TO 'rm'@'%';

CREATE DATABASE hive DEFAULT CHARACTER SET utf8 DEFAULT COLLATE utf8_general_ci;
CREATE USER 'hive'@'%' IDENTIFIED WITH mysql_native_password BY '!edc4rfVhive';
GRANT ALL PRIVILEGES ON hive.* TO 'hive'@'%';

CREATE DATABASE hue DEFAULT CHARACTER SET utf8 DEFAULT COLLATE utf8_general_ci;
CREATE USER 'hue'@'%' IDENTIFIED WITH mysql_native_password BY '!edc4rfVhue';
GRANT ALL PRIVILEGES ON hue.* TO 'hue'@'%';
[五]配置python3
某些 CDP 服务(例如 Cloudera Manager 和 Hue)使用 Python 3.x。要部署 CDP Private Cloud Base,安装 Python 3.x 是必不可少的。请查看支持的操作系统(OS),并按照相应的说明安装推荐的 Python 版本。
Cloudera Manager 7.13.1 仅支持以下操作系统。下表列出了支持的操作系统、这些操作系统随附的 Python 版本,以及部署 CDP 所需的 Python 3 版本:
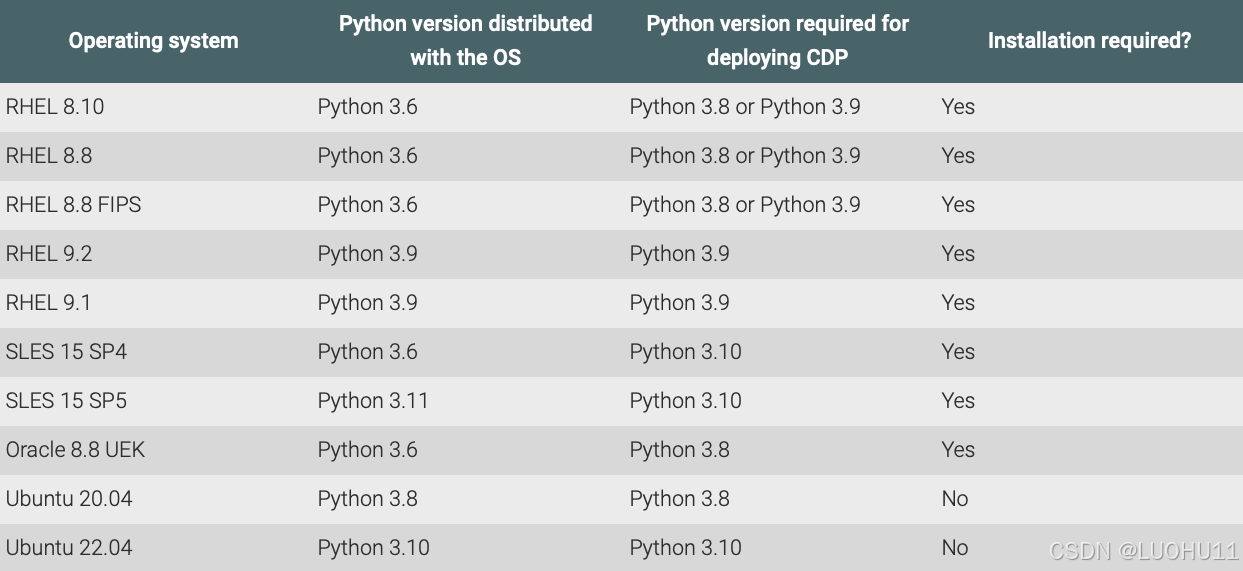
【重要提示】Python 3.8 的最低要求版本是 3.8.12。Python 3.9 的最低要求版本是 3.9.14。
Cloudera Manager 7.13.1 不支持 Python 2.7。当使用 Cloudera Manager 7.13.1 搭配 Cloudera Runtime 7.1.8 或 7.1.9 版本时,仅在操作系统允许移除 Python 2 版本的情况下,您可以从操作系统中移除所有 Python 2 版本。
如果您运行的是 Cloudera Runtime 7.1.7 SP3 或更早版本,且使用的是 Cloudera Manager 7.13.1,则 Cloudera Runtime 组件仍然需要 Python 2.7。在这种情况下,您必须同时安装 Python 2.7(用于 Cloudera Runtime 组件)和 Python 3(用于 Cloudera Manager 7.13.1)。
安装python3.9
[root@cdp73-1 cloudera-scm-agent]$ for i in $(seq 1 6); do     ssh cdp73-$i 'yum install python39 -y'; done
Updating Subscription Management repositories.
Unable to read consumer identity

This system is not registered with an entitlement server. You can use subscription-manager to register.

Last metadata expiration check: 0:12:44 ago on Thu 19 Dec 2024 11:42:52 PM EST.
Dependencies resolved.
=======================================================================================
 Package                     Arch    Version                           Repo        Size
=======================================================================================
Installing:
 python39                    x86_64  3.9.19-1.module_el8+1051+5bea6413 AppStream   34 k
Installing dependencies:
 python39-libs               x86_64  3.9.19-1.module_el8+1051+5bea6413 AppStream  8.8 M
 python39-pip-wheel          noarch  20.2.4-9.module_el8+963+a9c12c76  AppStream  1.1 M
 python39-setuptools-wheel   noarch  50.3.2-5.module_el8+695+192a31a9  AppStream  497 k
Installing weak dependencies:
 python39-pip                noarch  20.2.4-9.module_el8+963+a9c12c76  AppStream  2.1 M
 python39-setuptools         noarch  50.3.2-5.module_el8+695+192a31a9  AppStream  969 k
Enabling module streams:
 python39                            3.9

Transaction Summary
=======================================================================================
Install  6 Packages

Total download size: 13 M
Installed size: 45 M
Downloading Packages:
(1/6): python39-3.9.19-1.module_el8+1051+5bea64 677 kB/s |  34 kB     00:00
(2/6): python39-pip-wheel-20.2.4-9.module_el8+9 3.2 MB/s | 1.1 MB     00:00
(3/6): python39-setuptools-50.3.2-5.module_el8+ 3.0 MB/s | 969 kB     00:00
(4/6): python39-setuptools-wheel-50.3.2-5.modul 2.7 MB/s | 497 kB     00:00
(5/6): python39-pip-20.2.4-9.module_el8+963+a9c 2.2 MB/s | 2.1 MB     00:00
(6/6): python39-libs-3.9.19-1.module_el8+1051+5 6.8 MB/s | 8.8 MB     00:01
--------------------------------------------------------------------------------
Total                                            10 MB/s |  13 MB     00:01
Running transaction check
Transaction check succeeded.
Running transaction test
Transaction test succeeded.
Running transaction
  Preparing        :                                                        1/1
  Installing       : python39-setuptools-wheel-50.3.2-5.module_el8+695+19   1/6
  Installing       : python39-pip-wheel-20.2.4-9.module_el8+963+a9c12c76.   2/6
  Installing       : python39-libs-3.9.19-1.module_el8+1051+5bea6413.x86_   3/6
  Installing       : python39-3.9.19-1.module_el8+1051+5bea6413.x86_64      4/6
  Running scriptlet: python39-3.9.19-1.module_el8+1051+5bea6413.x86_64      4/6
  Installing       : python39-setuptools-50.3.2-5.module_el8+695+192a31a9   5/6
  Running scriptlet: python39-setuptools-50.3.2-5.module_el8+695+192a31a9   5/6
  Installing       : python39-pip-20.2.4-9.module_el8+963+a9c12c76.noarch   6/6
  Running scriptlet: python39-pip-20.2.4-9.module_el8+963+a9c12c76.noarch   6/6
  Verifying        : python39-3.9.19-1.module_el8+1051+5bea6413.x86_64      1/6
  Verifying        : python39-libs-3.9.19-1.module_el8+1051+5bea6413.x86_   2/6
  Verifying        : python39-pip-20.2.4-9.module_el8+963+a9c12c76.noarch   3/6
  Verifying        : python39-pip-wheel-20.2.4-9.module_el8+963+a9c12c76.   4/6
  Verifying        : python39-setuptools-50.3.2-5.module_el8+695+192a31a9   5/6
  Verifying        : python39-setuptools-wheel-50.3.2-5.module_el8+695+19   6/6
Installed products updated.

Installed:
  python39-3.9.19-1.module_el8+1051+5bea6413.x86_64
  python39-libs-3.9.19-1.module_el8+1051+5bea6413.x86_64
  python39-pip-20.2.4-9.module_el8+963+a9c12c76.noarch
  python39-pip-wheel-20.2.4-9.module_el8+963+a9c12c76.noarch
  python39-setuptools-50.3.2-5.module_el8+695+192a31a9.noarch
  python39-setuptools-wheel-50.3.2-5.module_el8+695+192a31a9.noarch

Complete!
---后省略
确认python3的安装
[root@cdp73-1 cloudera-scm-agent]$ for i in $(seq 1 6); do     ssh cdp73-$i 'python3.9 --version'; done
Python 3.9.19
Python 3.9.19
Python 3.9.19
Python 3.9.19
Python 3.9.19
Python 3.9.19
安装psycopg2
[root@cdp73-1 ~]# for i in $(seq 1 6); do     ssh cdp73-$i 'python3.9 -m pip install psycopg2-binary'; done
WARNING: Running pip install with root privileges is generally not a good idea. Try `python3.9 -m pip install --user` instead.
Collecting psycopg2-binary
  Downloading psycopg2_binary-2.9.10-cp39-cp39-manylinux_2_17_x86_64.manylinux2014_x86_64.whl (3.0 MB)
Installing collected packages: psycopg2-binary
Successfully installed psycopg2-binary-2.9.10
--后省略
确认psycopg2
[root@cdp73-1 ~]$ for i in $(seq 1 6); do ssh cdp73-$i 'python3.9 -m pip show psycopg2-binary'; done
Name: psycopg2-binary
Version: 2.9.10
Summary: psycopg2 - Python-PostgreSQL Database Adapter
Home-page: https://psycopg.org/
Author: Federico Di Gregorio
Author-email: fog@initd.org
License: LGPL with exceptions
Location: /usr/local/lib64/python3.9/site-packages
Requires:
Required-by:
安装MySQL client
curl -sSLO https://dev.mysql.com/get/mysql80-community-release-el8-8.noarch.rpm
rpm -ivh mysql80-community-release-el8-8.noarch.rpm
yum install mysql-devel
yum install -y xmlsec1  xmlsec1-openssl
export PATH=/usr/local/bin:$PATH
yum install gcc python39-devel -y
pip3.9 install mysqlclient
[六]配置本地源
安装http服务
[root@cdp73-1 ~]$ yum install httpd -y创建源目录
[root@cdp73-1 ~]$ cd /var/www/html/
[root@cdp73-1 html]# ls -al
total 0
drwxr-xr-x. 2 root root  6 Oct  7  2019 .
drwxr-xr-x. 4 root root 33 Dec 15 22:33 ..
[root@cdp73-1 html]$ mkdir -p ./cloudera/{cdp,cm}
[root@cdp73-1 html]$
复制安装包到目录
[root@cdp73-1 cloudera]$ tree /var/www/html/cloudera/cdp/
/var/www/html/cloudera/cdp/
├── CDH-7.3.1-1.cdh7.3.1.p0.60371244-el8.parcel
├── CDH-7.3.1-1.cdh7.3.1.p0.60371244-el8.parcel.sha1
├── CDH-7.3.1-1.cdh7.3.1.p0.60371244-el8.parcel.sha256
└── manifest.json

0 directories, 4 files
[root@cdp73-1 cloudera]$ tree /var/www/html/cloudera/cm/
/var/www/html/cloudera/cm/
├── allkeys.asc
├── allkeyssha256.asc
├── cloudera-manager-agent-7.13.1.0-60343691.el8.x86_64.rpm
├── cloudera-manager-daemons-7.13.1.0-60343691.el8.x86_64.rpm
├── cloudera-manager-server-7.13.1.0-60343691.el8.x86_64.rpm
├── cloudera-manager-server-db-2-7.13.1.0-60343691.el8.x86_64.rpm
├── cloudera-manager-support-cdh6-7.13.1.0-60343691.el8.x86_64.rpm
├── openjdk8-8.0+372_1-cloudera.x86_64.rpm
└── repodata
    ├── 01a4c622091d2a05696e747023367e3f6021feccff8f3199f3bc84dc94b5663a-primary.sqlite.bz2
    ├── 12fafd6bb44c7589a57f8eeed92cb155a067be0a06f00af13ab69f99a36ef778-filelists.sqlite.bz2
    ├── 4279bfacd083dbc429ef4a3473b8e5a076f47b4b8600ba767e0bea7360713fae-primary.xml.gz
    ├── 8019db4202cce9560641b05525b34bd0d05a70cfabce1c9f53e5c2c300383d16-other.xml.gz
    ├── 80405a2db1ae0815e1df55ed608fd58443d158e69f947b9426ccb71957e776fe-other.sqlite.bz2
    ├── c8a348525ef378dd6fa72980484e92b91041809db05de796d1b1e990a7e8cd49-filelists.xml.gz
    └── repomd.xml

1 directory, 15 files
[root@cdp73-1 cloudera]#
生产CM安装包的repodata
[root@cdp73-1 cloudera]$ yum install createrepo -y

Installed:
  createrepo_c-0.11.0-1.el8.x86_64                                                     createrepo_c-libs-0.11.0-1.el8.x86_64                                                     drpm-0.3.0-14.el8.x86_64

Complete!
[root@cdp73-1 cloudera]4 createrepo cm
Directory walk started
Directory walk done - 6 packages
Temporary output repo path: cm/.repodata/
Preparing sqlite DBs
Pool started (with 5 workers)
Pool finished
[root@cdp73-1 cloudera]$ ls -al cm/
total 2177332
drwxr-xr-x. 3 root root       4096 Dec 16 00:42 .
drwxr-xr-x. 4 root root         27 Dec 15 22:35 ..
-rw-r--r--. 1 root root  123060380 Dec 15 22:38 cloudera-manager-agent-7.13.1.0-60343691.el8.x86_64.rpm
-rw-r--r--. 1 root root 1893511976 Dec 15 22:38 cloudera-manager-daemons-7.13.1.0-60343691.el8.x86_64.rpm
-rw-r--r--. 1 root root      20828 Dec 15 22:38 cloudera-manager-server-7.13.1.0-60343691.el8.x86_64.rpm
-rw-r--r--. 1 root root      15108 Dec 15 22:38 cloudera-manager-server-db-2-7.13.1.0-60343691.el8.x86_64.rpm
-rw-r--r--. 1 root root  109983460 Dec 15 22:38 cloudera-manager-support-cdh6-7.13.1.0-60343691.el8.x86_64.rpm
-rw-r--r--. 1 root root  102972677 Dec 15 22:38 openjdk8-8.0+372_1-cloudera.x86_64.rpm
drwxr-xr-x. 2 root root       4096 Dec 16 00:42 repodata
[root@cdp73-1 cloudera]# ls -al cm/
启动http服务
[root@cdp73-1 ~]$ systemctl start httpd
[root@cdp73-1 ~]$
确认可以访问
http://192.168.0.171/cloudera/cm/

[七]安装Cloudera Manager
【重要提示】在典型的安装过程中,socket的somax连接数绝对不能设置为一个非常低的值(默认值是128,对于Hadoop系统来说非常低)。Cloudera建议您通过Cloudera Manager或主机检查器将socket的somax连接数值至少设置为16000(OOTB,即开箱即用)。
Security-Enhanced Linux(SELinux)允许您通过策略设置访问控制。然而,如果您无法使用自己的策略部署运行时集群,那么在部署运行时包之前,您可以将SELinux在每个集群主机上设置为宽容模式。
【注意】Cloudera要求在开始安装Cloudera Manager应用程序之前,先禁用RHEL 8(及更高版本)系统中存在的fapolicyd守护进程。请注意,fapolicyd是一个用户空间守护进程,它根据进程和文件的属性来确定对文件的访问权限。它可用于将进程或文件访问列入黑名单或白名单。在强制使用这个守护进程时要格外小心。配置不当可能会导致系统无法正常工作。
【注意】CDP Private Cloud Data Services 1.5.4 不支持在 CDP Private Cloud Base 7.3.1 上运行。如果您在集群上使用了 Data Services 1.5.4,则不得安装或升级到 CDP Private Cloud Base 7.3.1,因为它们不兼容。
【一般提示】在生产环境中,安全性的重要性不容小觑。TLS和Kerberos构成了您CDP运行时环境安全操作的基础。Cloudera仅在Kerberos已启用以进行用户身份验证的集群上支持如Ranger和Atlas等安全服务。
配置Cloudera Manager的Repository
[root@cdp73-1 ~]# cat  /etc/yum.repos.d/cloudera-manager.repo
[cloudera-manager]
name=Cloudera Manager 7.13.1
baseurl=http://192.168.0.171/cloudera/cm/
gpgcheck=0
enabled=1
autorefresh=0
type=rpm-md
[root@cdp73-1 ~]#
安装 Java Development Kit
【重要提示】请注意,每当使用OpenJDK的系统在操作系统级别进行安全补丁更新时,OpenJDK的小版本也会随之更新(因为它是随操作系统一起提供的,而不是像Oracle JDK或Azul JDK那样作为手动获取的外部工具包)。
在某些情况下,客户的安全团队可能会要求使用随更新后的补丁OpenJDK(无论操作系统附带什么)一起提供的更新JDK cacert来更新链证书。
当发生这种情况时,您需要基于新的JDK重新生成证书链和CSR(证书签名请求)。如需更多信息,请联系Cloudera支持和客户项目团队。
[root@cdp73-1 ~]$ yum install openjdk8 -y
Updating Subscription Management repositories.
Unable to read consumer identity

This system is not registered with an entitlement server. You can use subscription-manager to register.

Last metadata expiration check: 0:00:14 ago on Mon 16 Dec 2024 01:03:09 AM EST.
Dependencies resolved.
===============================================================================================================================================================================================================================================================
 Package                                                  Architecture                                           Version                                                                Repository                                                        Size
===============================================================================================================================================================================================================================================================
Installing:
 openjdk8                                                 x86_64                                                 1.8.0_372_cloudera-1                                                   cloudera-manager                                                  98 M

Transaction Summary
===============================================================================================================================================================================================================================================================
Install  1 Package

Total download size: 98 M
Installed size: 195 M
Downloading Packages:
openjdk8-8.0+372_1-cloudera.x86_64.rpm                                                                                                                                                                                         150 MB/s |  98 MB     00:00
---------------------------------------------------------------------------------------------------------------------------------------------------------------------------------------------------------------------------------------------------------------
Total                                                                                                                                                                                                                          150 MB/s |  98 MB     00:00
Running transaction check
Transaction check succeeded.
Running transaction test
Transaction test succeeded.
Running transaction
  Preparing        :                                                                                                                                                                                                                                       1/1
  Installing       : openjdk8-1.8.0_372_cloudera-1.x86_64                                                                                                                                                                                                  1/1
  Verifying        : openjdk8-1.8.0_372_cloudera-1.x86_64                                                                                                                                                                                                  1/1
Installed products updated.

Installed:
  openjdk8-1.8.0_372_cloudera-1.x86_64

Complete!
[root@cdp73-1 ~]#
安装 Cloudera Manager Server和 Cloudera Manager Agent
[root@cdp73-1 ~]$  yum install cloudera-manager-daemons cloudera-manager-agent cloudera-manager-server

Complete!
初始化Cloudera Manager数据库
[root@cdp73-1 ~]$ /opt/cloudera/cm/schema/scm_prepare_database.sh mysql -h cdp73-1.test.com  --scm-host cdp73-1.test.com  scm scm
Enter SCM password:
JAVA_HOME=/usr/java/jdk1.8u372-b07-cloudera
Verifying that we can write to /etc/cloudera-scm-server
Creating SCM configuration file in /etc/cloudera-scm-server
Executing:  /usr/java/jdk1.8u372-b07-cloudera/bin/java -cp /usr/share/java/mysql-connector-java.jar:/usr/share/java/oracle-connector-java.jar:/usr/share/java/postgresql-connector-java.jar:/opt/cloudera/cm/schema/../lib/* com.cloudera.enterprise.dbutil.DbCommandExecutor /etc/cloudera-scm-server/db.properties com.cloudera.cmf.db.
Loading class `com.mysql.jdbc.Driver'. This is deprecated. The new driver class is `com.mysql.cj.jdbc.Driver'. The driver is automatically registered via the SPI and manual loading of the driver class is generally unnecessary.
[                          main] DbCommandExecutor              INFO  Successfully connected to database.
All done, your SCM database is configured correctly!
[root@cdp73-1 ~]#
启动Cloudera Manager Server
[root@cdp73-1 ~]$ systemctl start cloudera-scm-server
[root@cdp73-1 ~]$ systemctl enable cloudera-scm-server
确认启动成功
可使用下面命令通过日志观察启动过程
tail -f /var/log/cloudera-scm-server/cloudera-scm-server.logtail -f /var/log/cloudera-scm-server/cloudera-scm-server.log
当日志中出现下面日志标志着启动完成
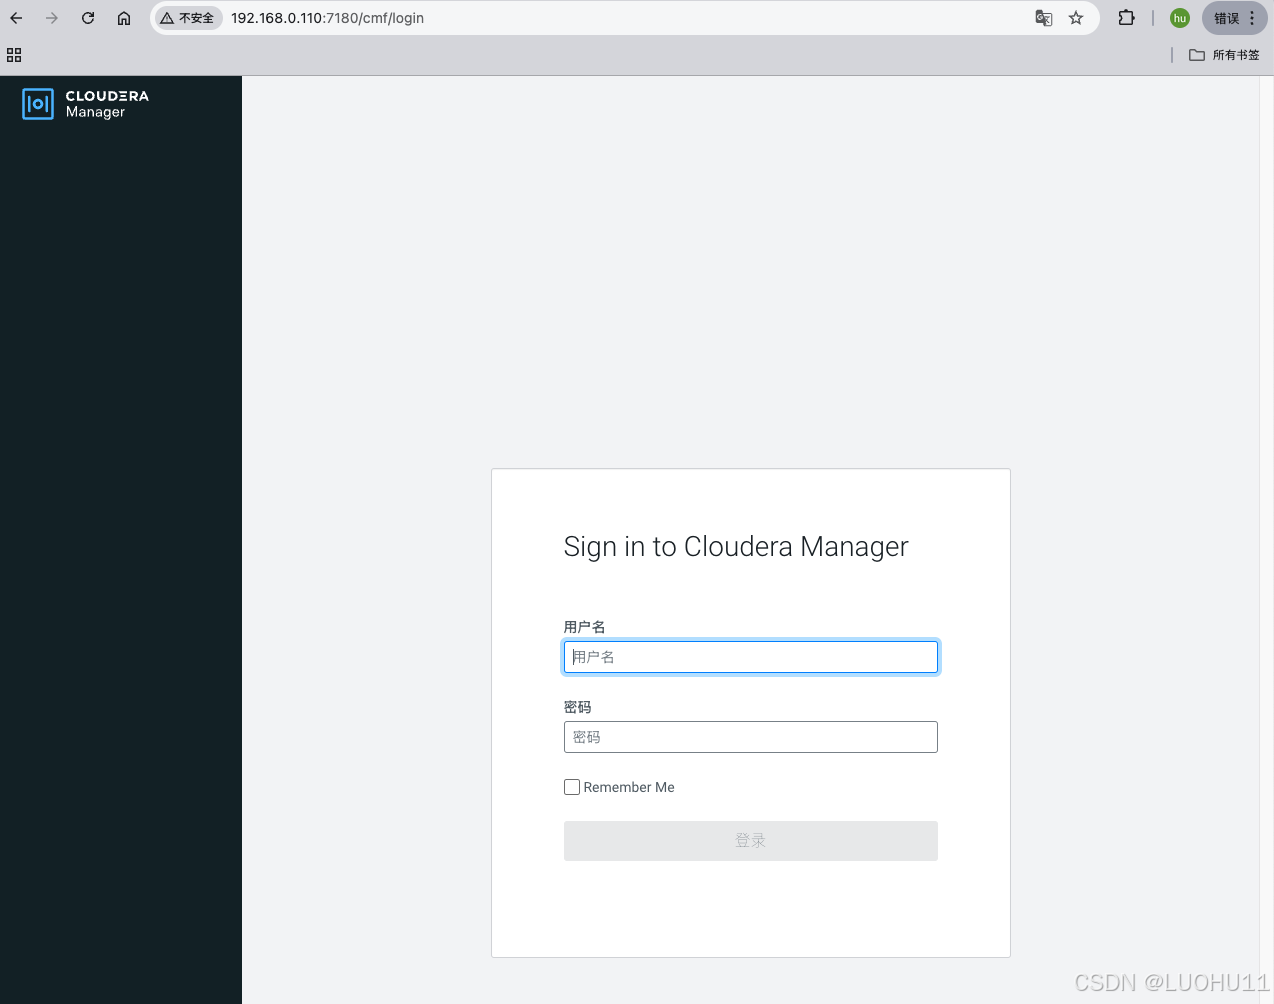
INFO WebServerImpl:com.cloudera.server.cmf.WebServerImpl: Started Jetty server.启动完成后可以访问Cloudera Manager的WebUI
Username: admin
Password: admin
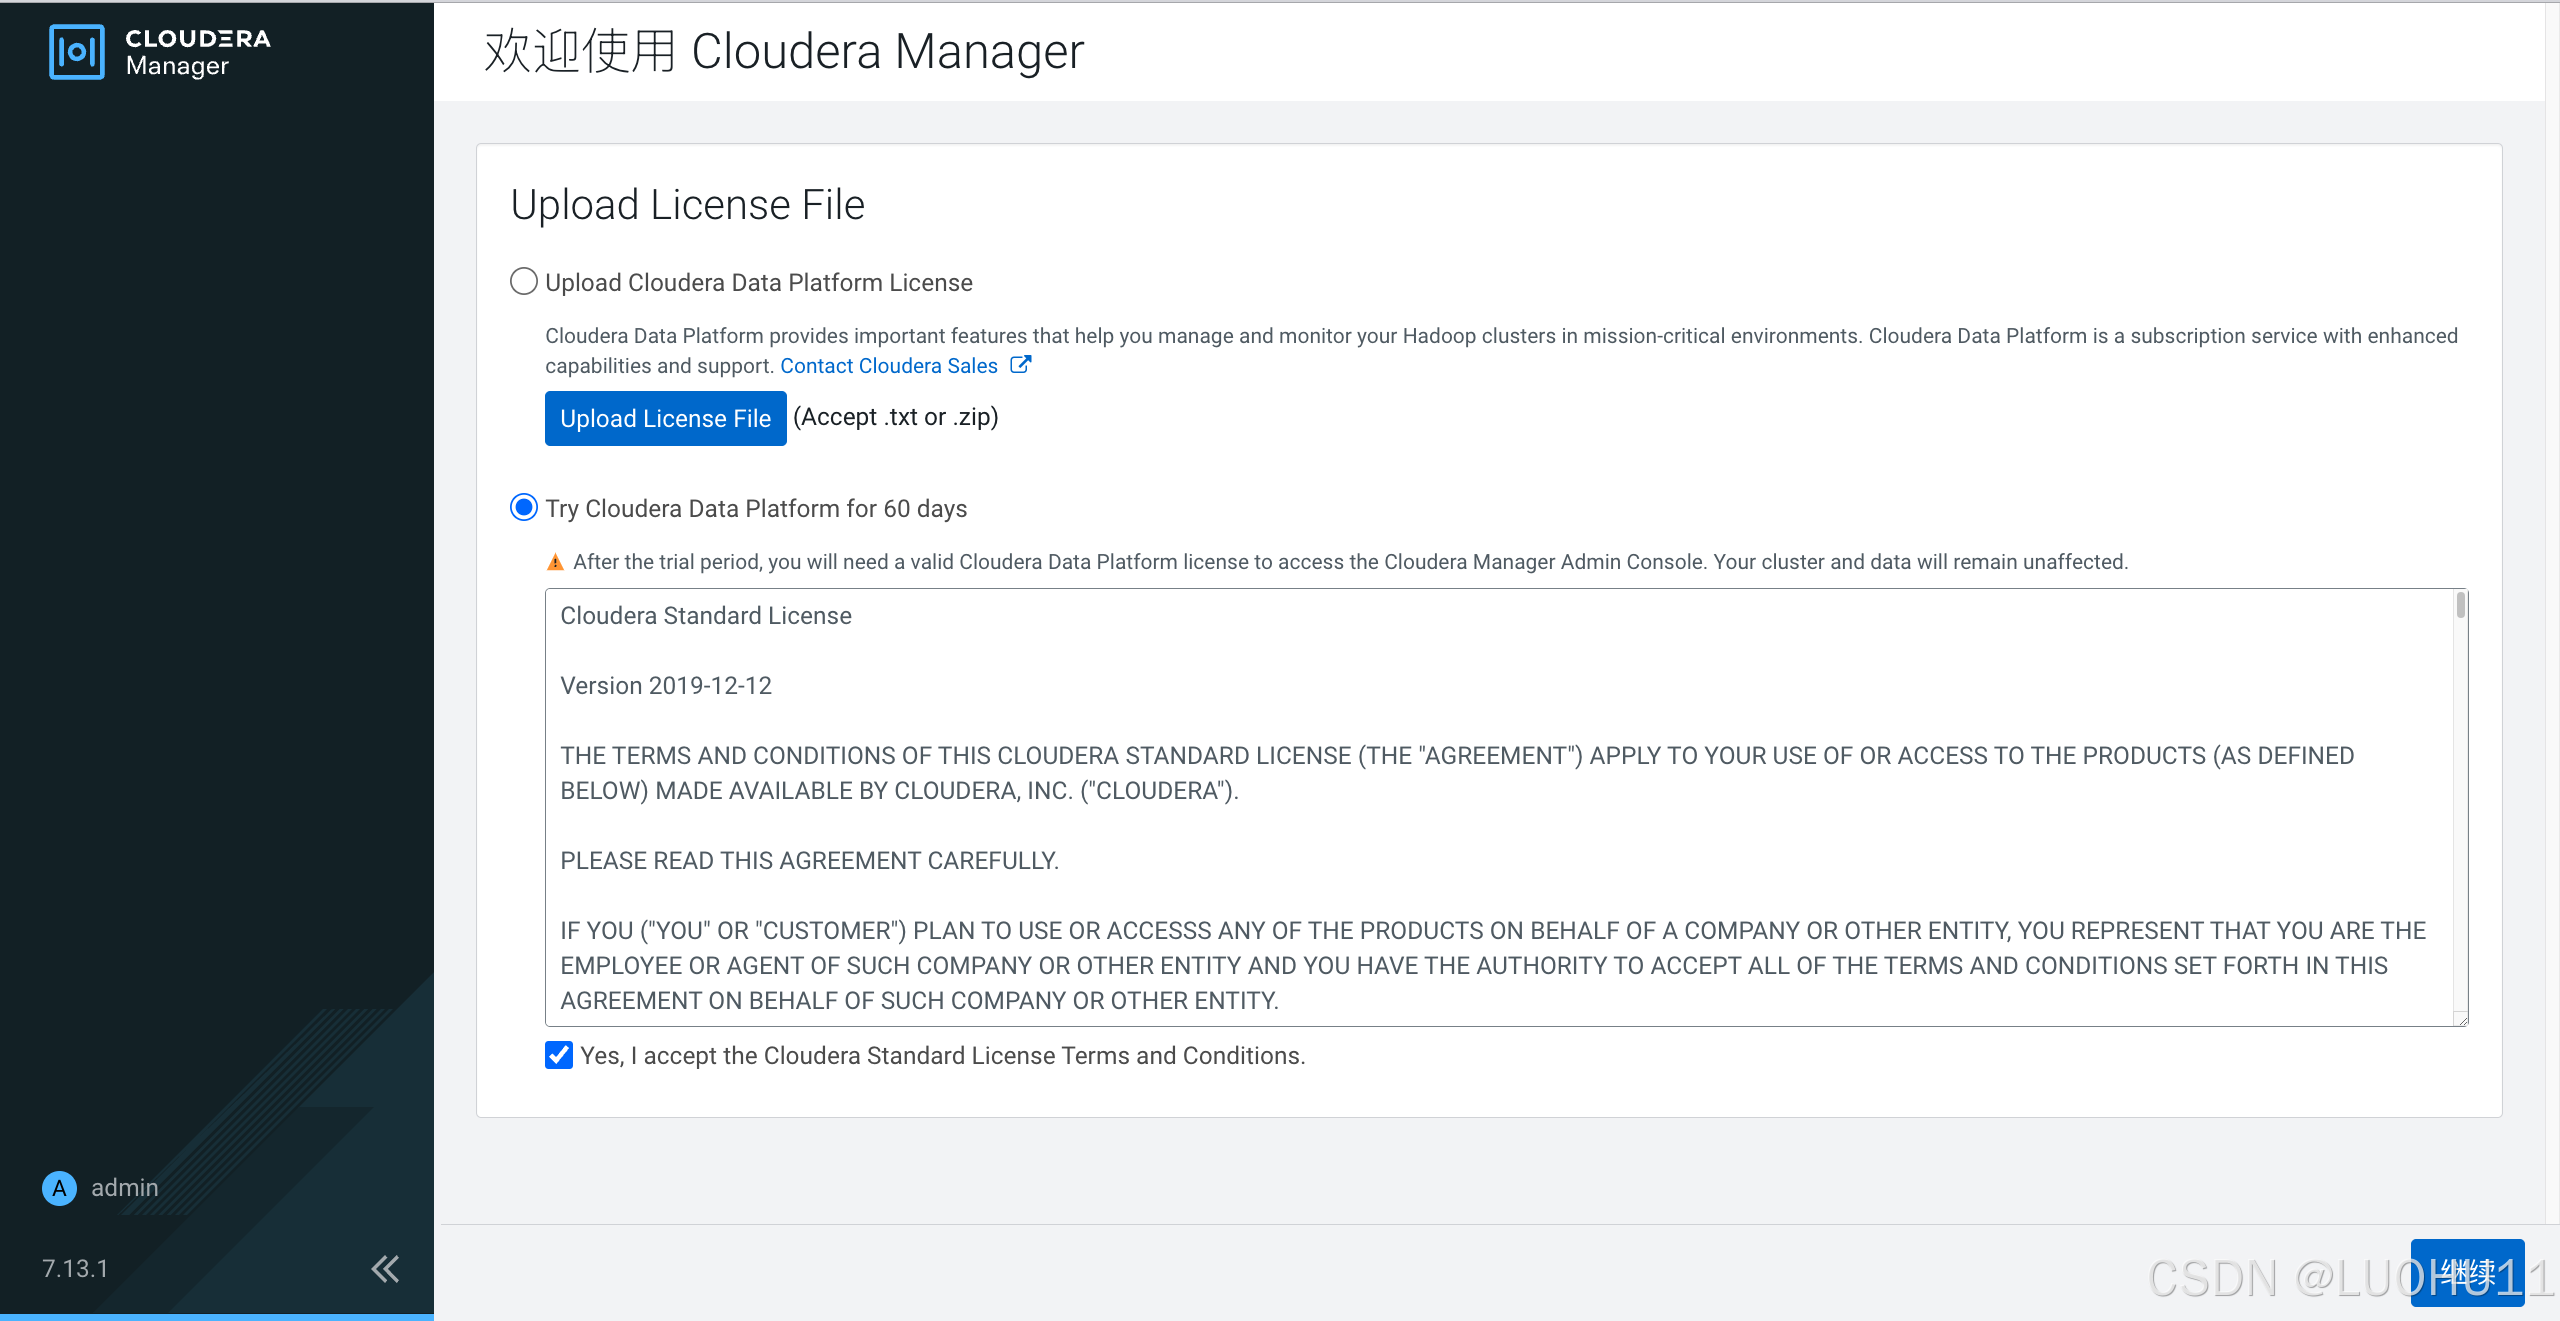
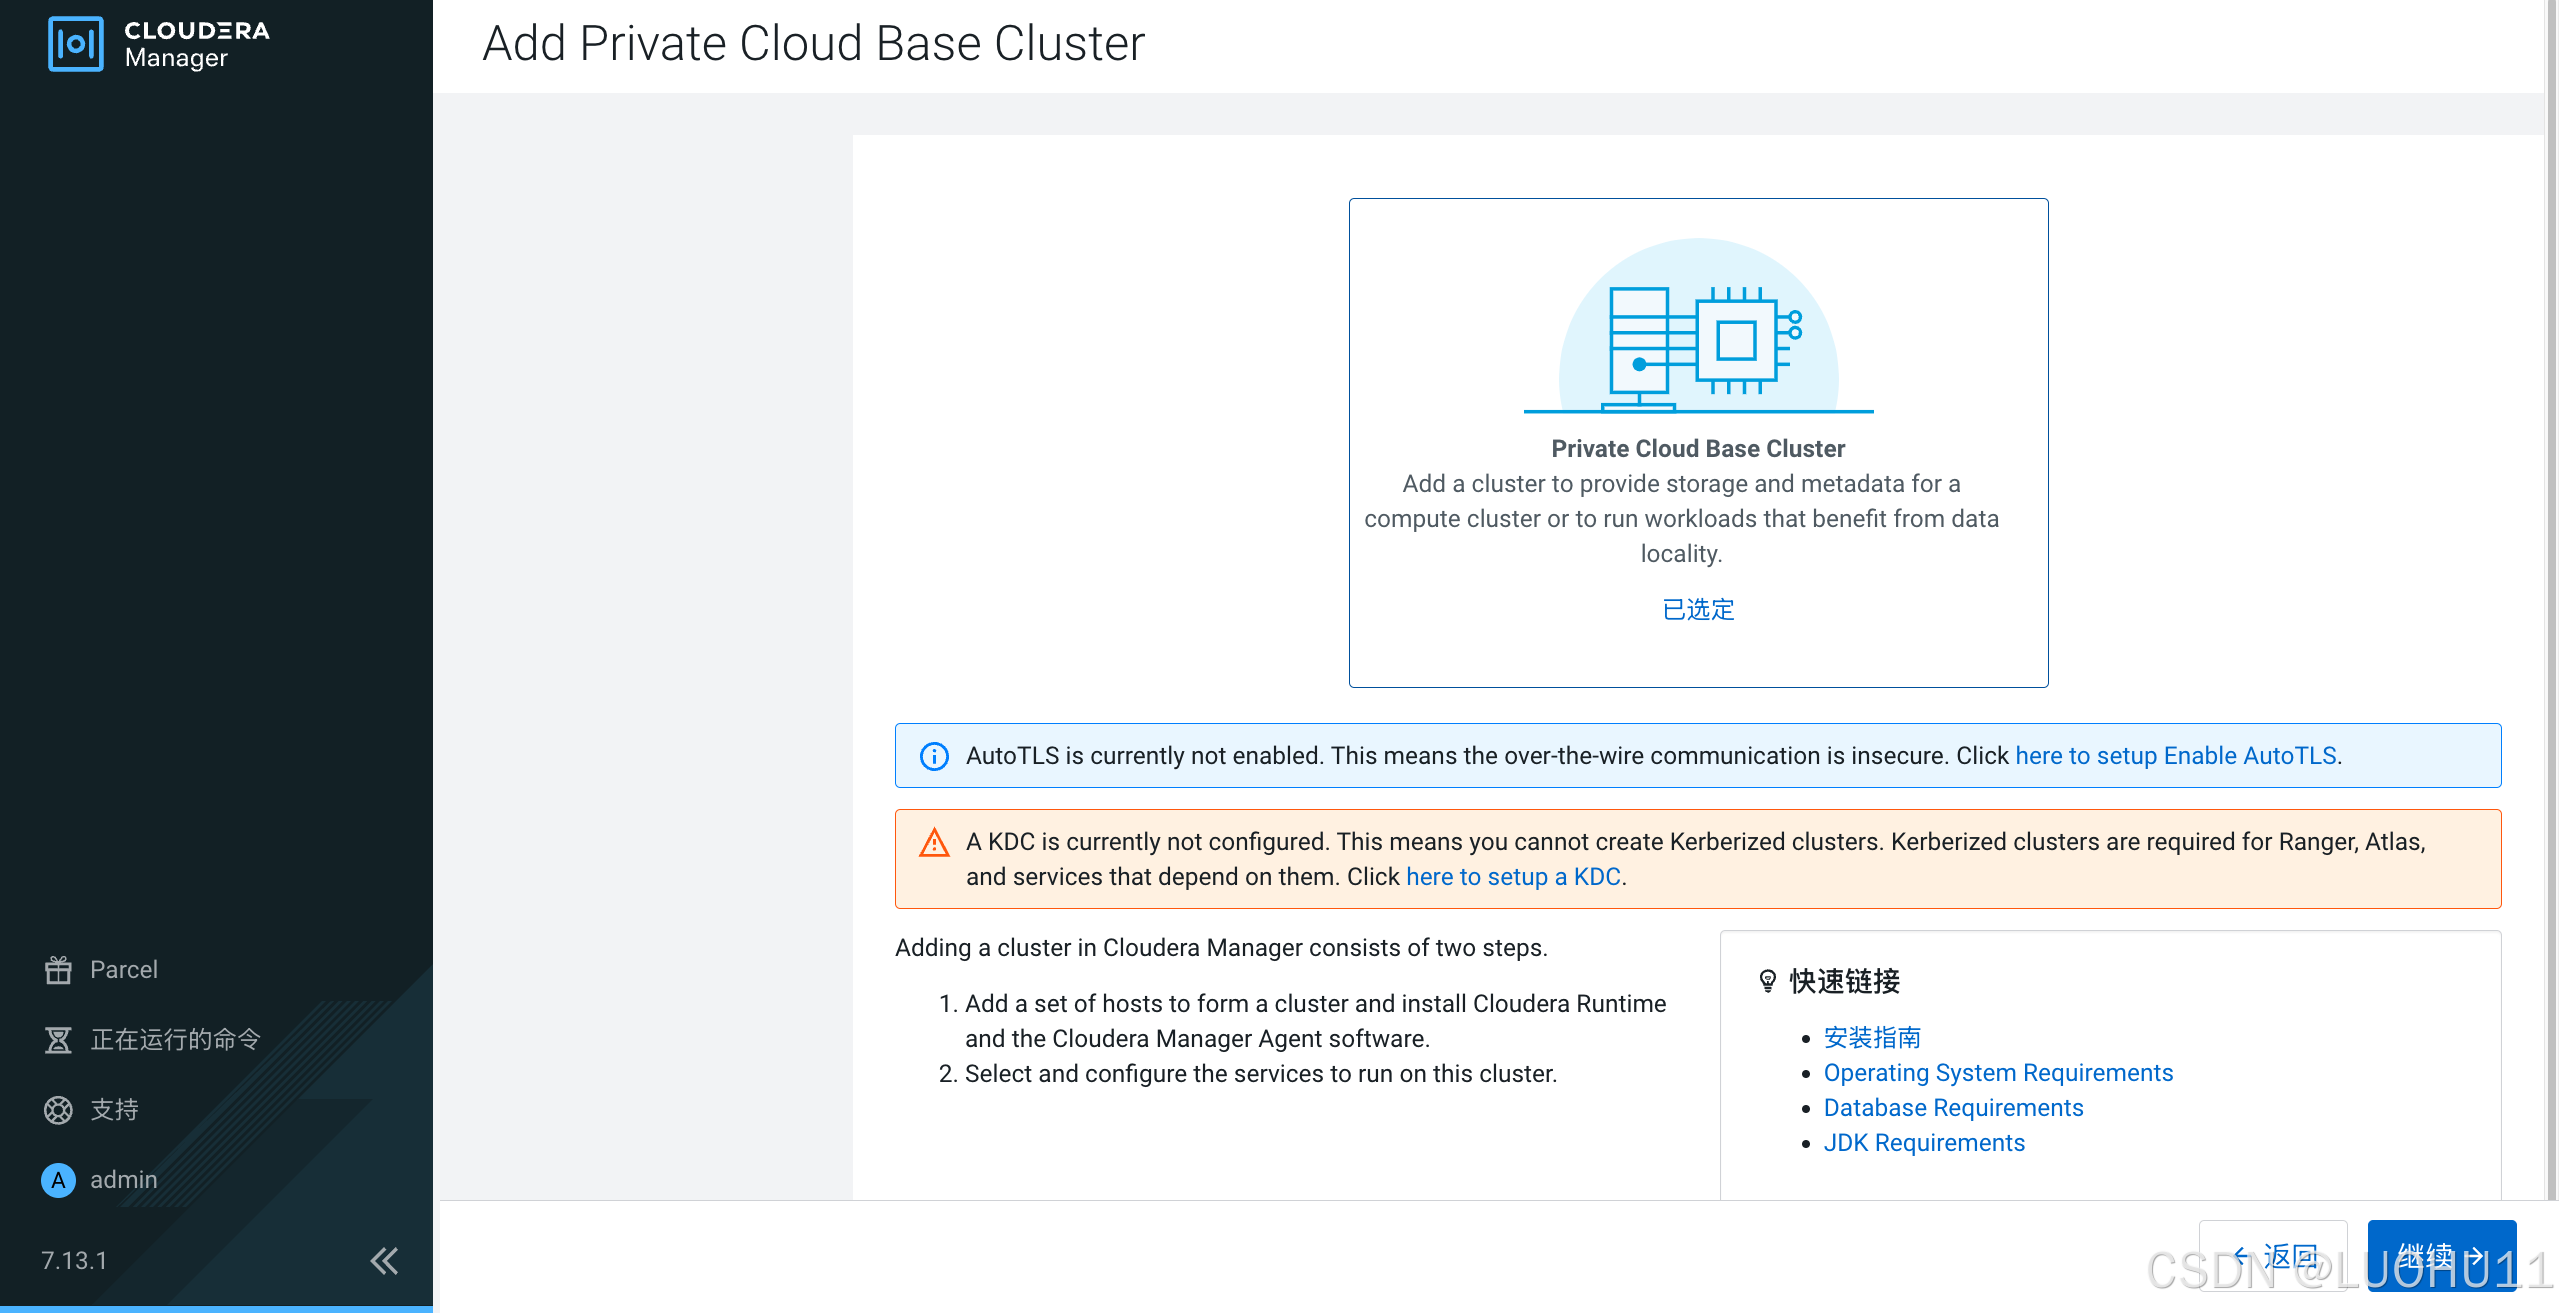
[八]使用向导设置集群
选择试用60天
选择初始化私有云集群
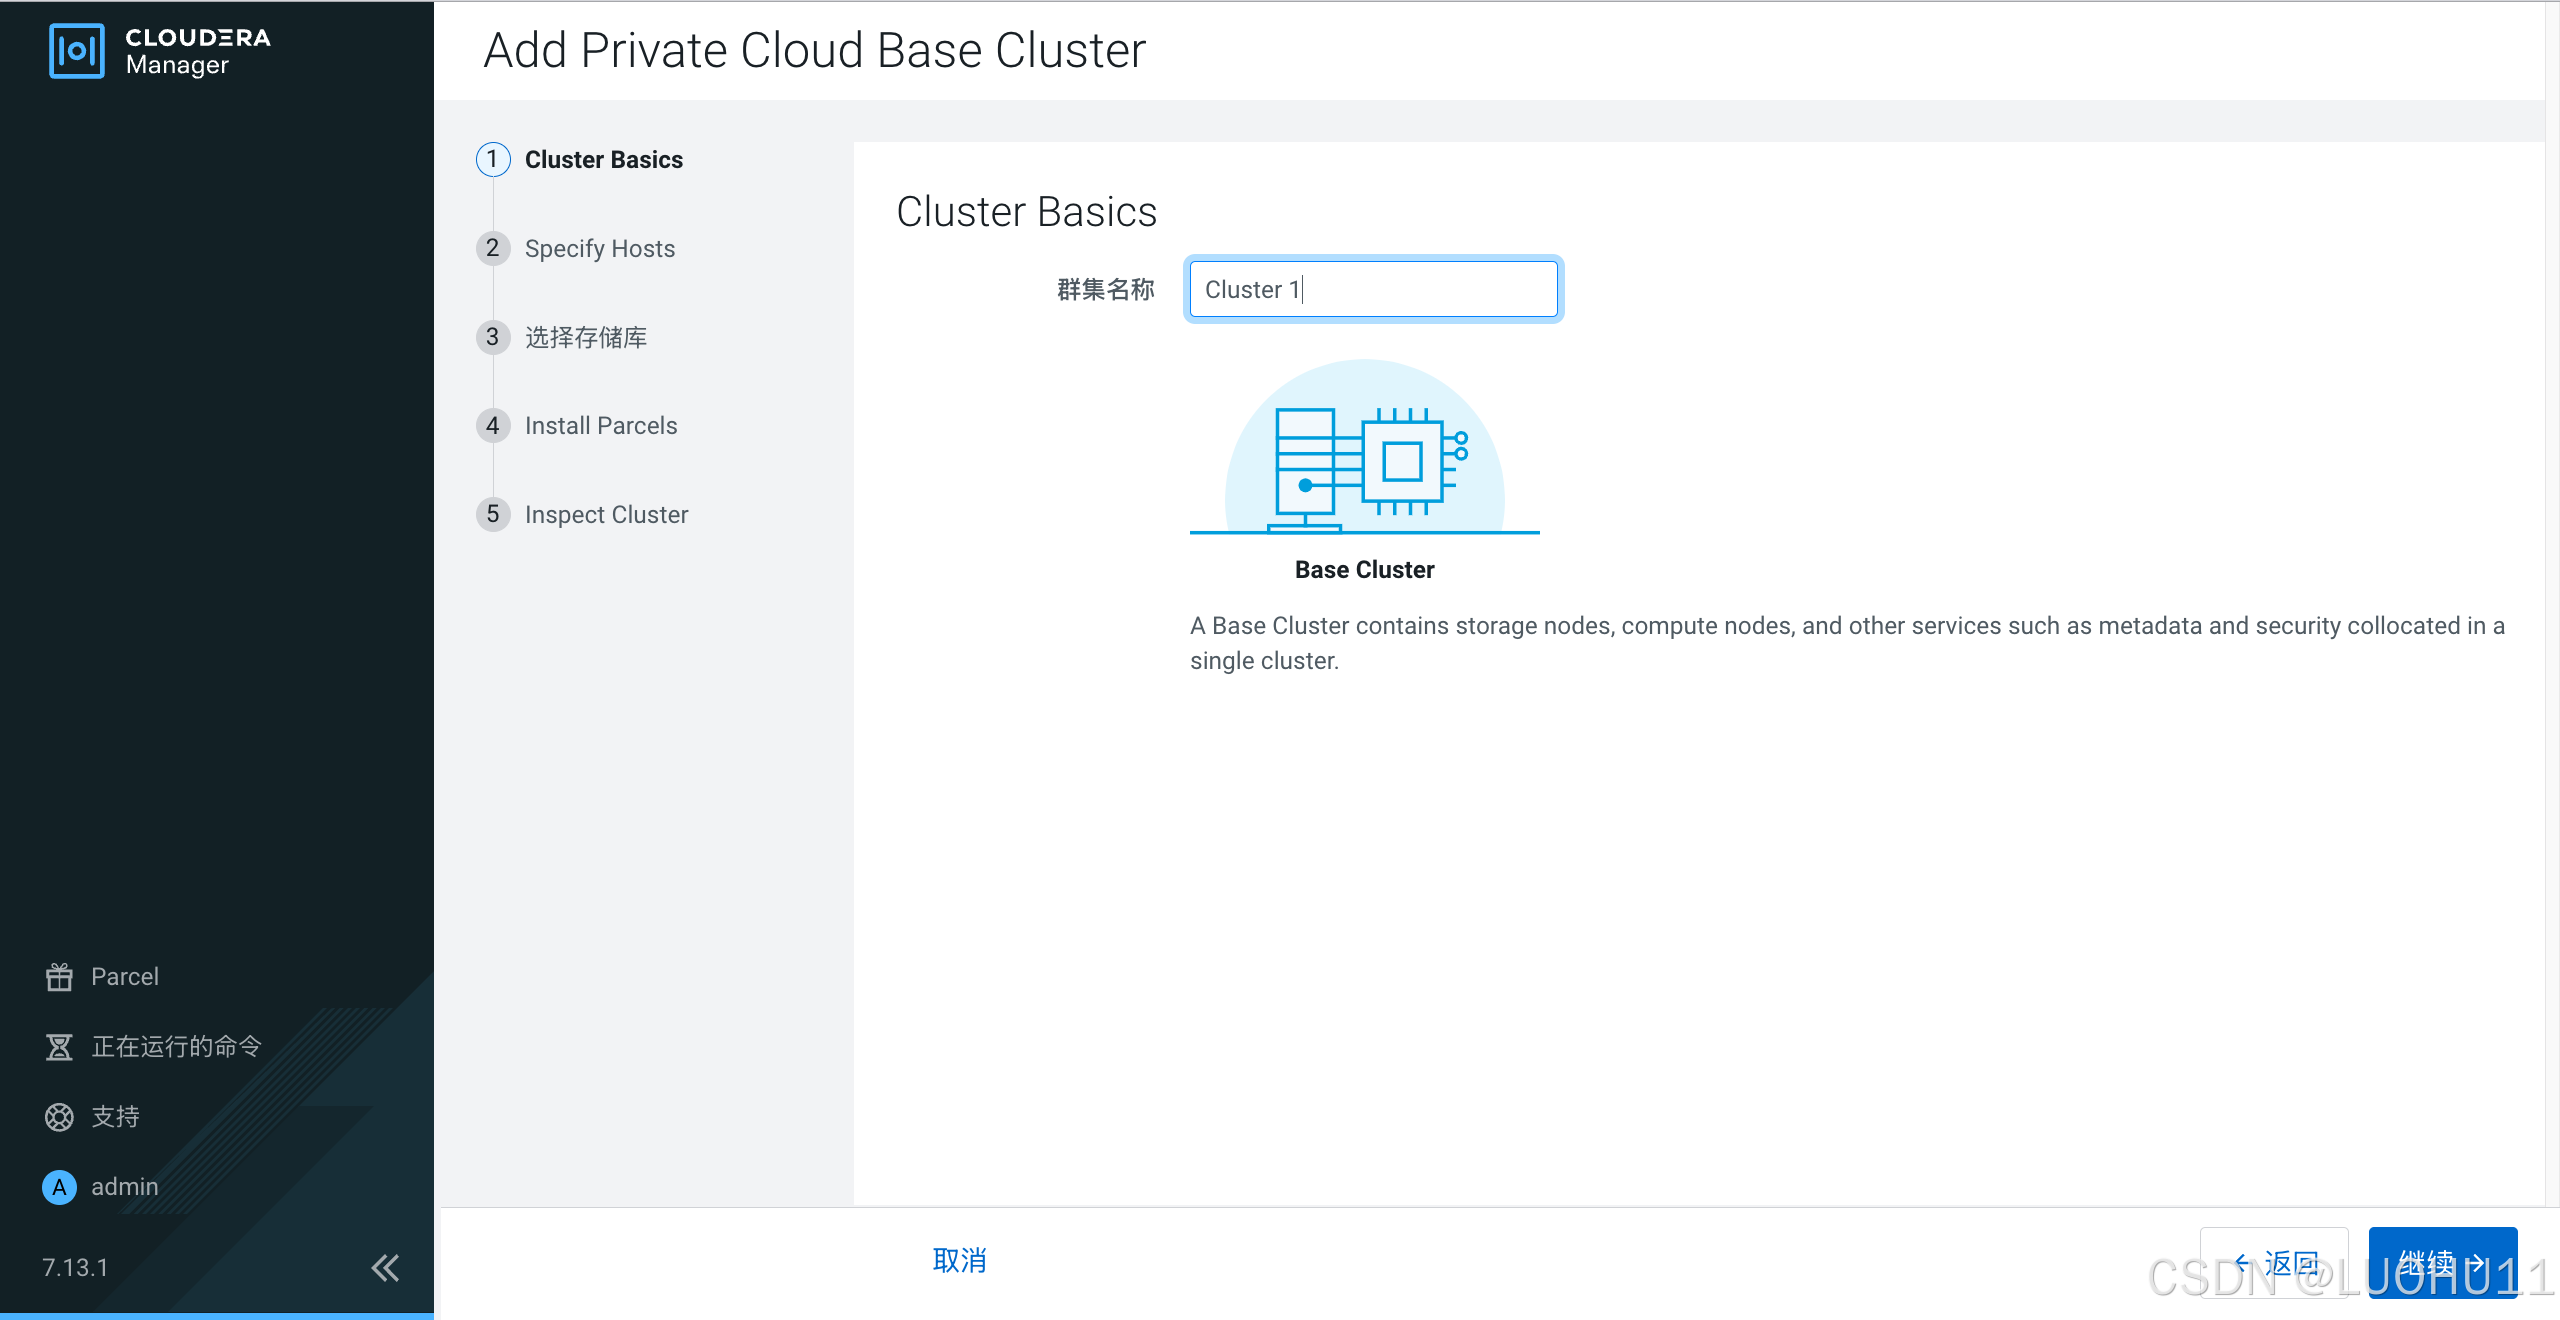
填写集群名
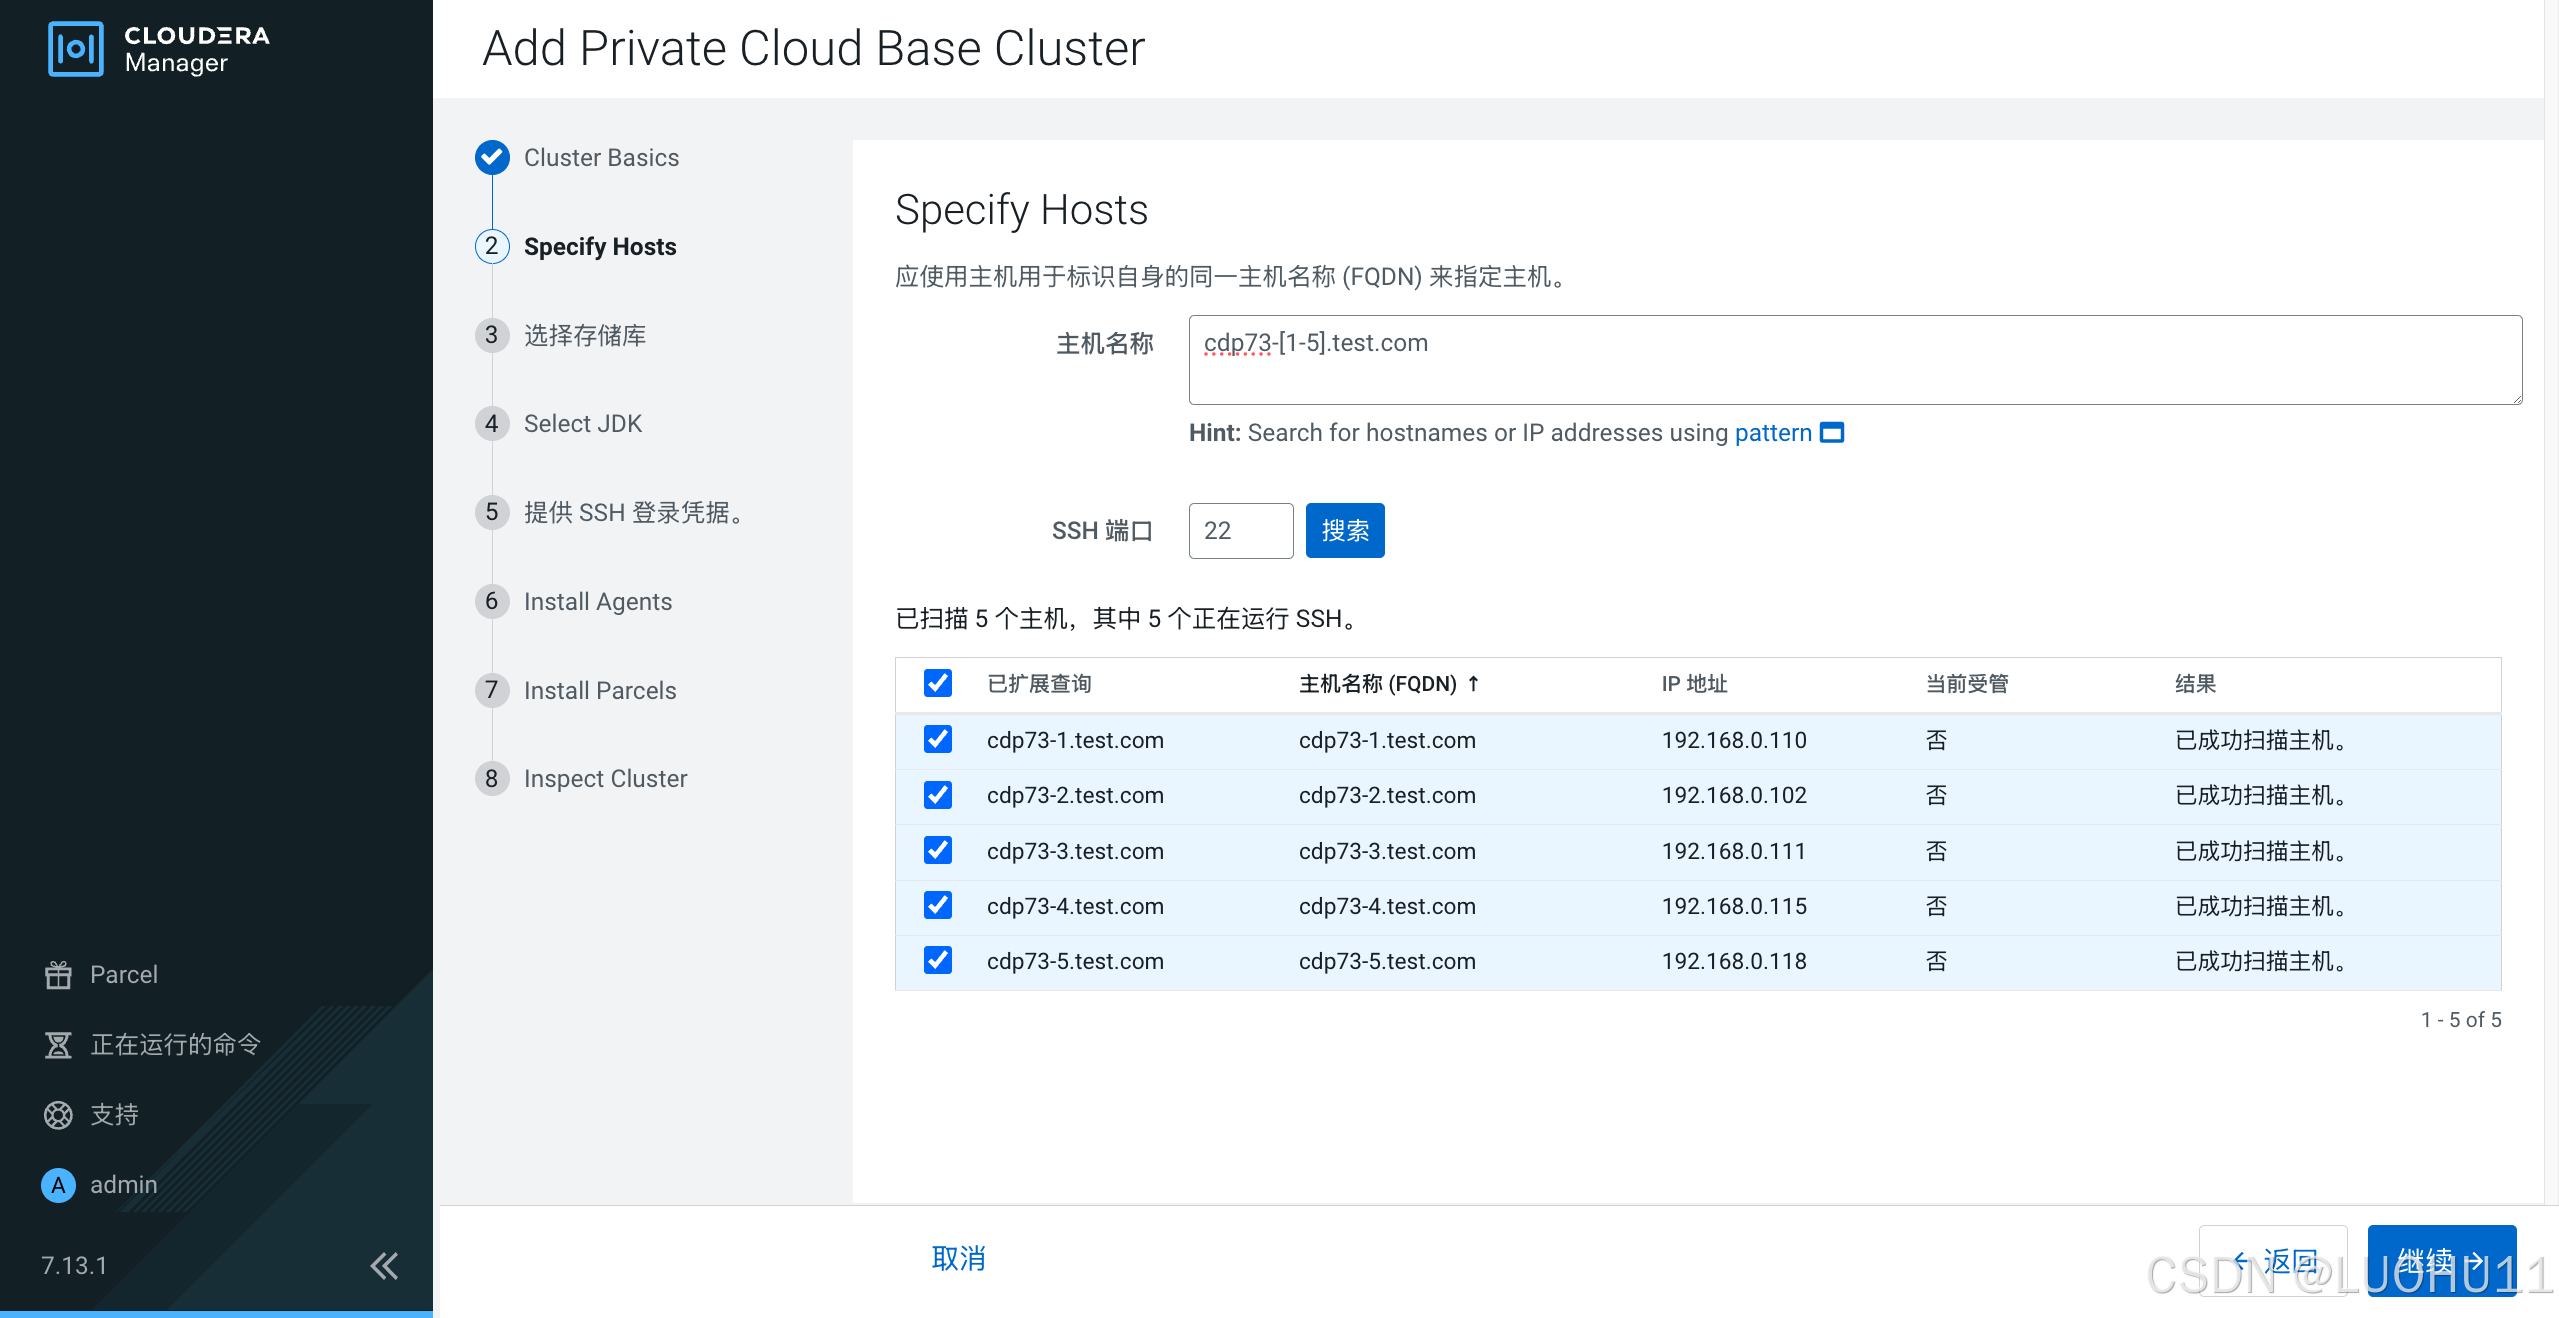
指定集群主机
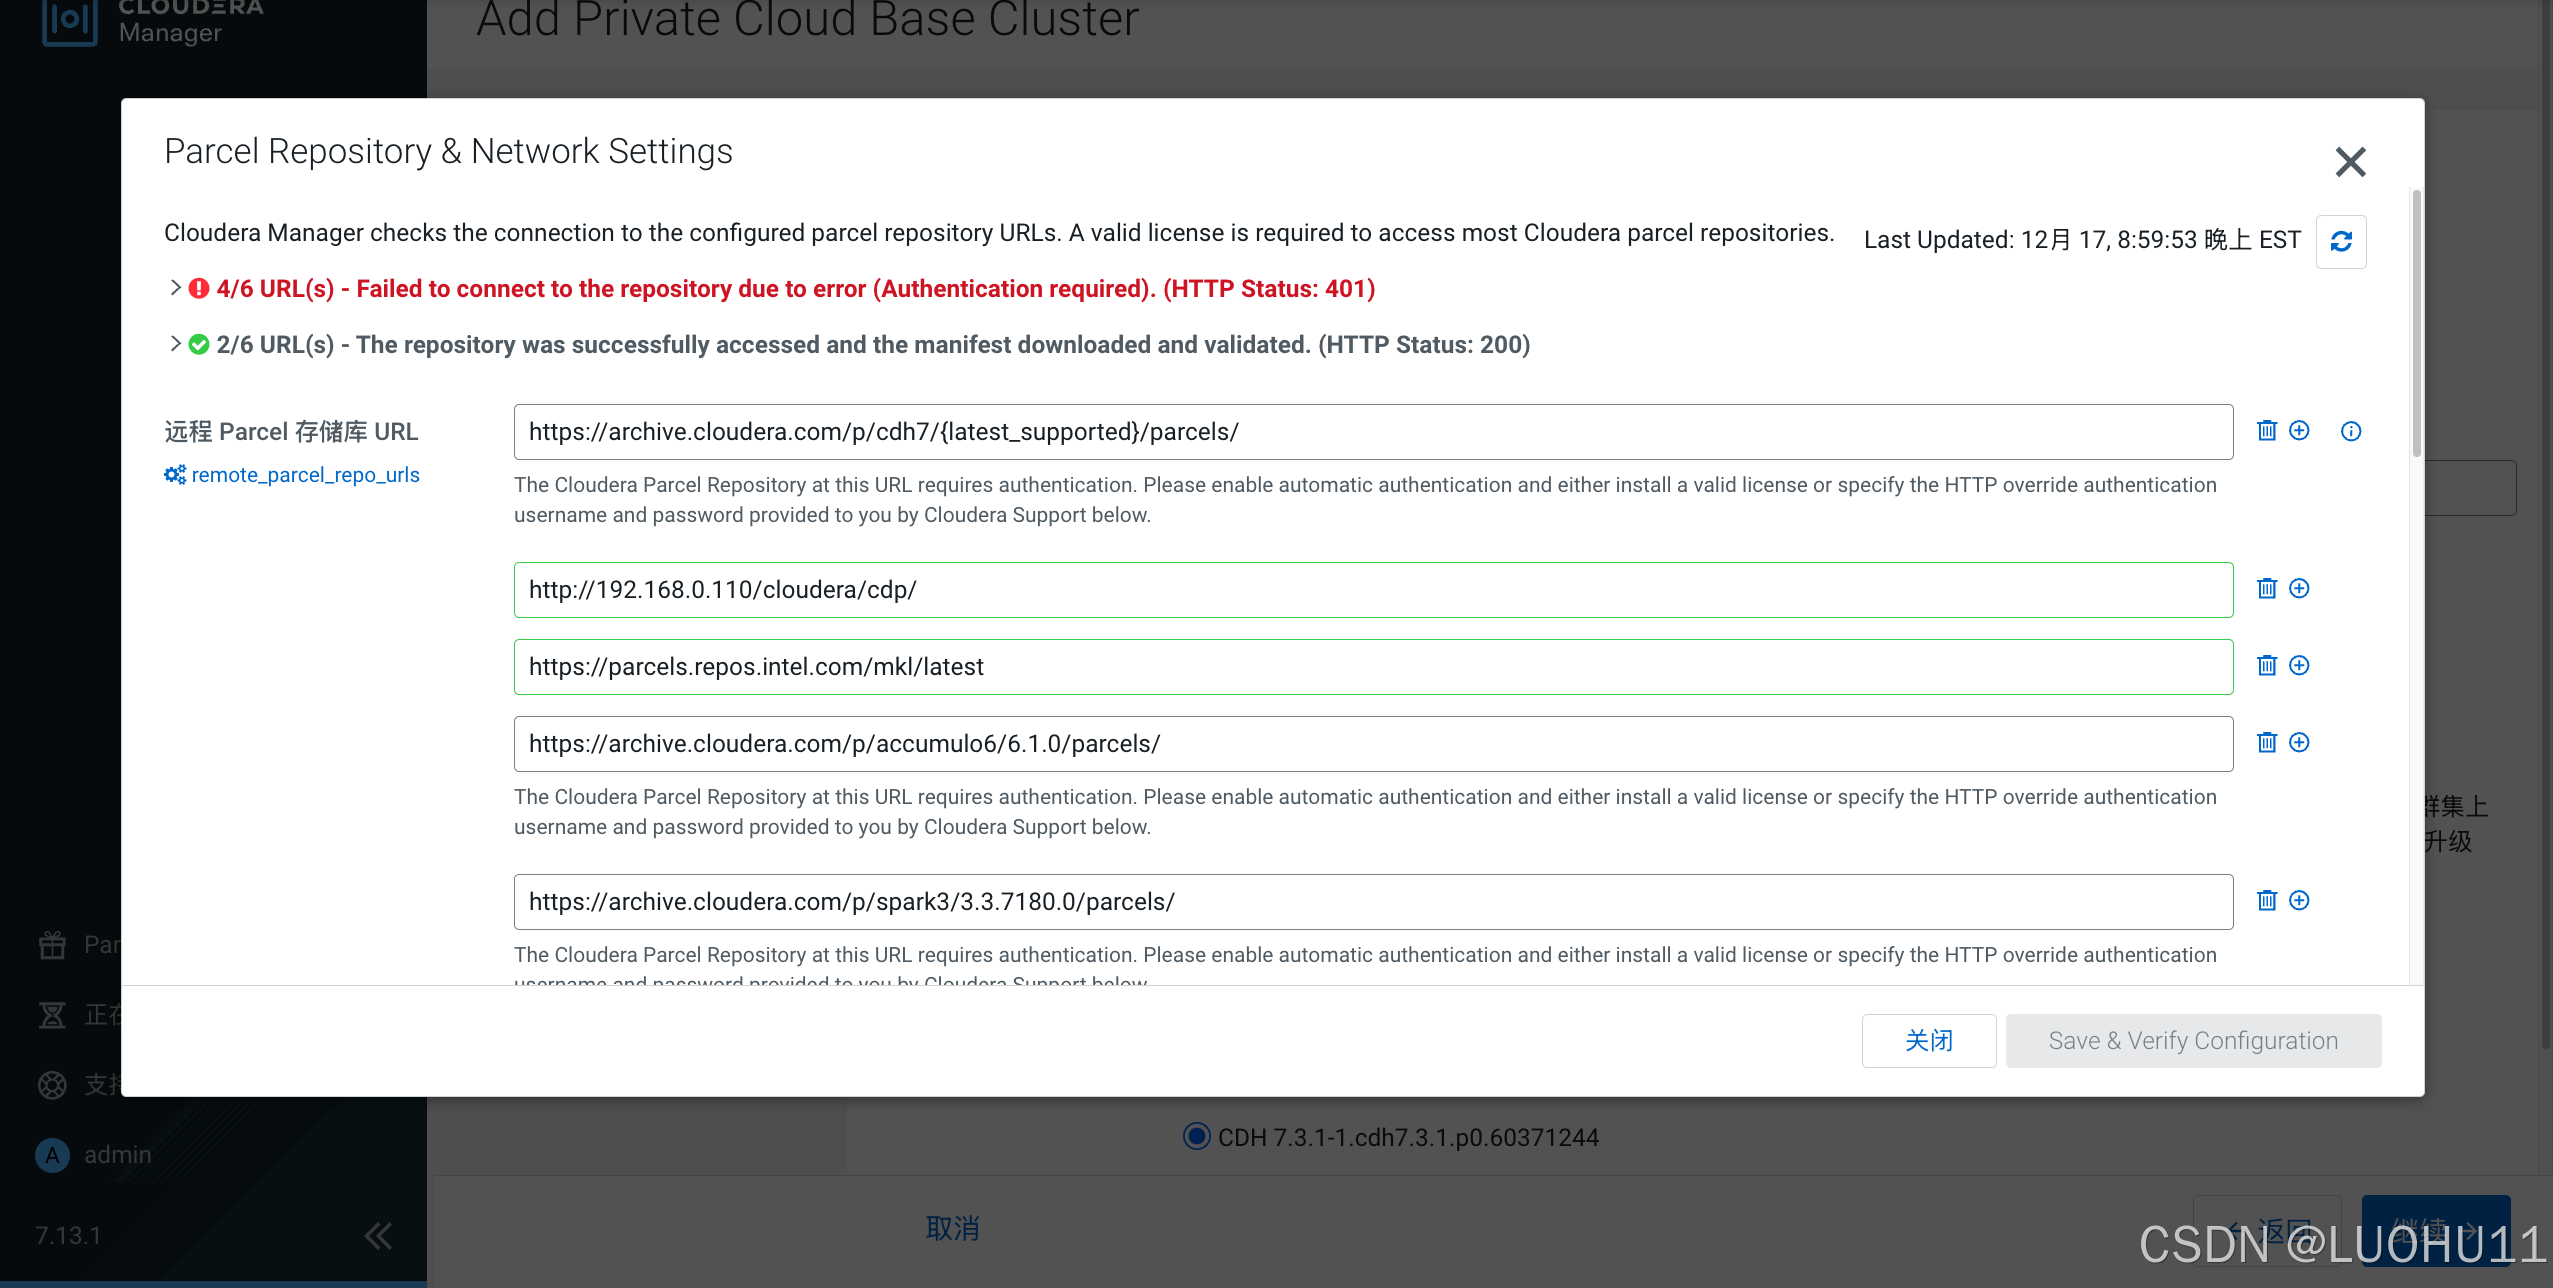
 选择存储库
选择存储库
Cloudera Manager Agent勾选自定义存储库,填入http://192.168.0.171/cloudera/cm/
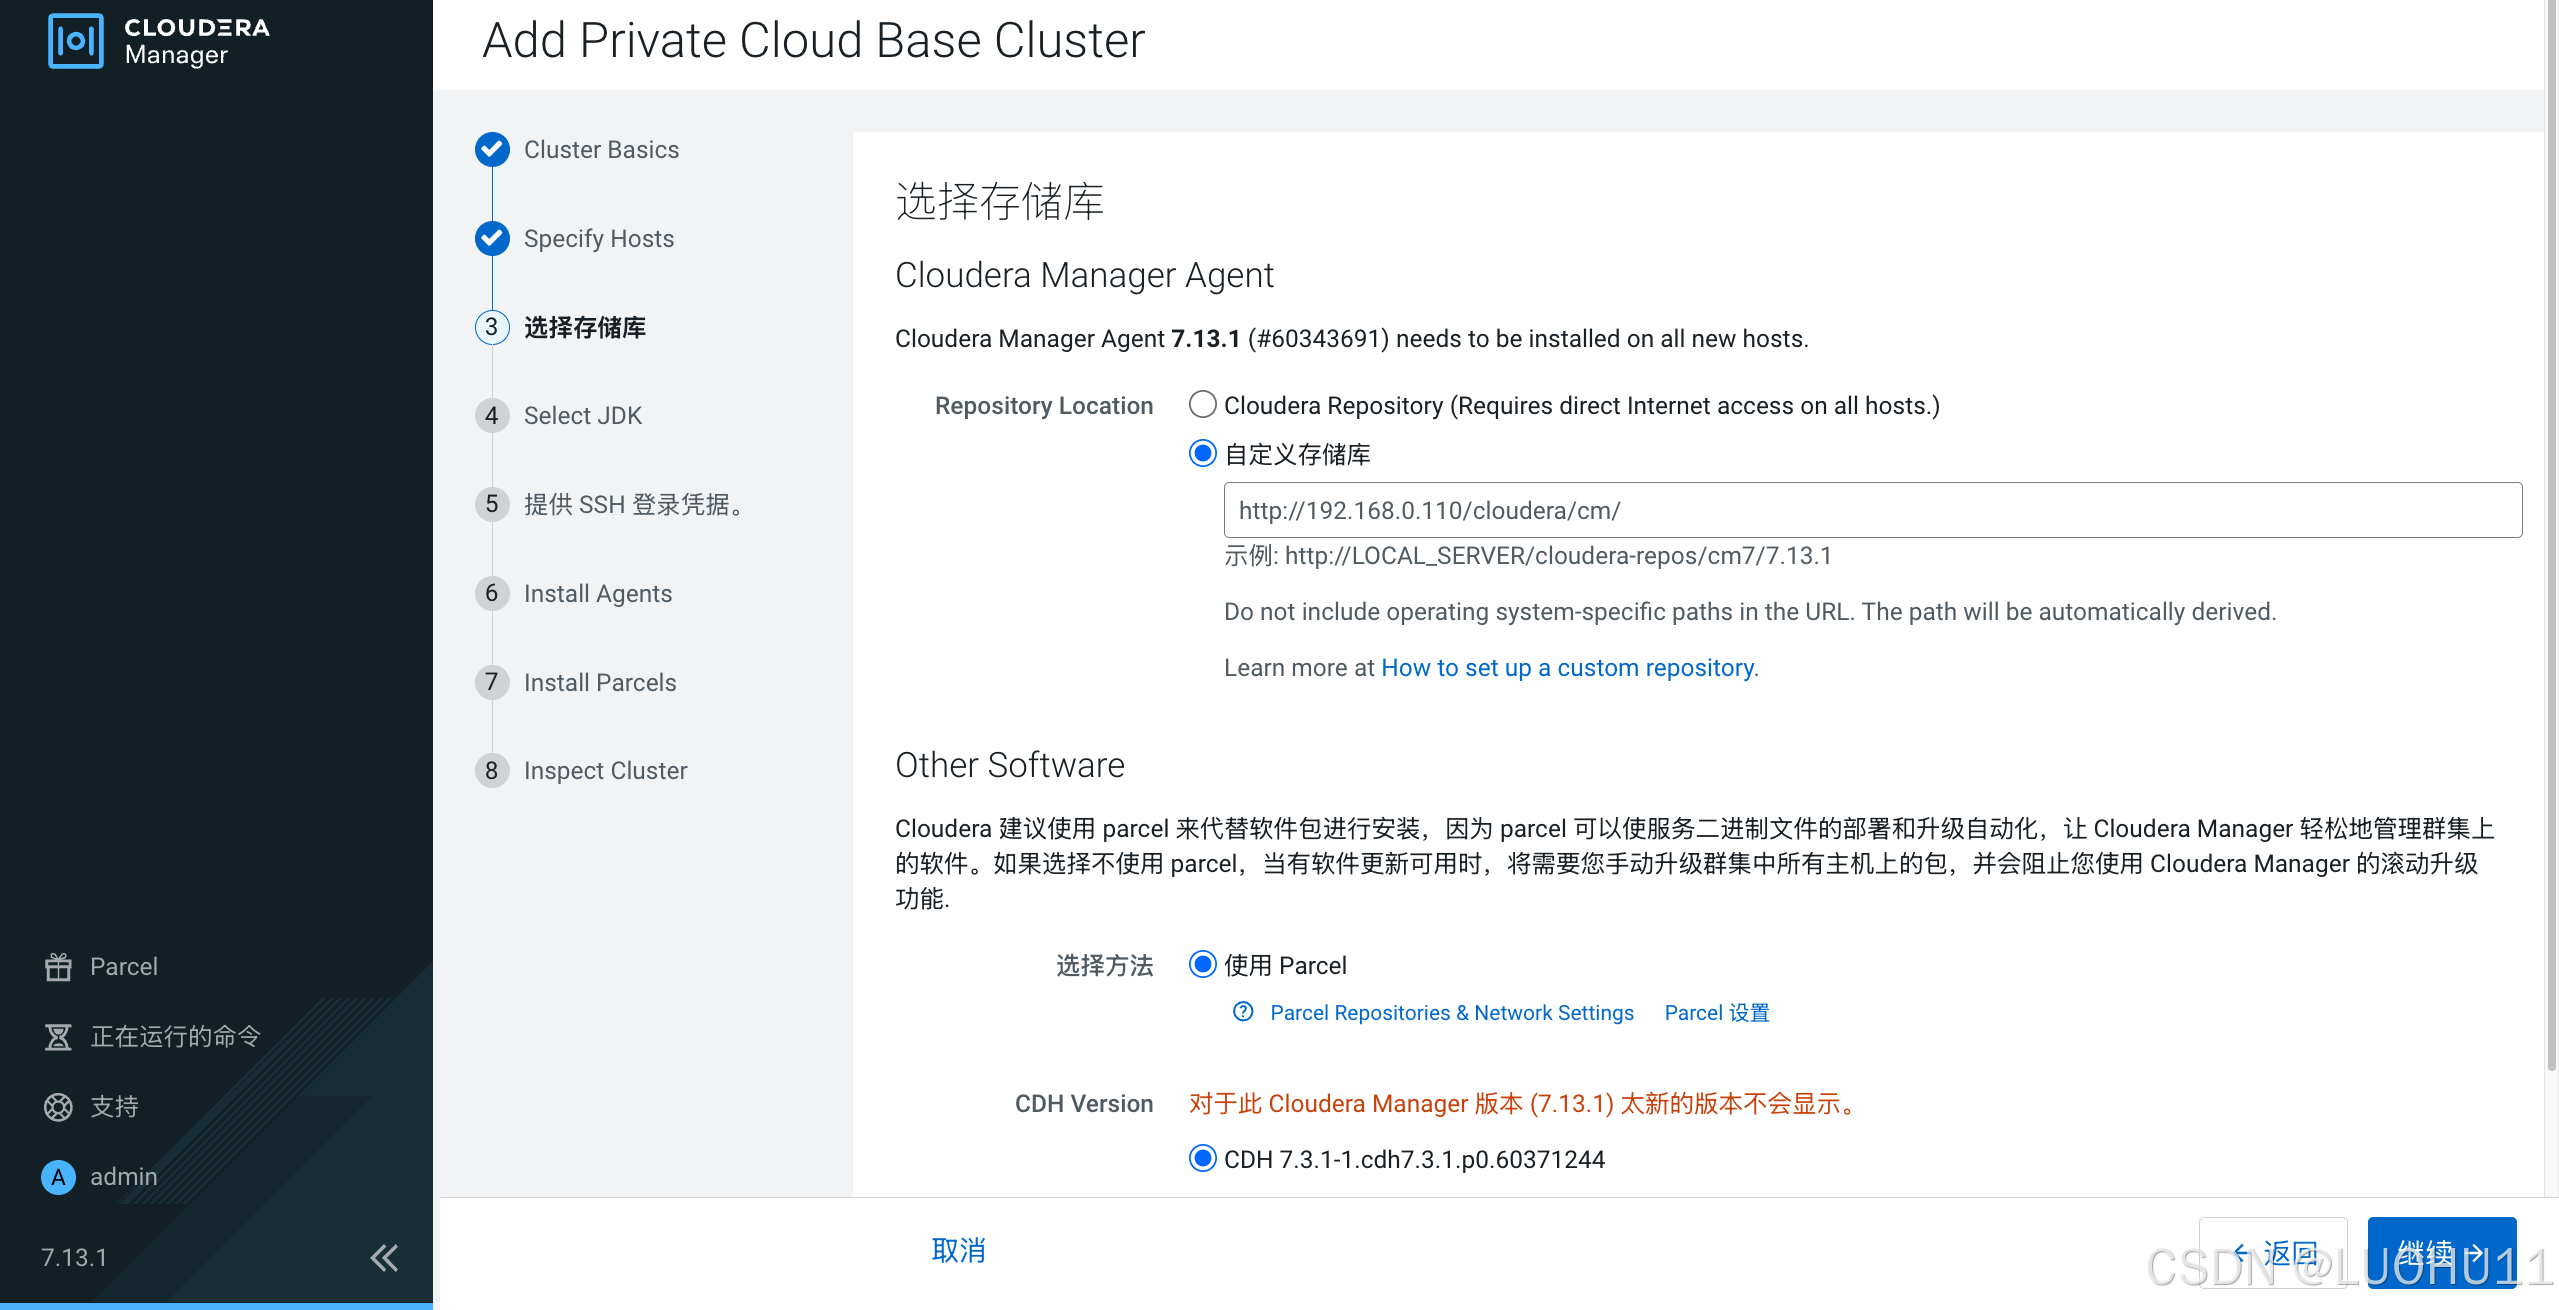
Other Software 勾选使用 Parcel,在Parcel Repository & Network Settings中填入http://192.168.0.171/cloudera/cdp/
选择JDK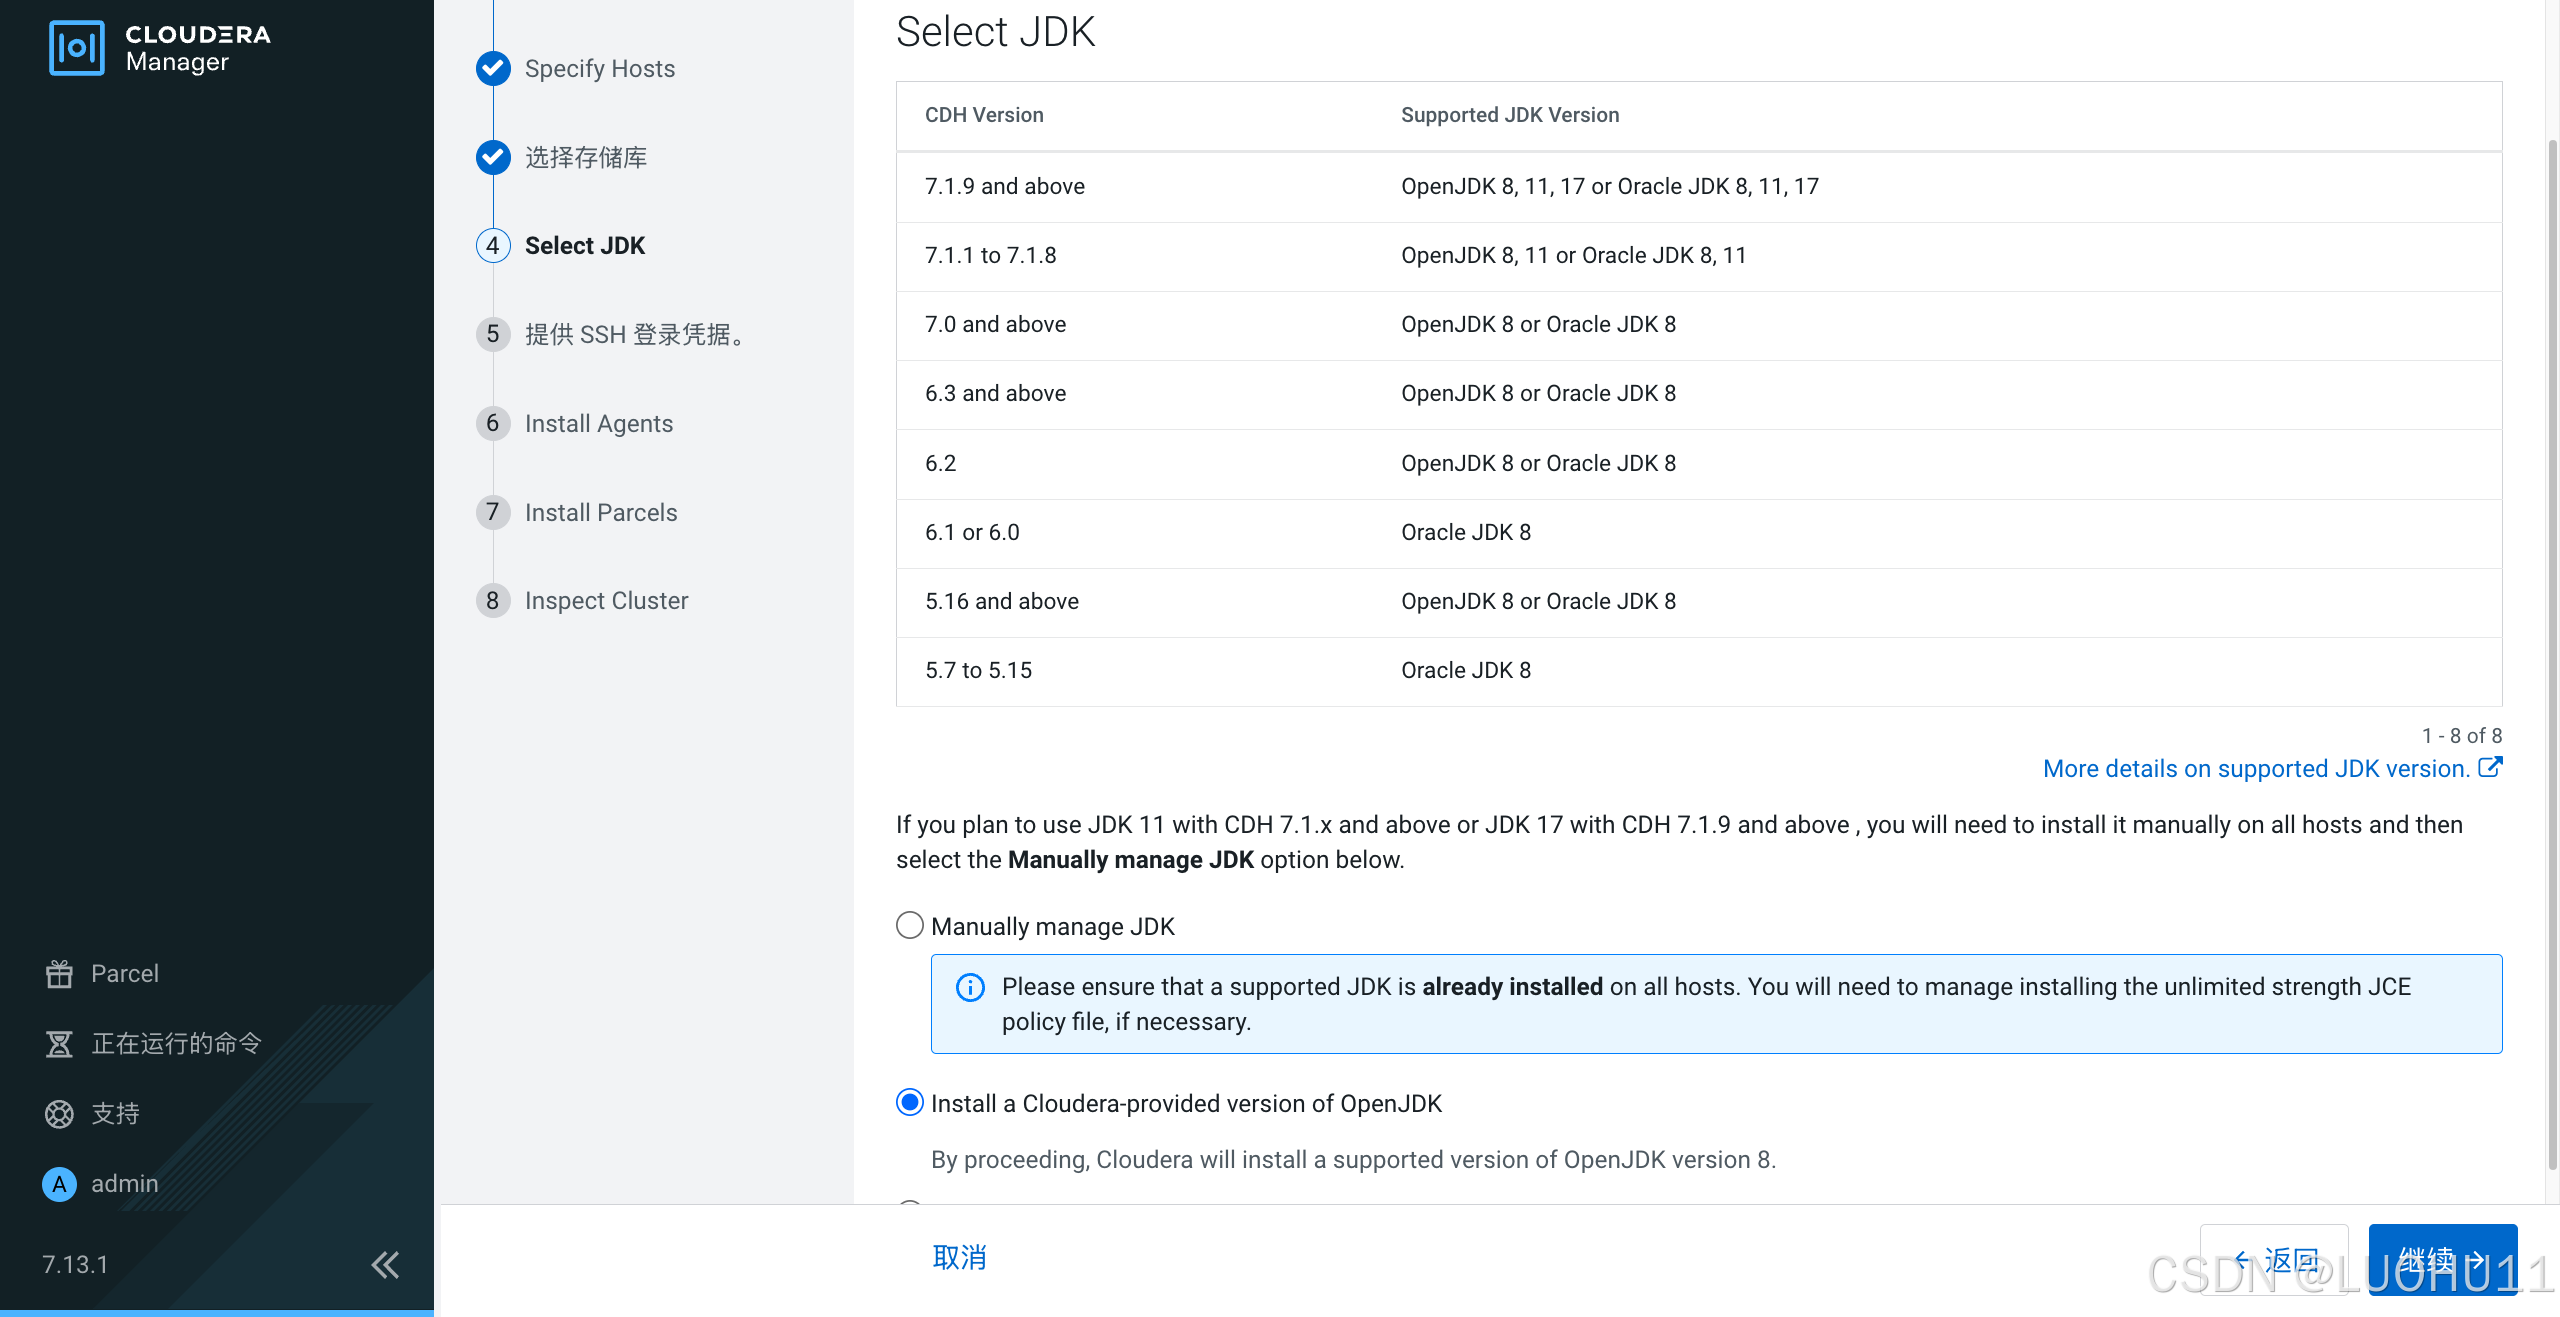
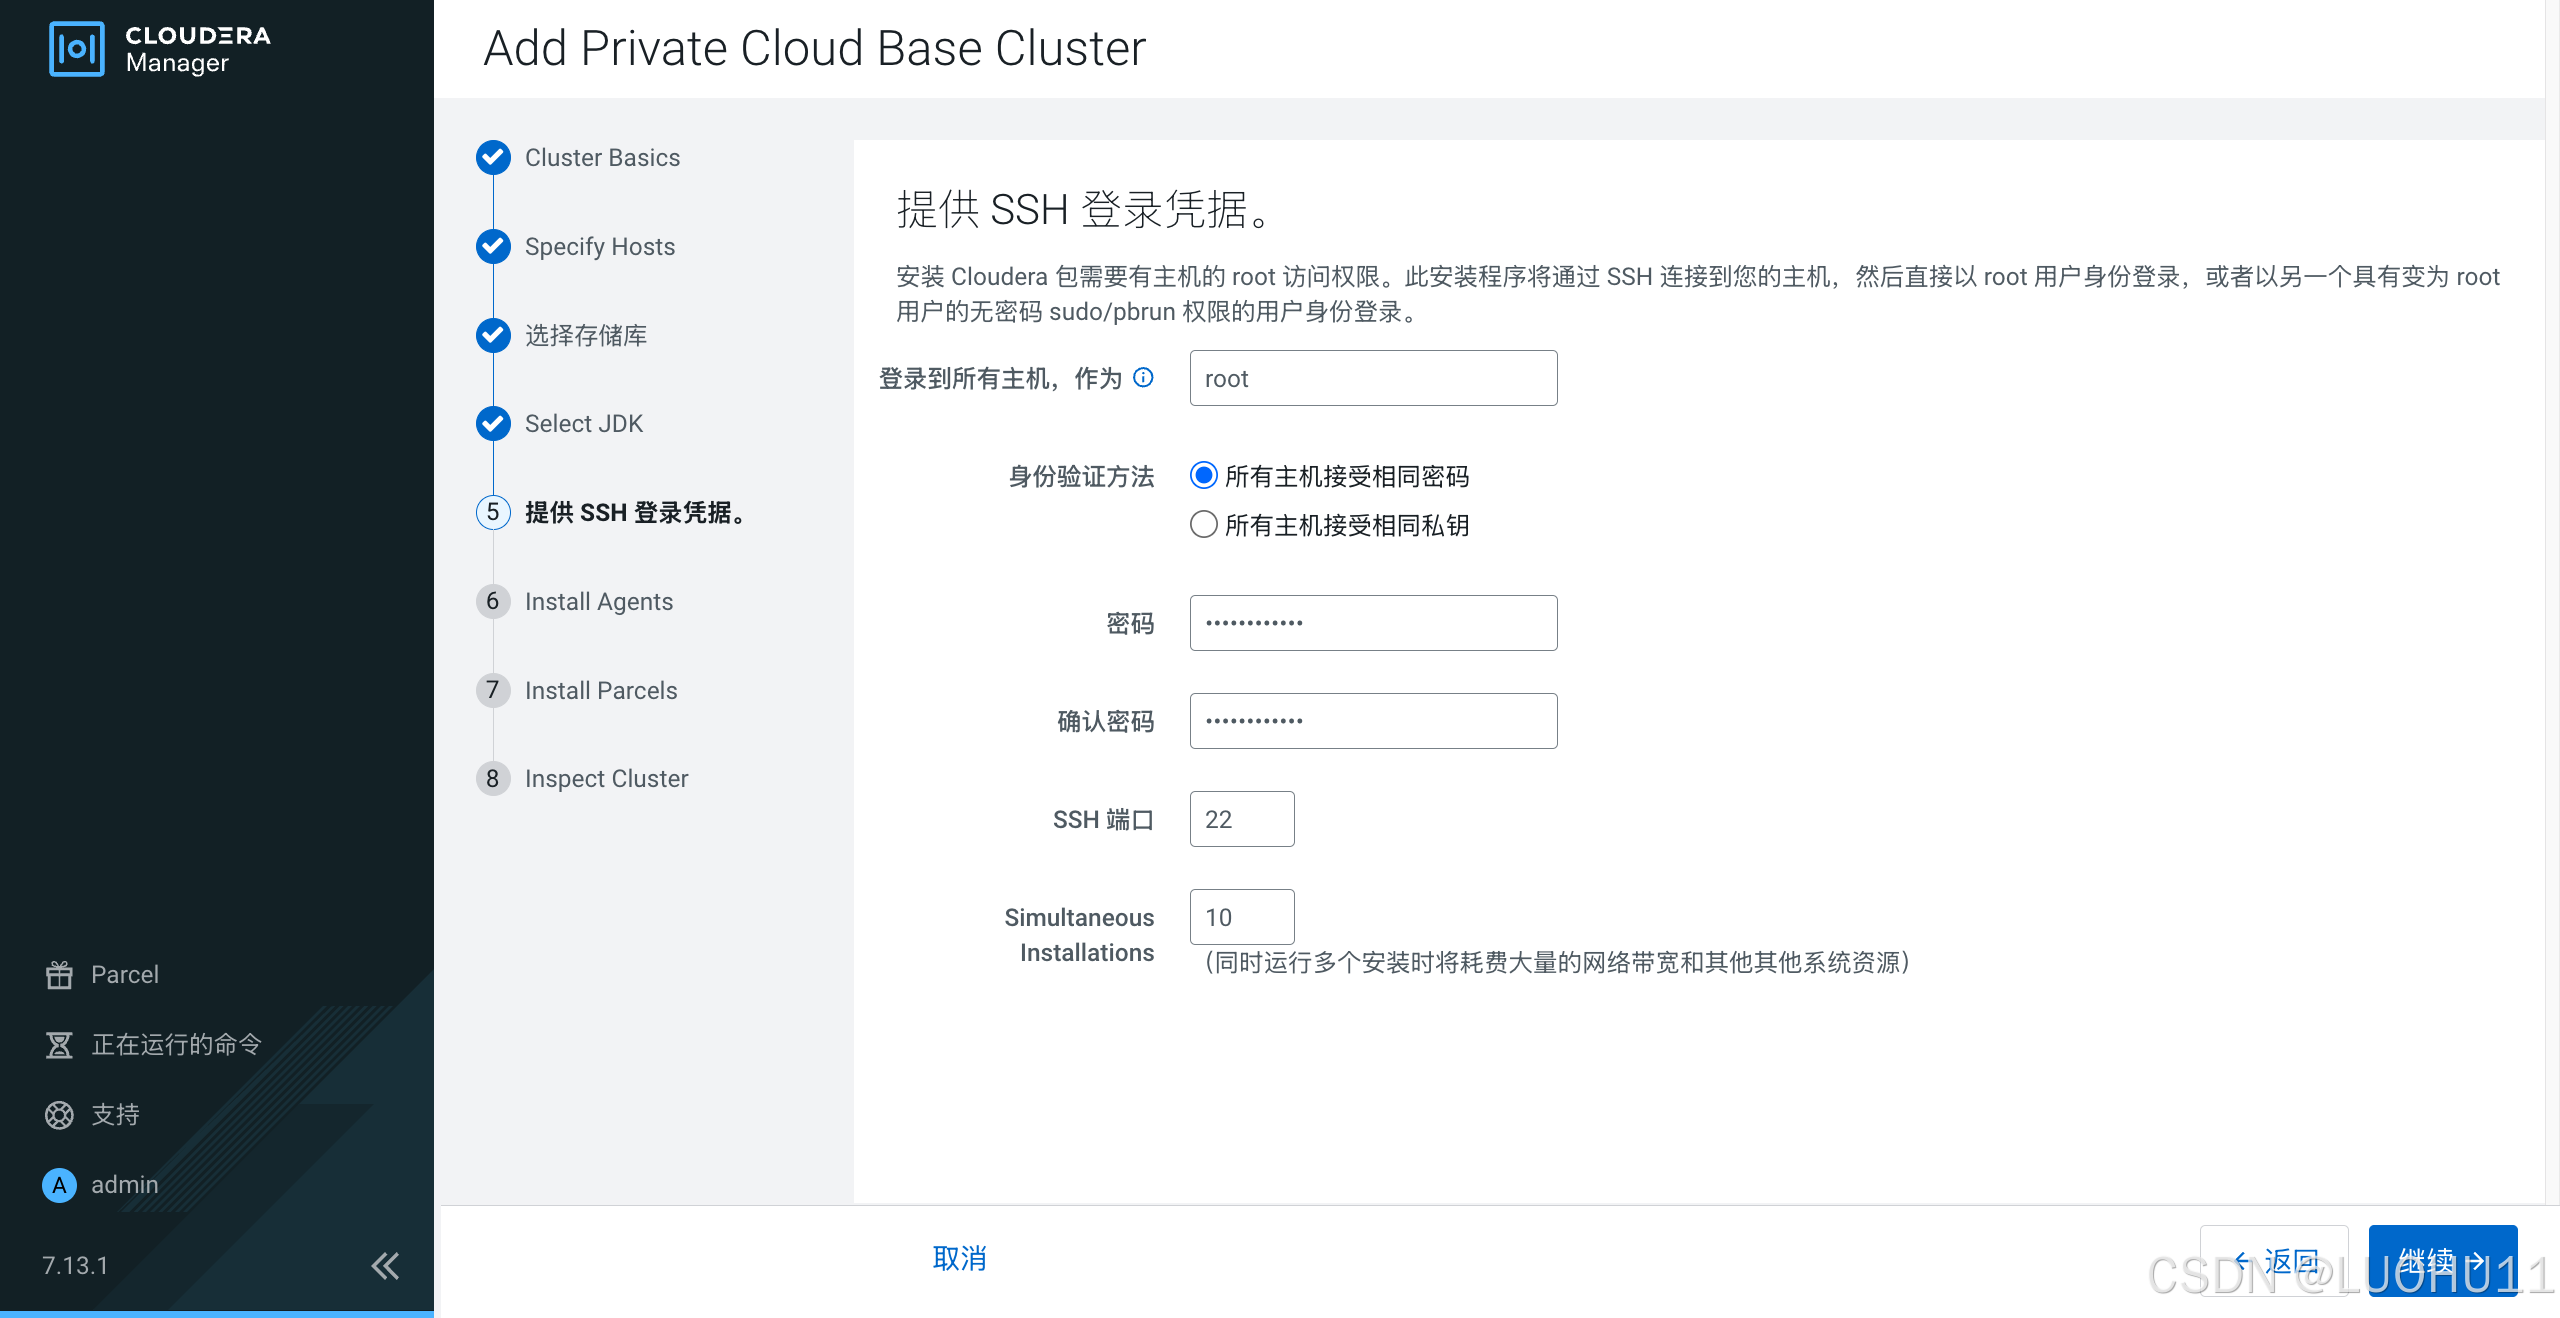
提供 SSH 登录凭据
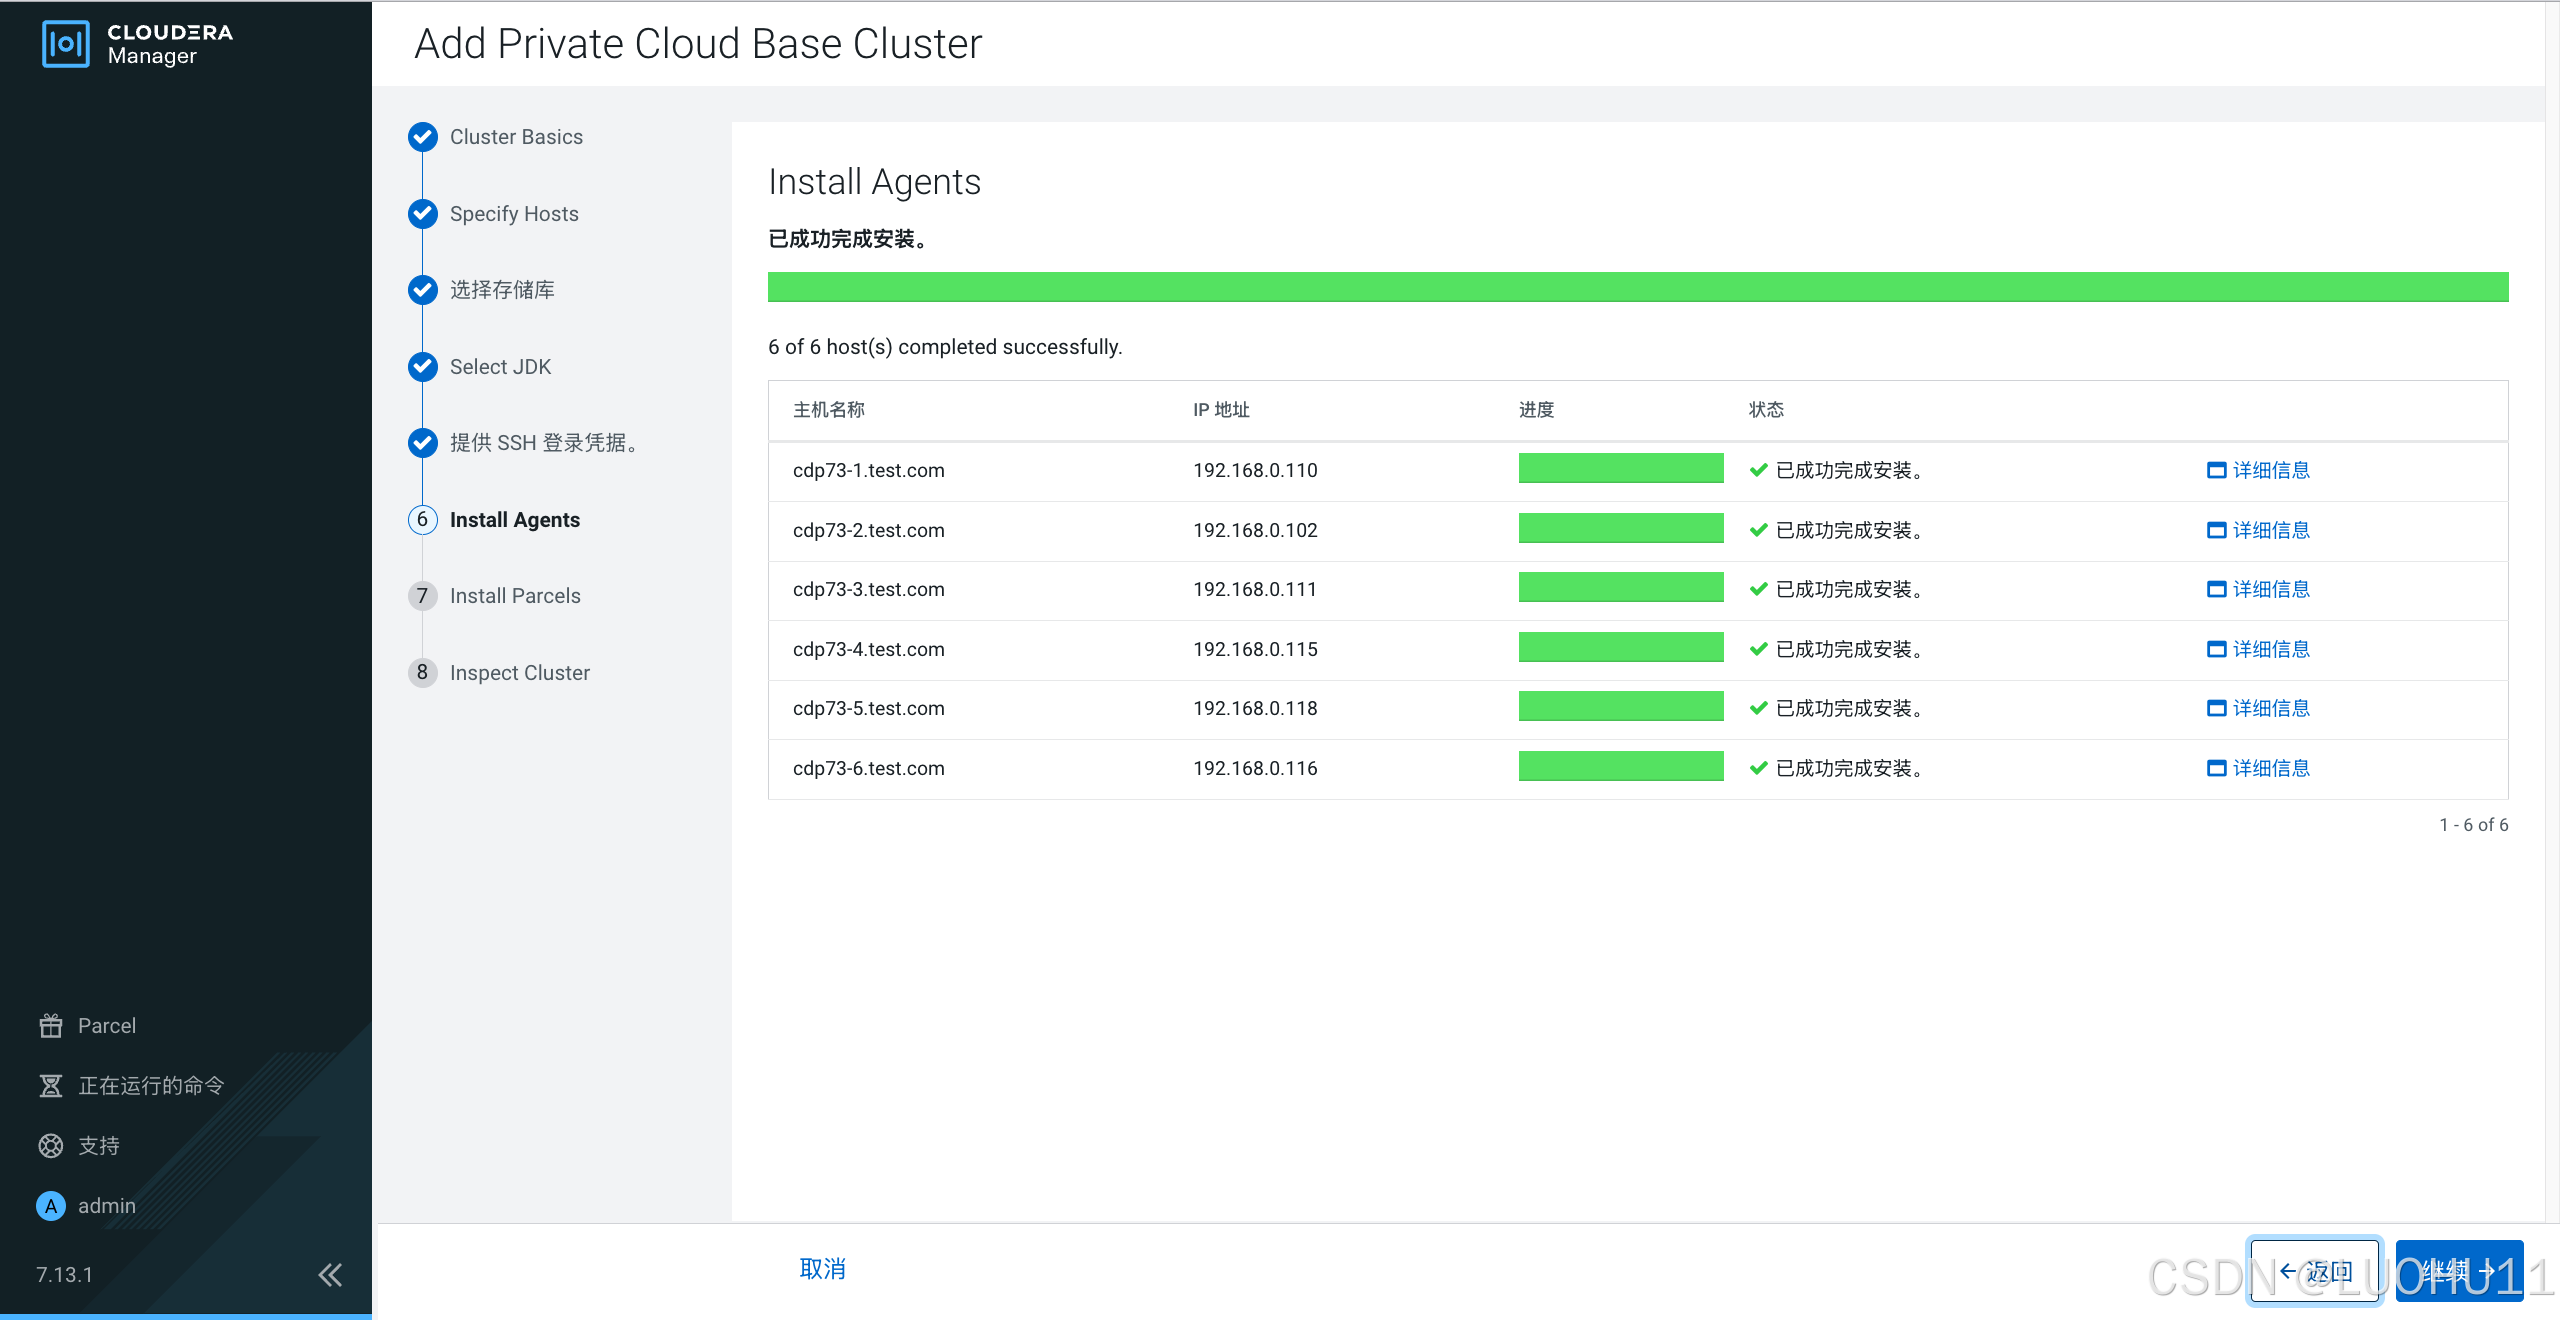
安装Agent
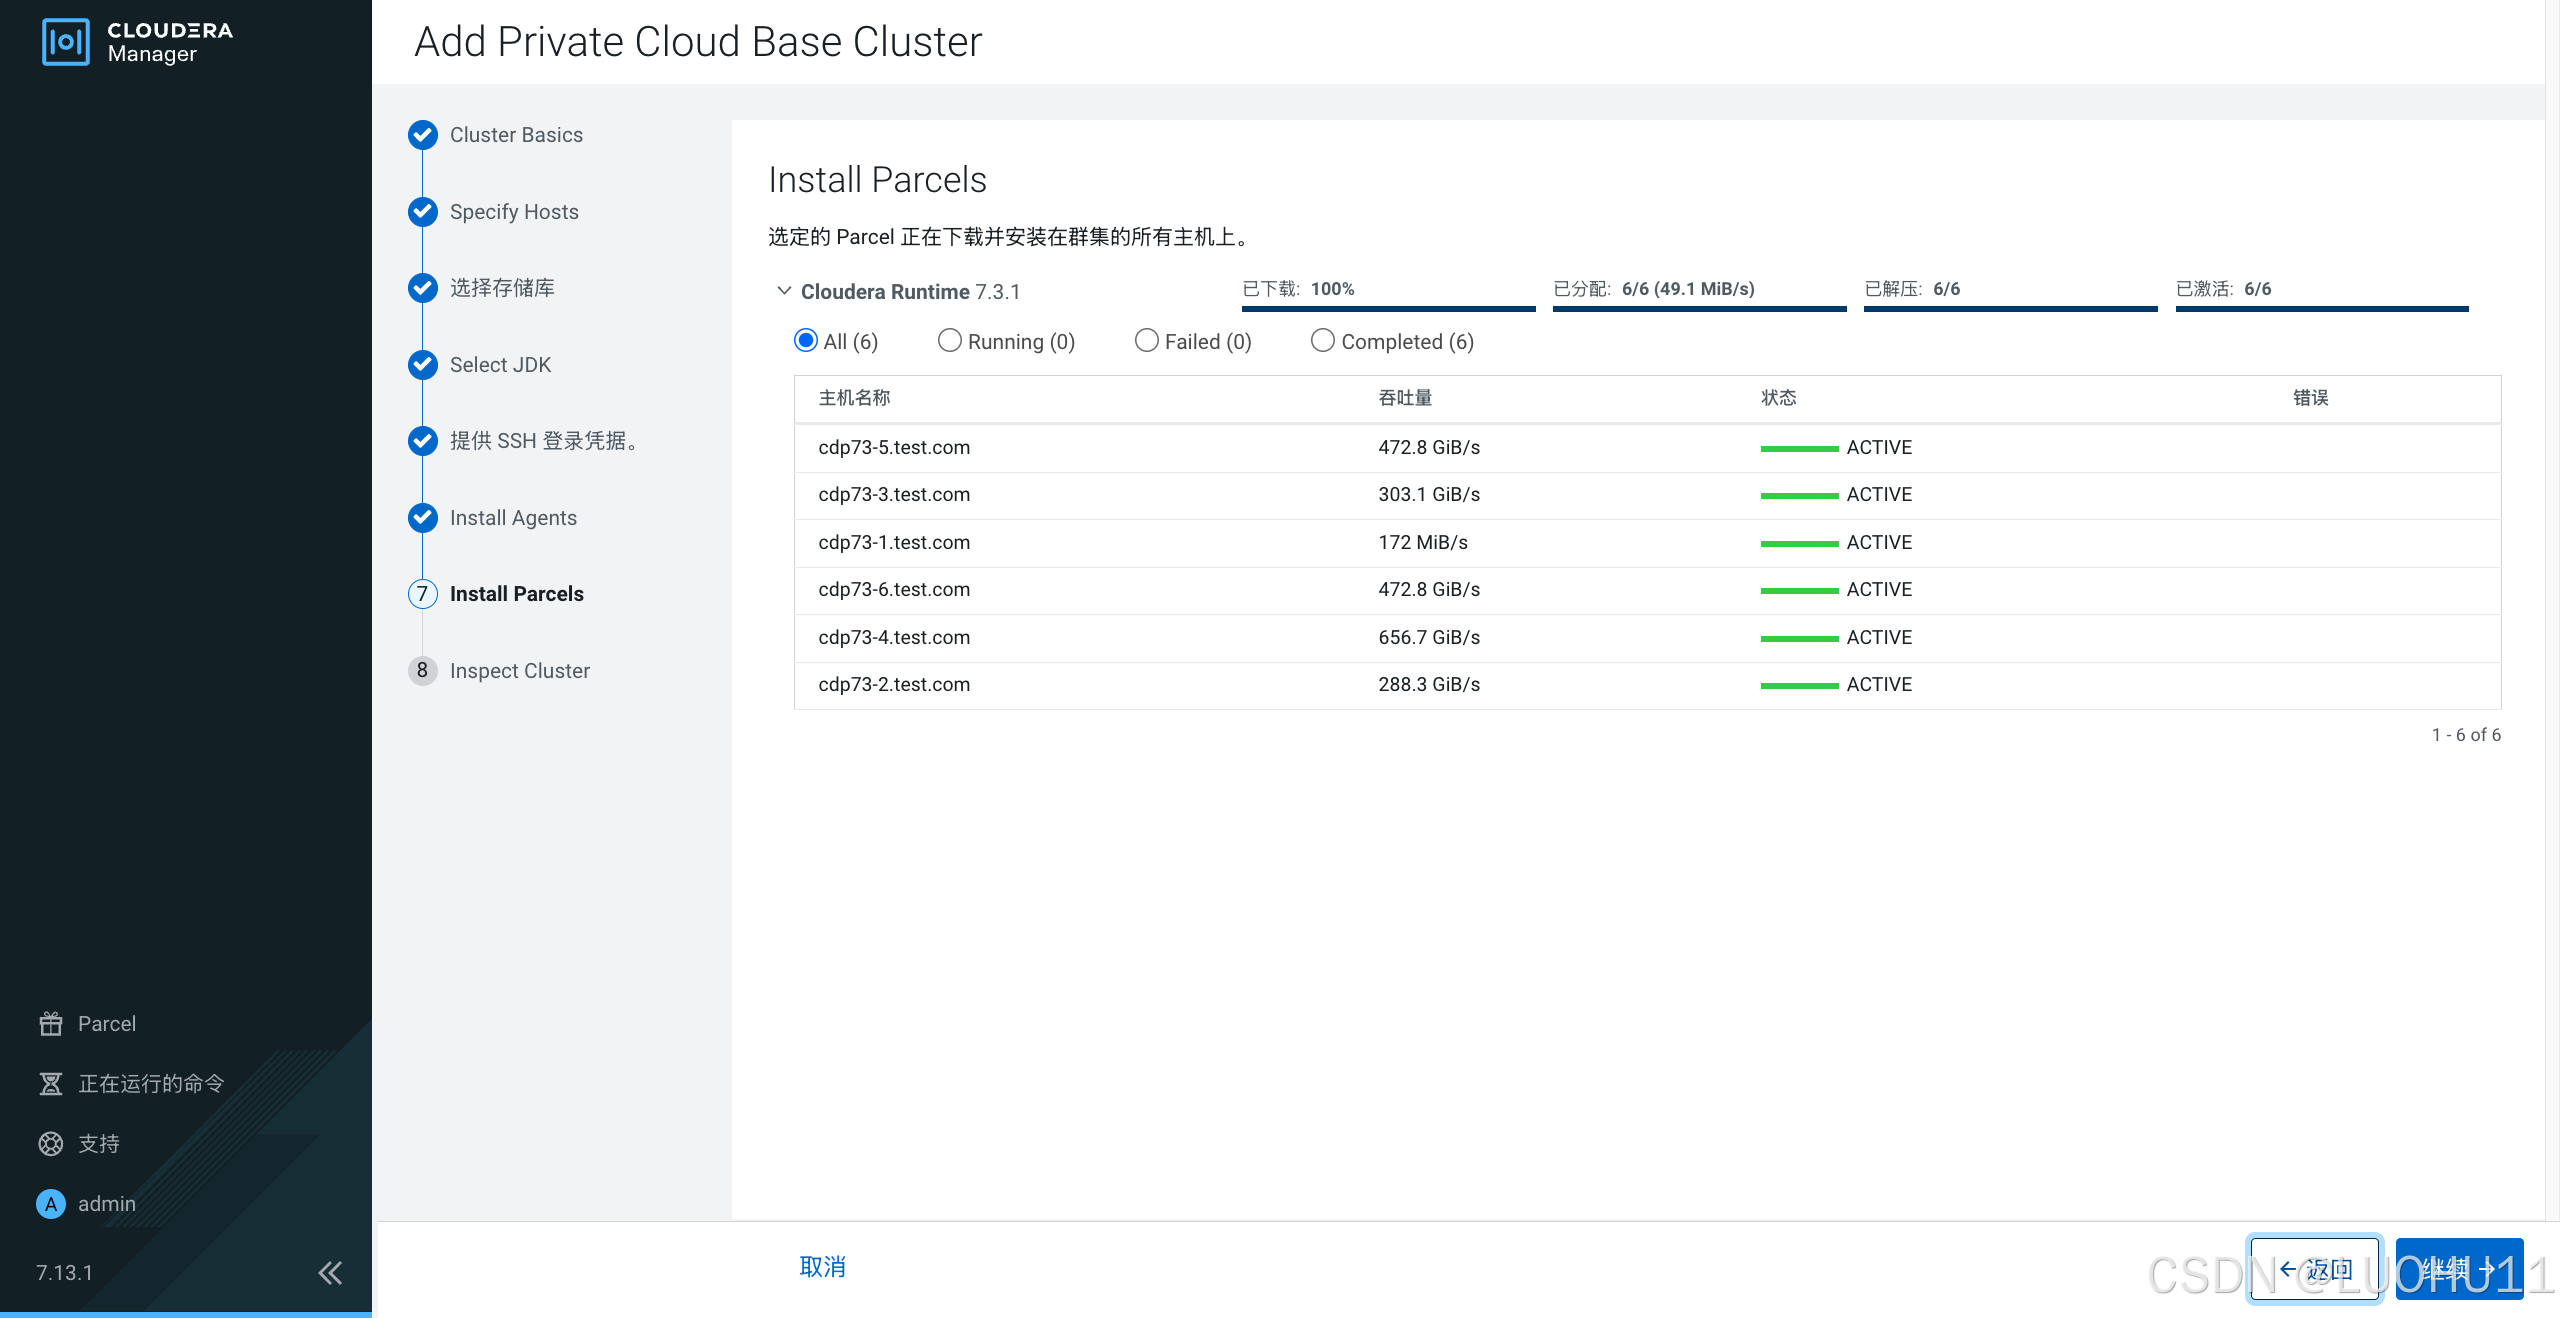
安装Parcles
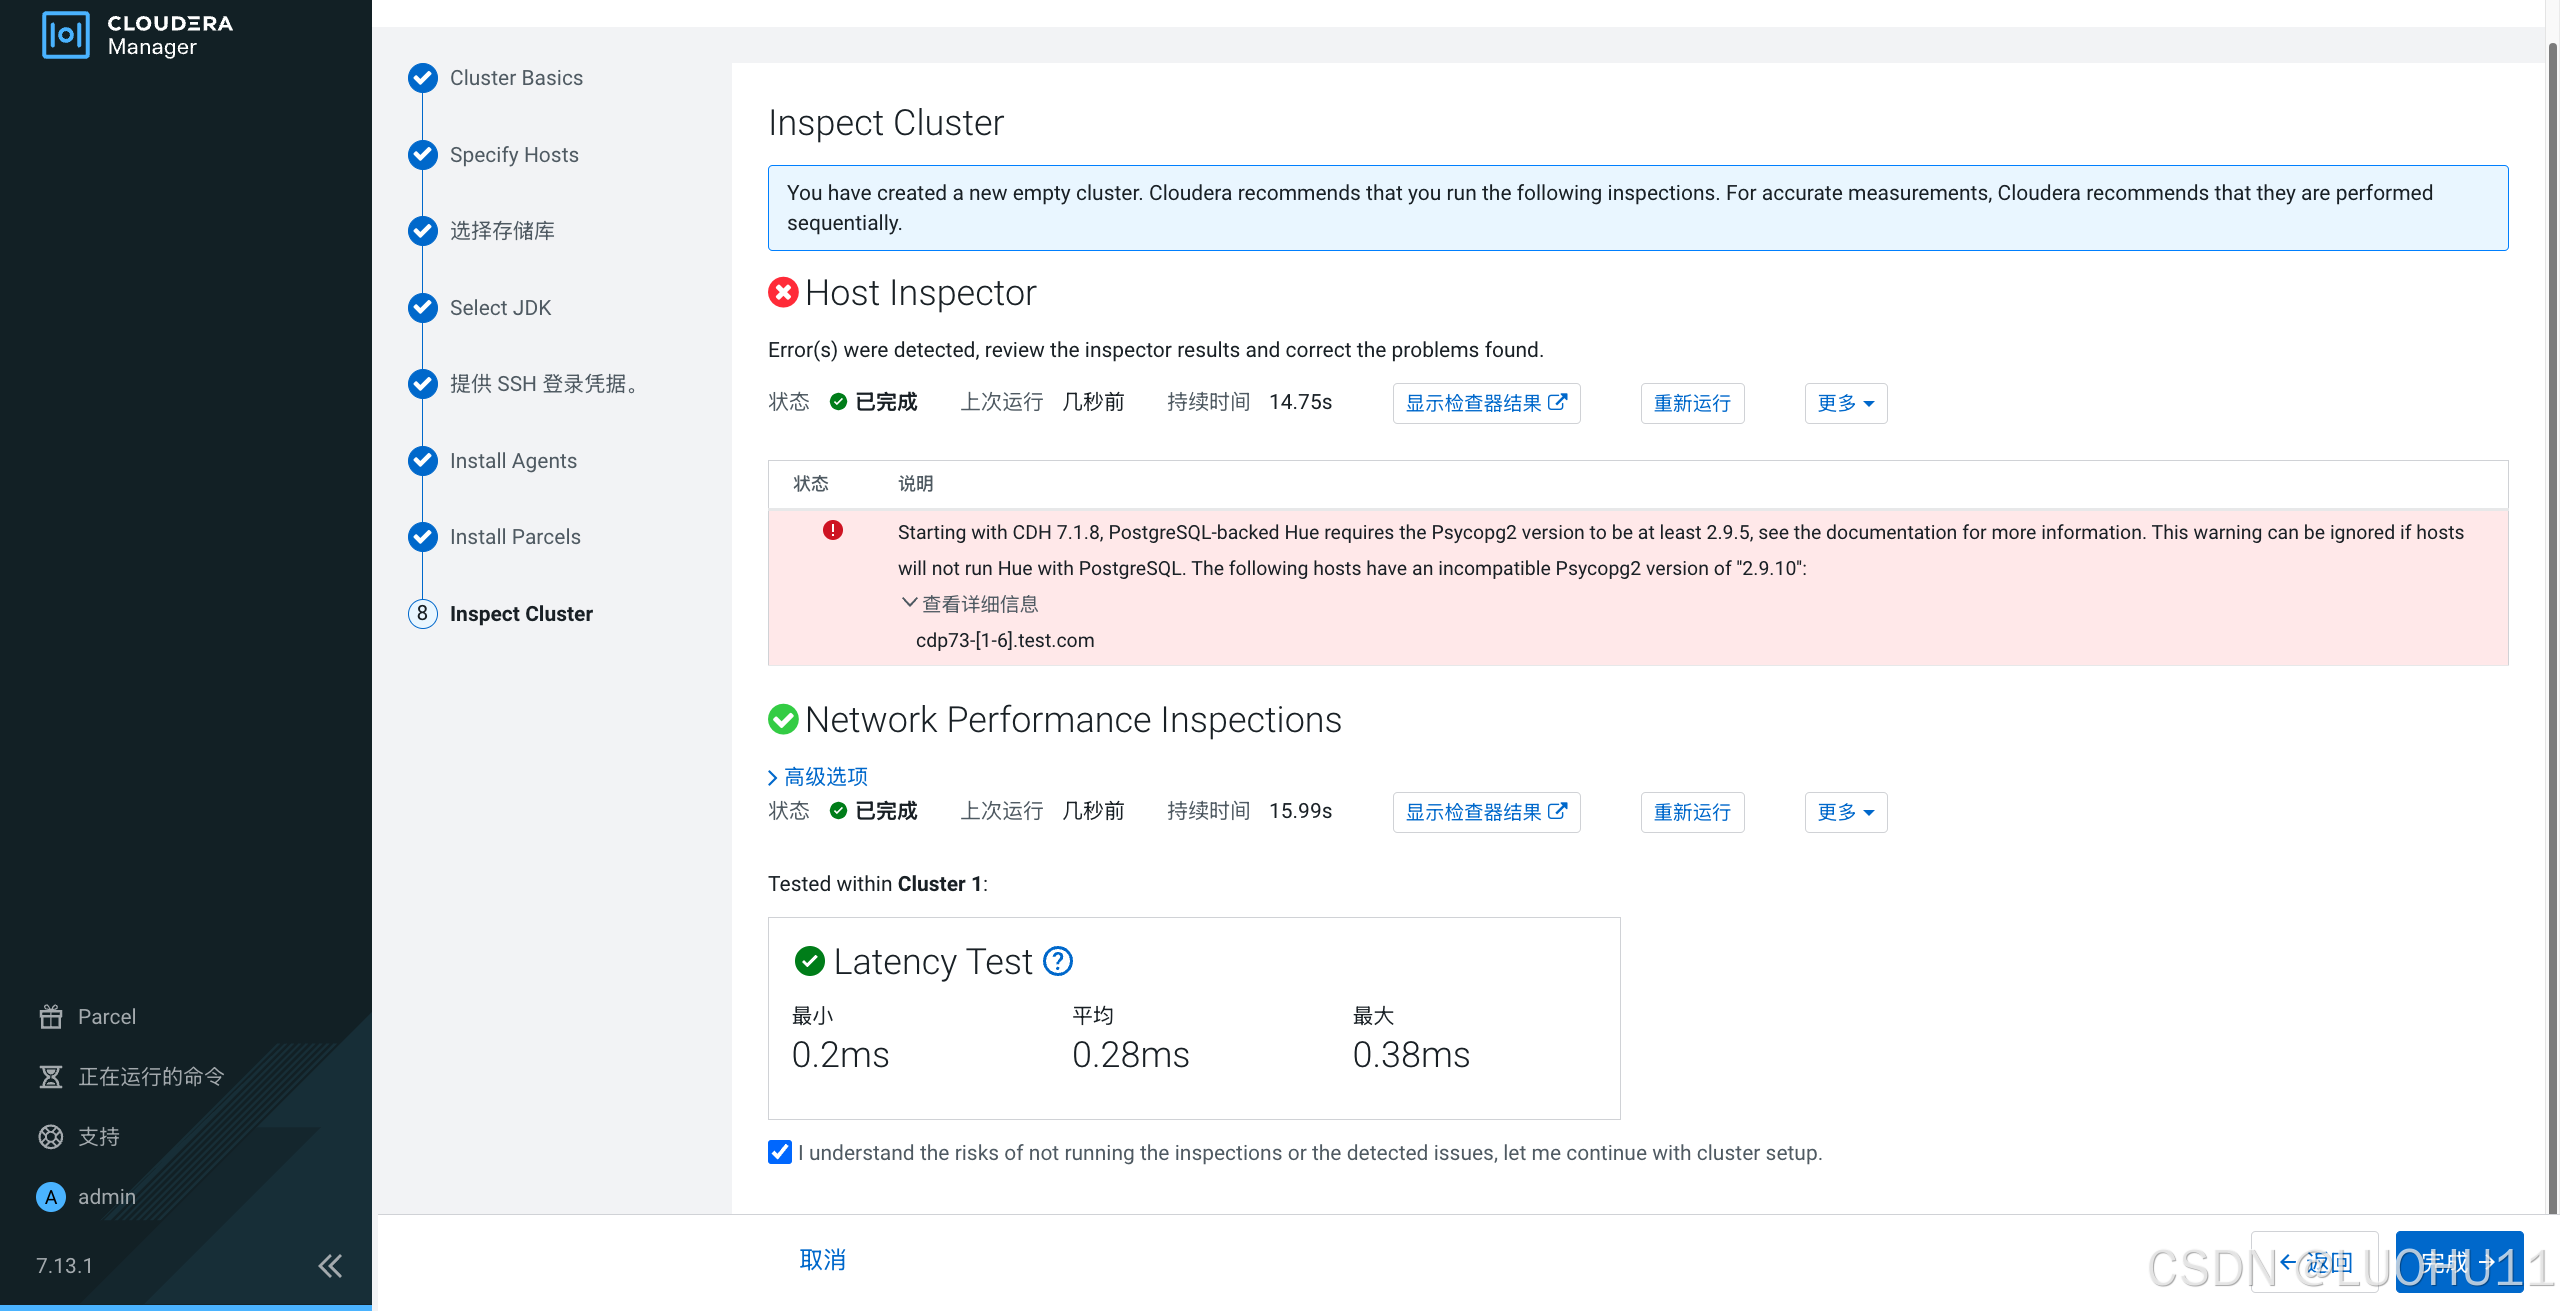
检查主机
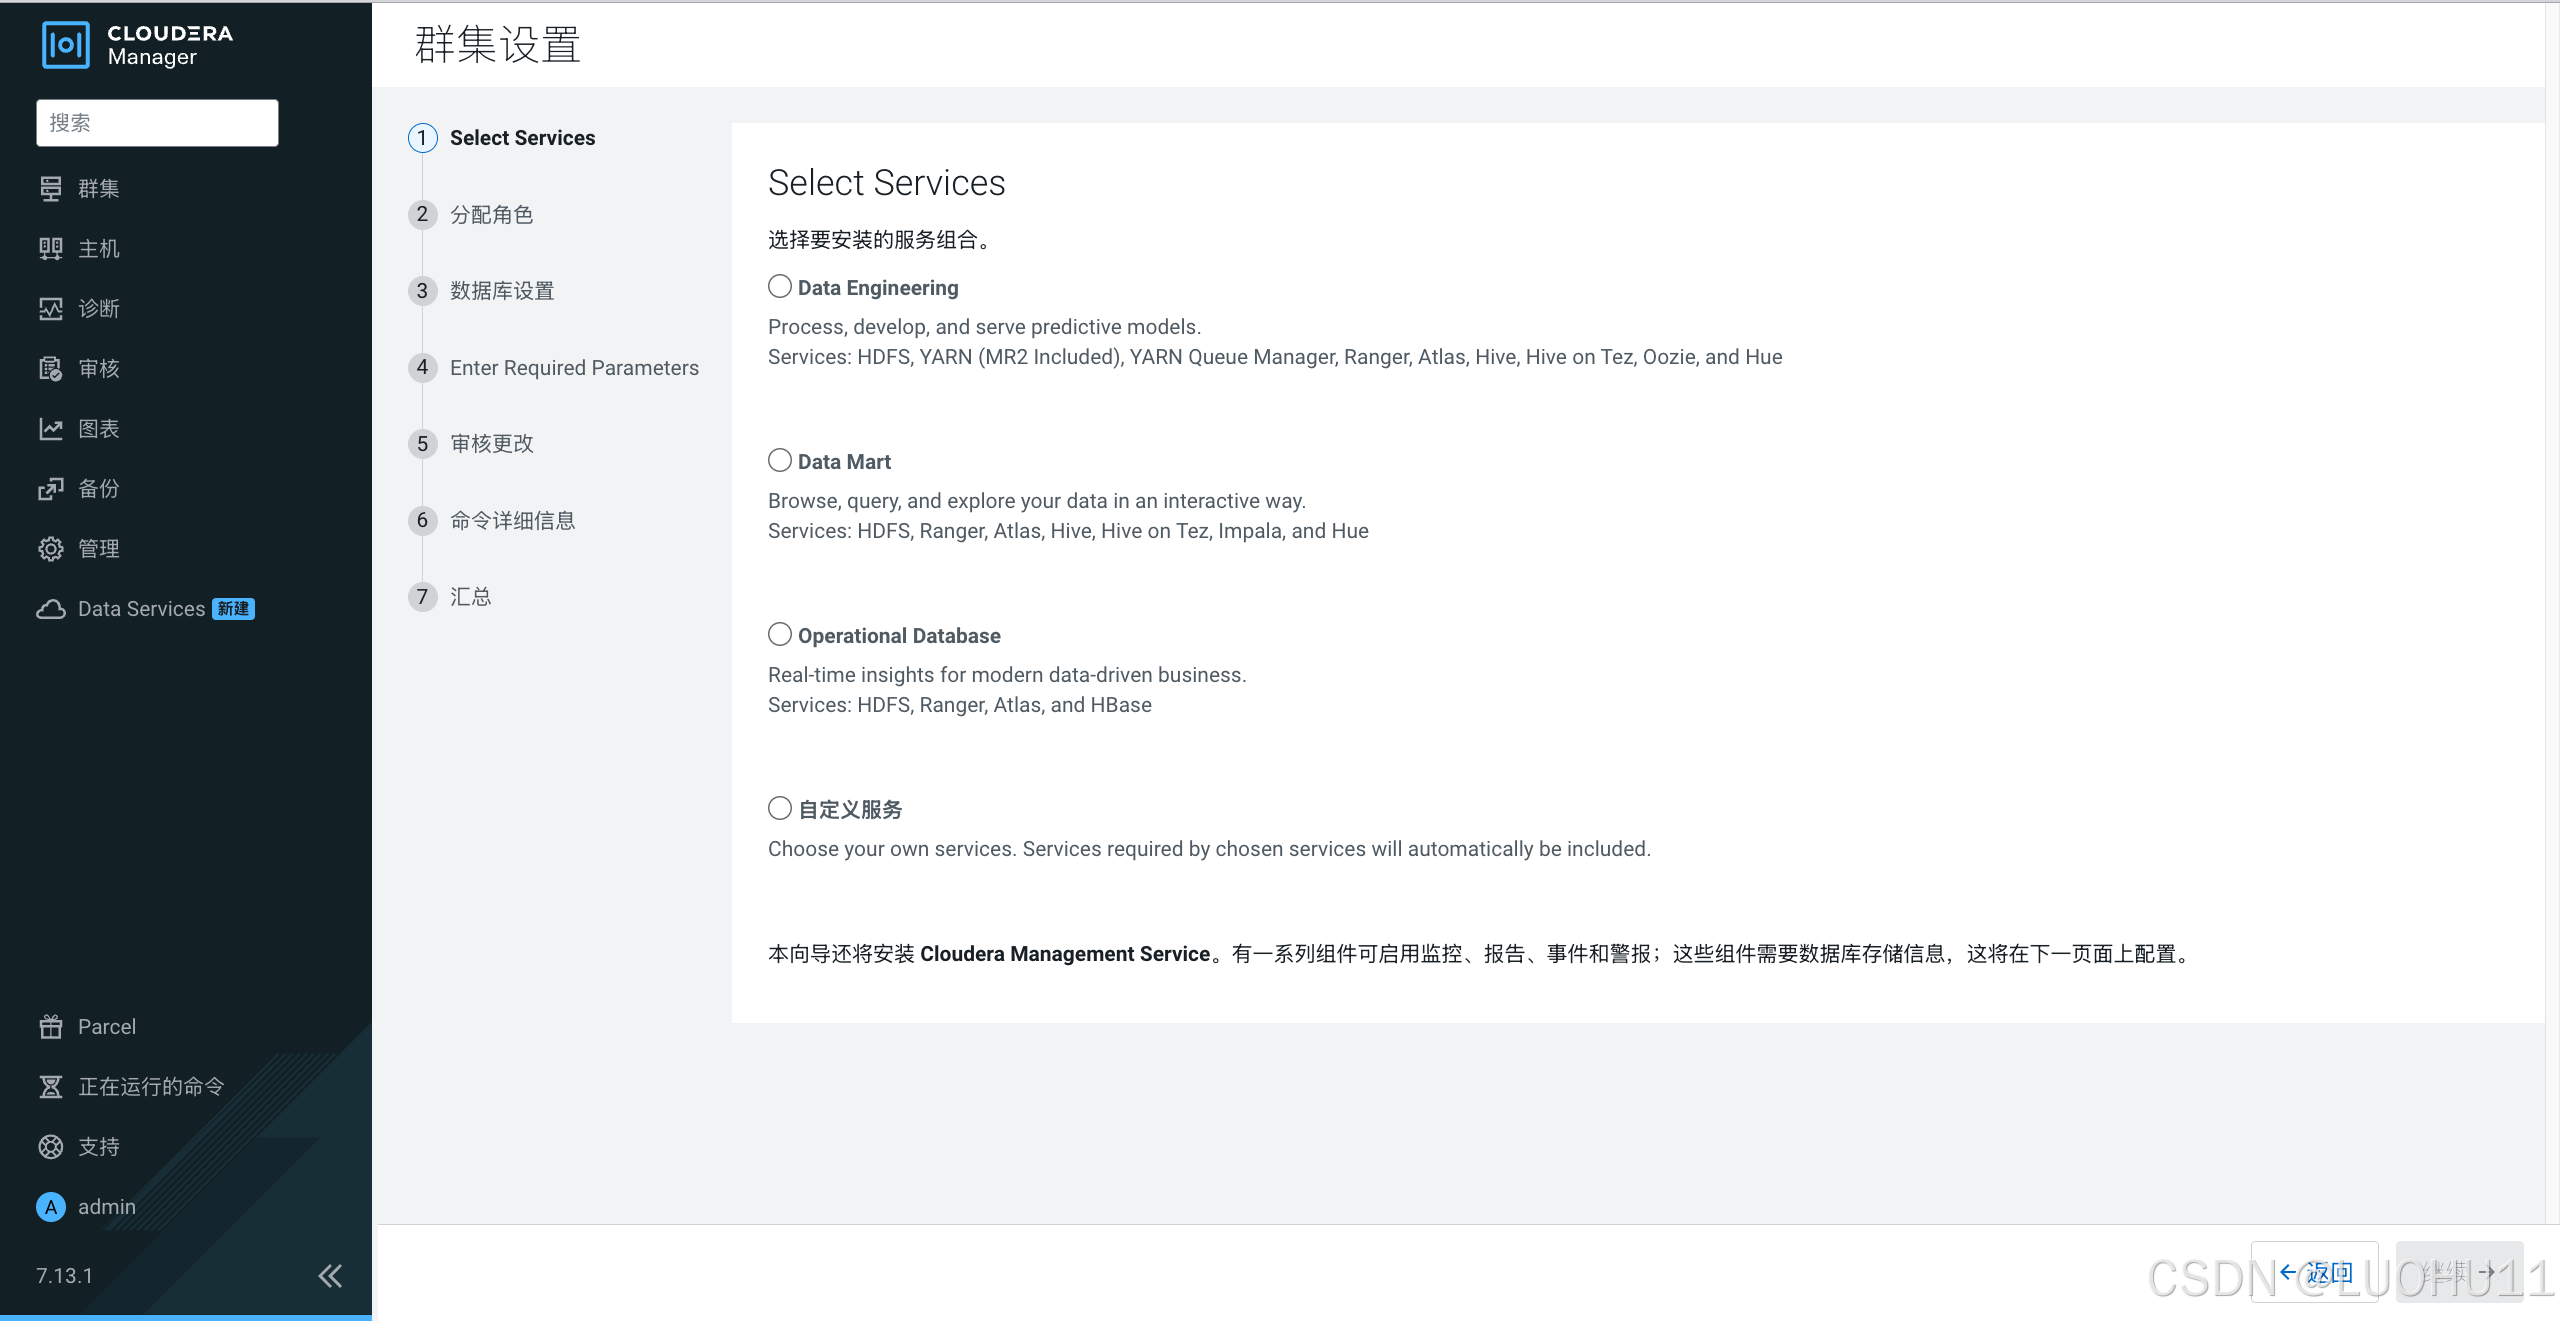
[九]安装服务
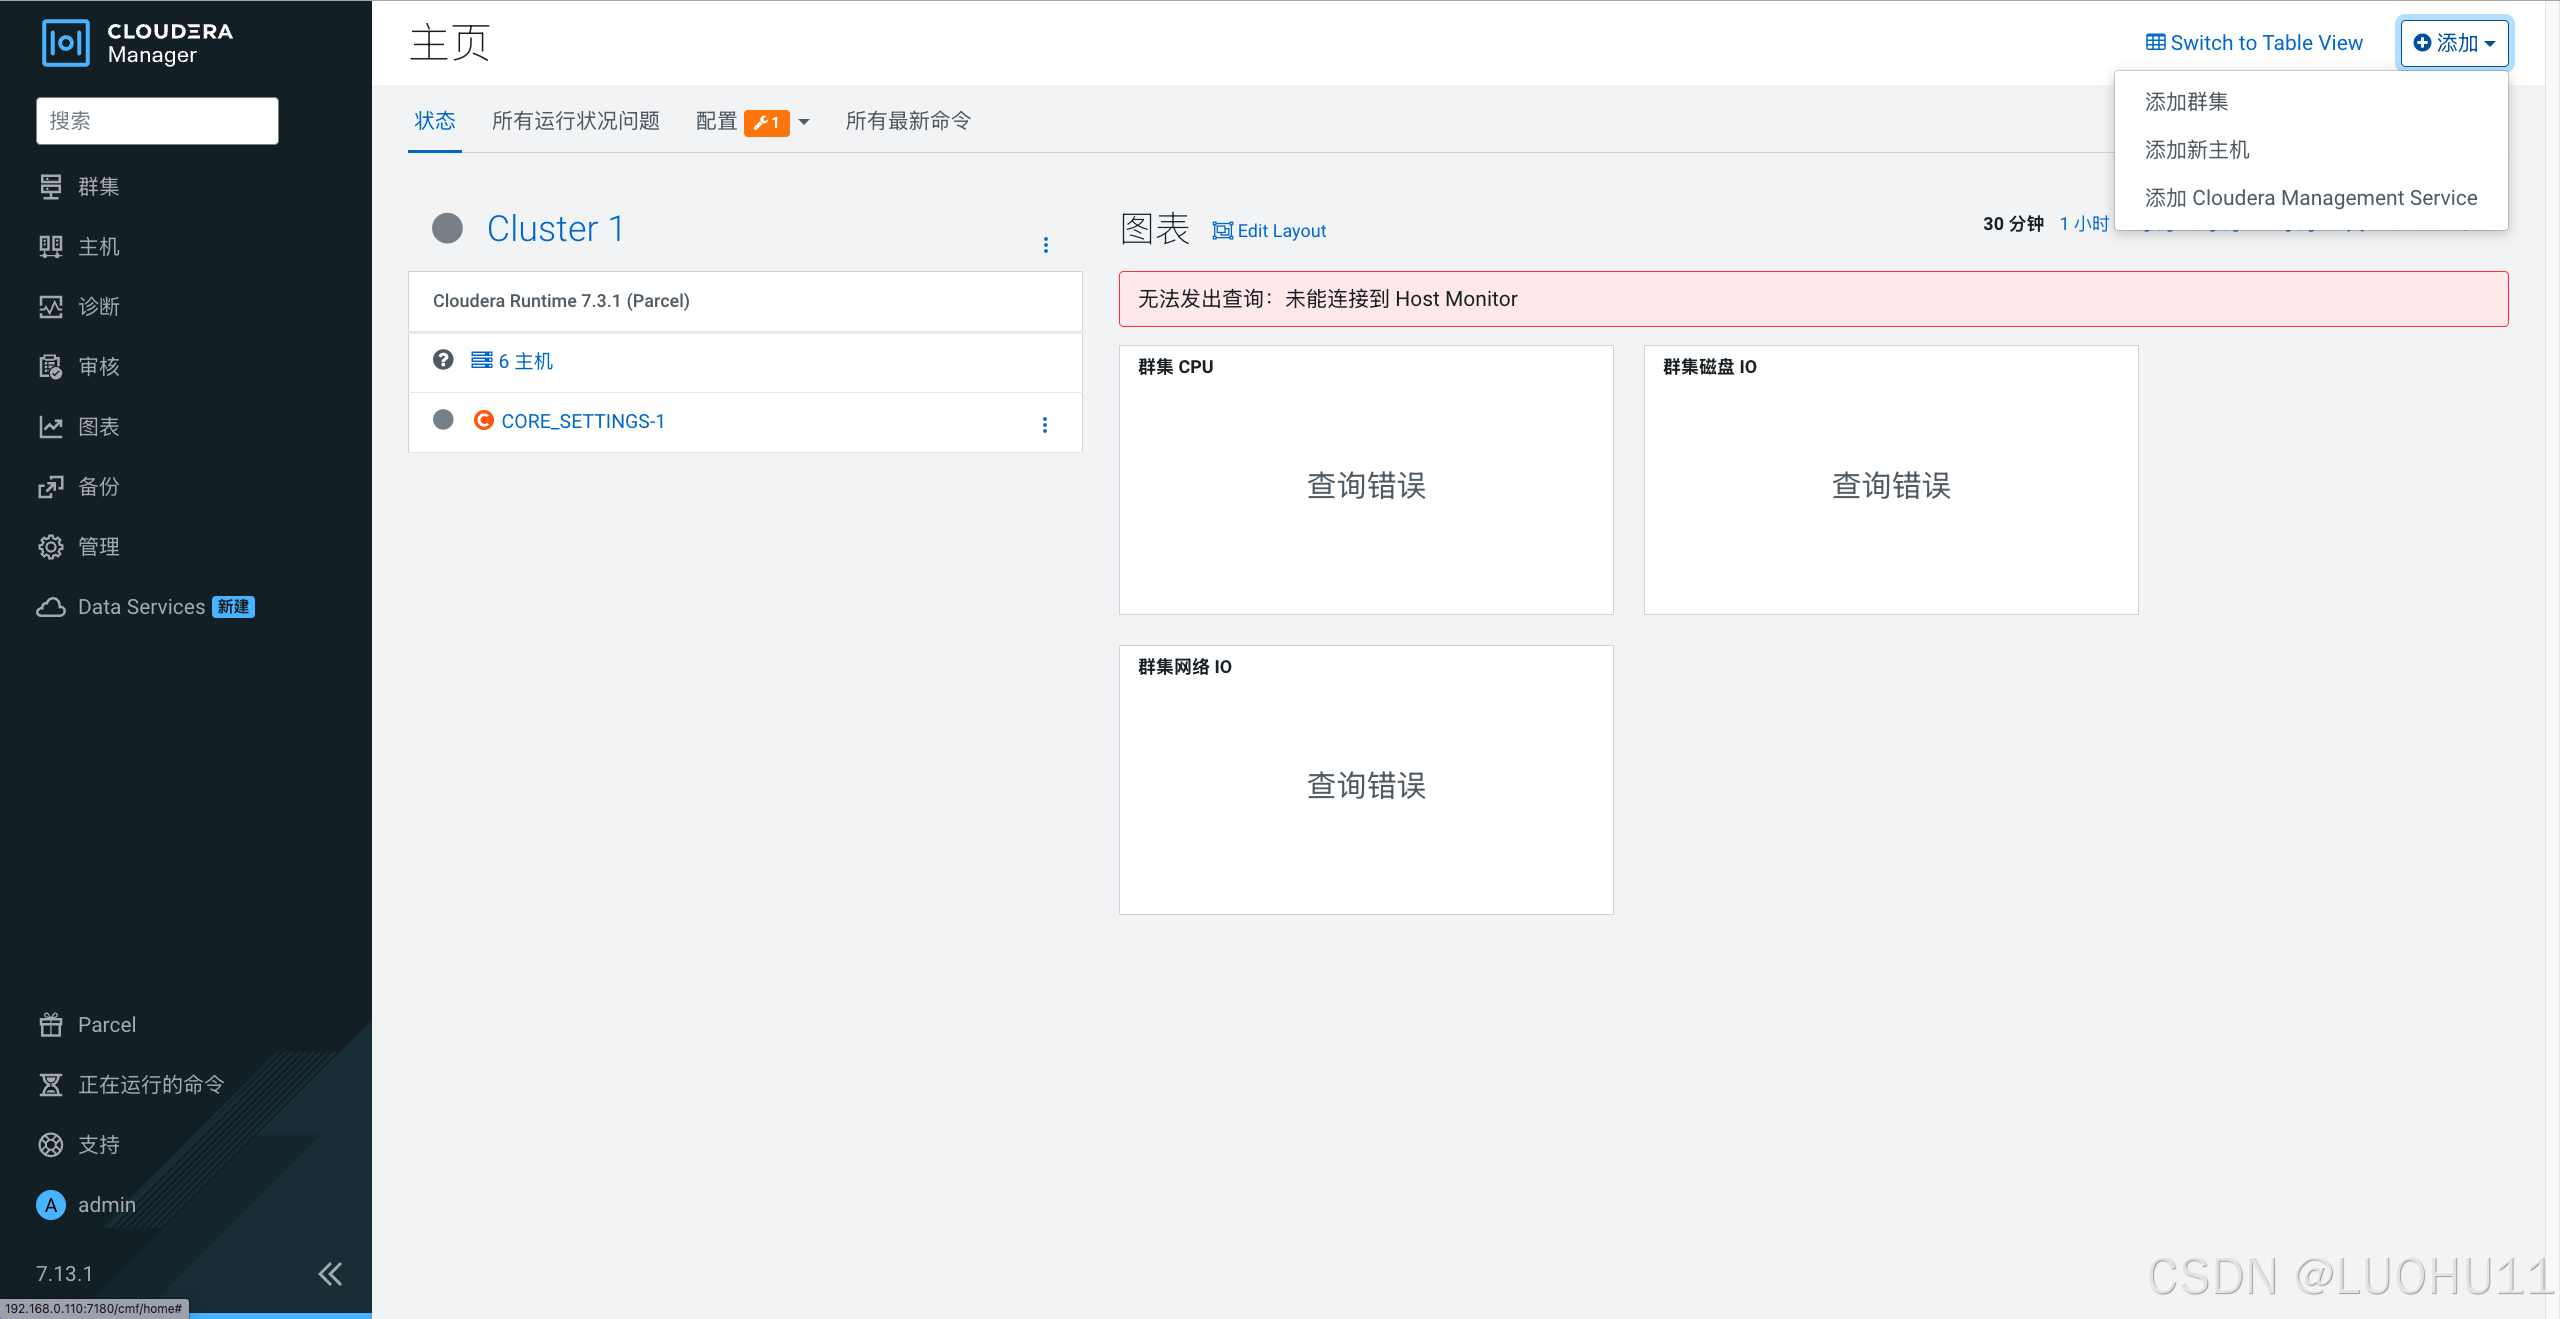
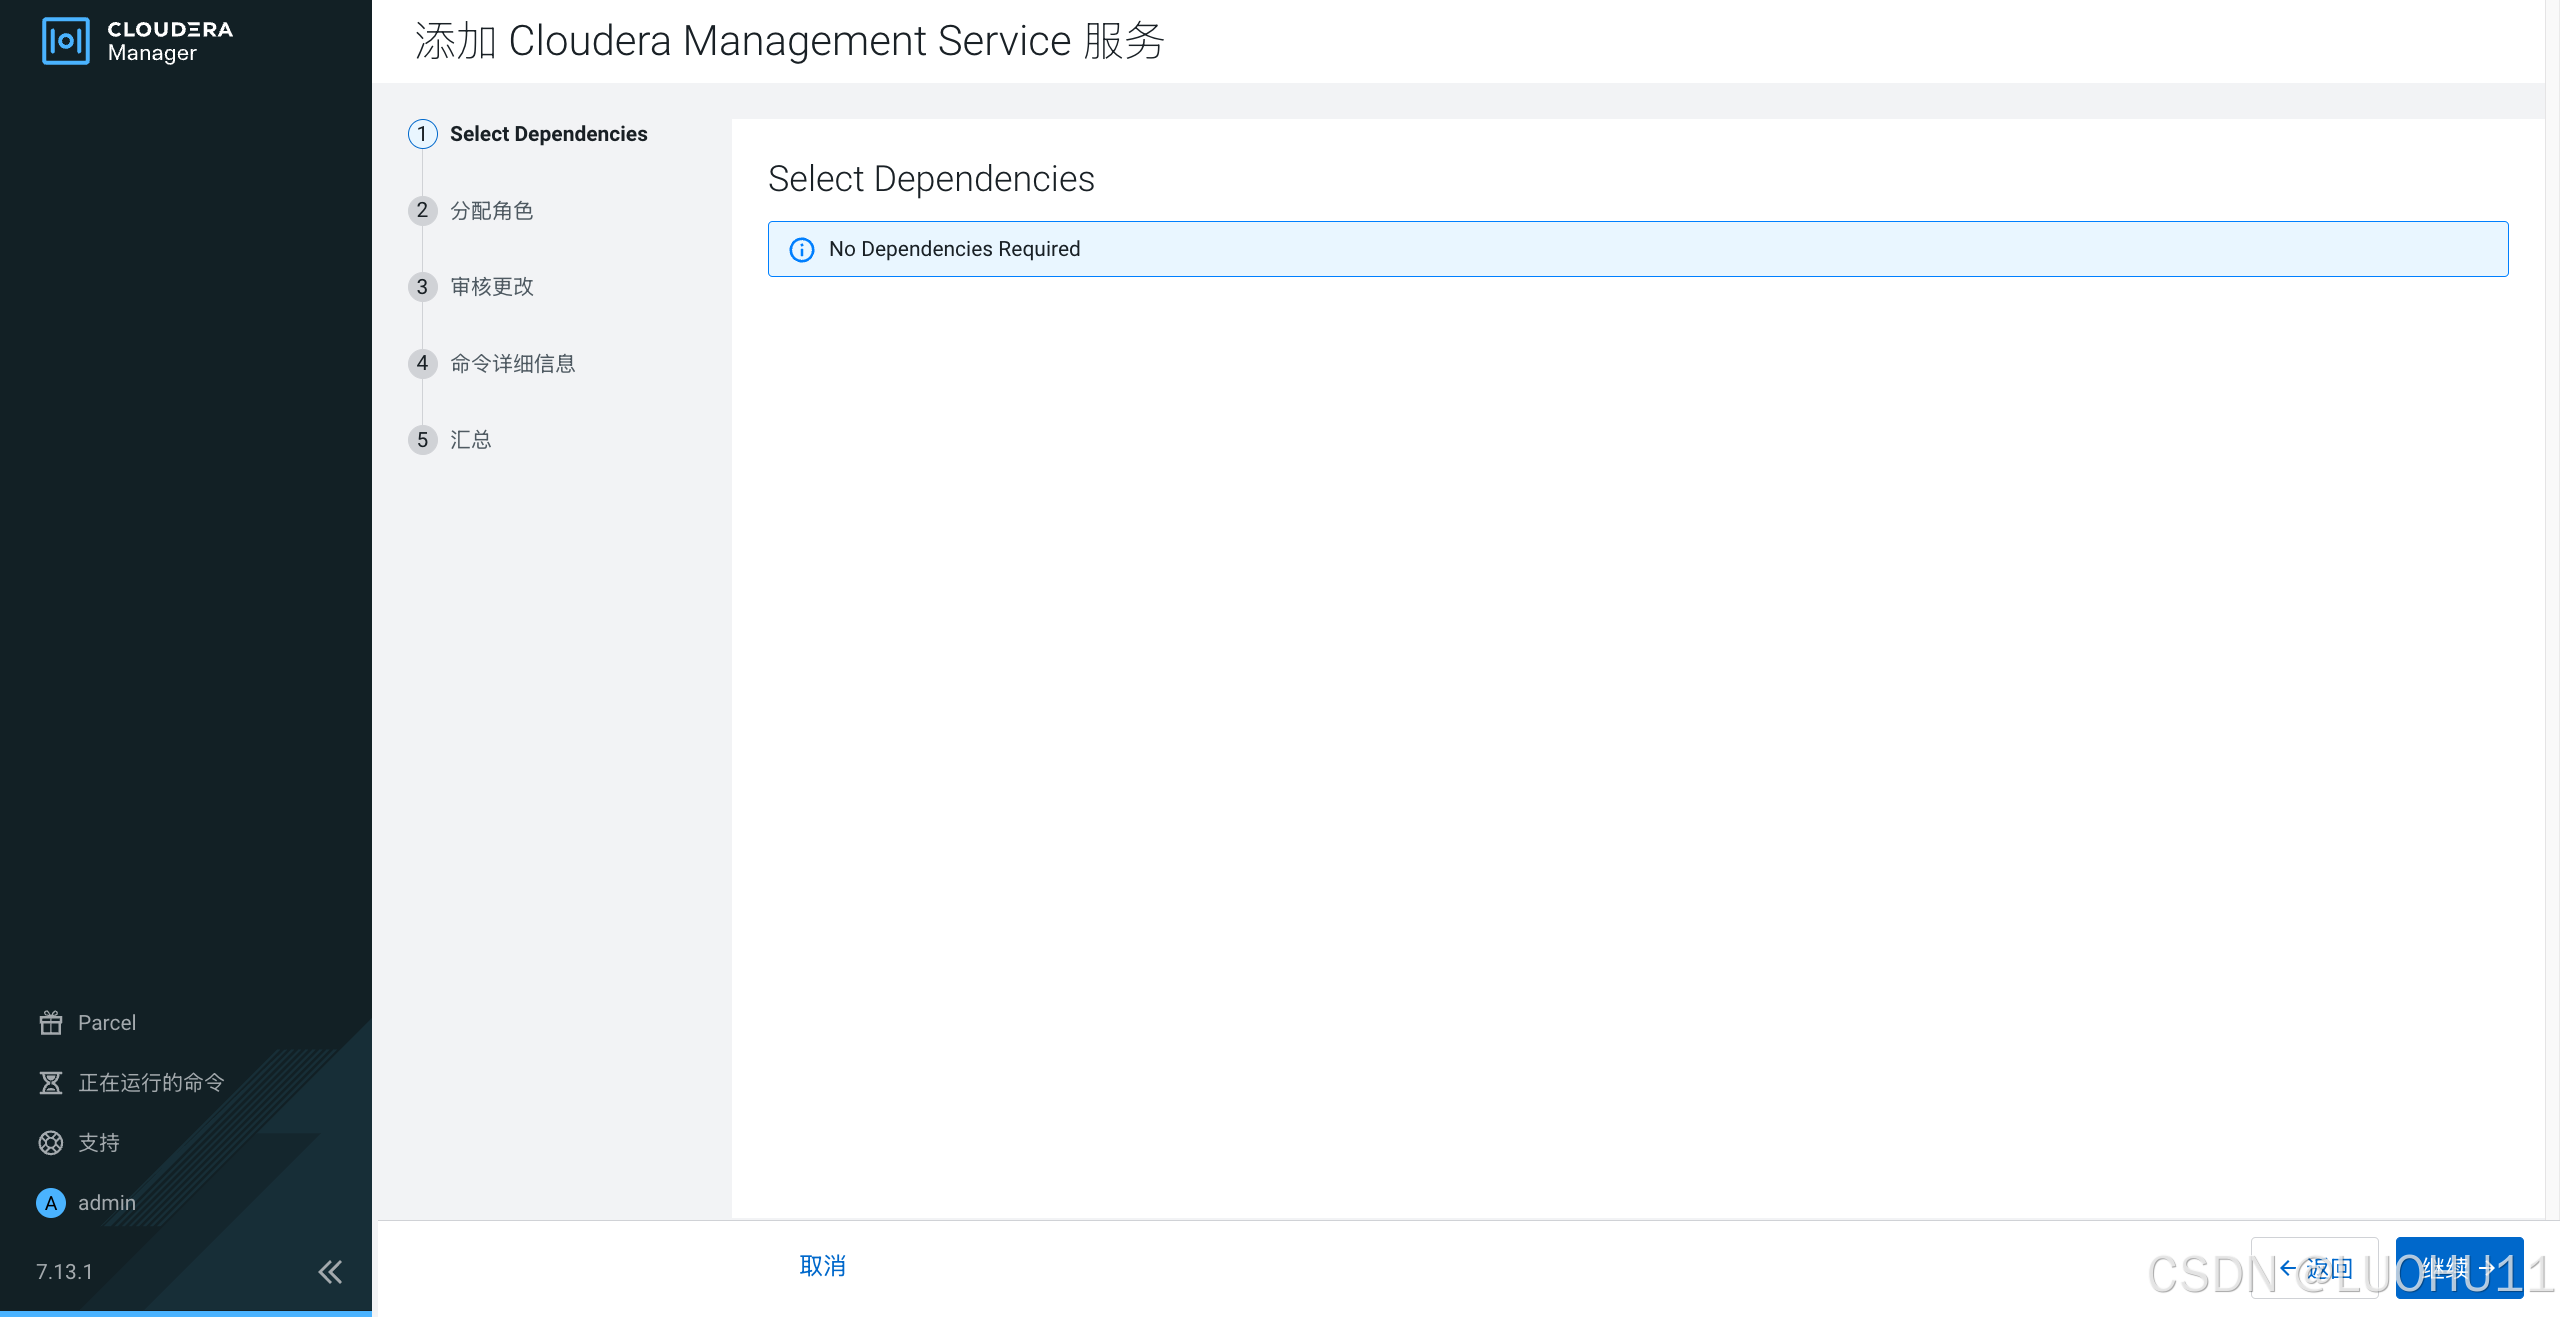
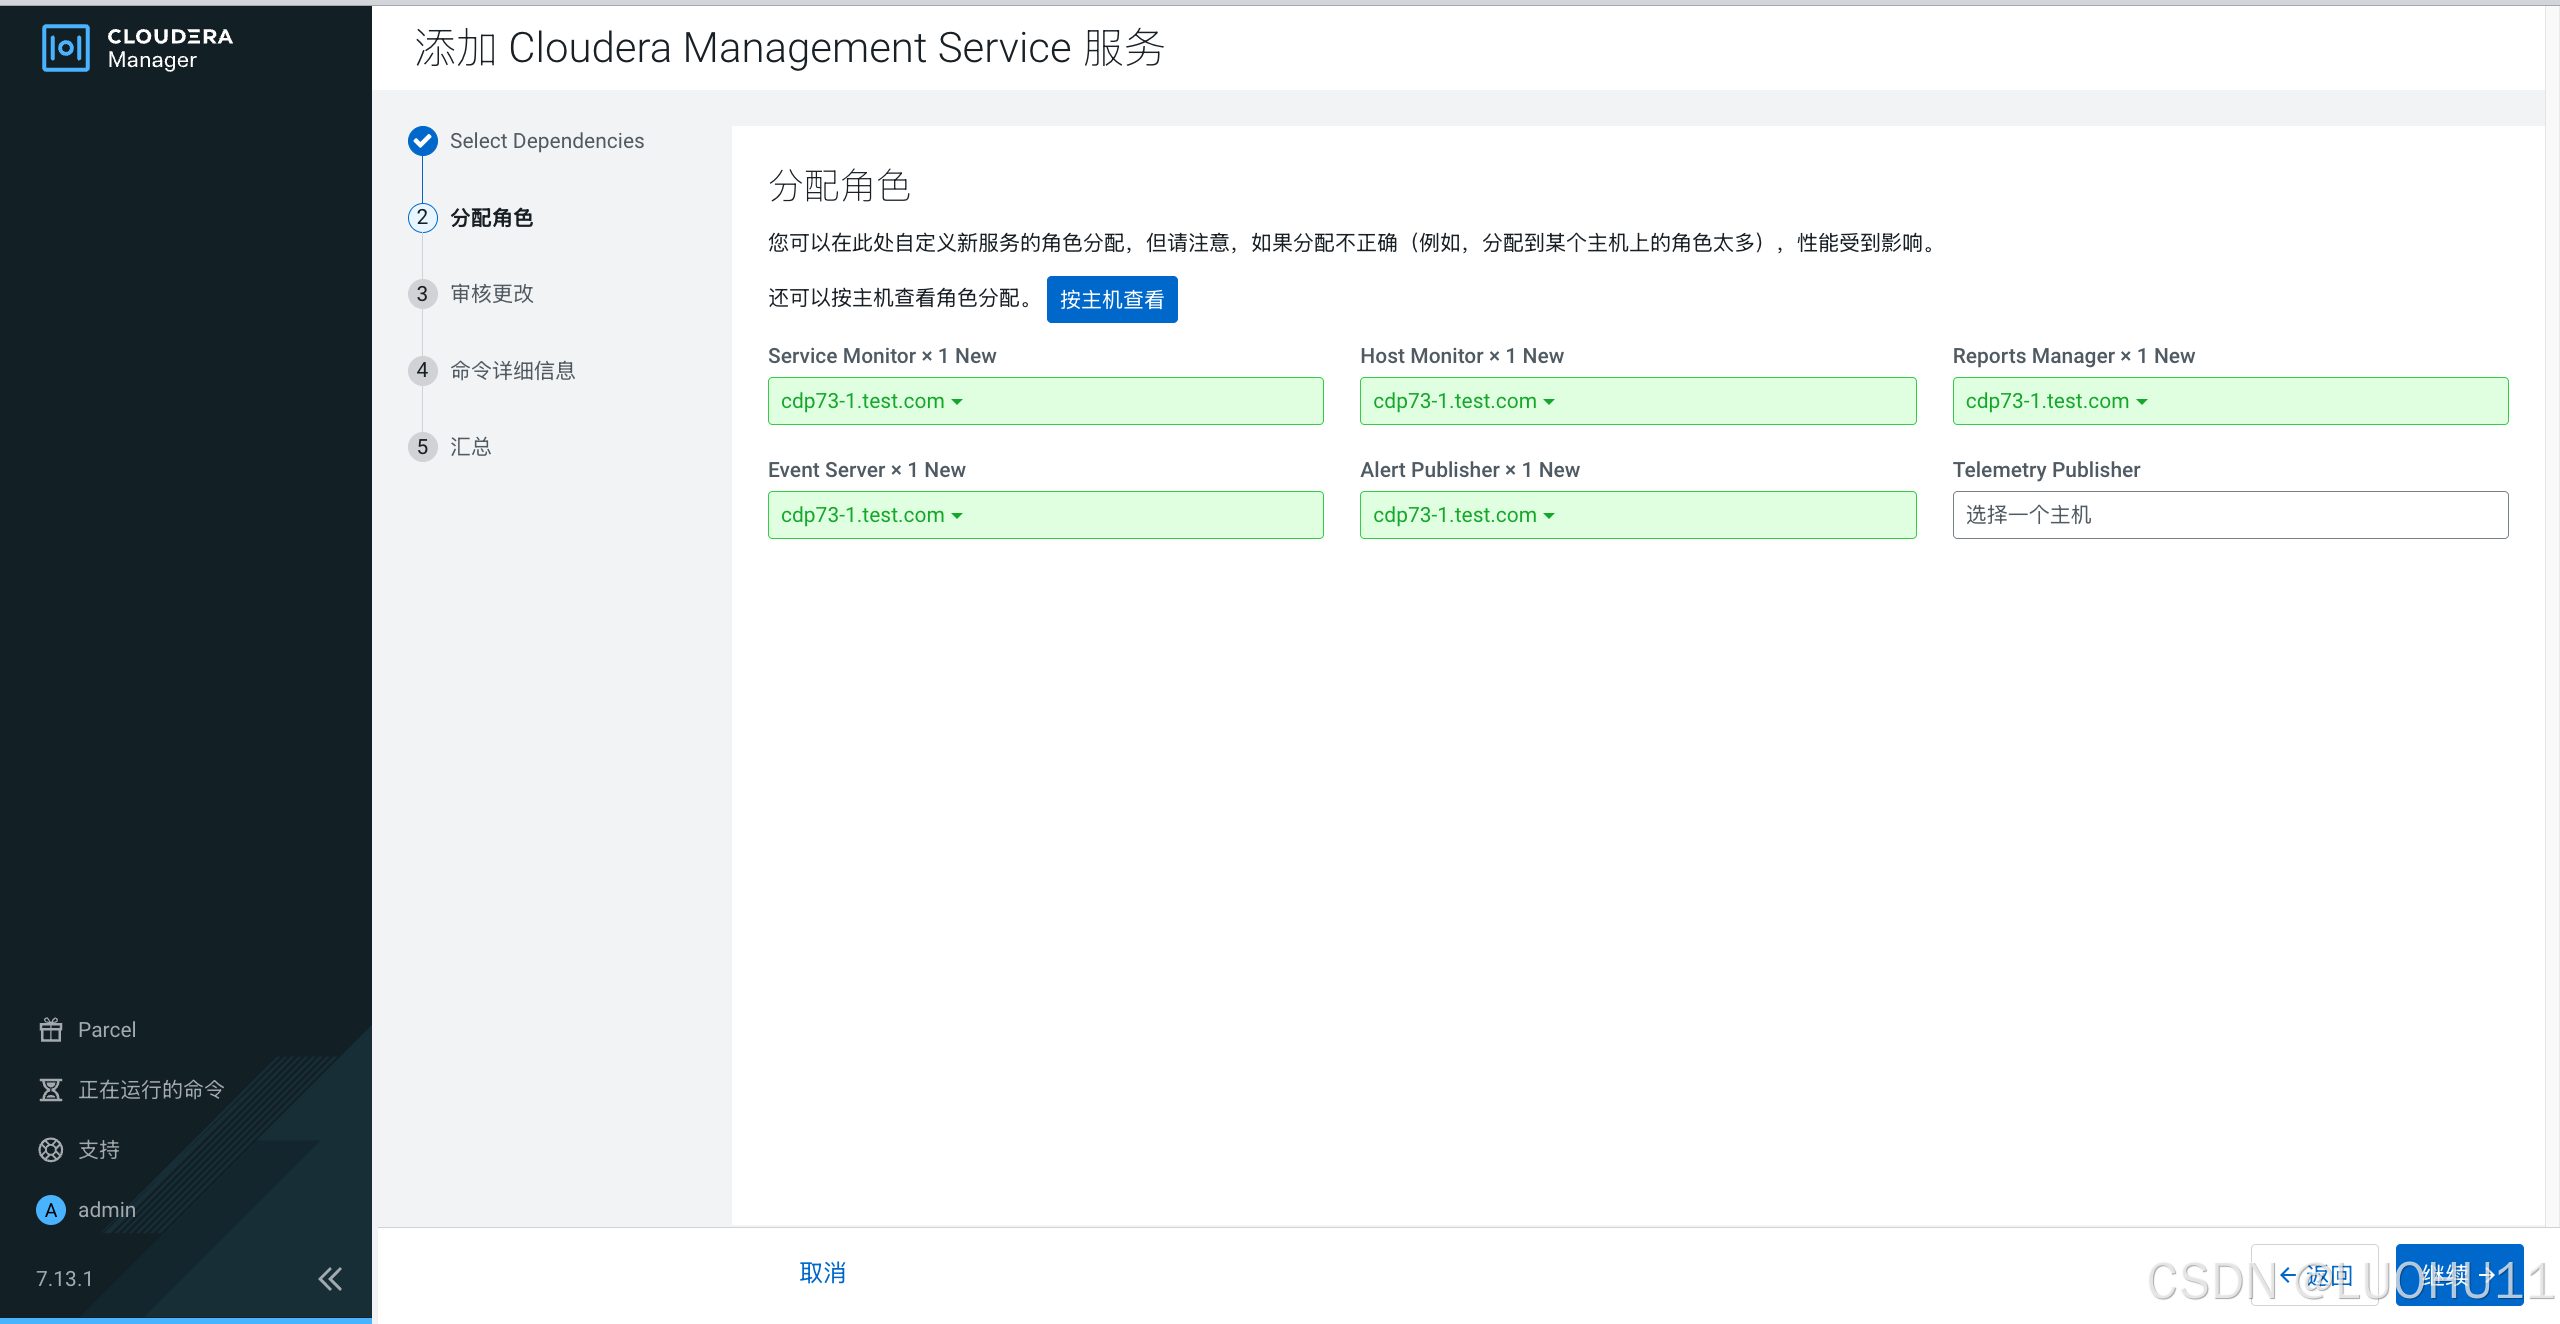
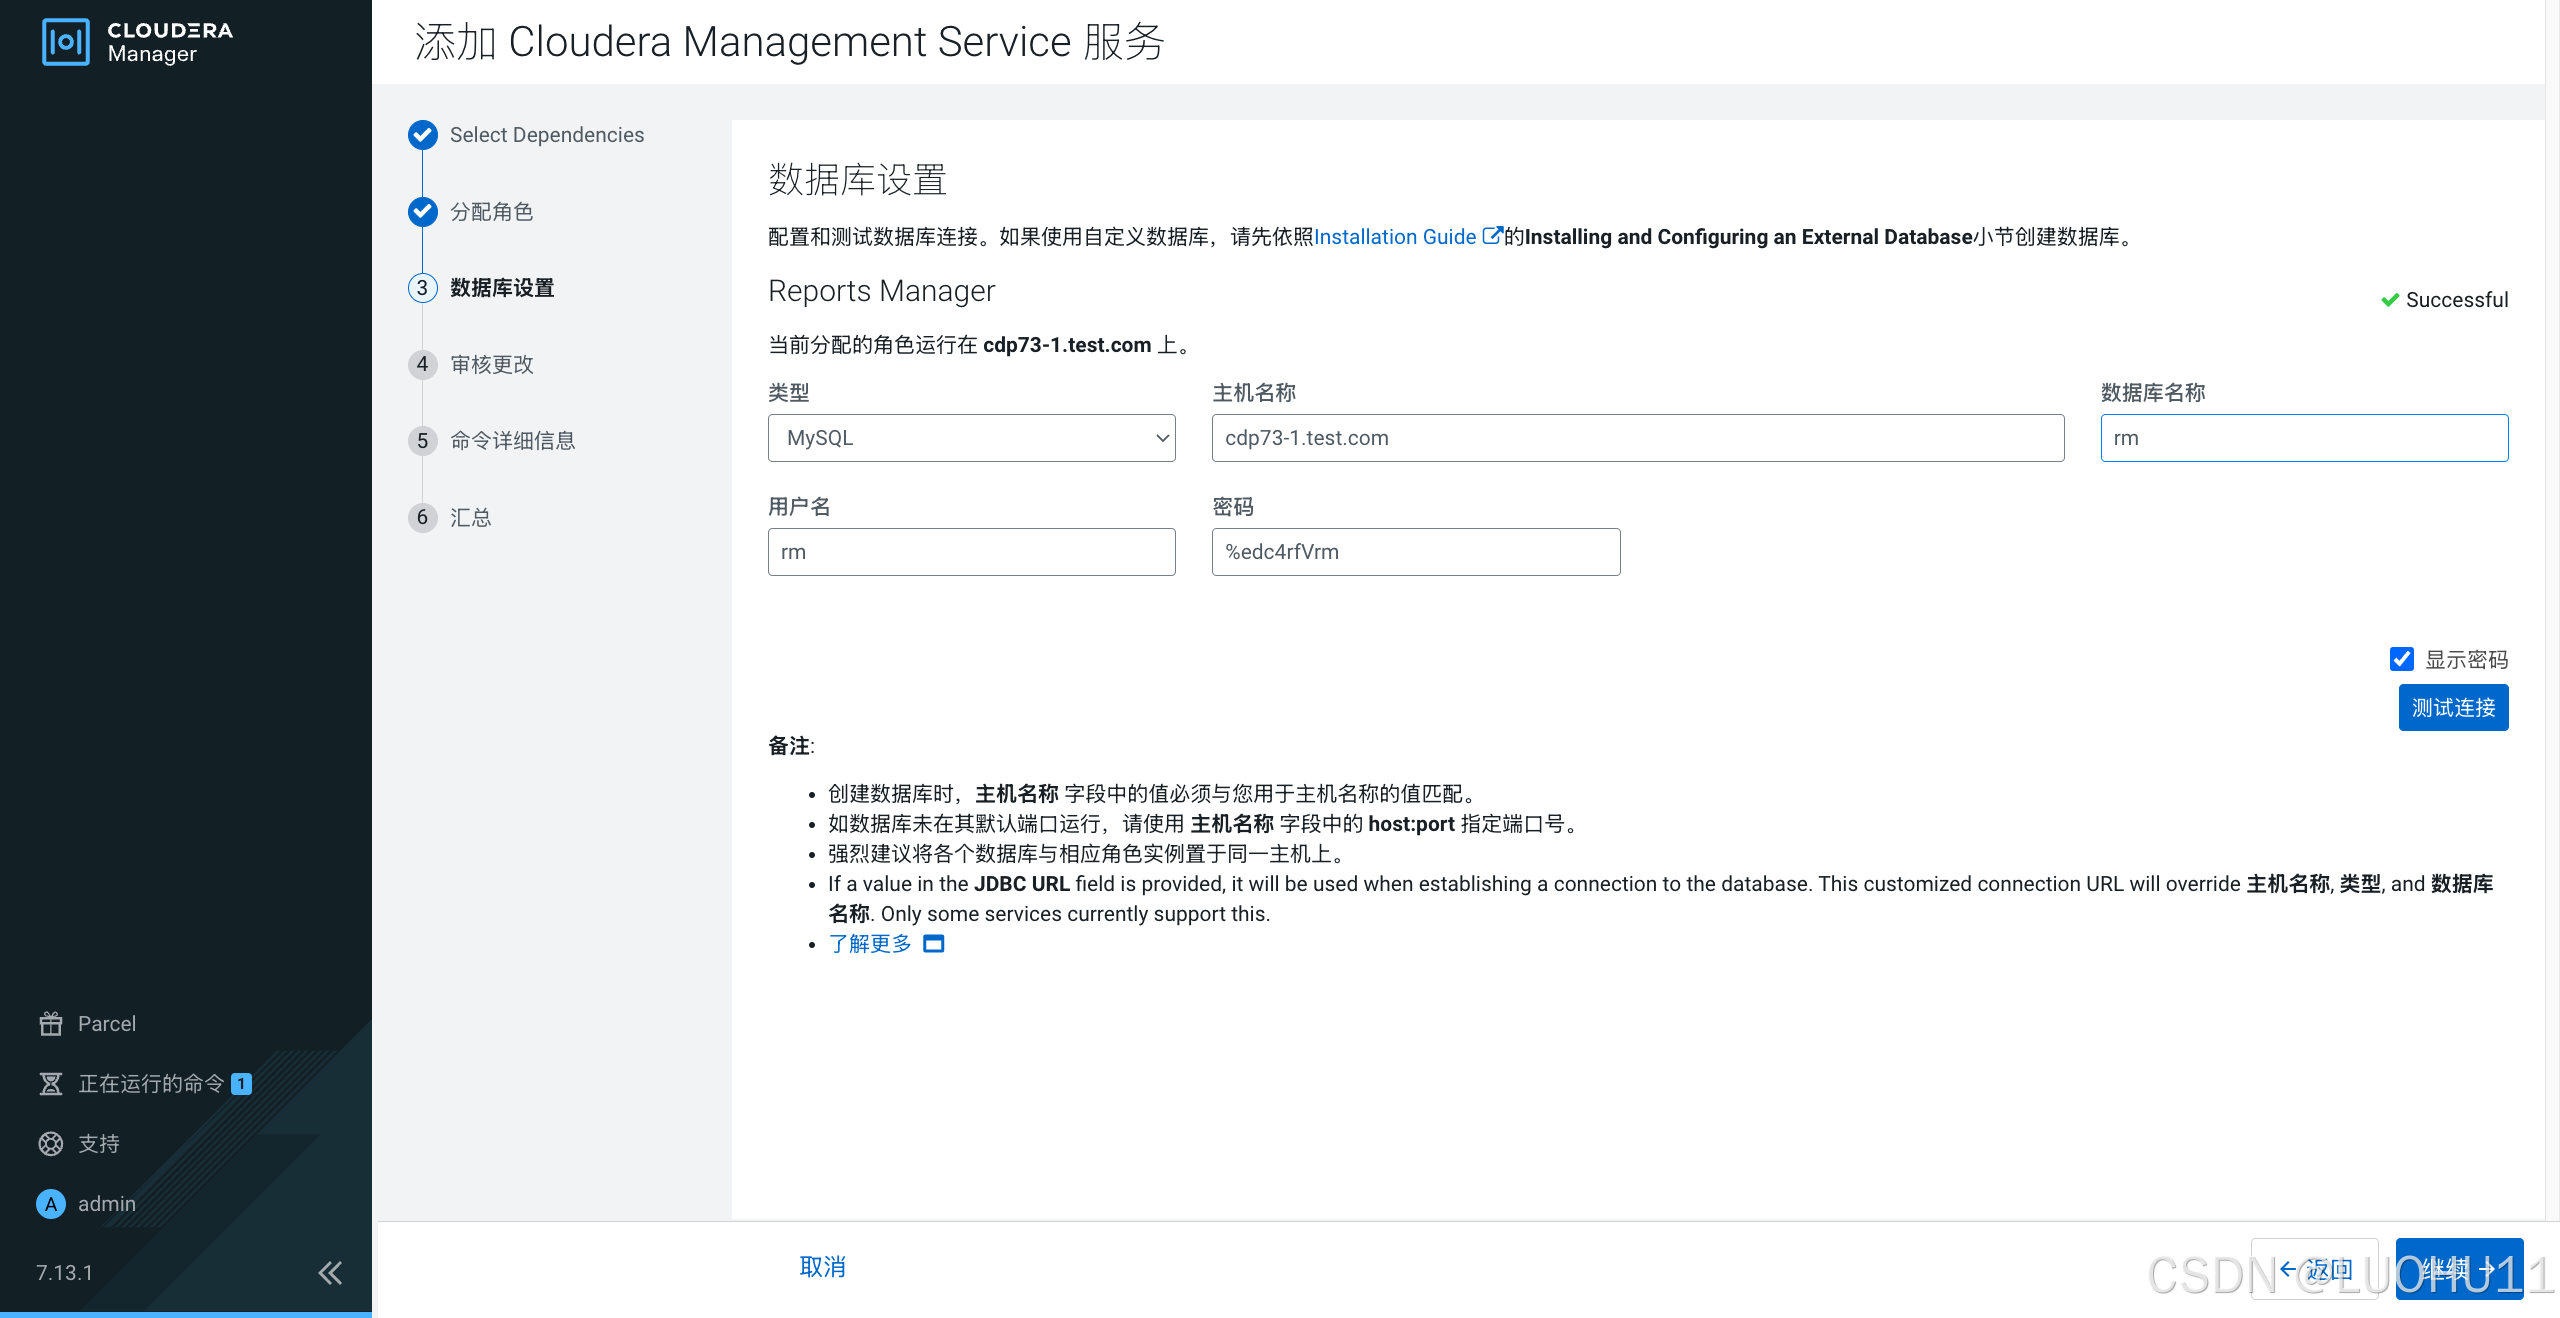
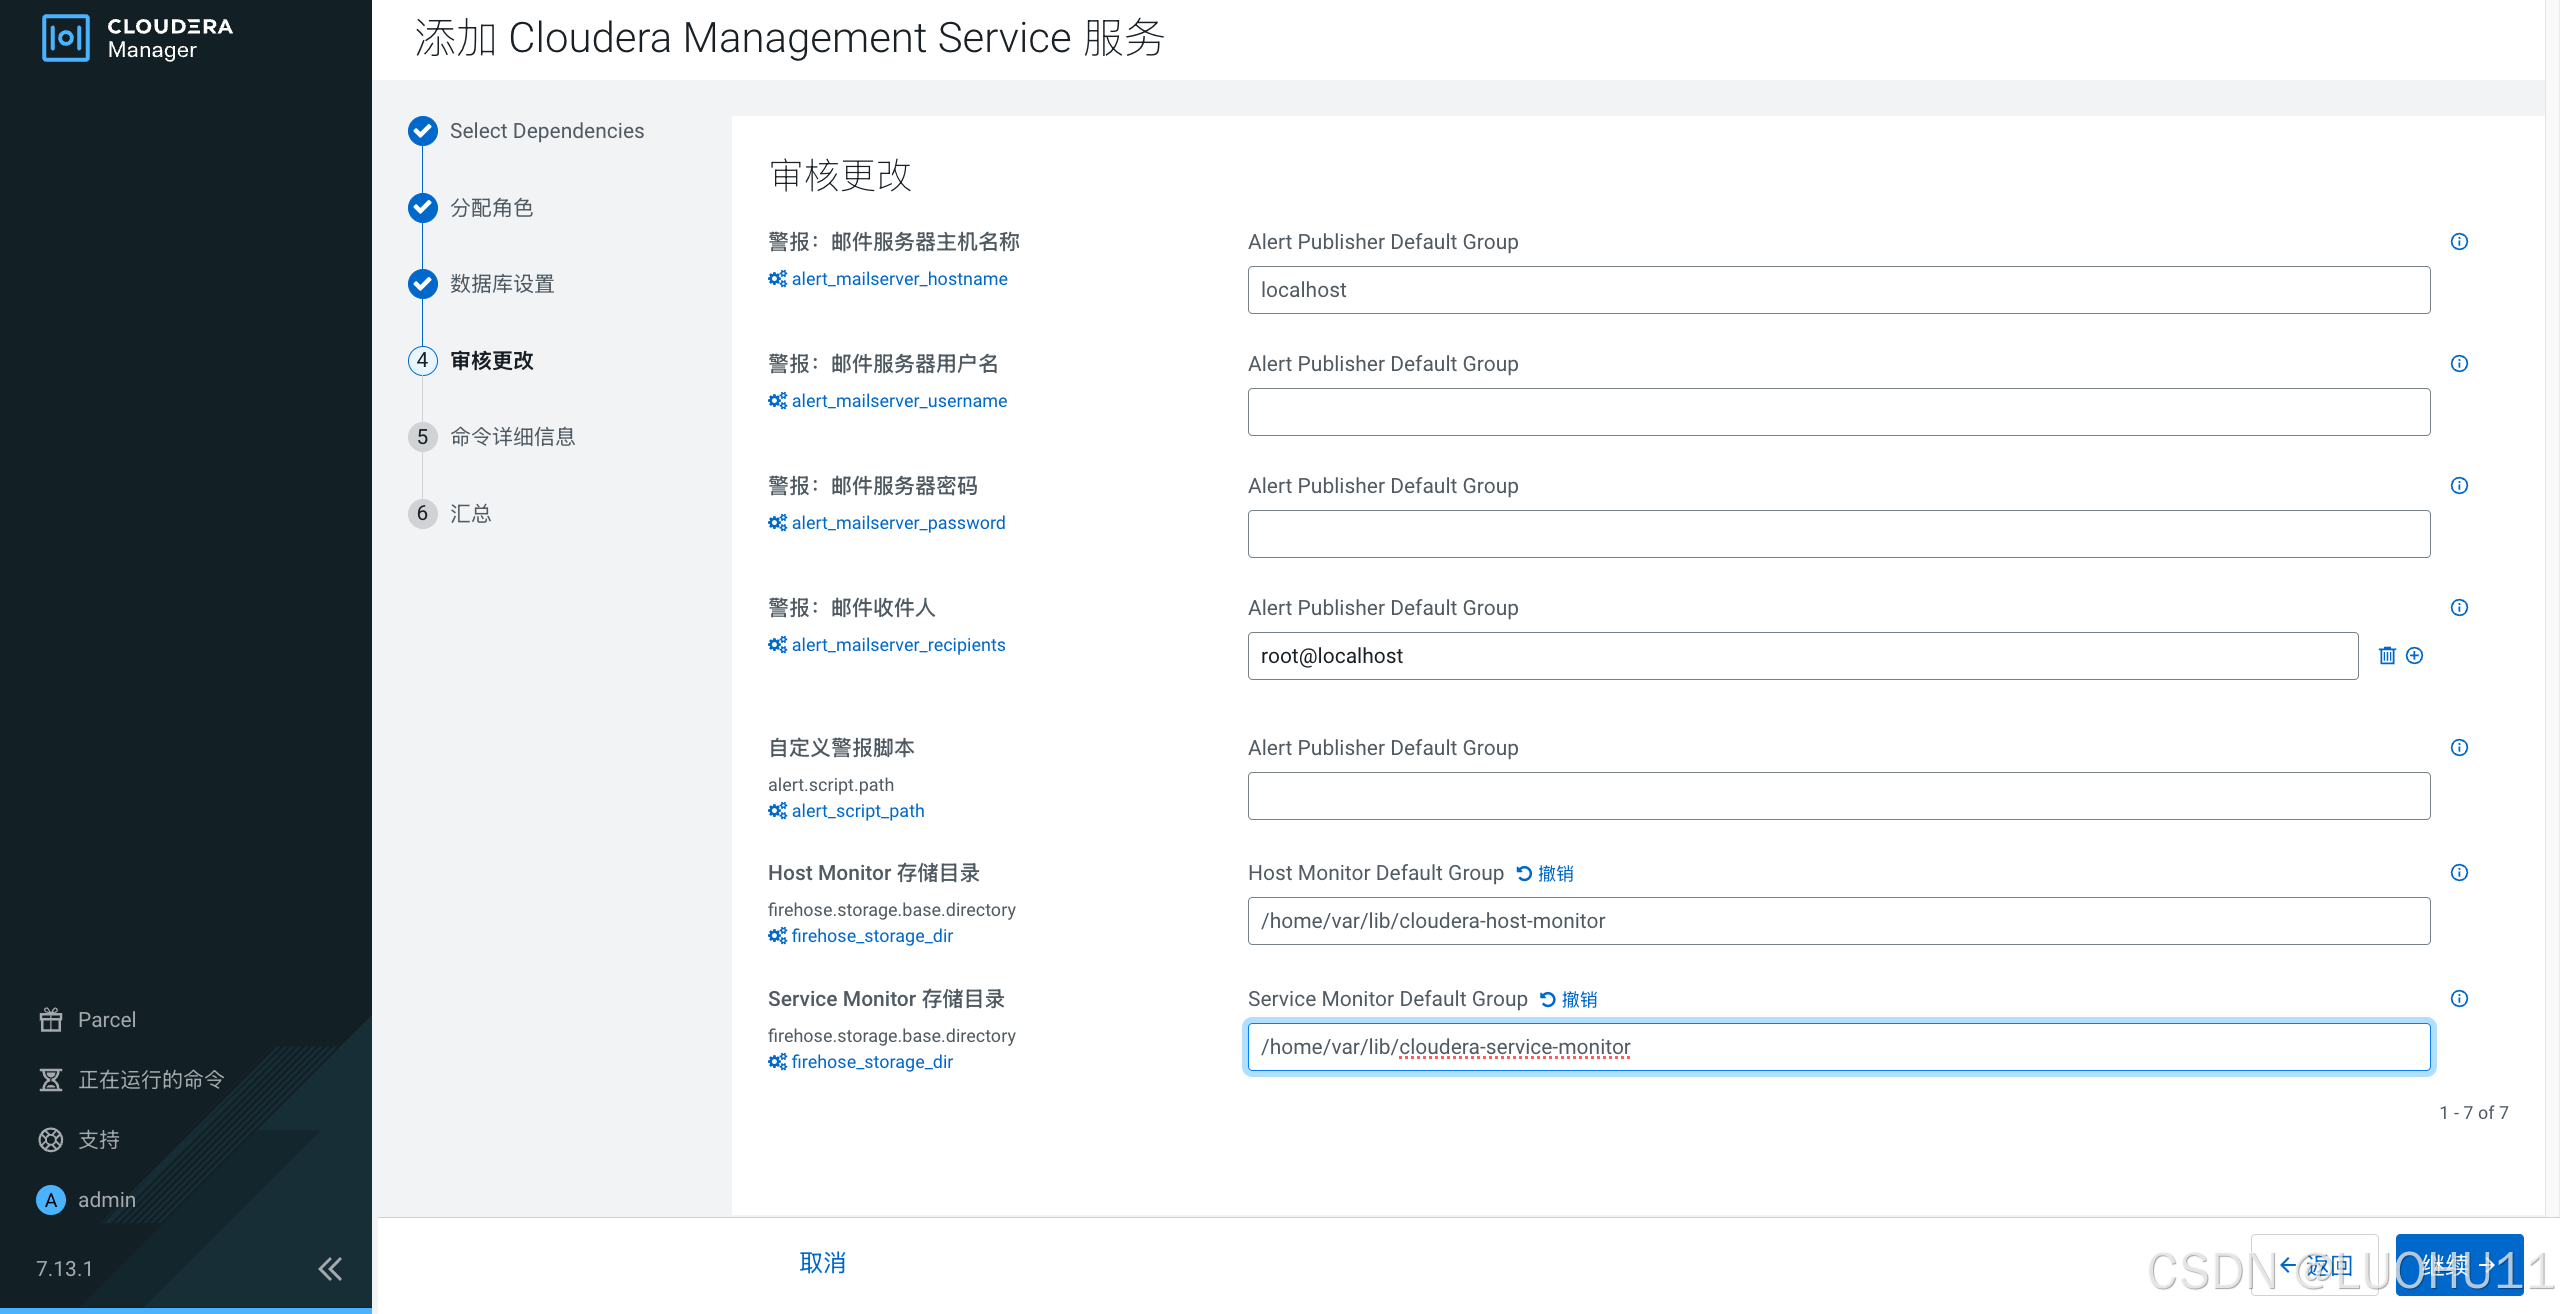
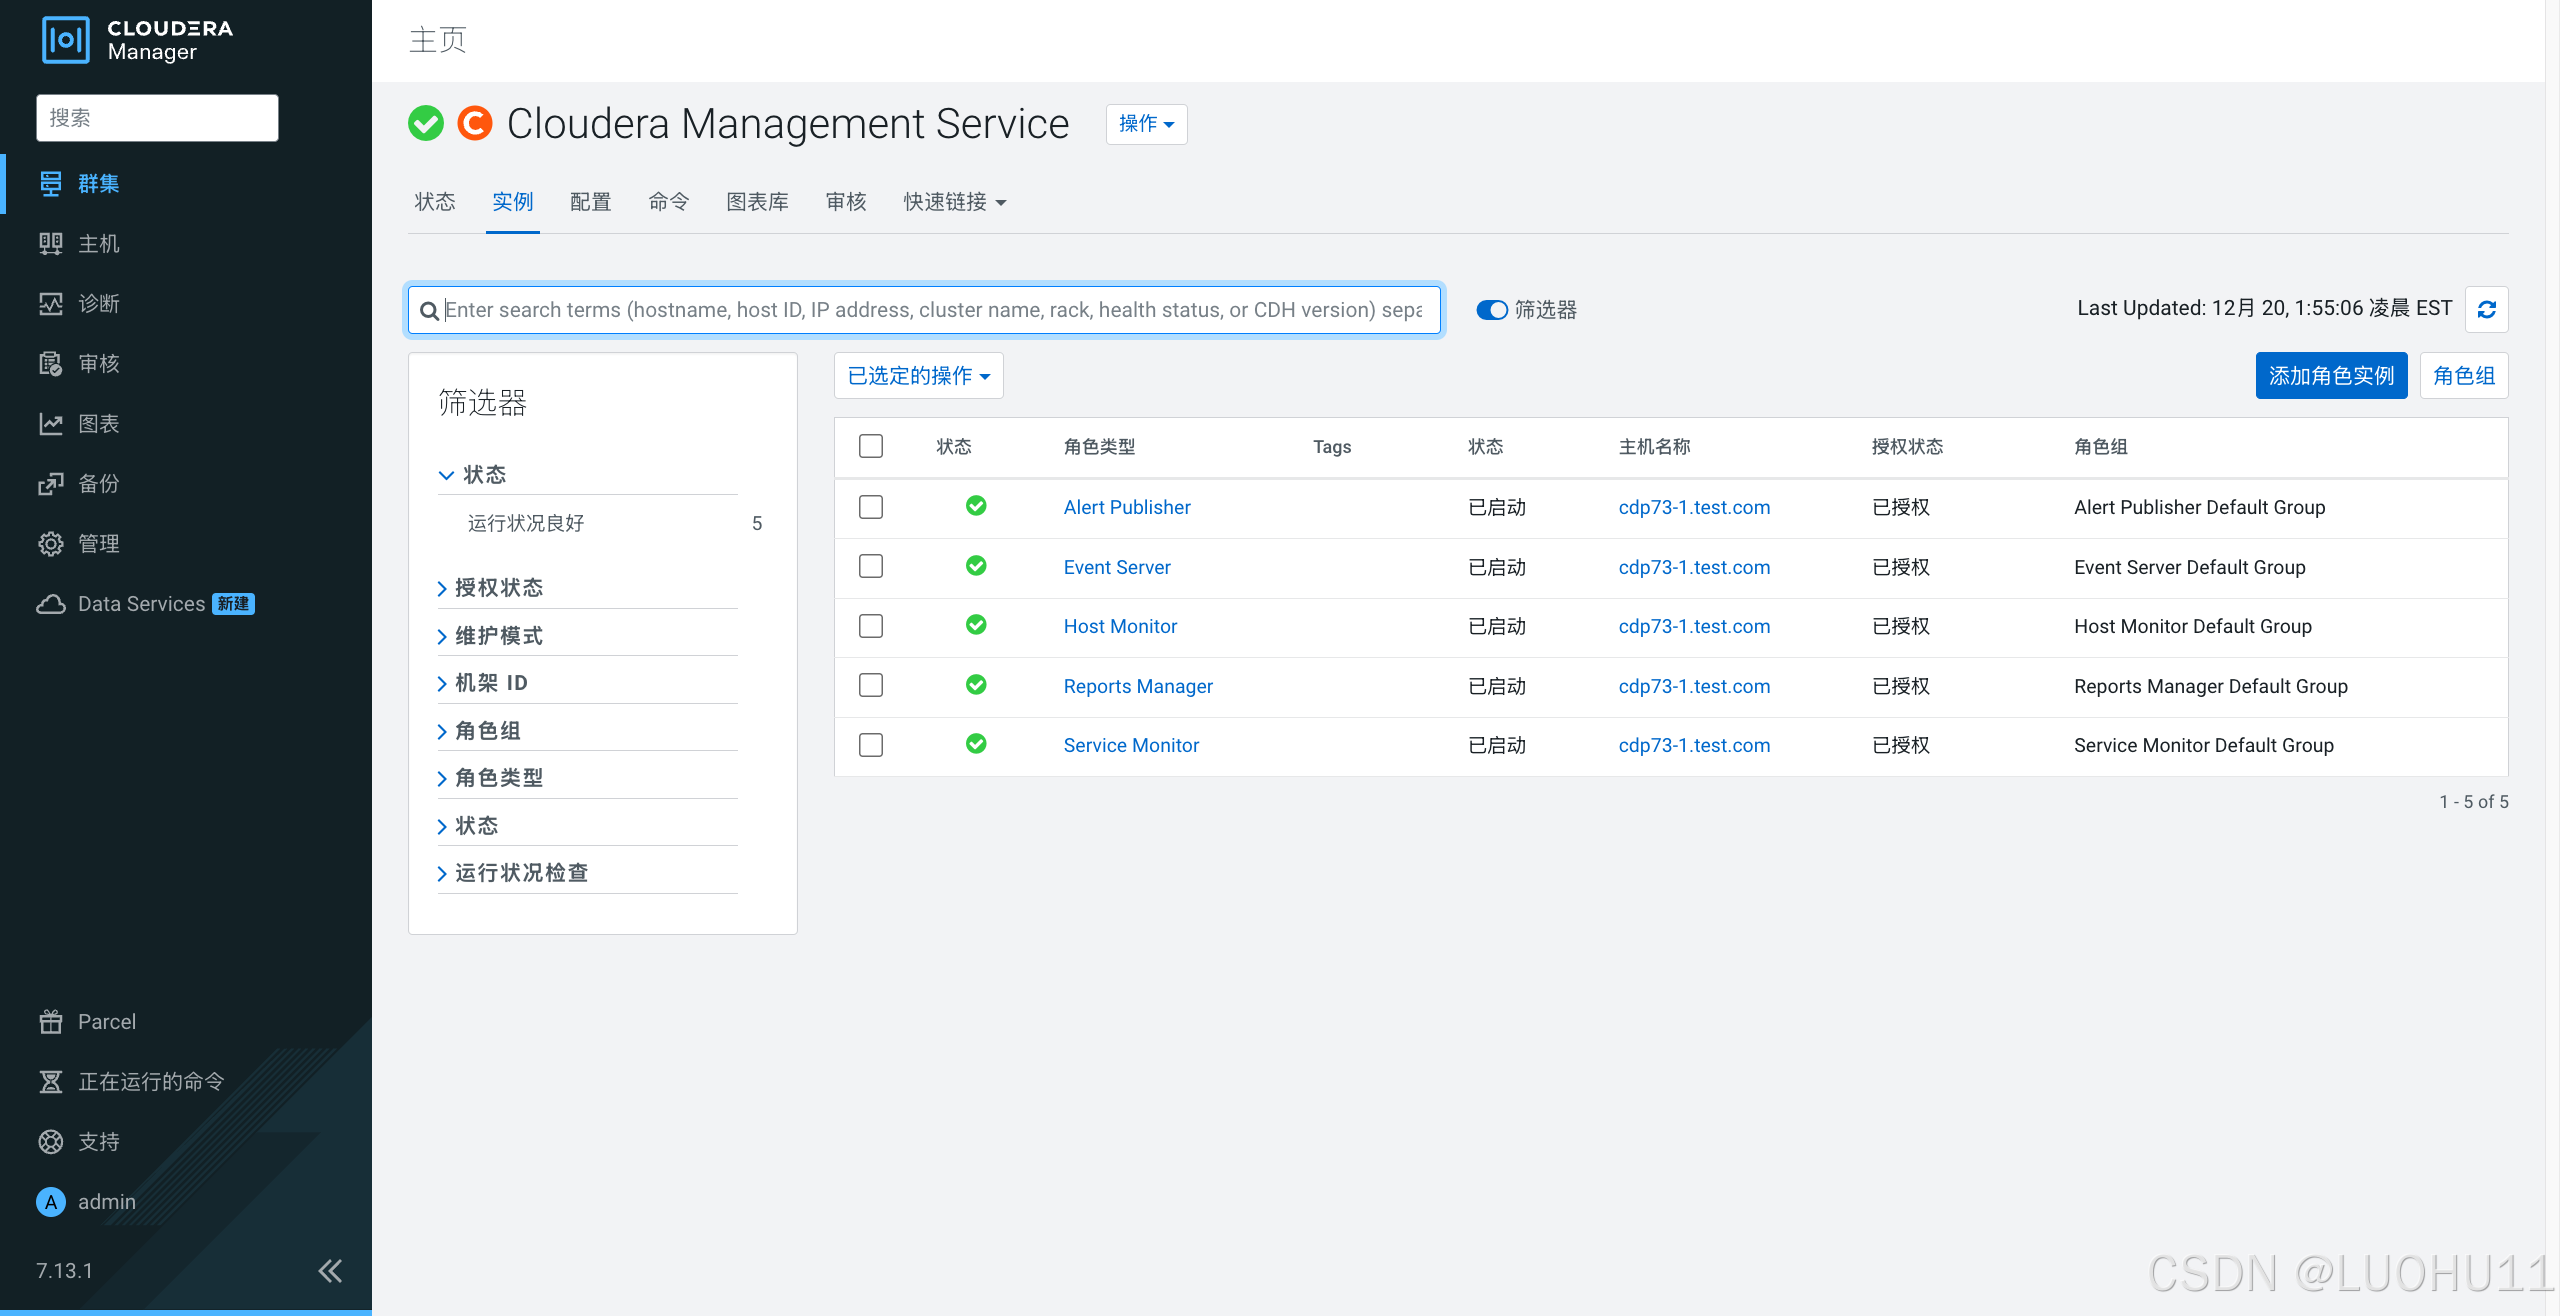
添加 Cloudera Management Service 服务
选择依赖
分配角色
数据库设置
审核更改
命令详细信息
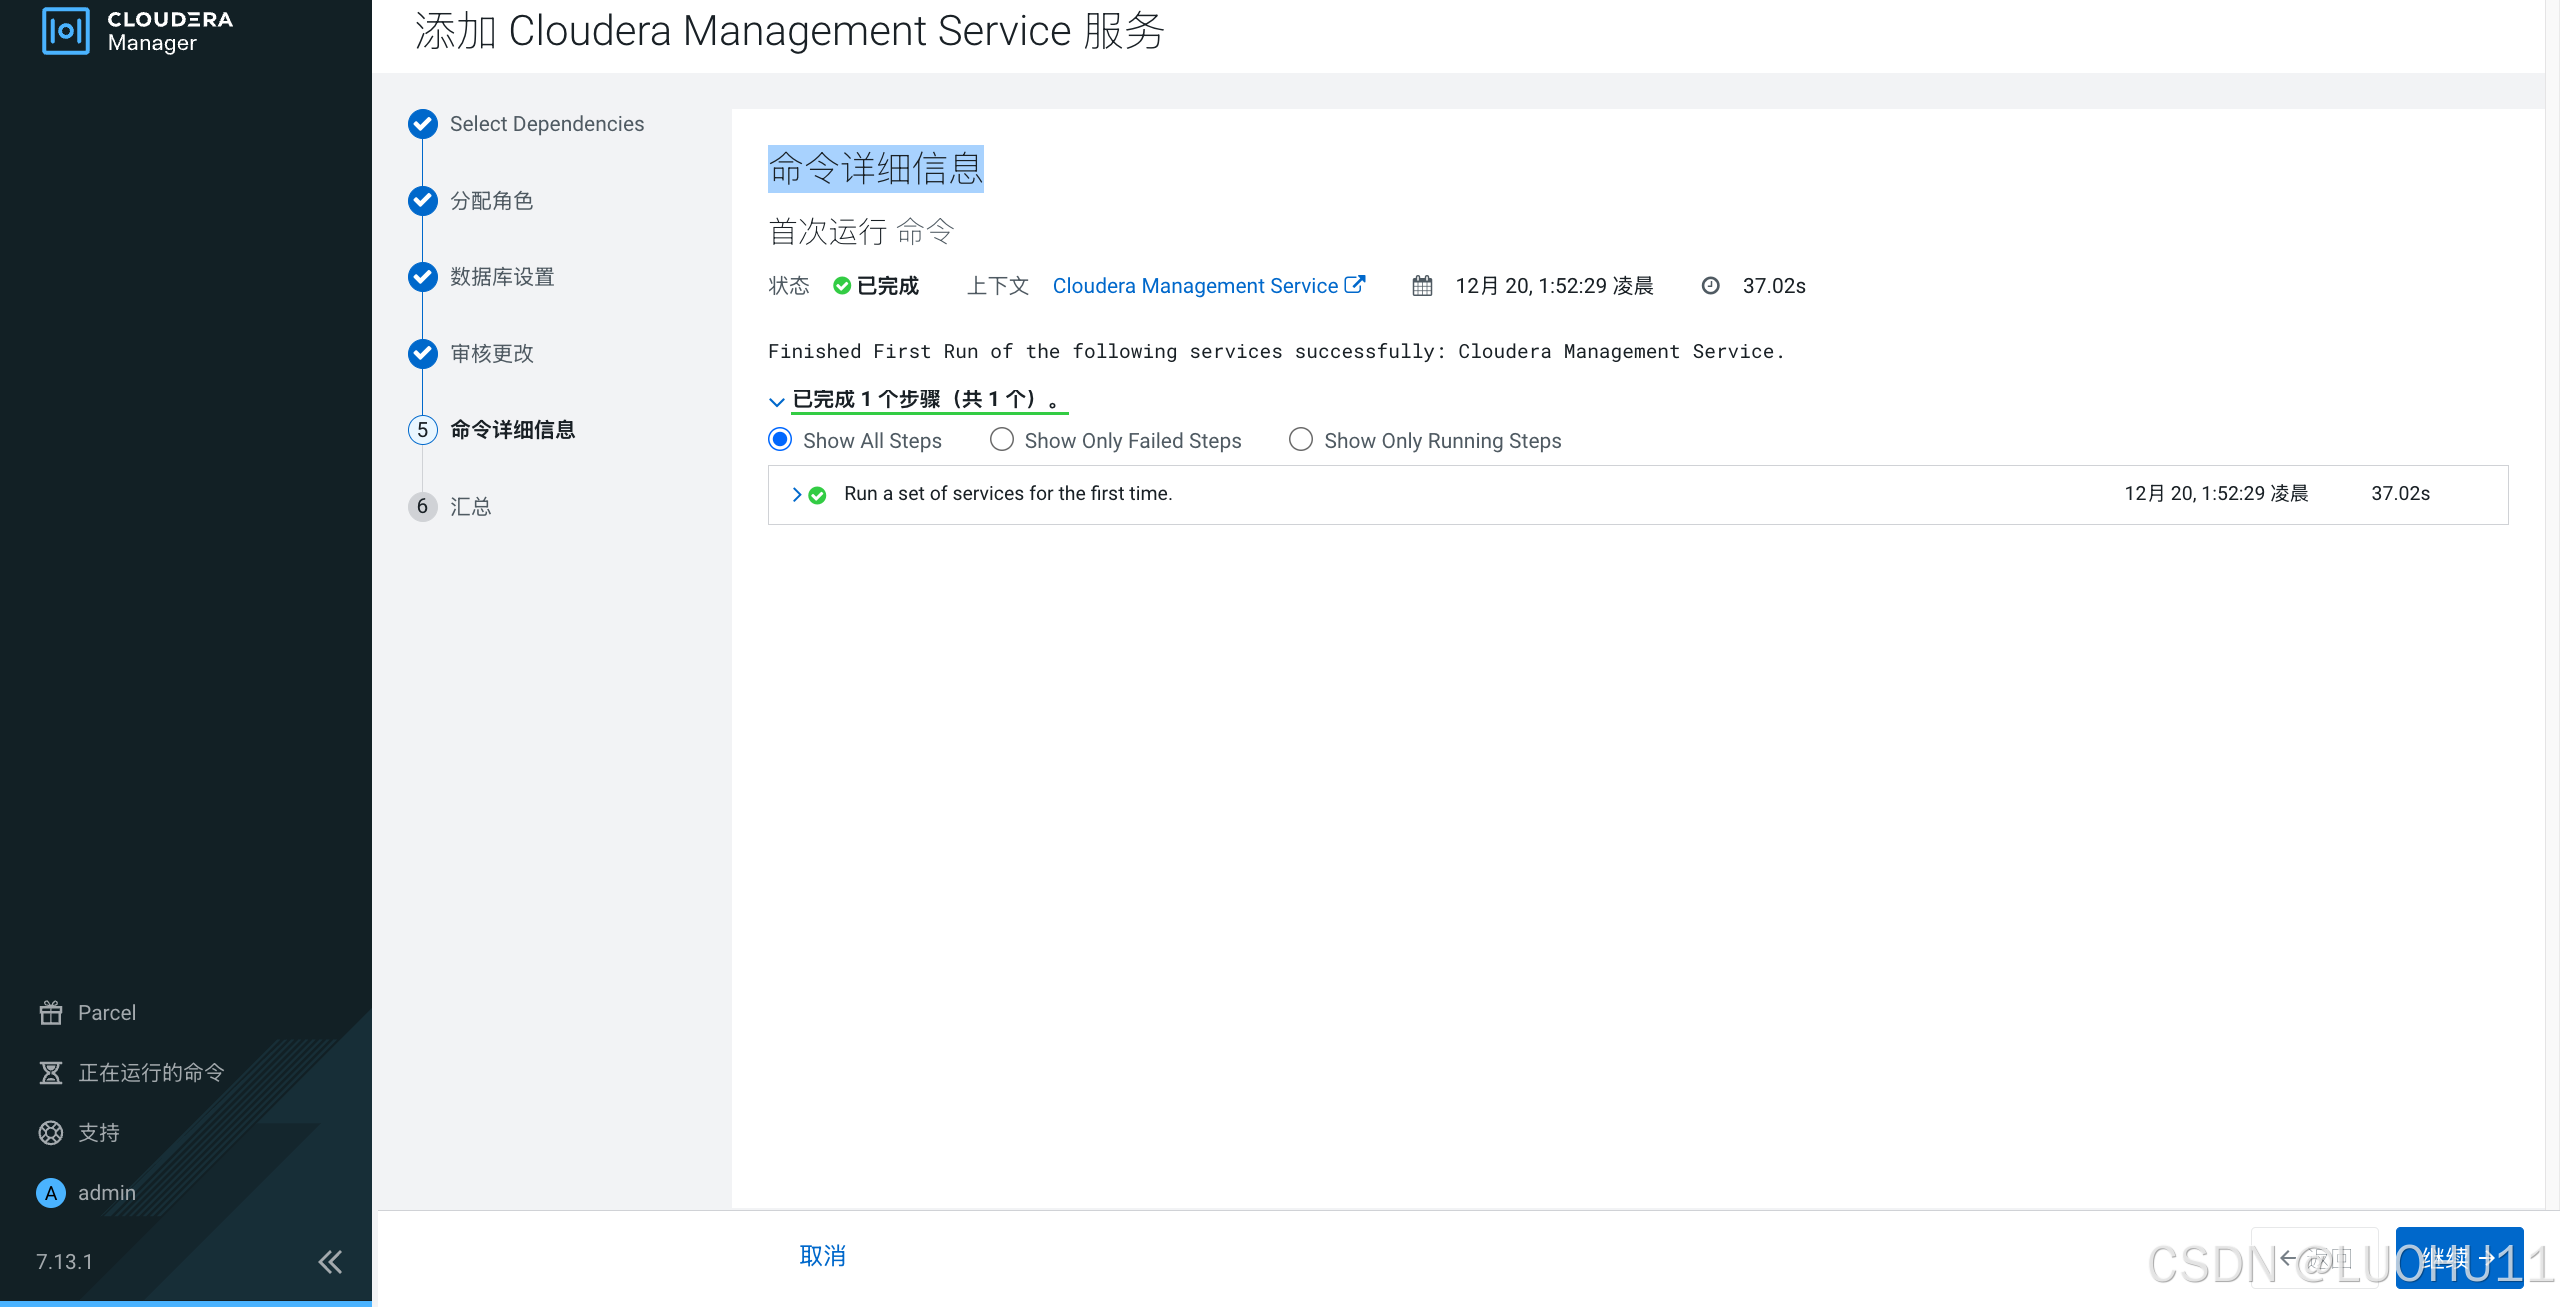
汇总

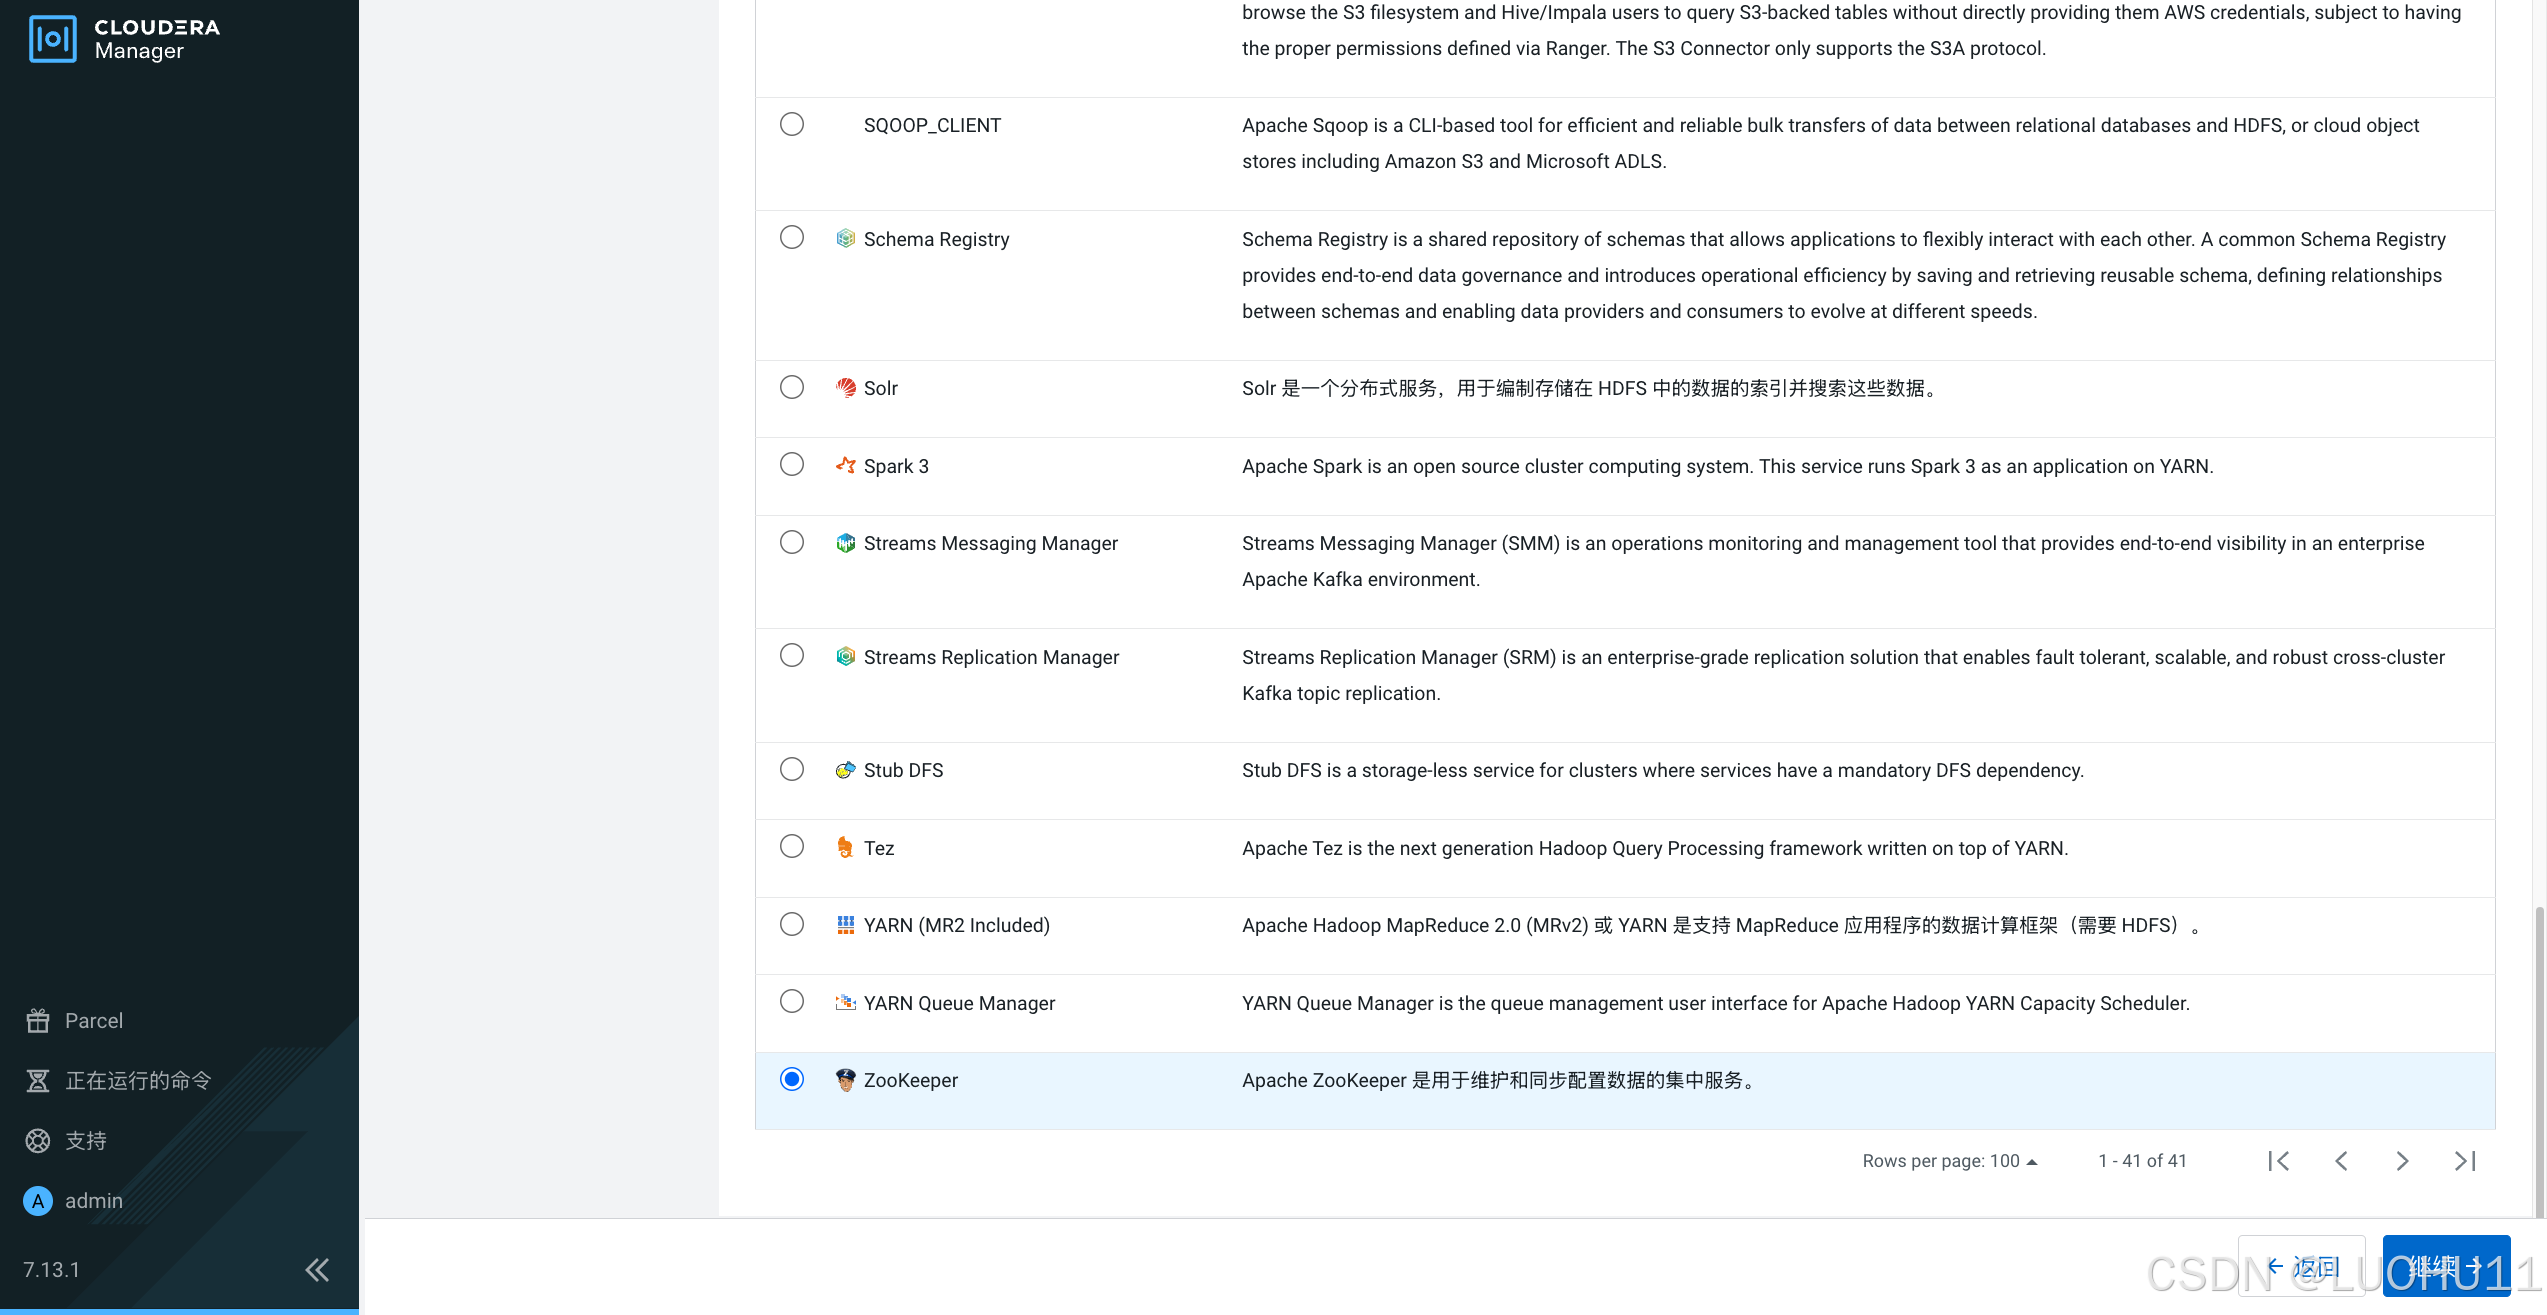
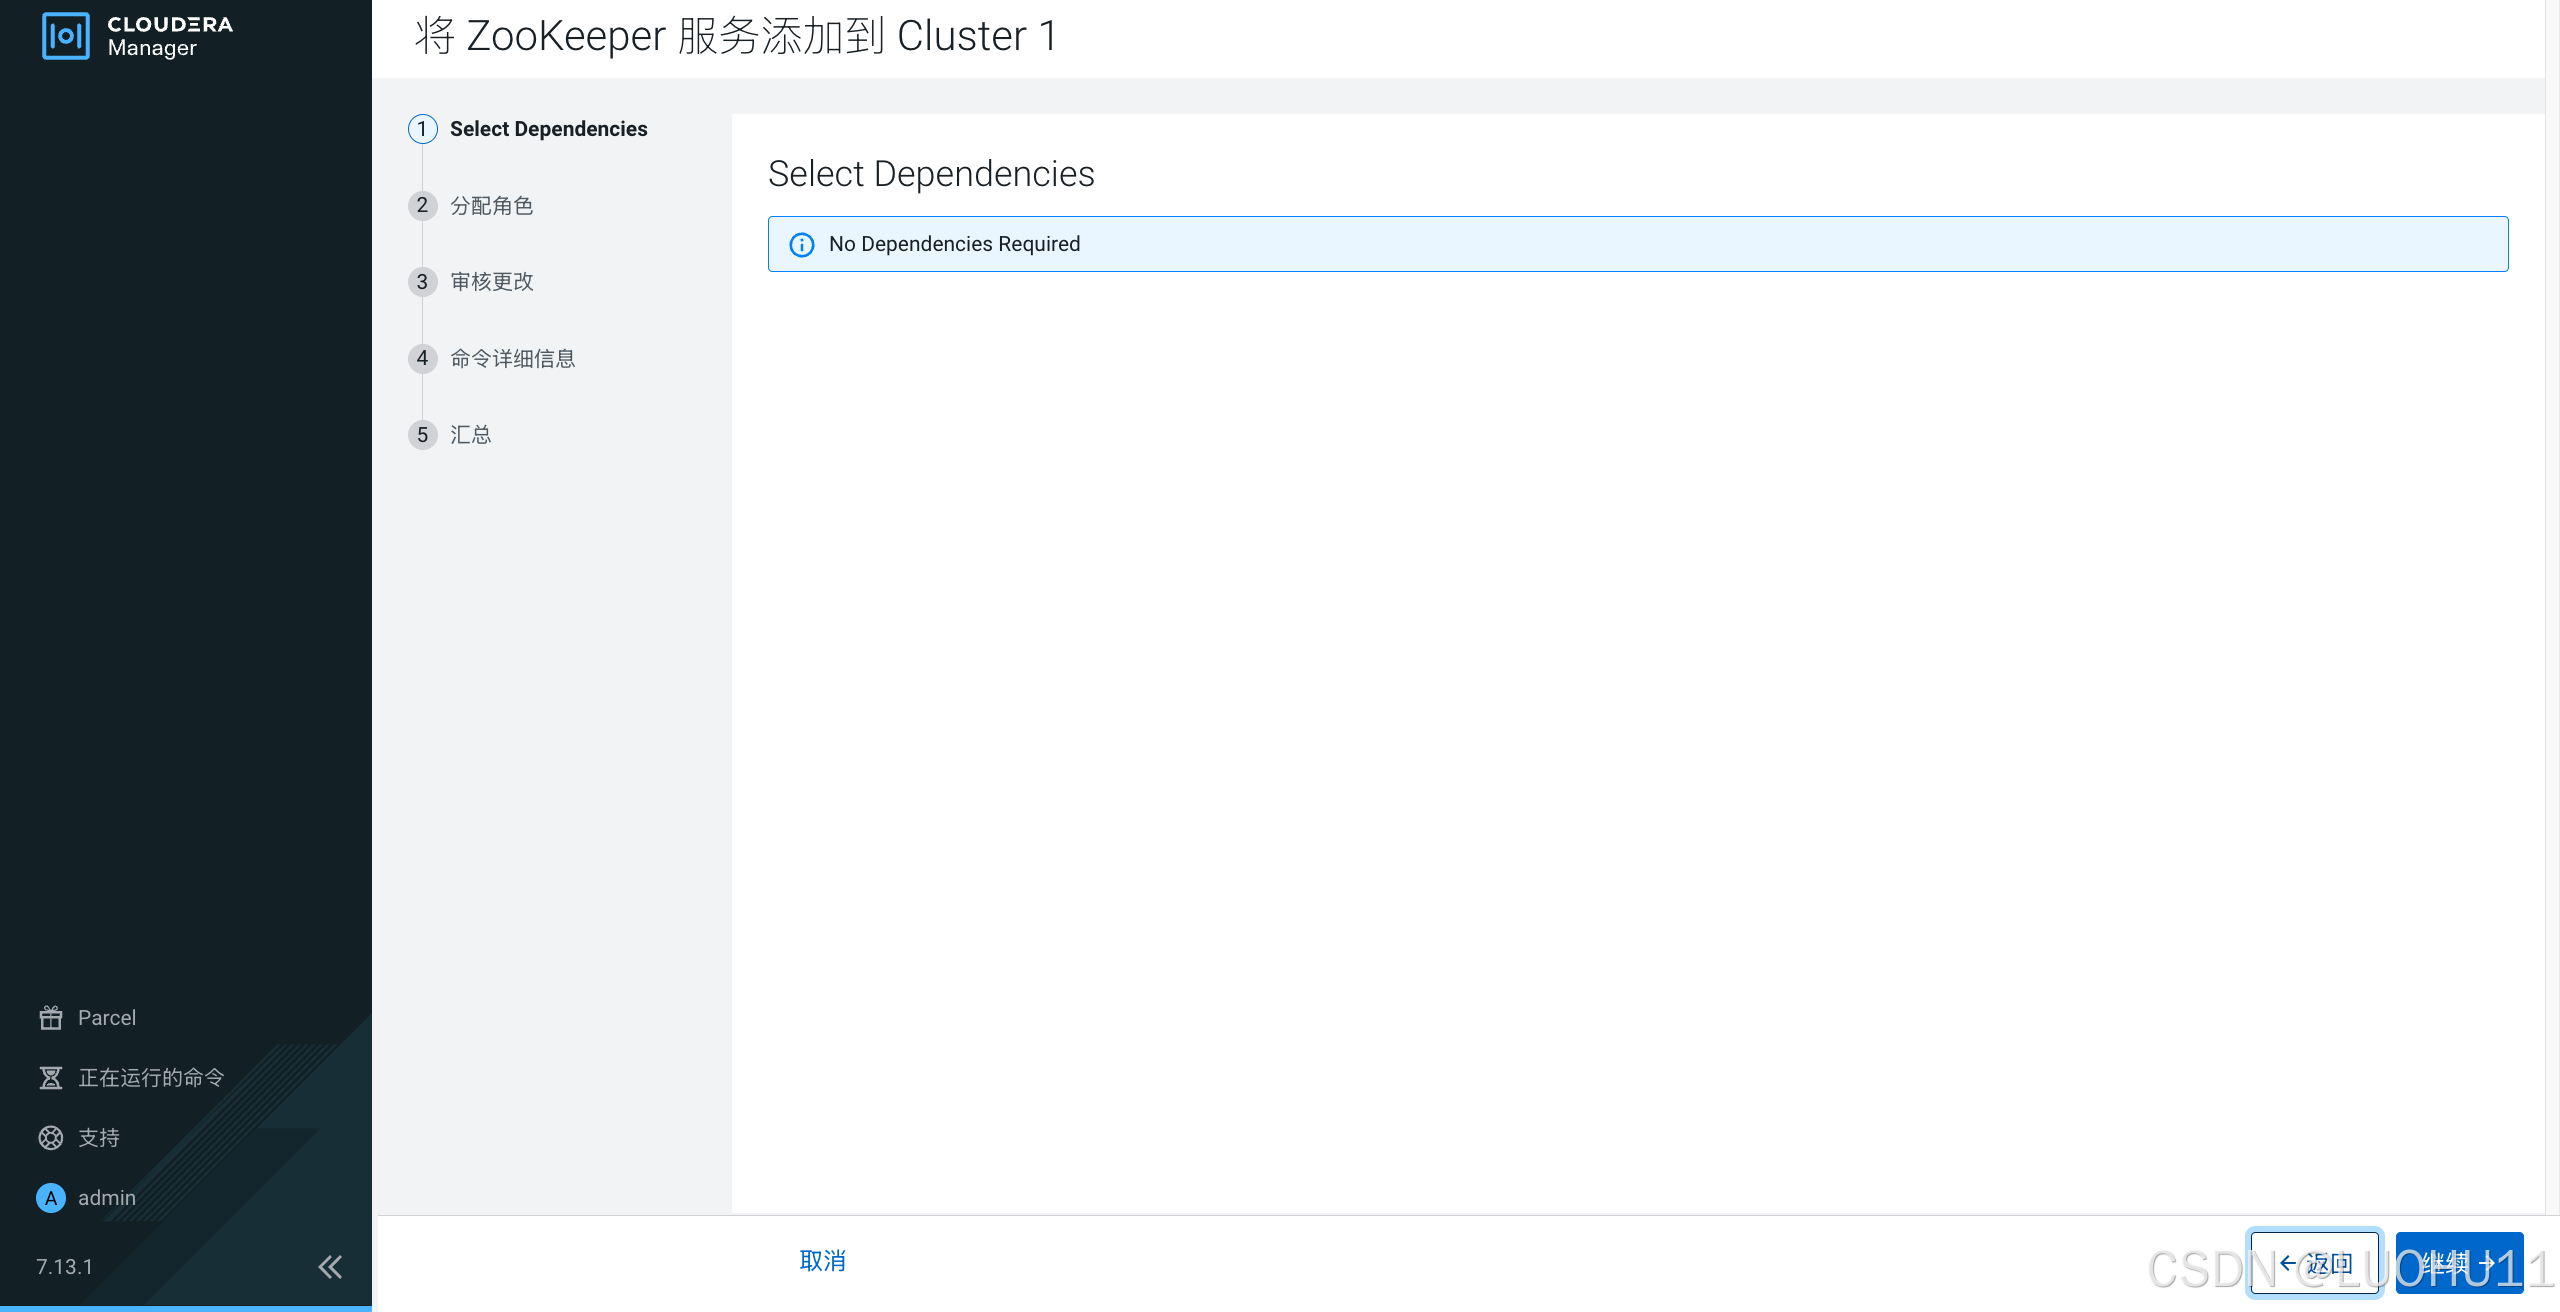
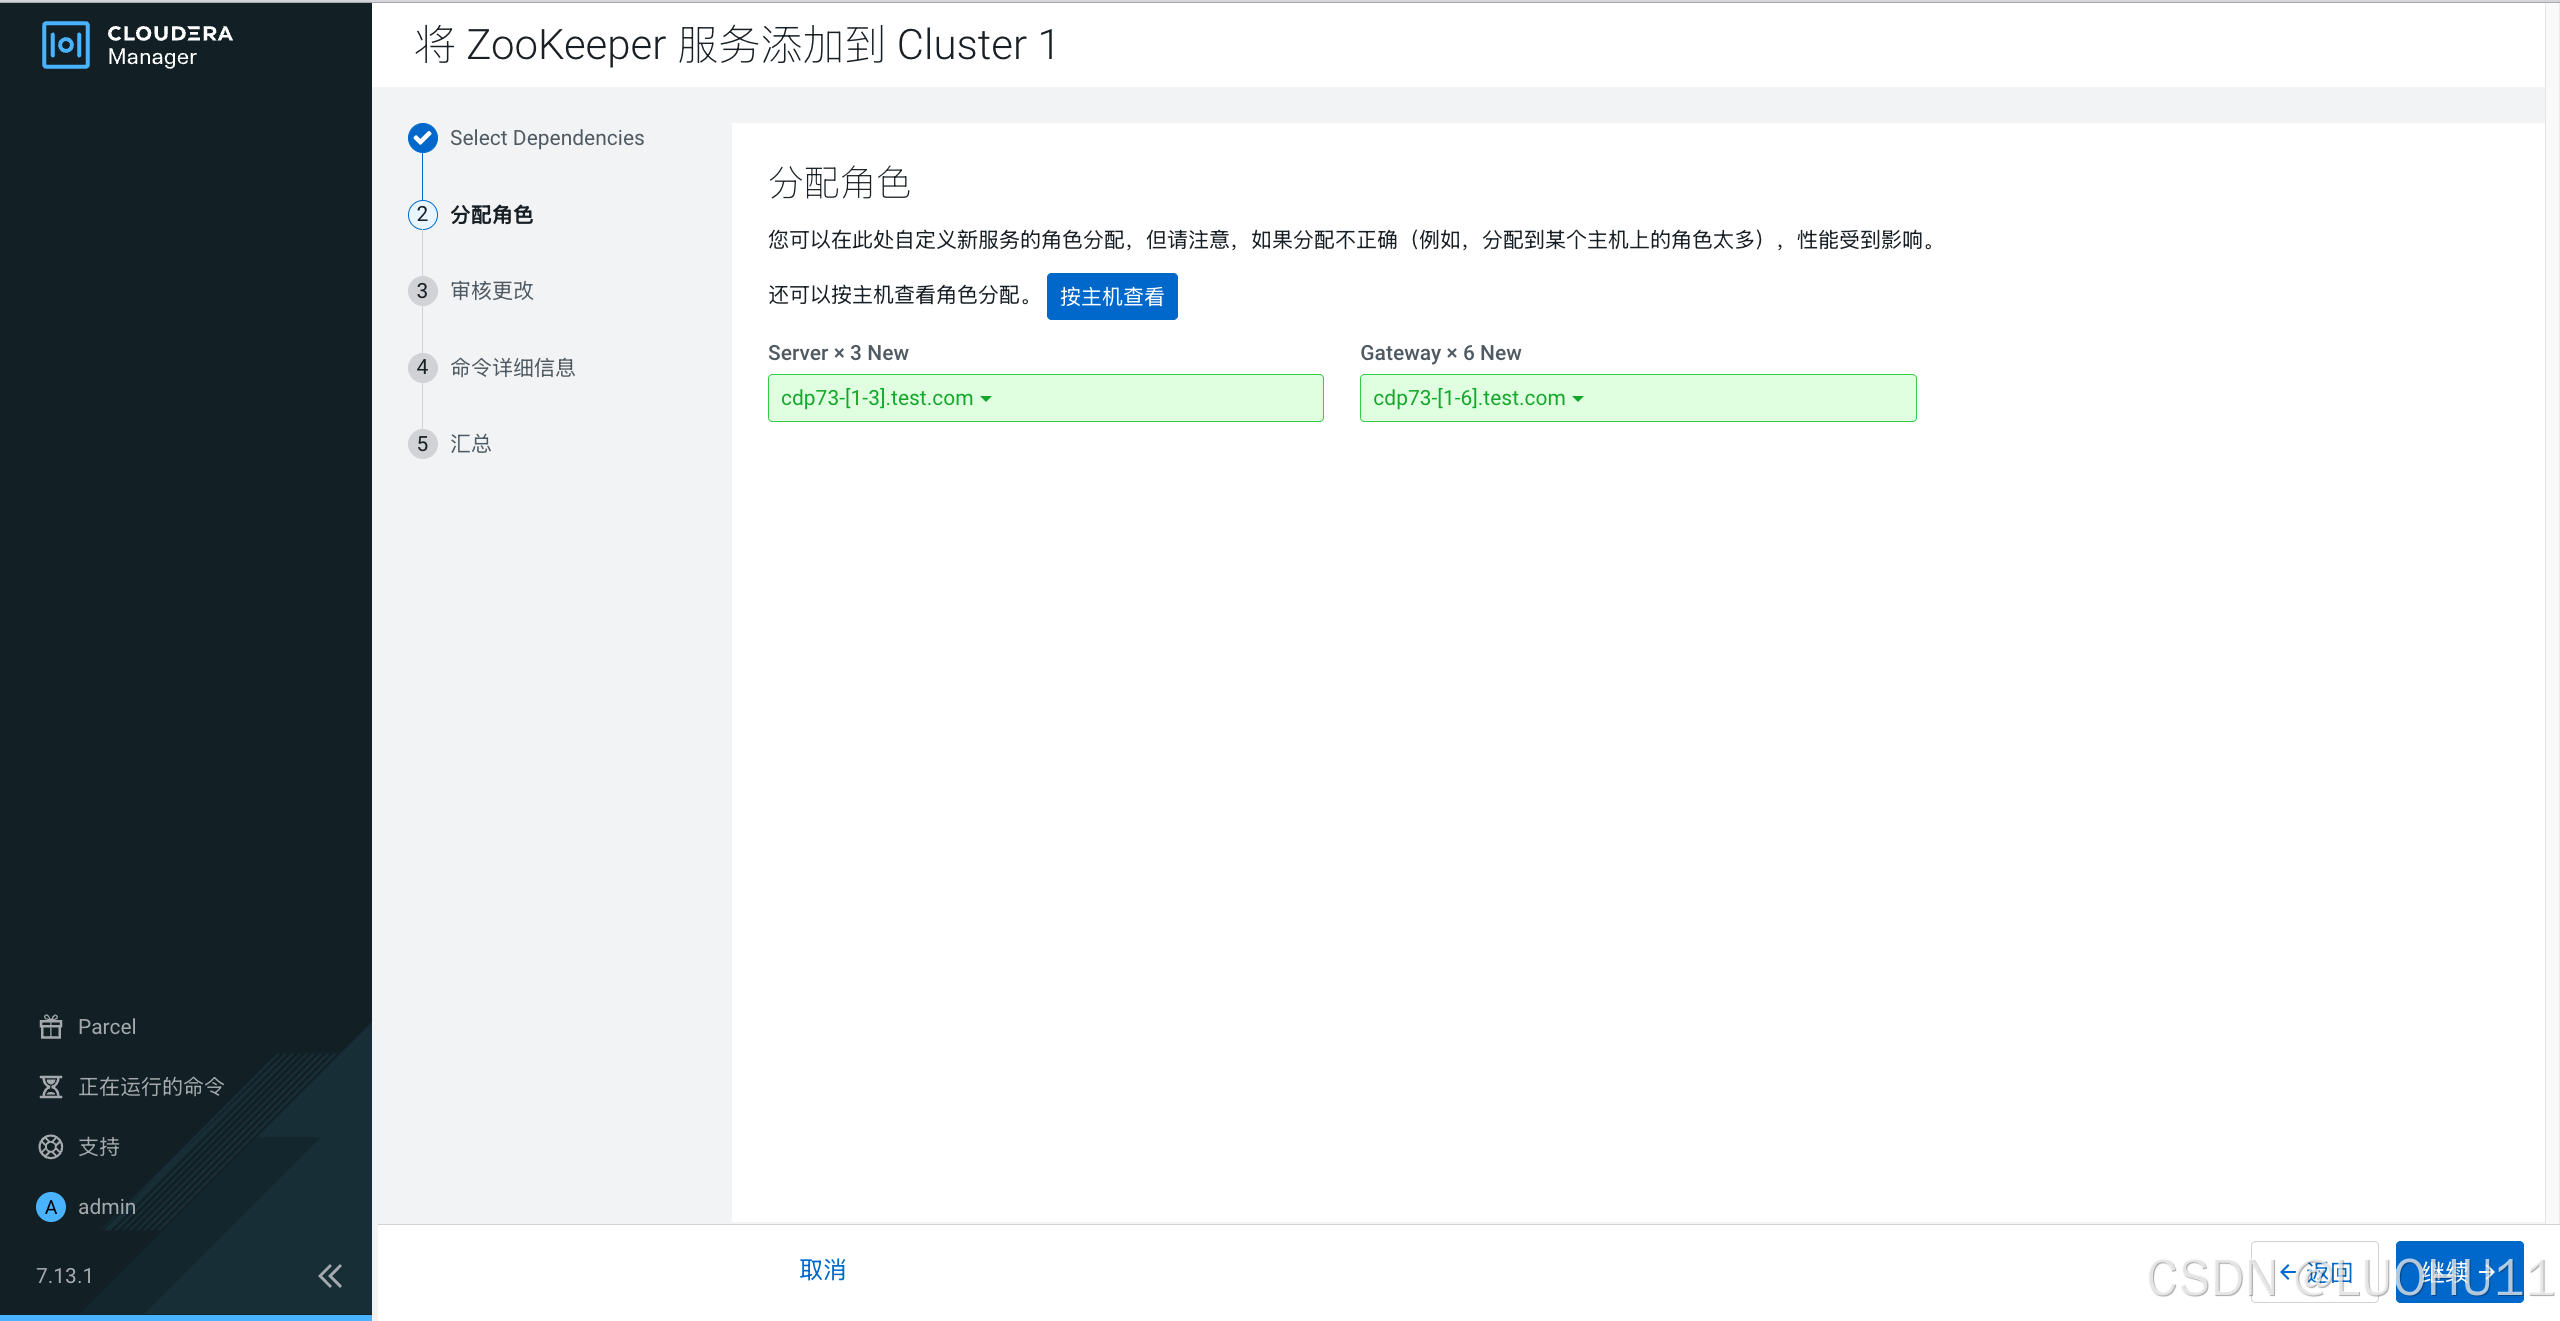
添加zookeeper服务
选择依赖
分配角色
审核更改

命令详细信息
汇总
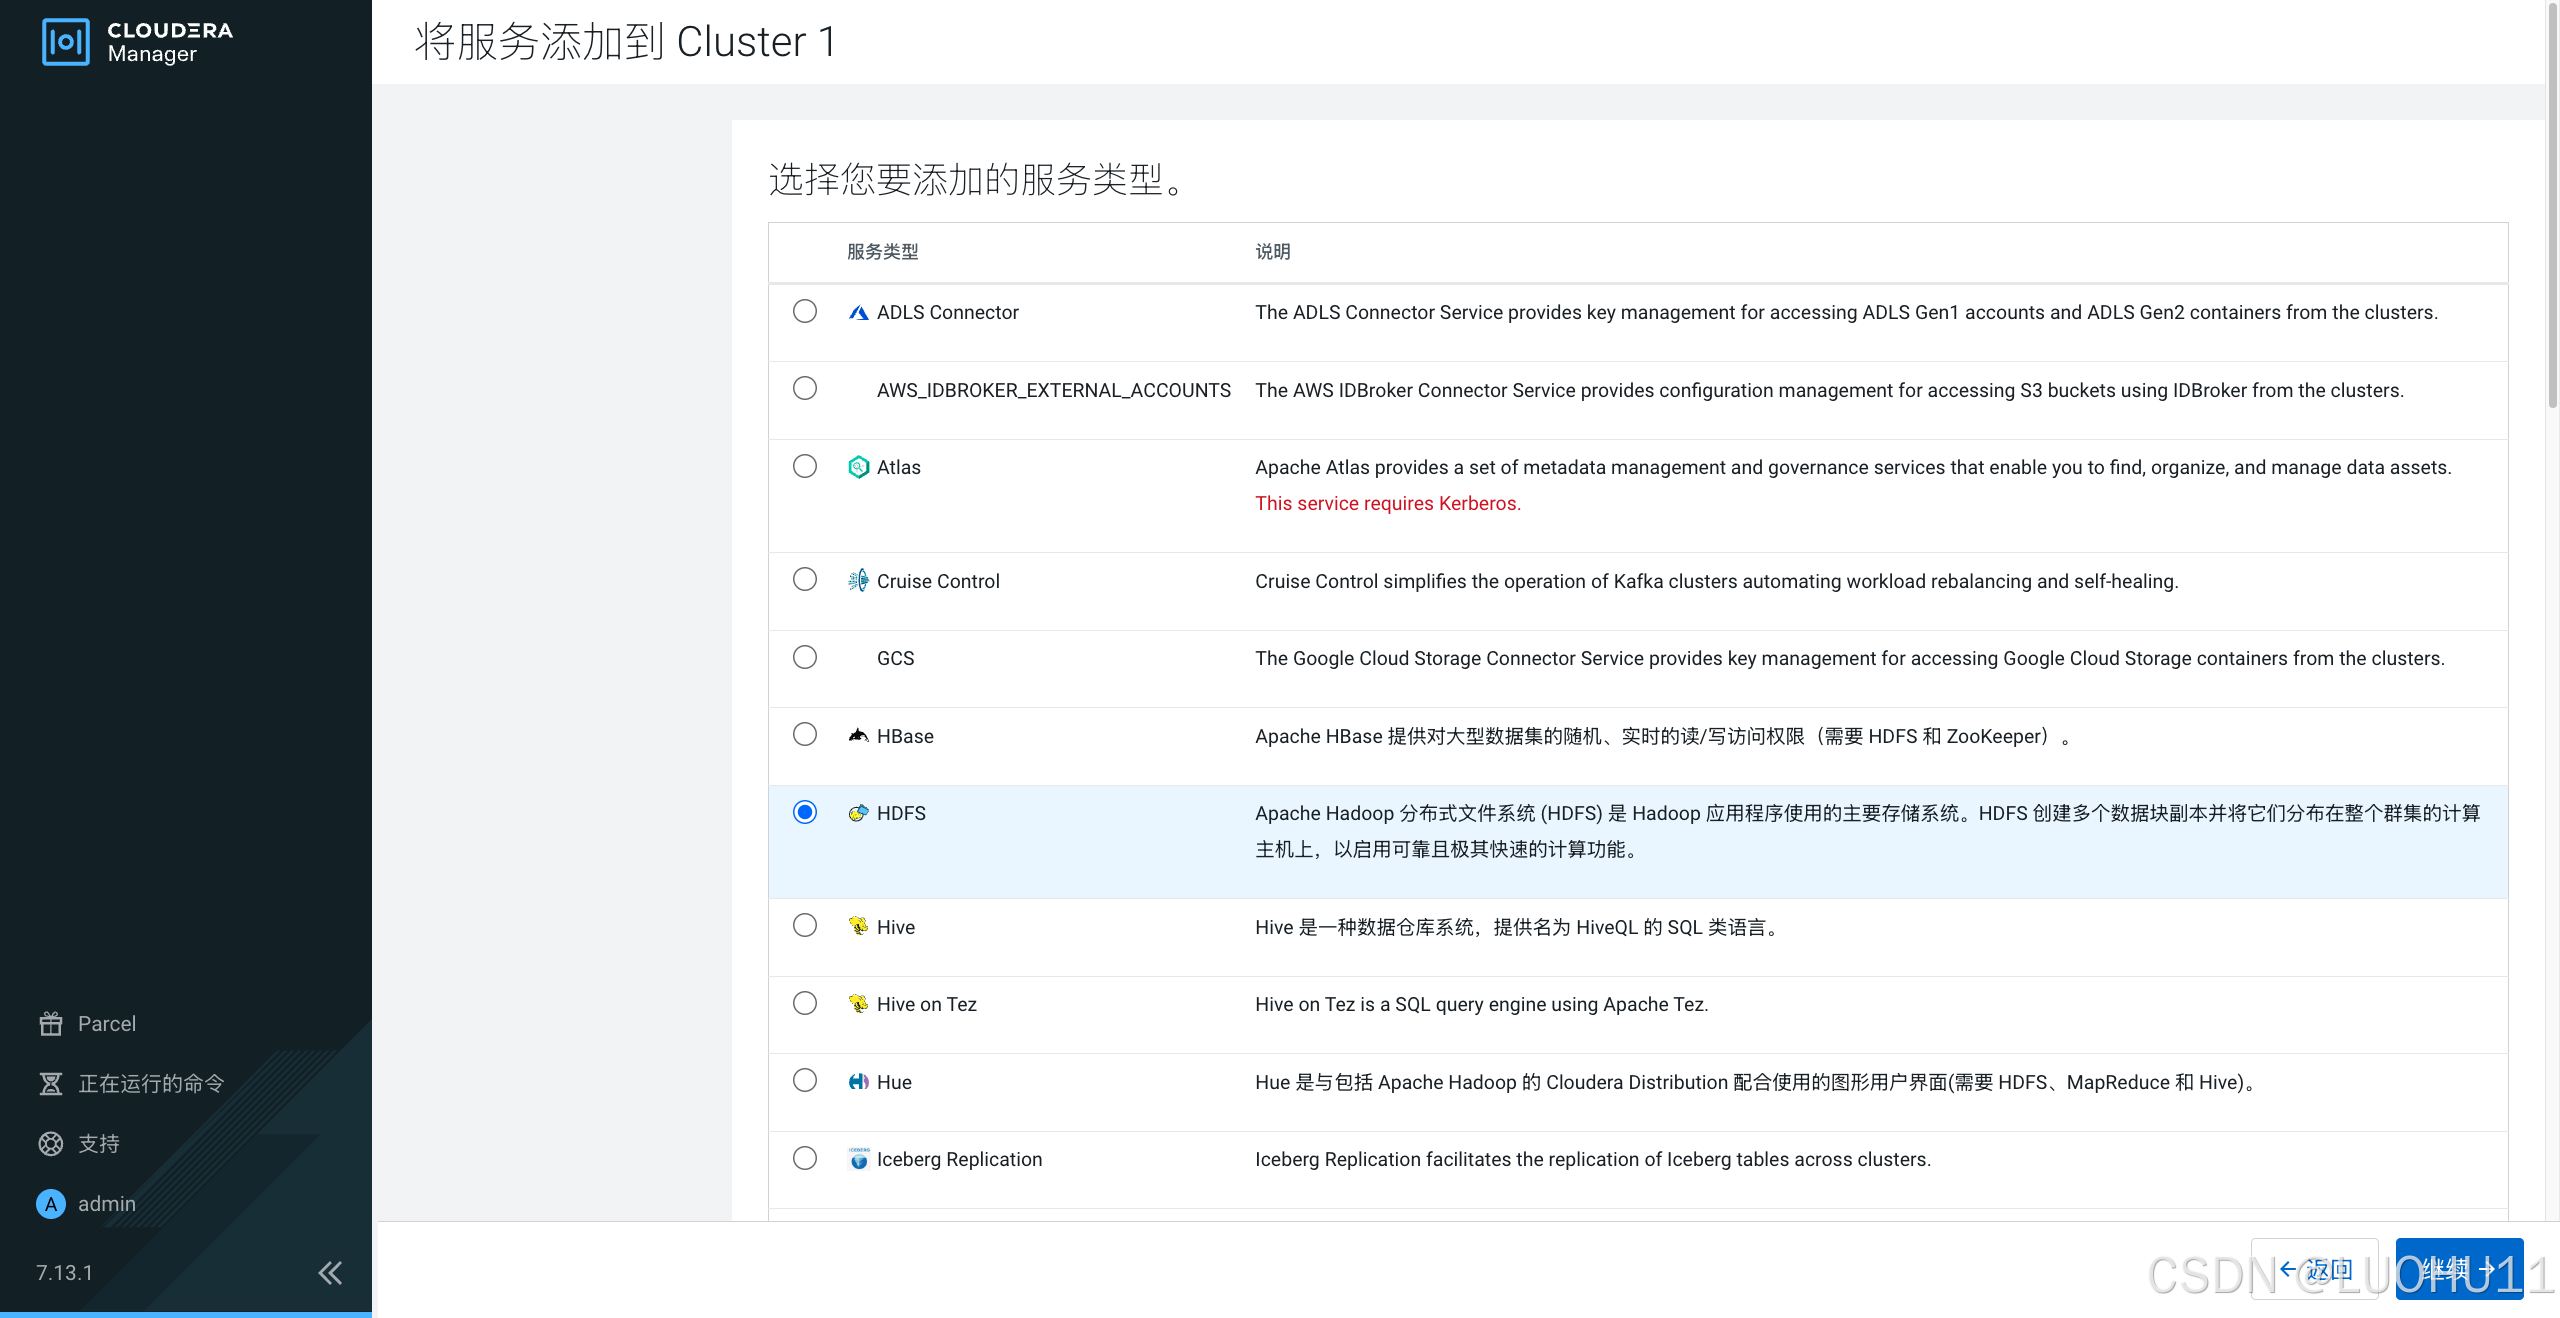
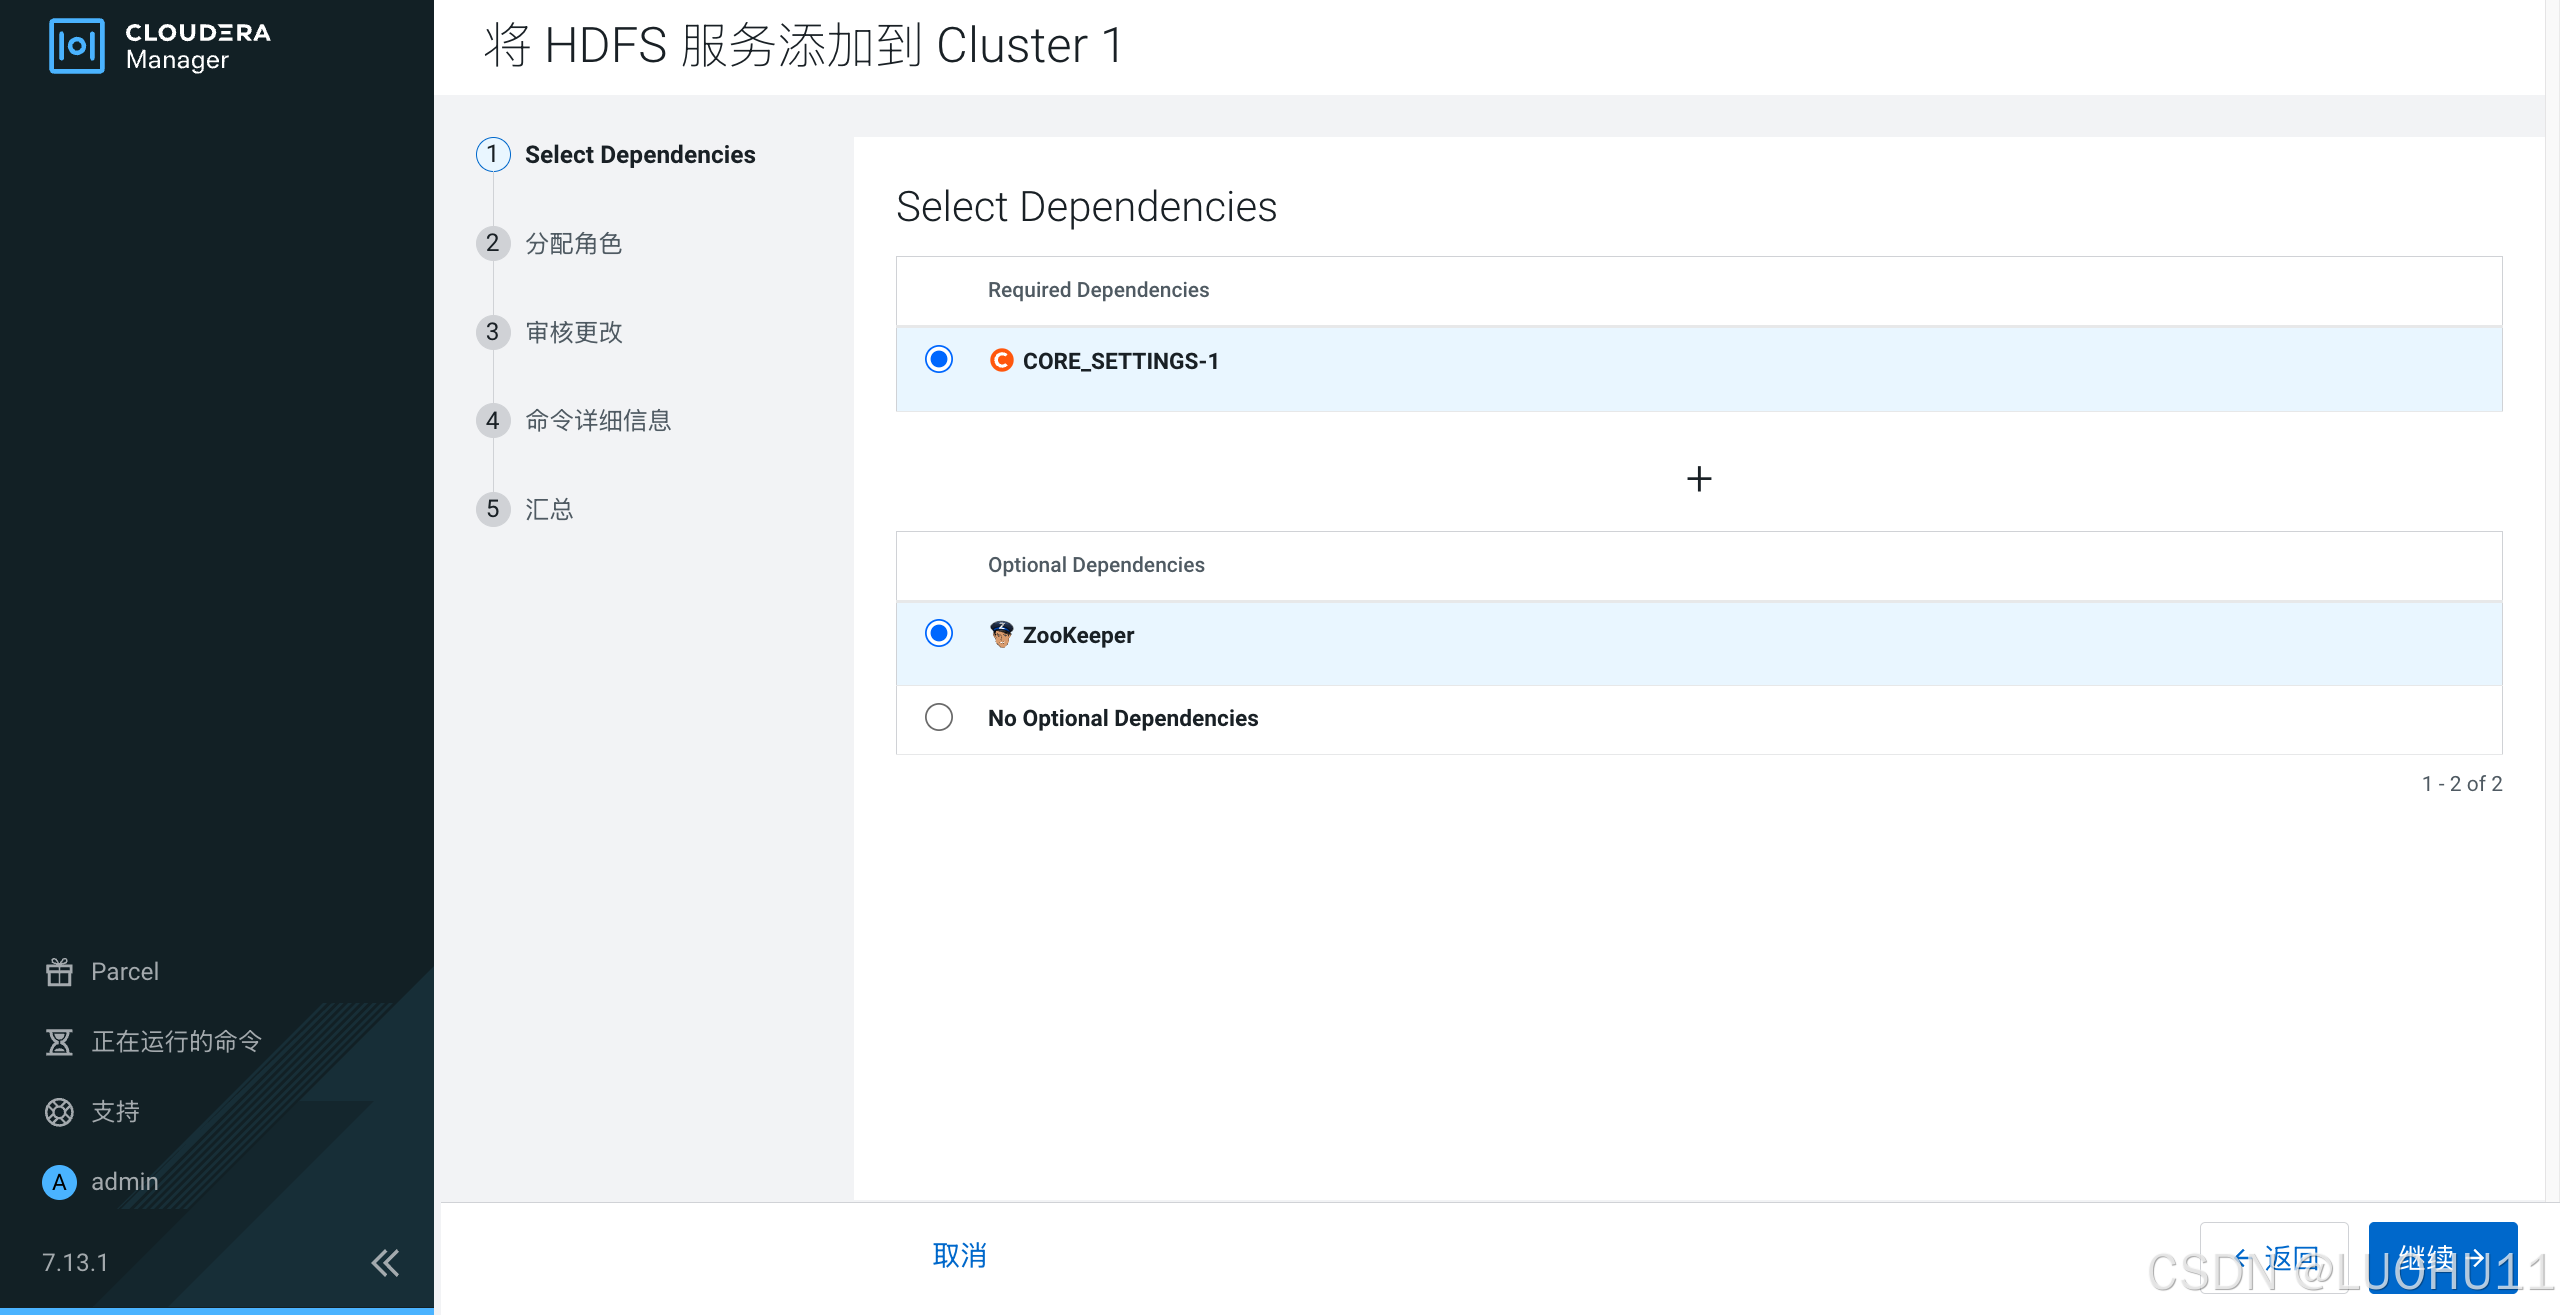
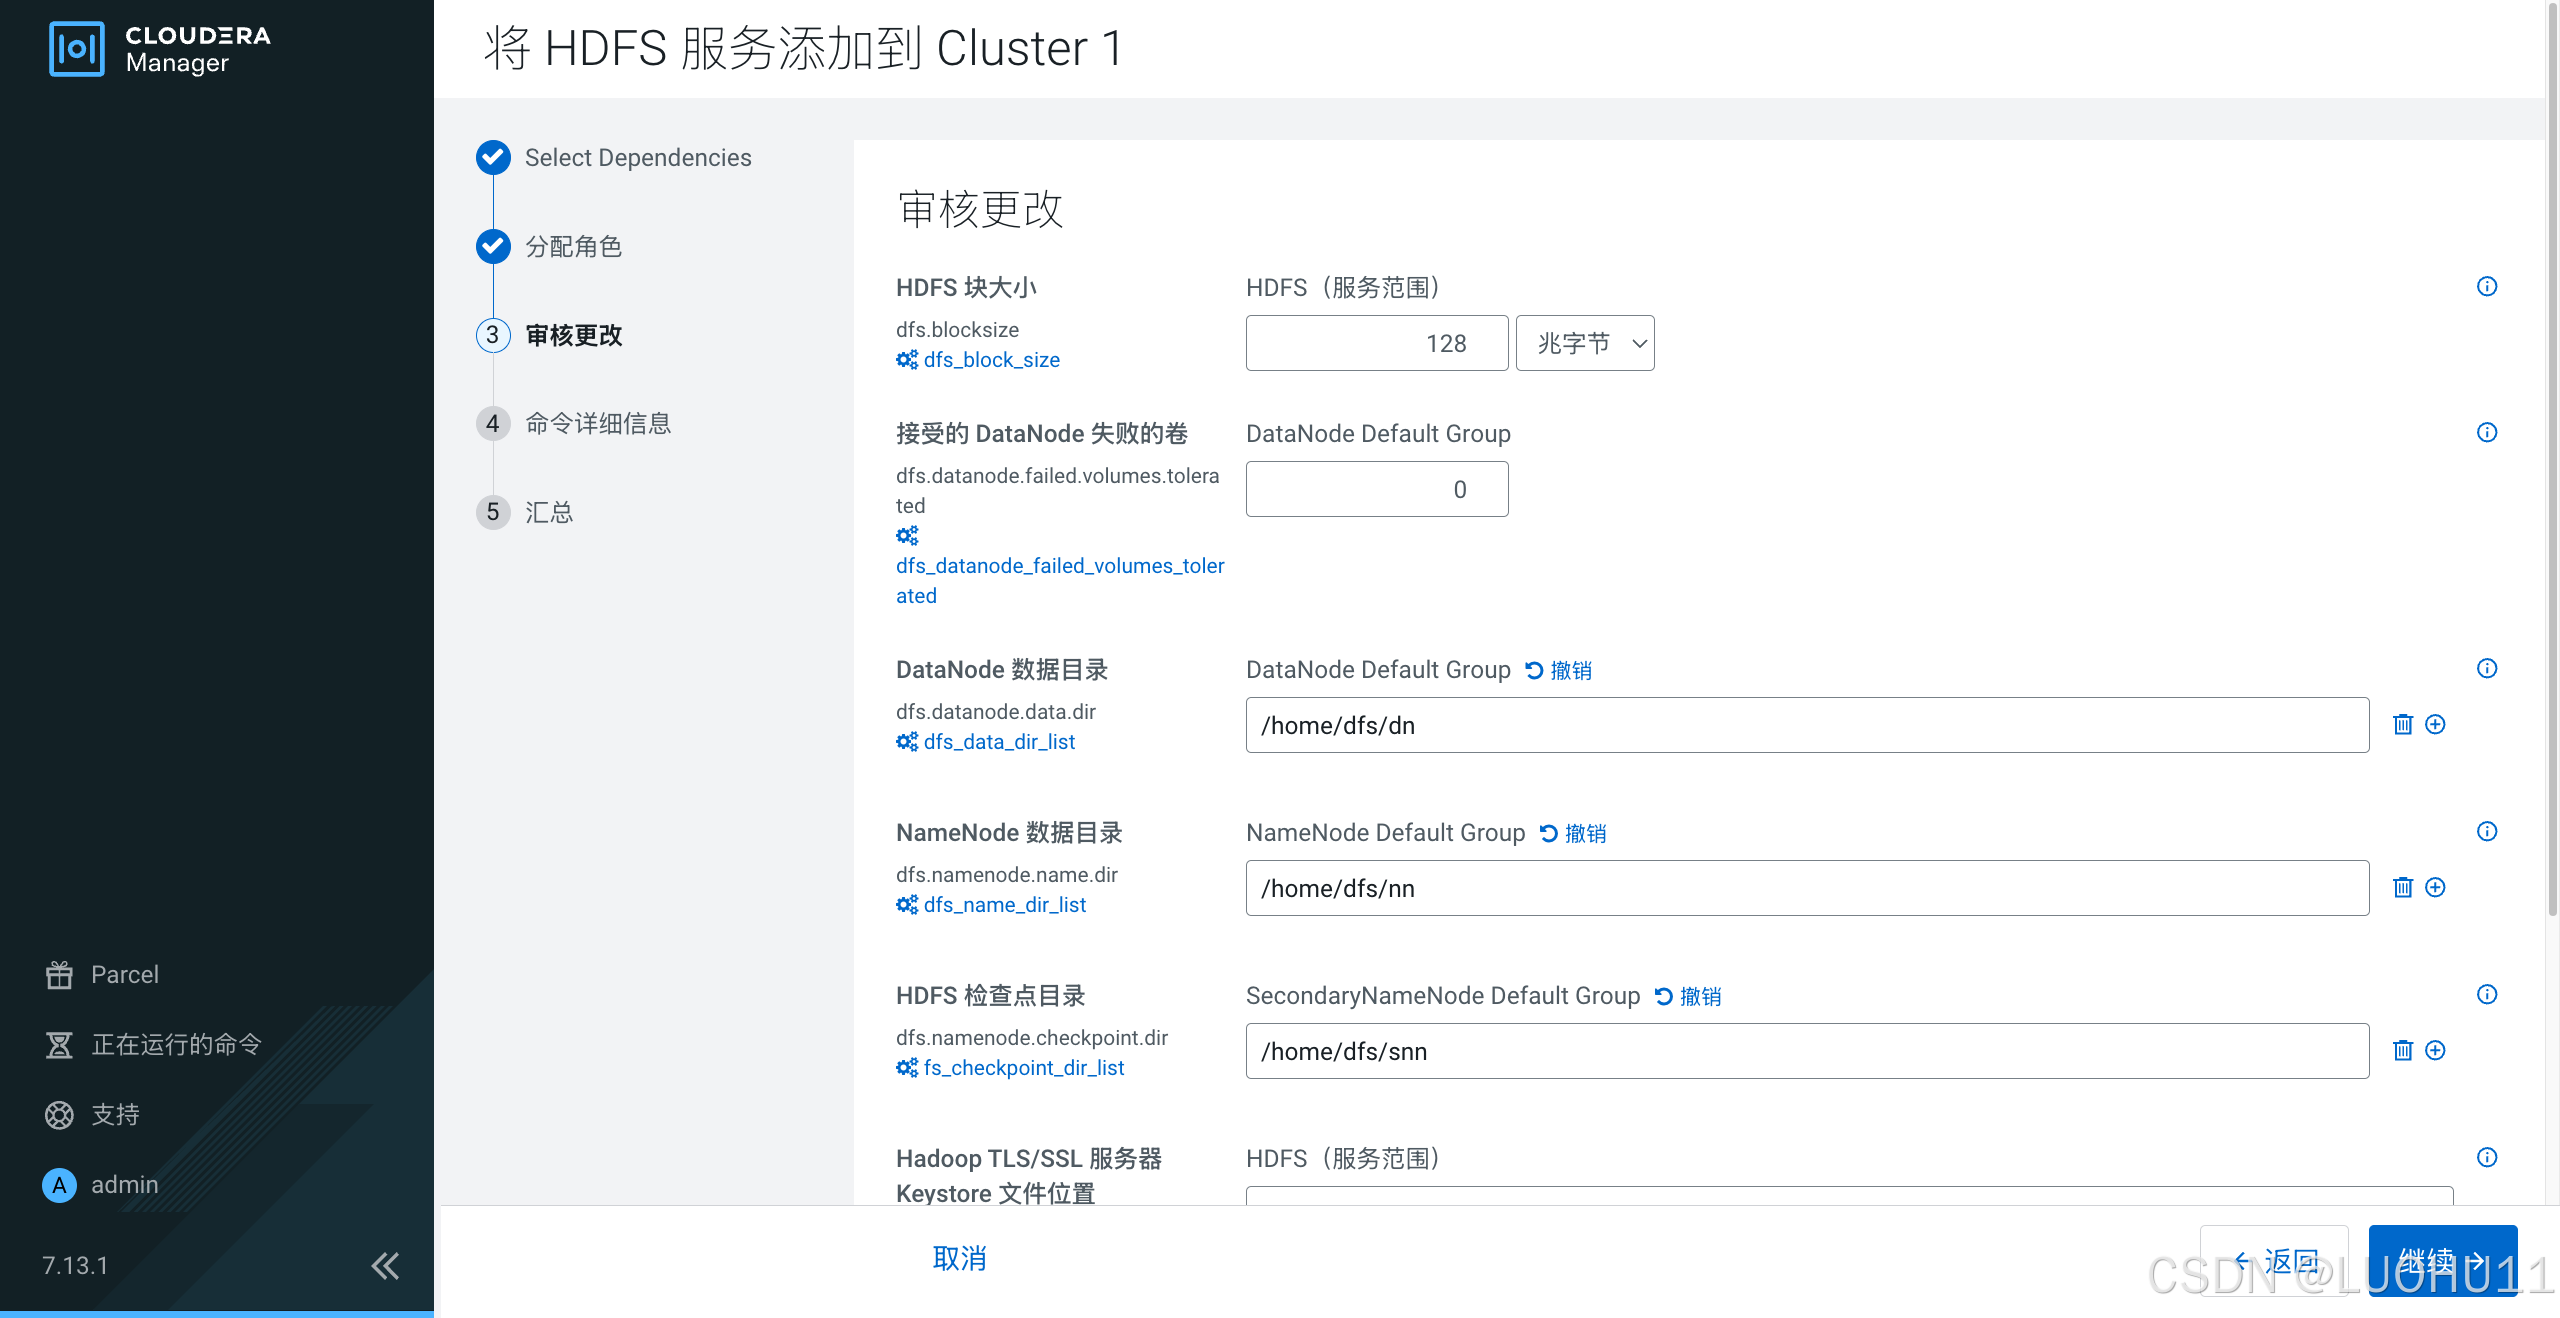
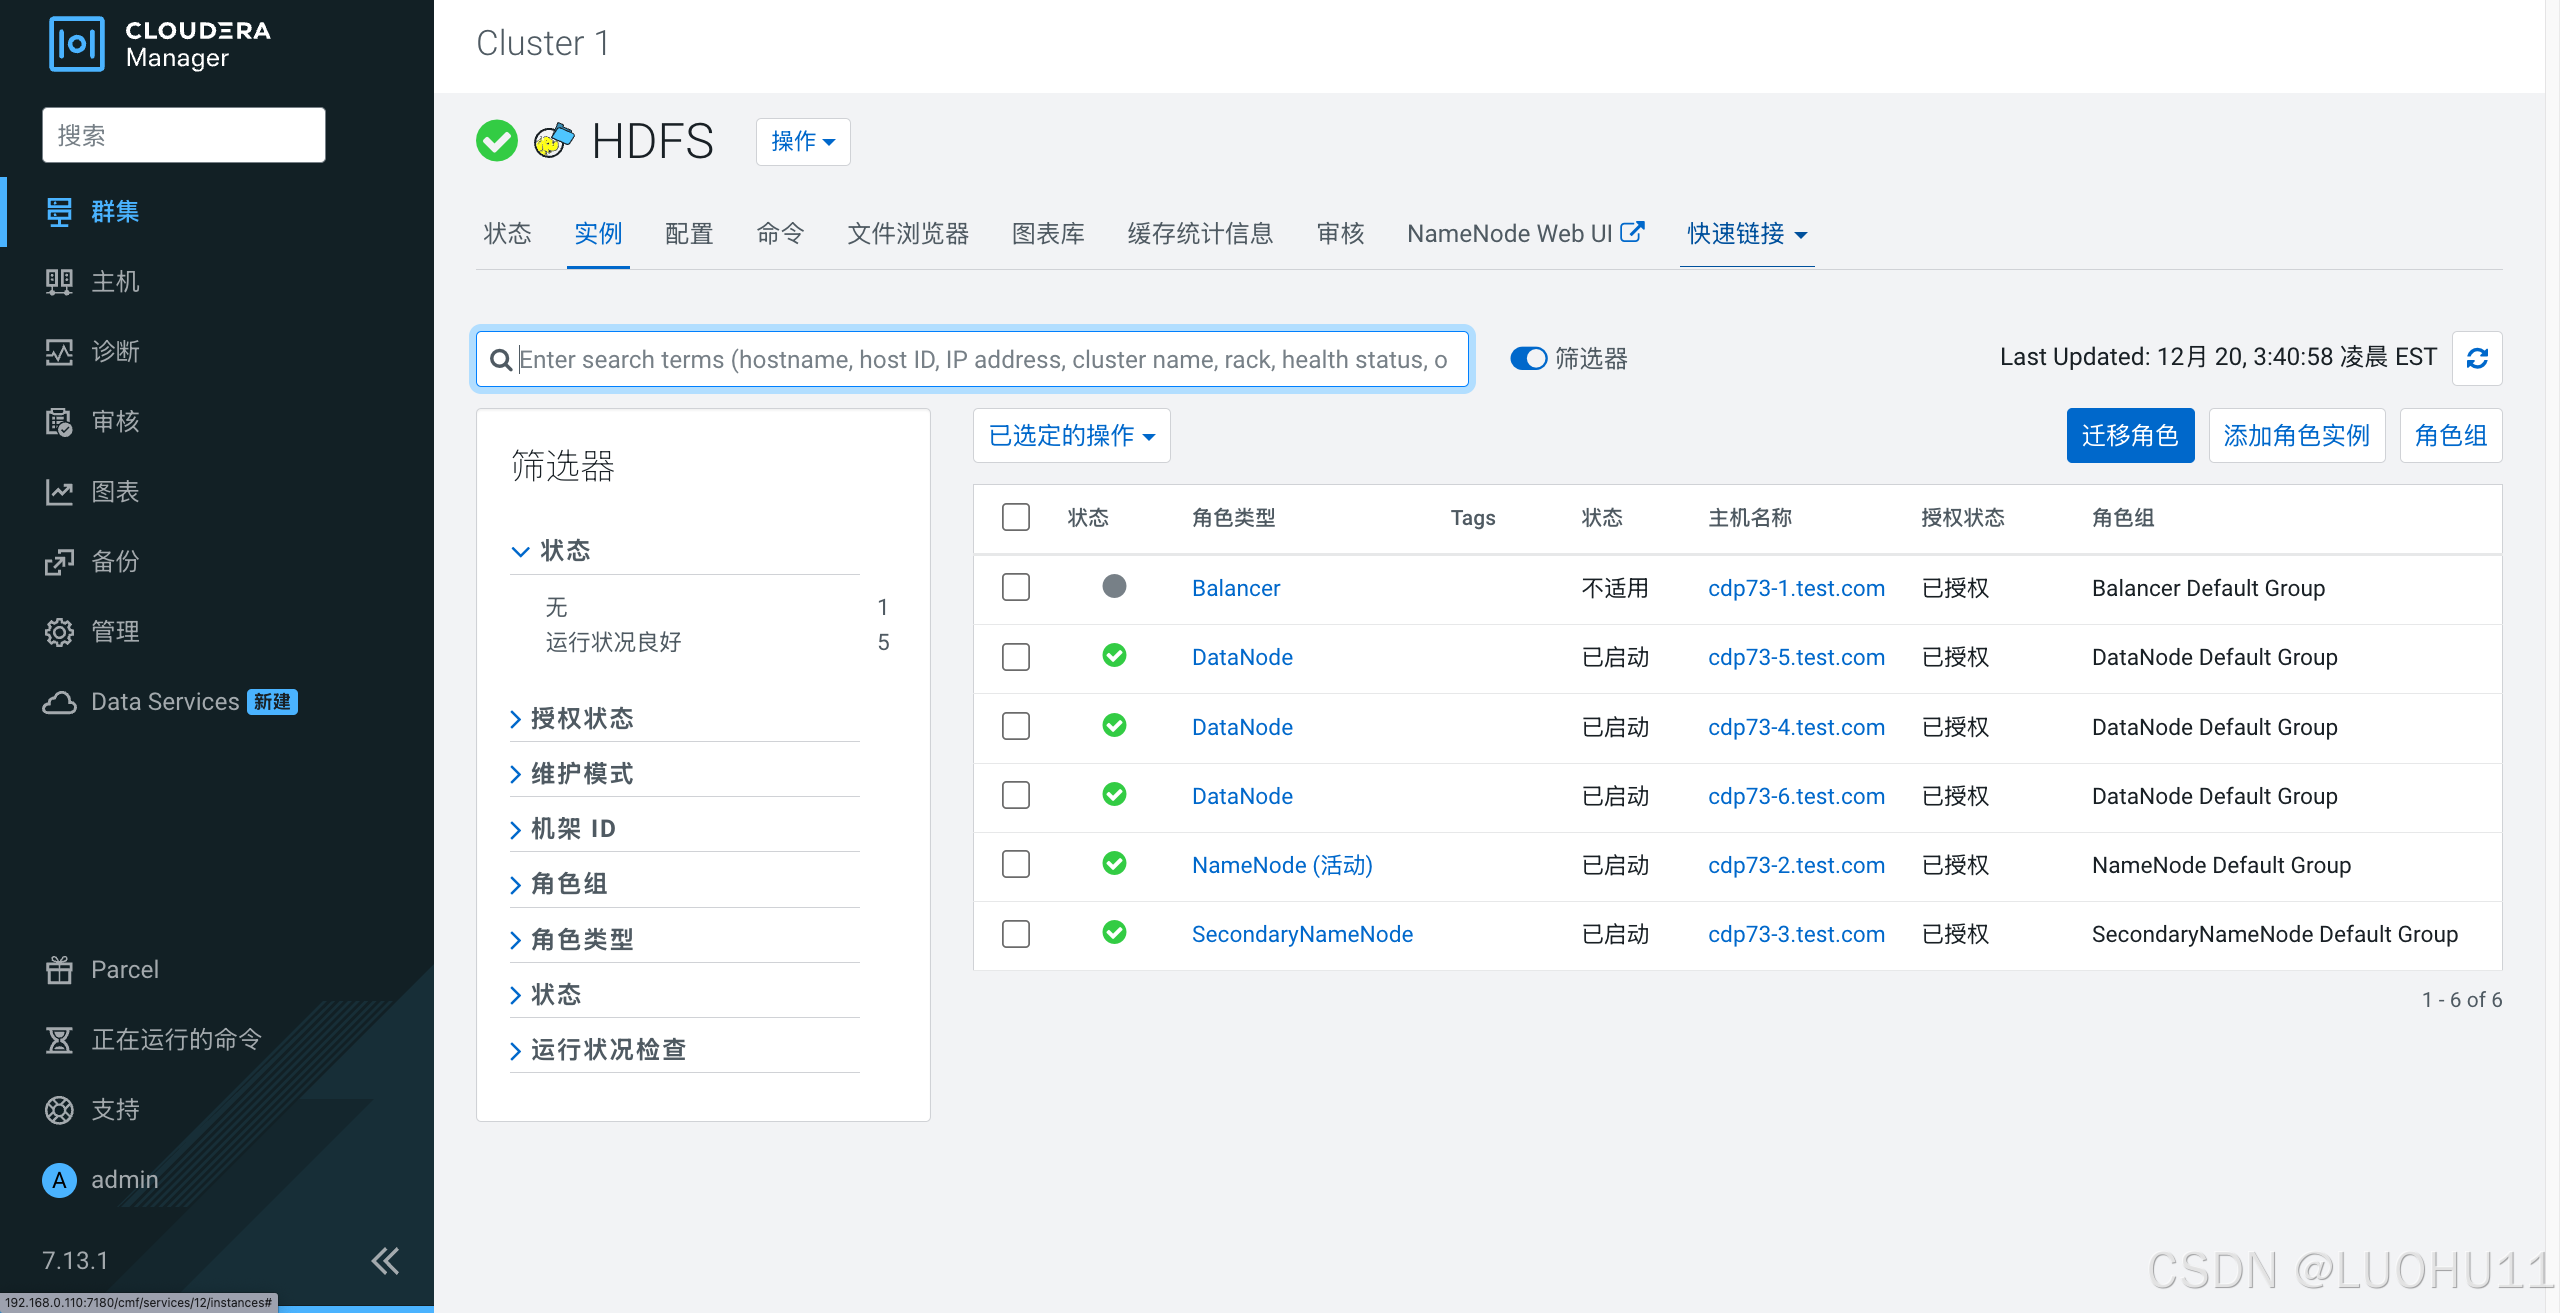
添加HDFS服务
选择依赖
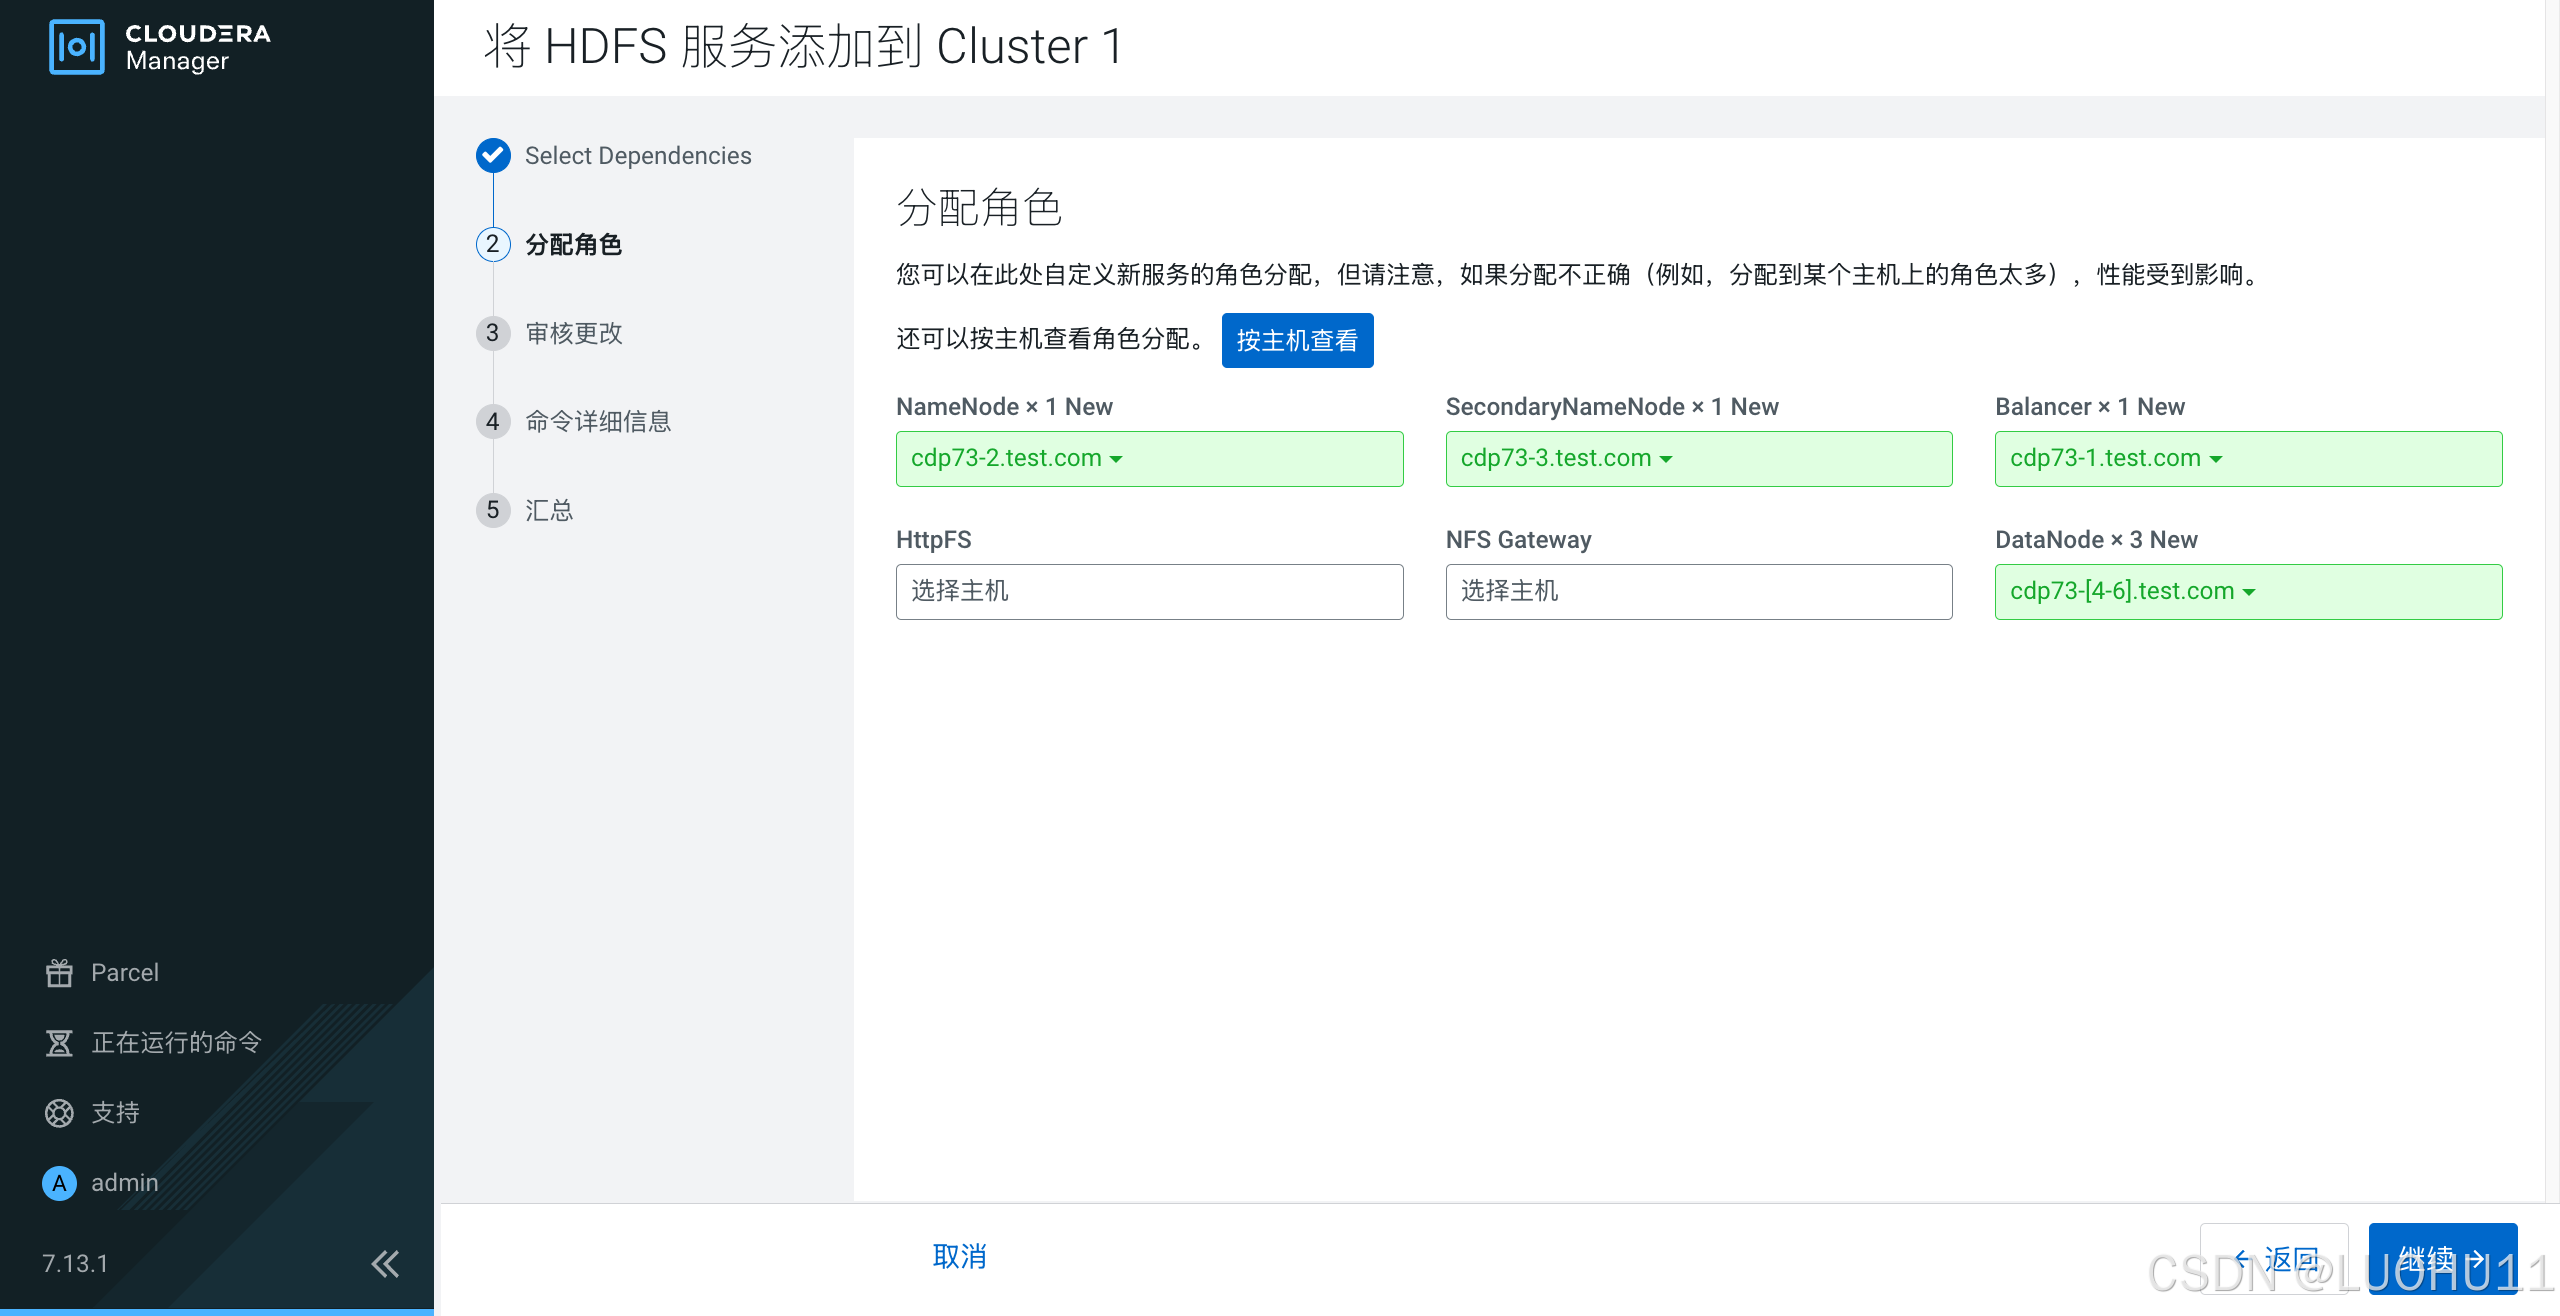
分配角色
审核更改
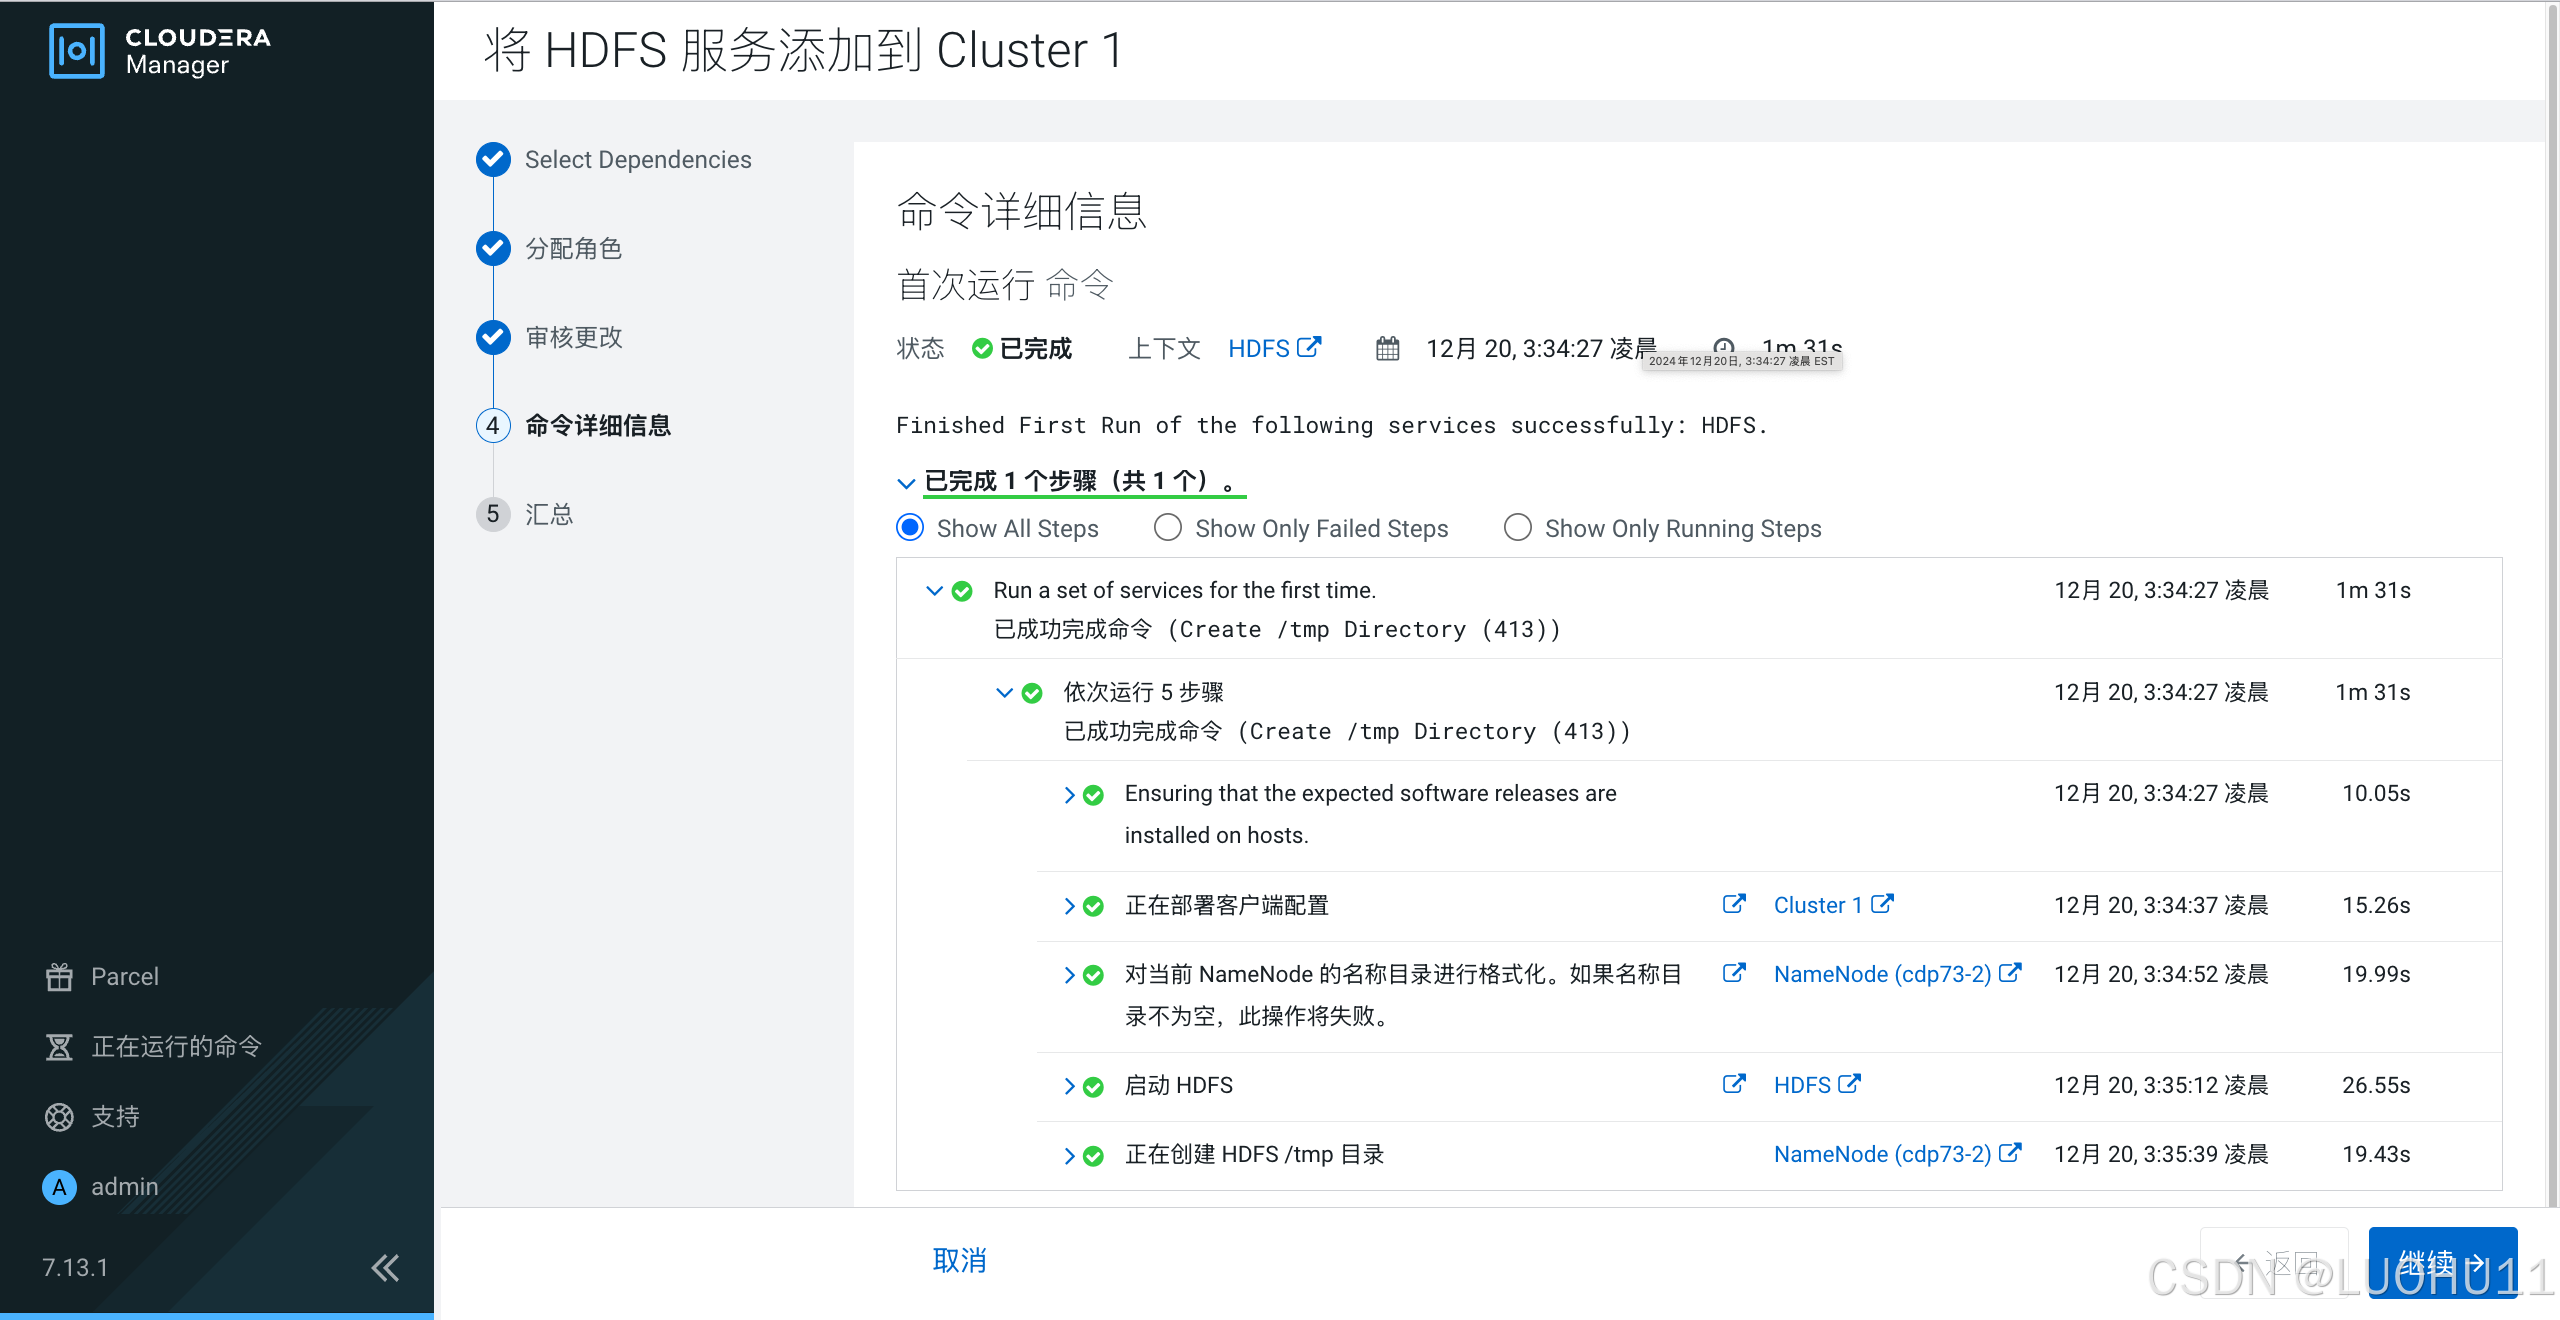
命令详细信息
汇总

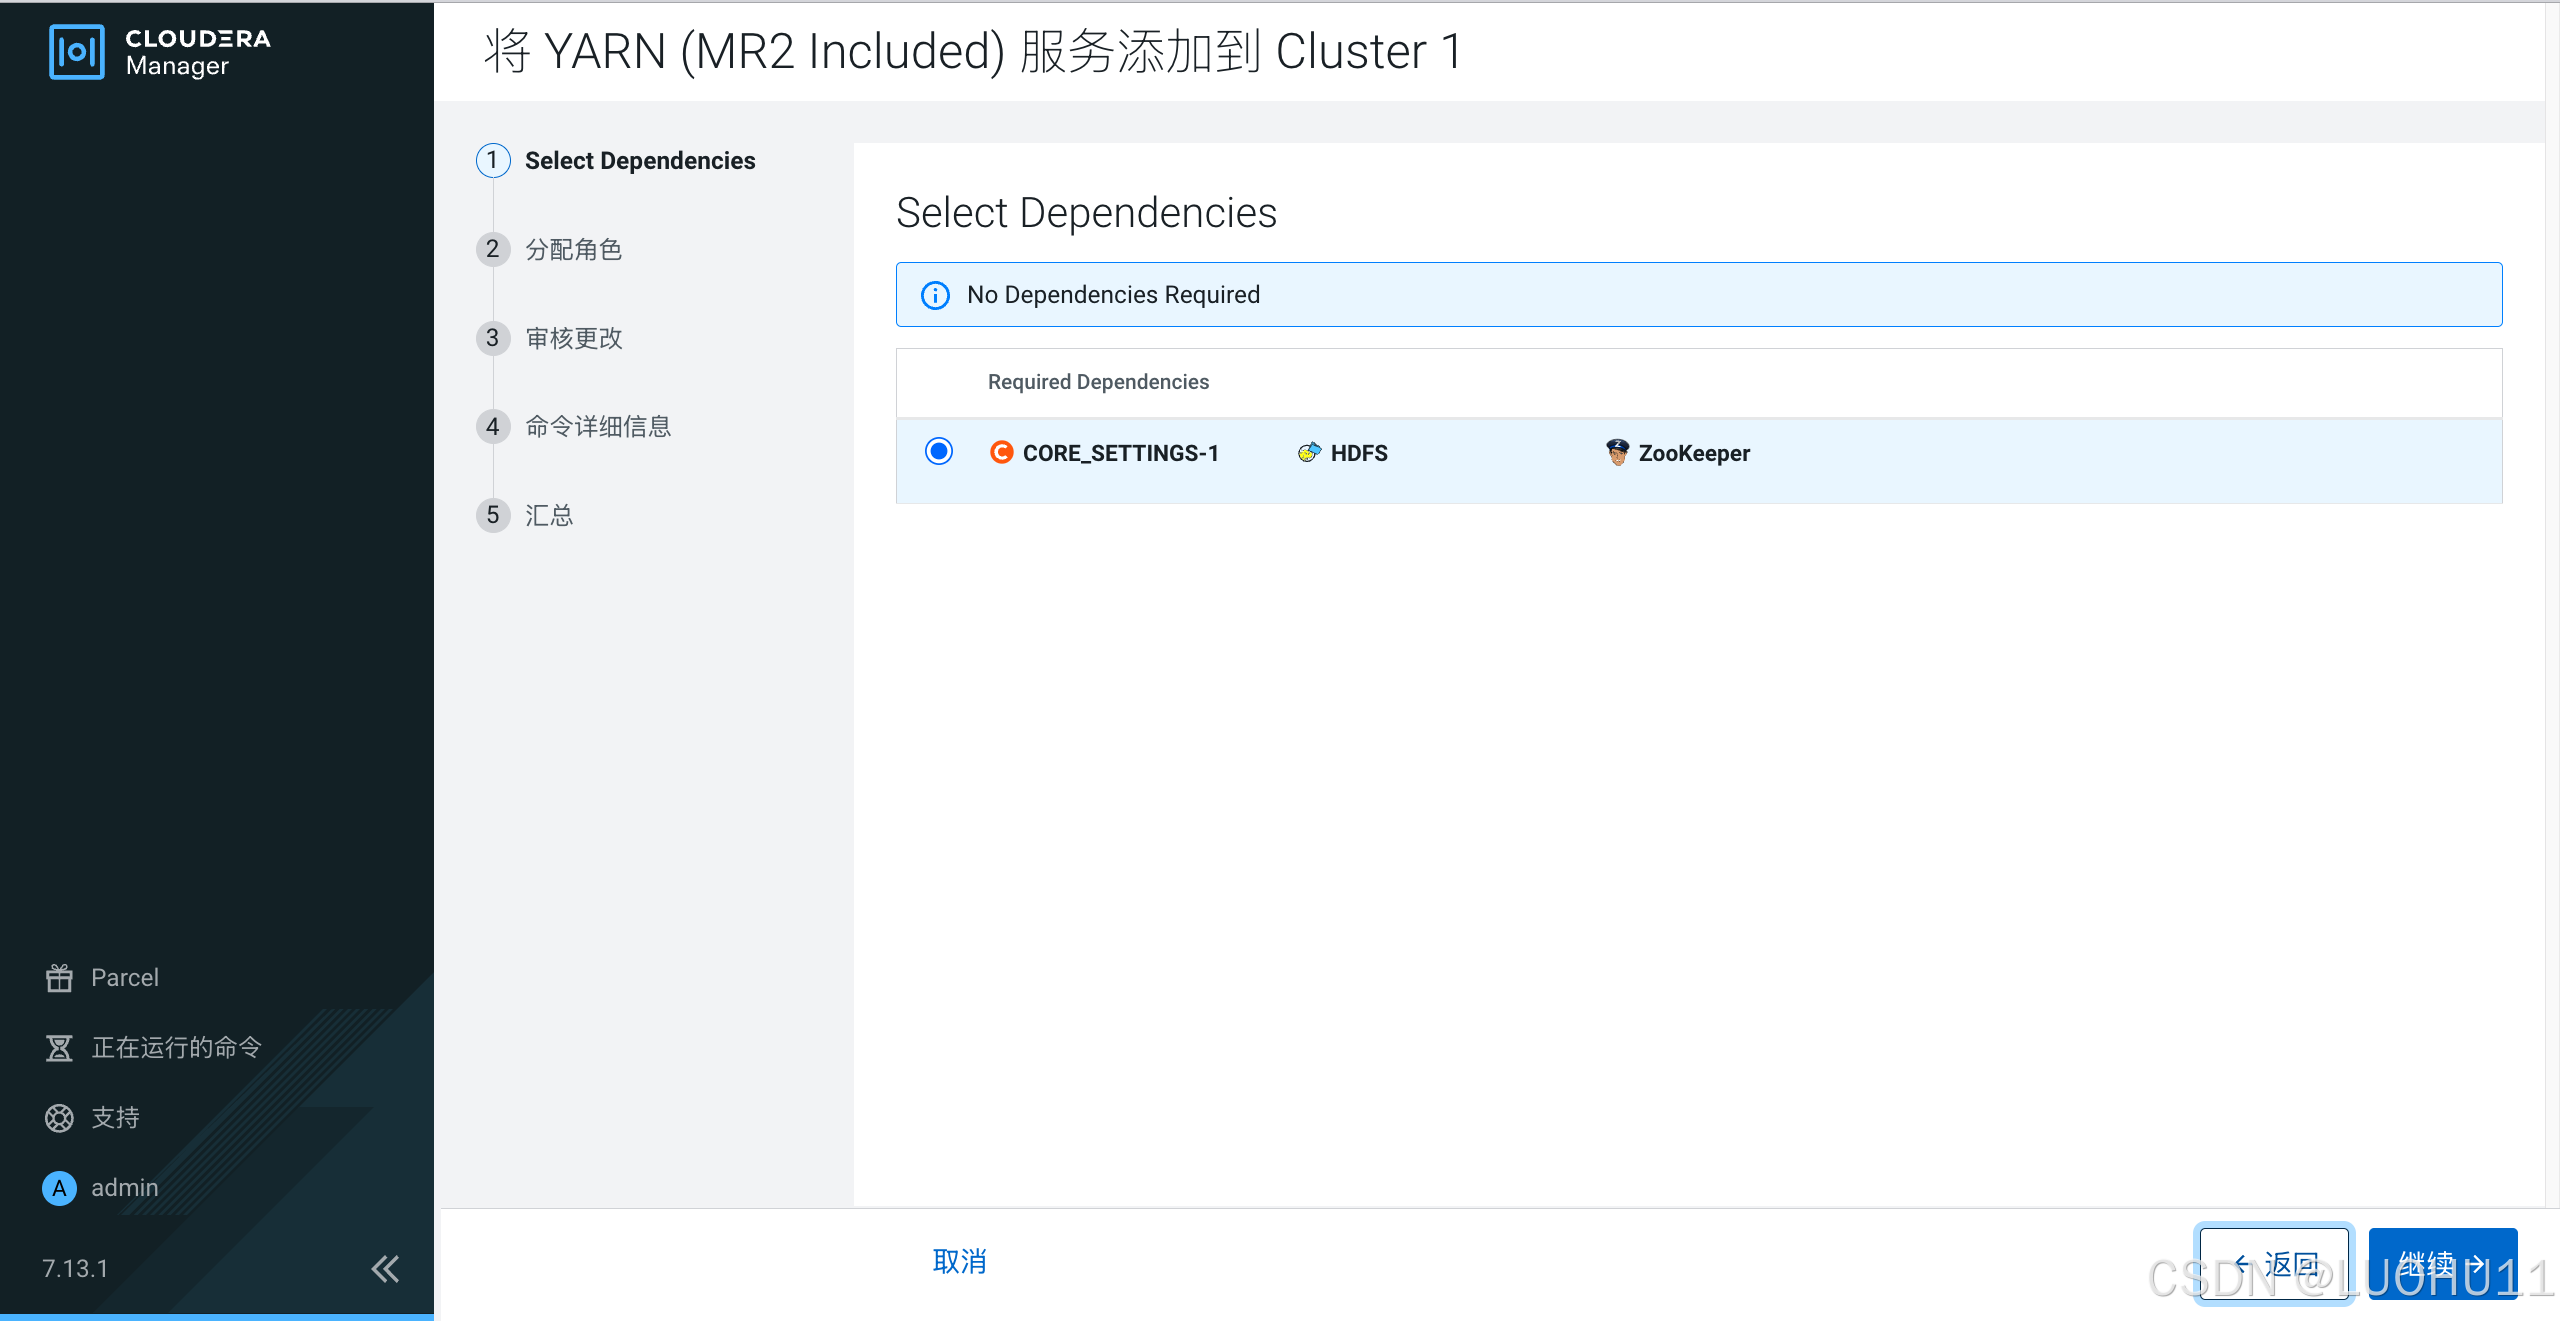
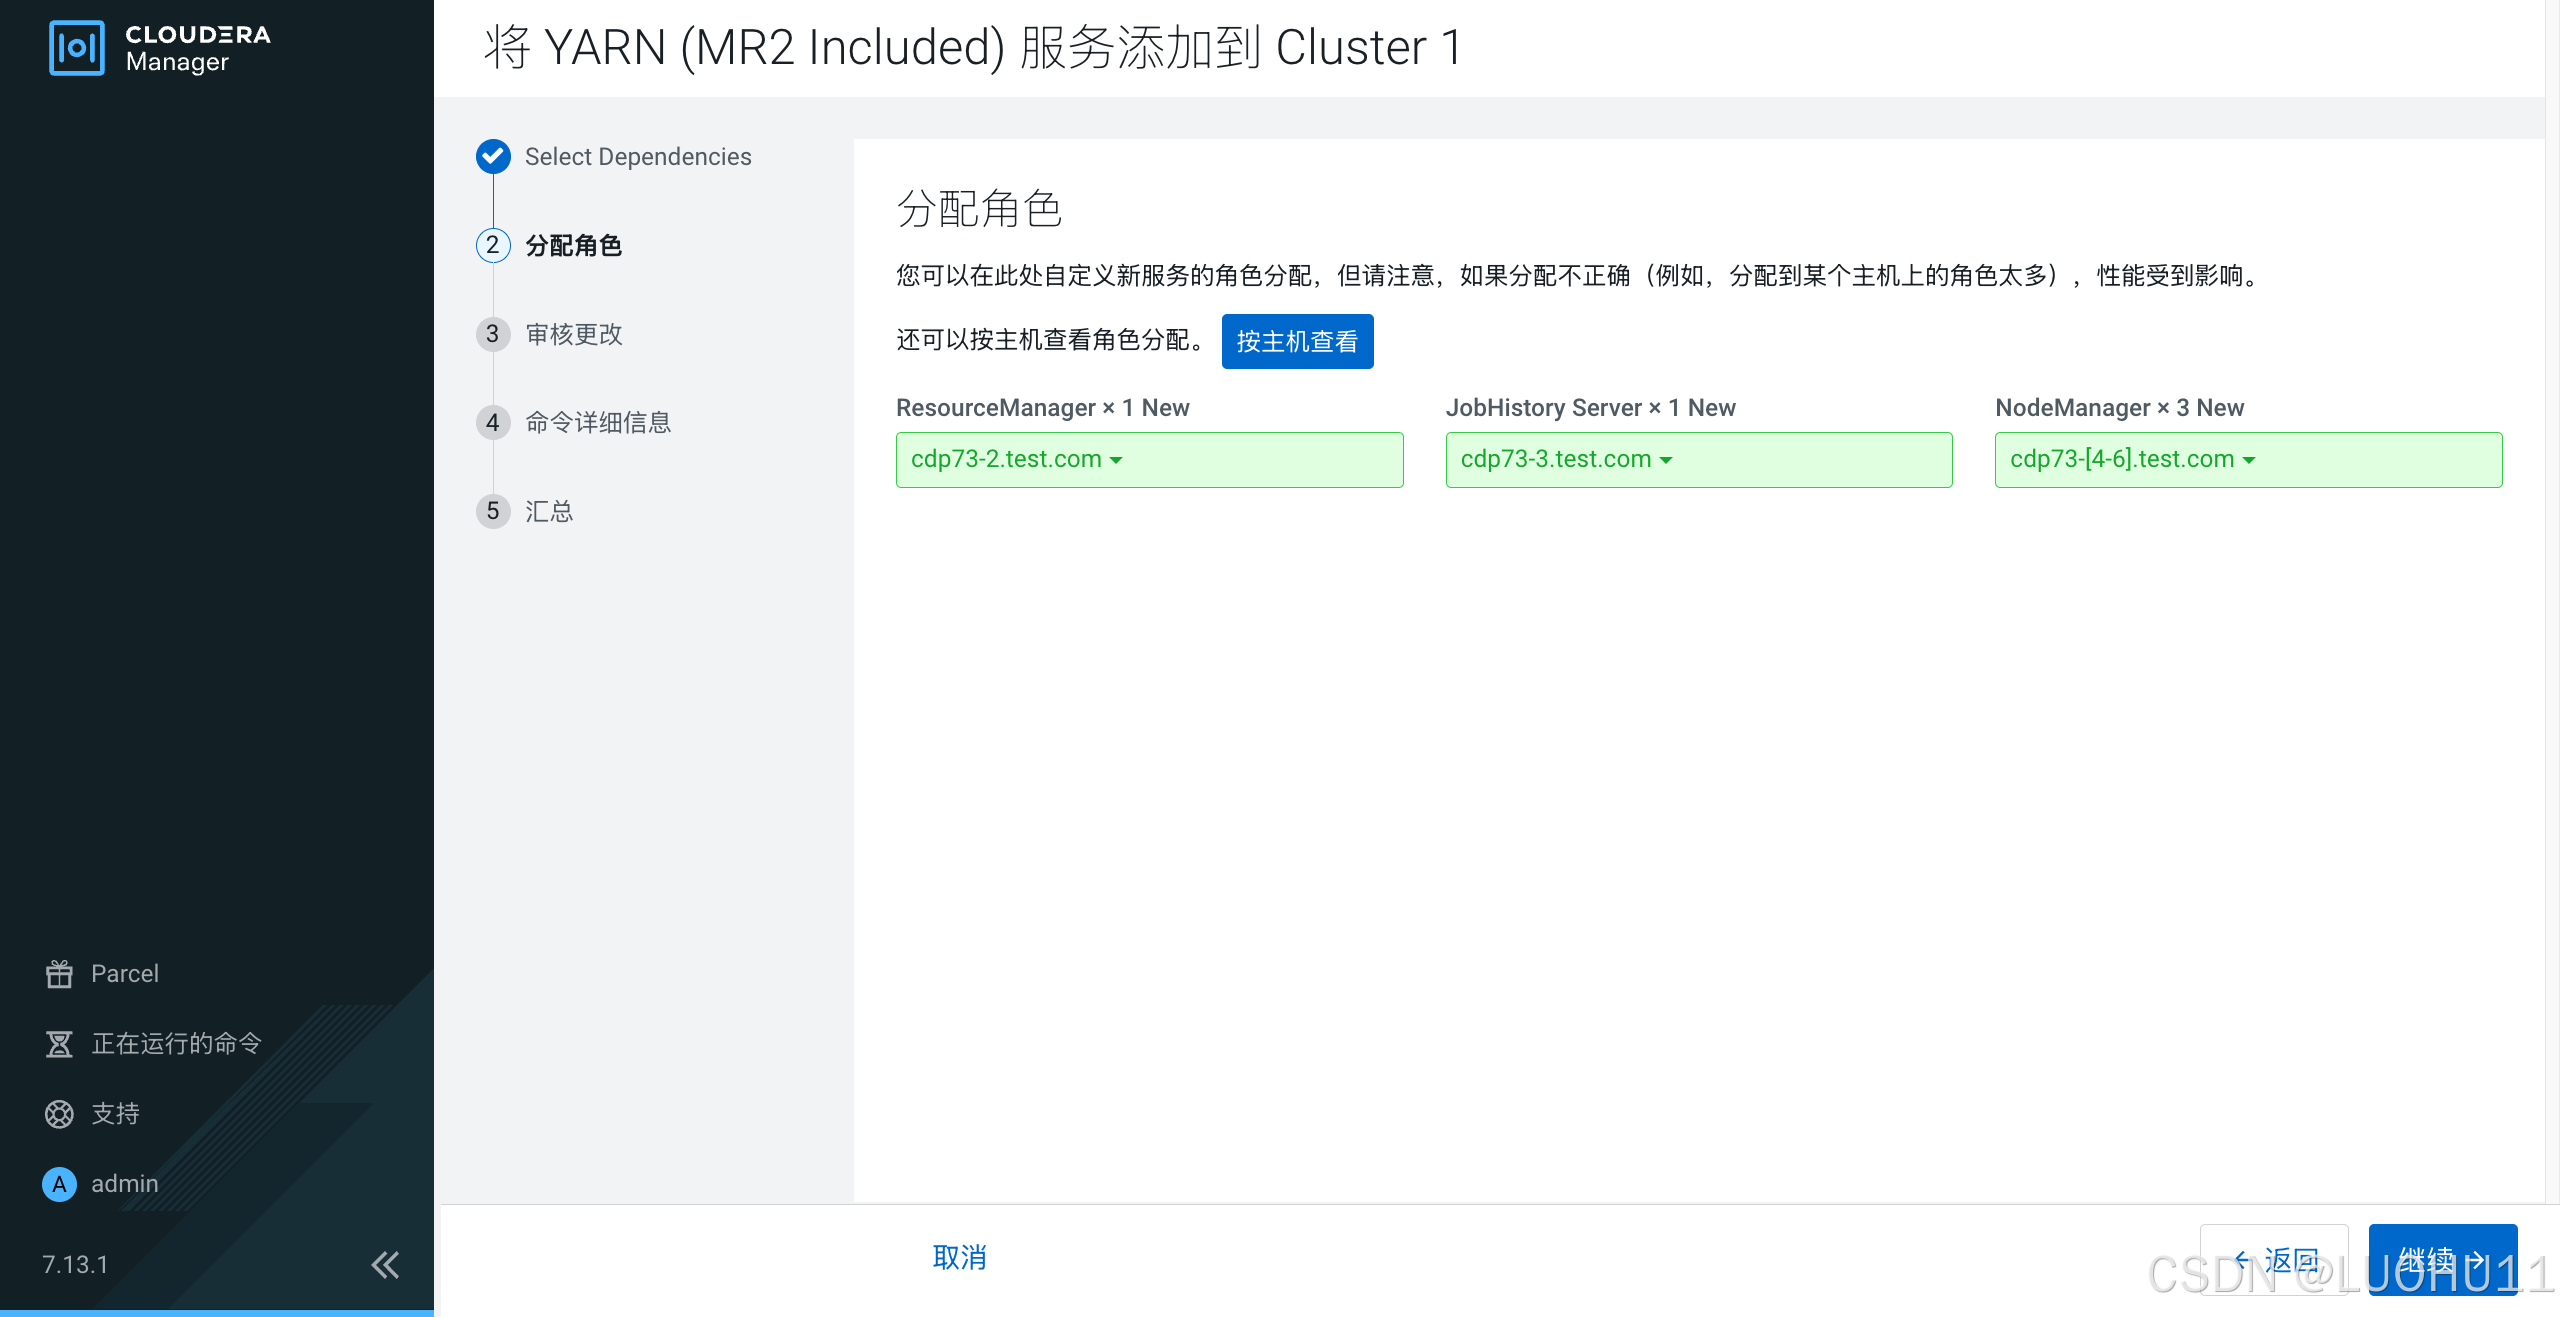
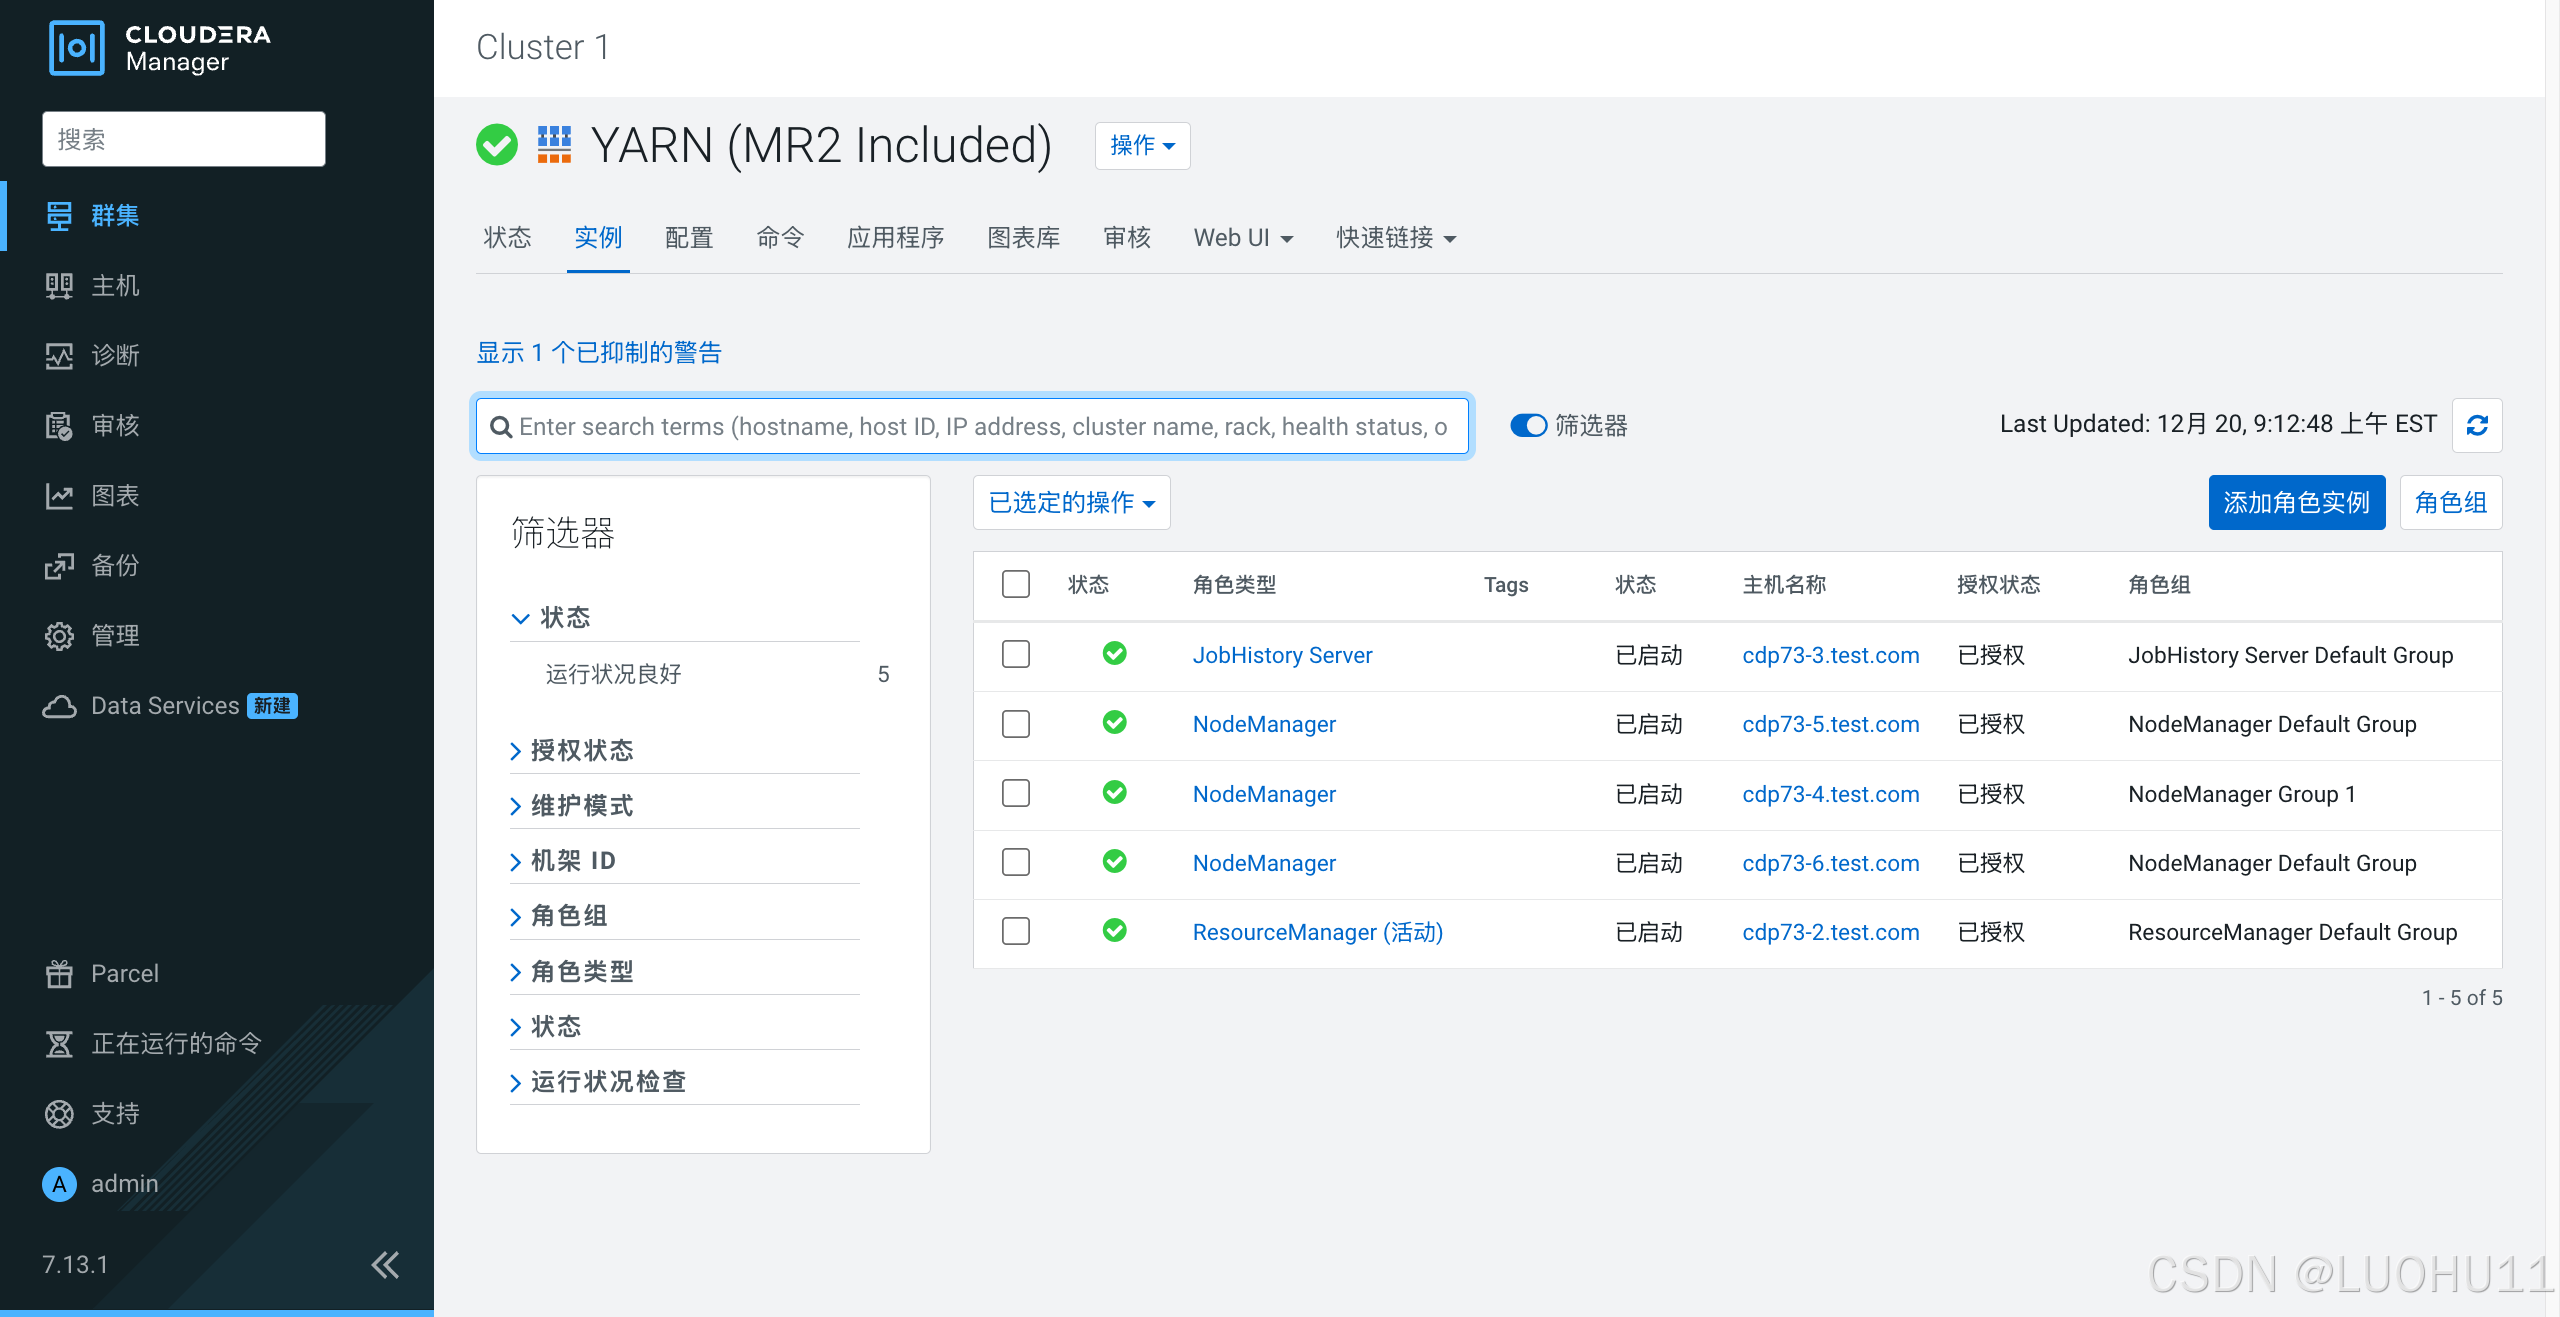
添加Yarn服务

选择依赖
分配角色
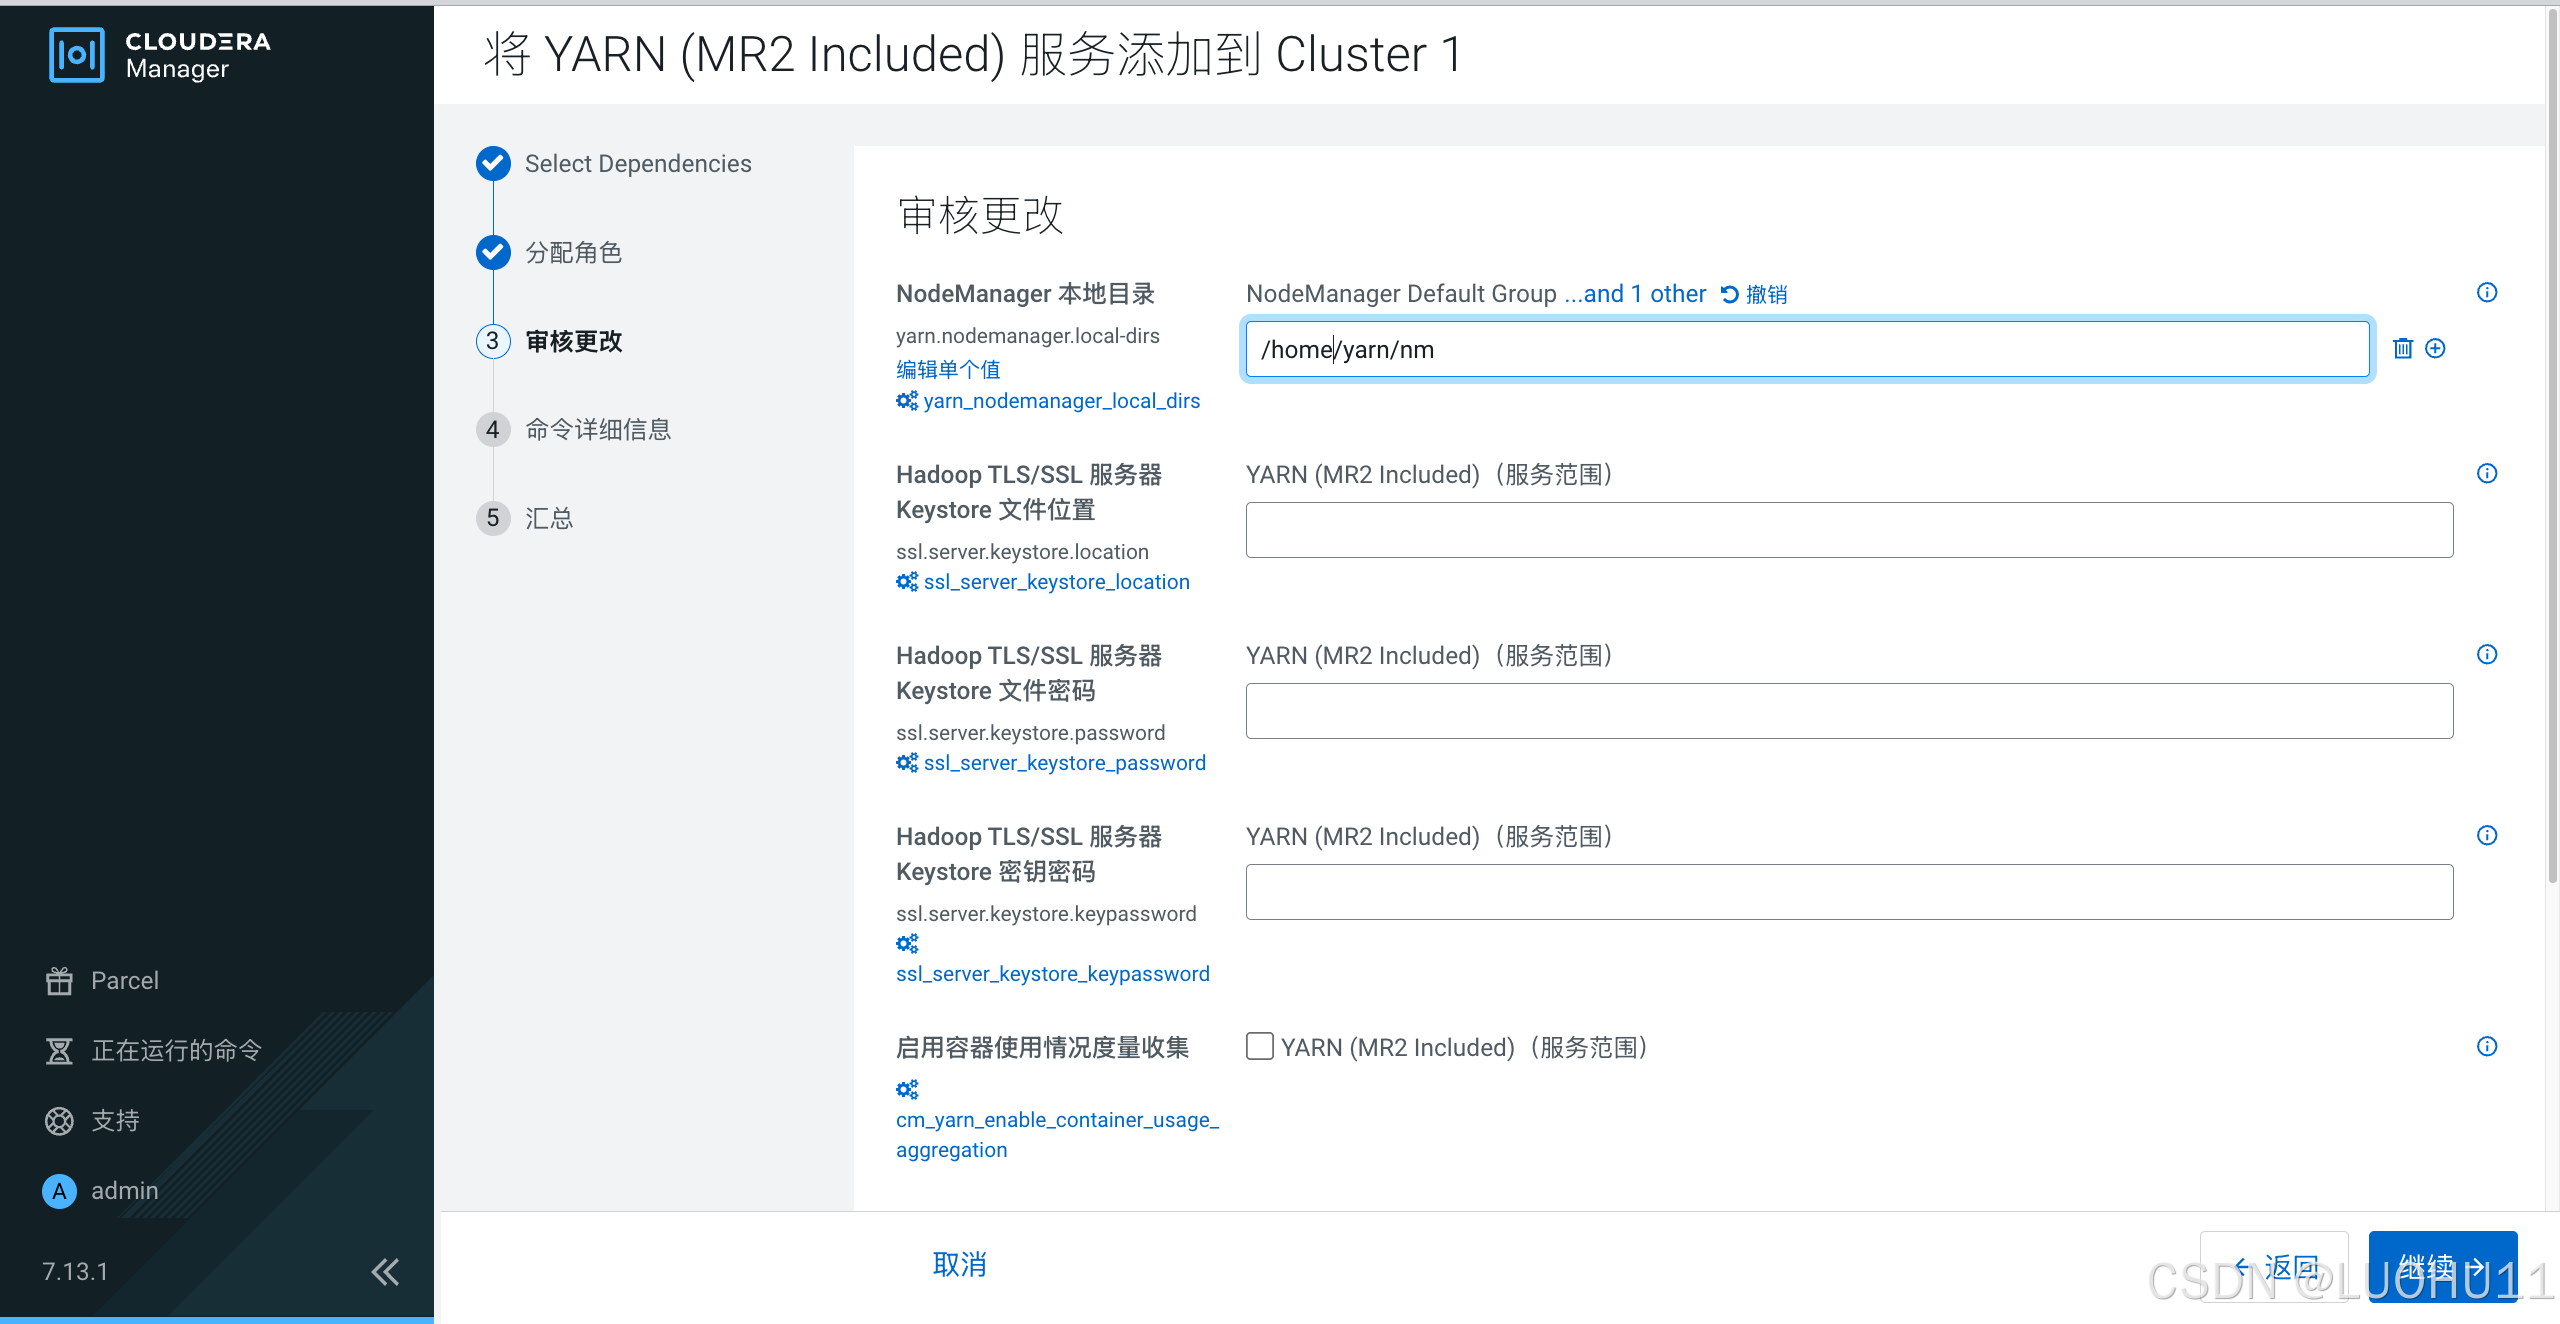
审核更改
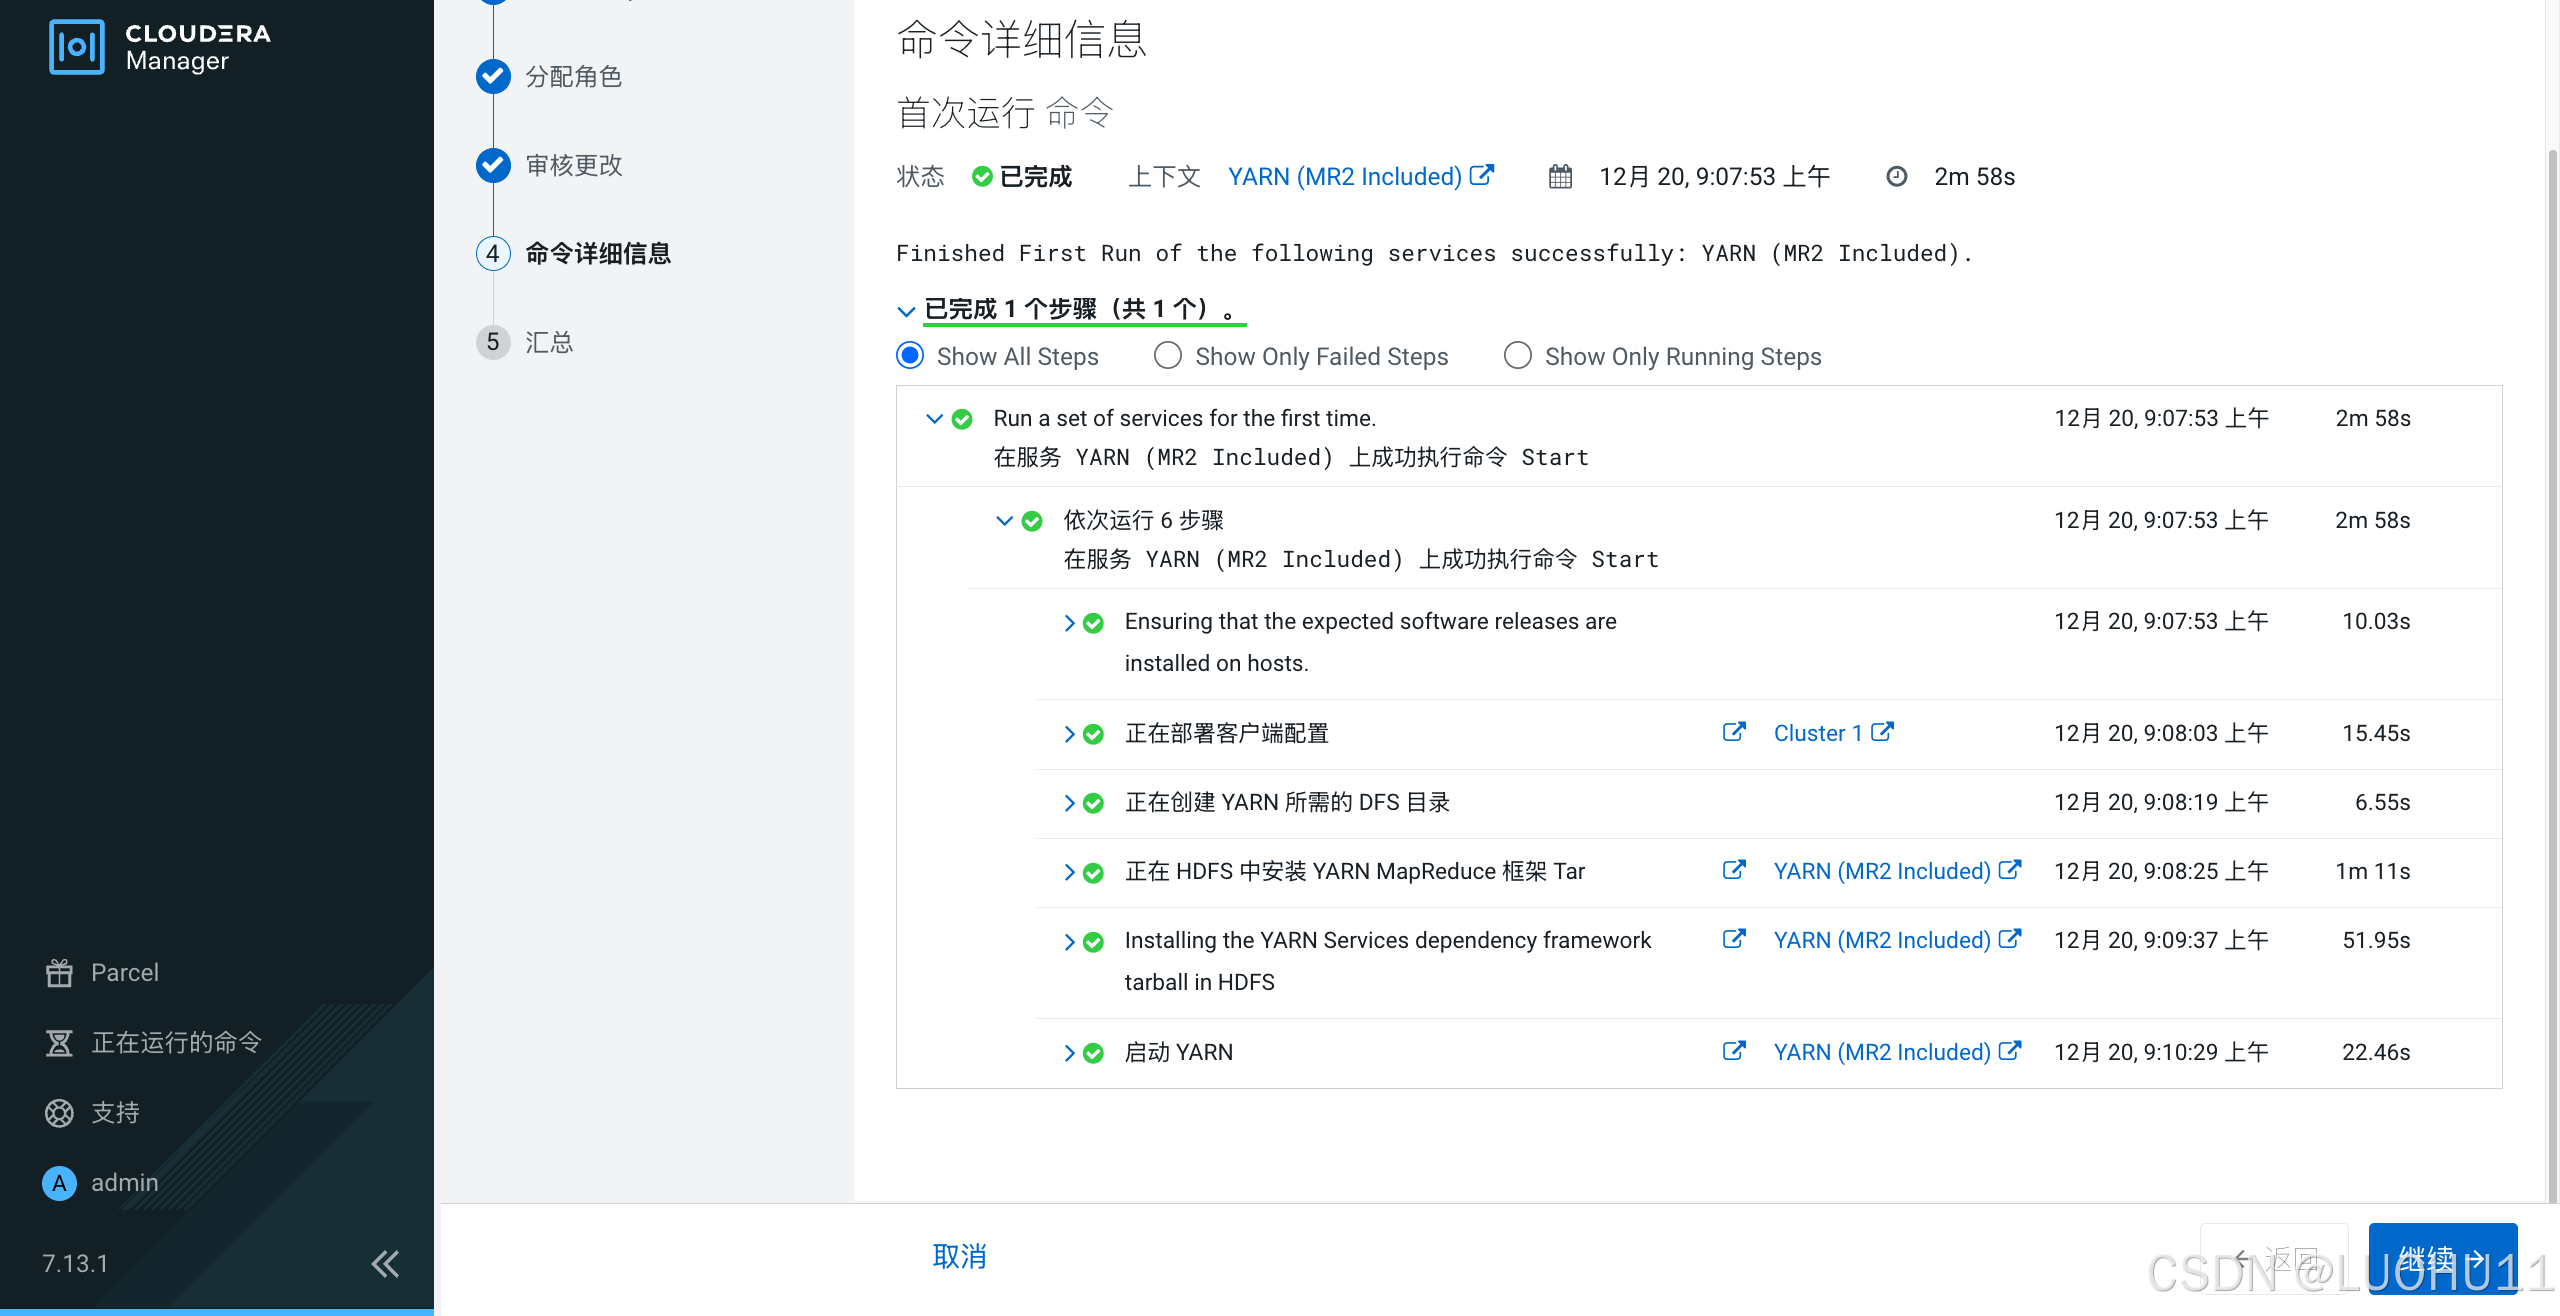
命令详细信息
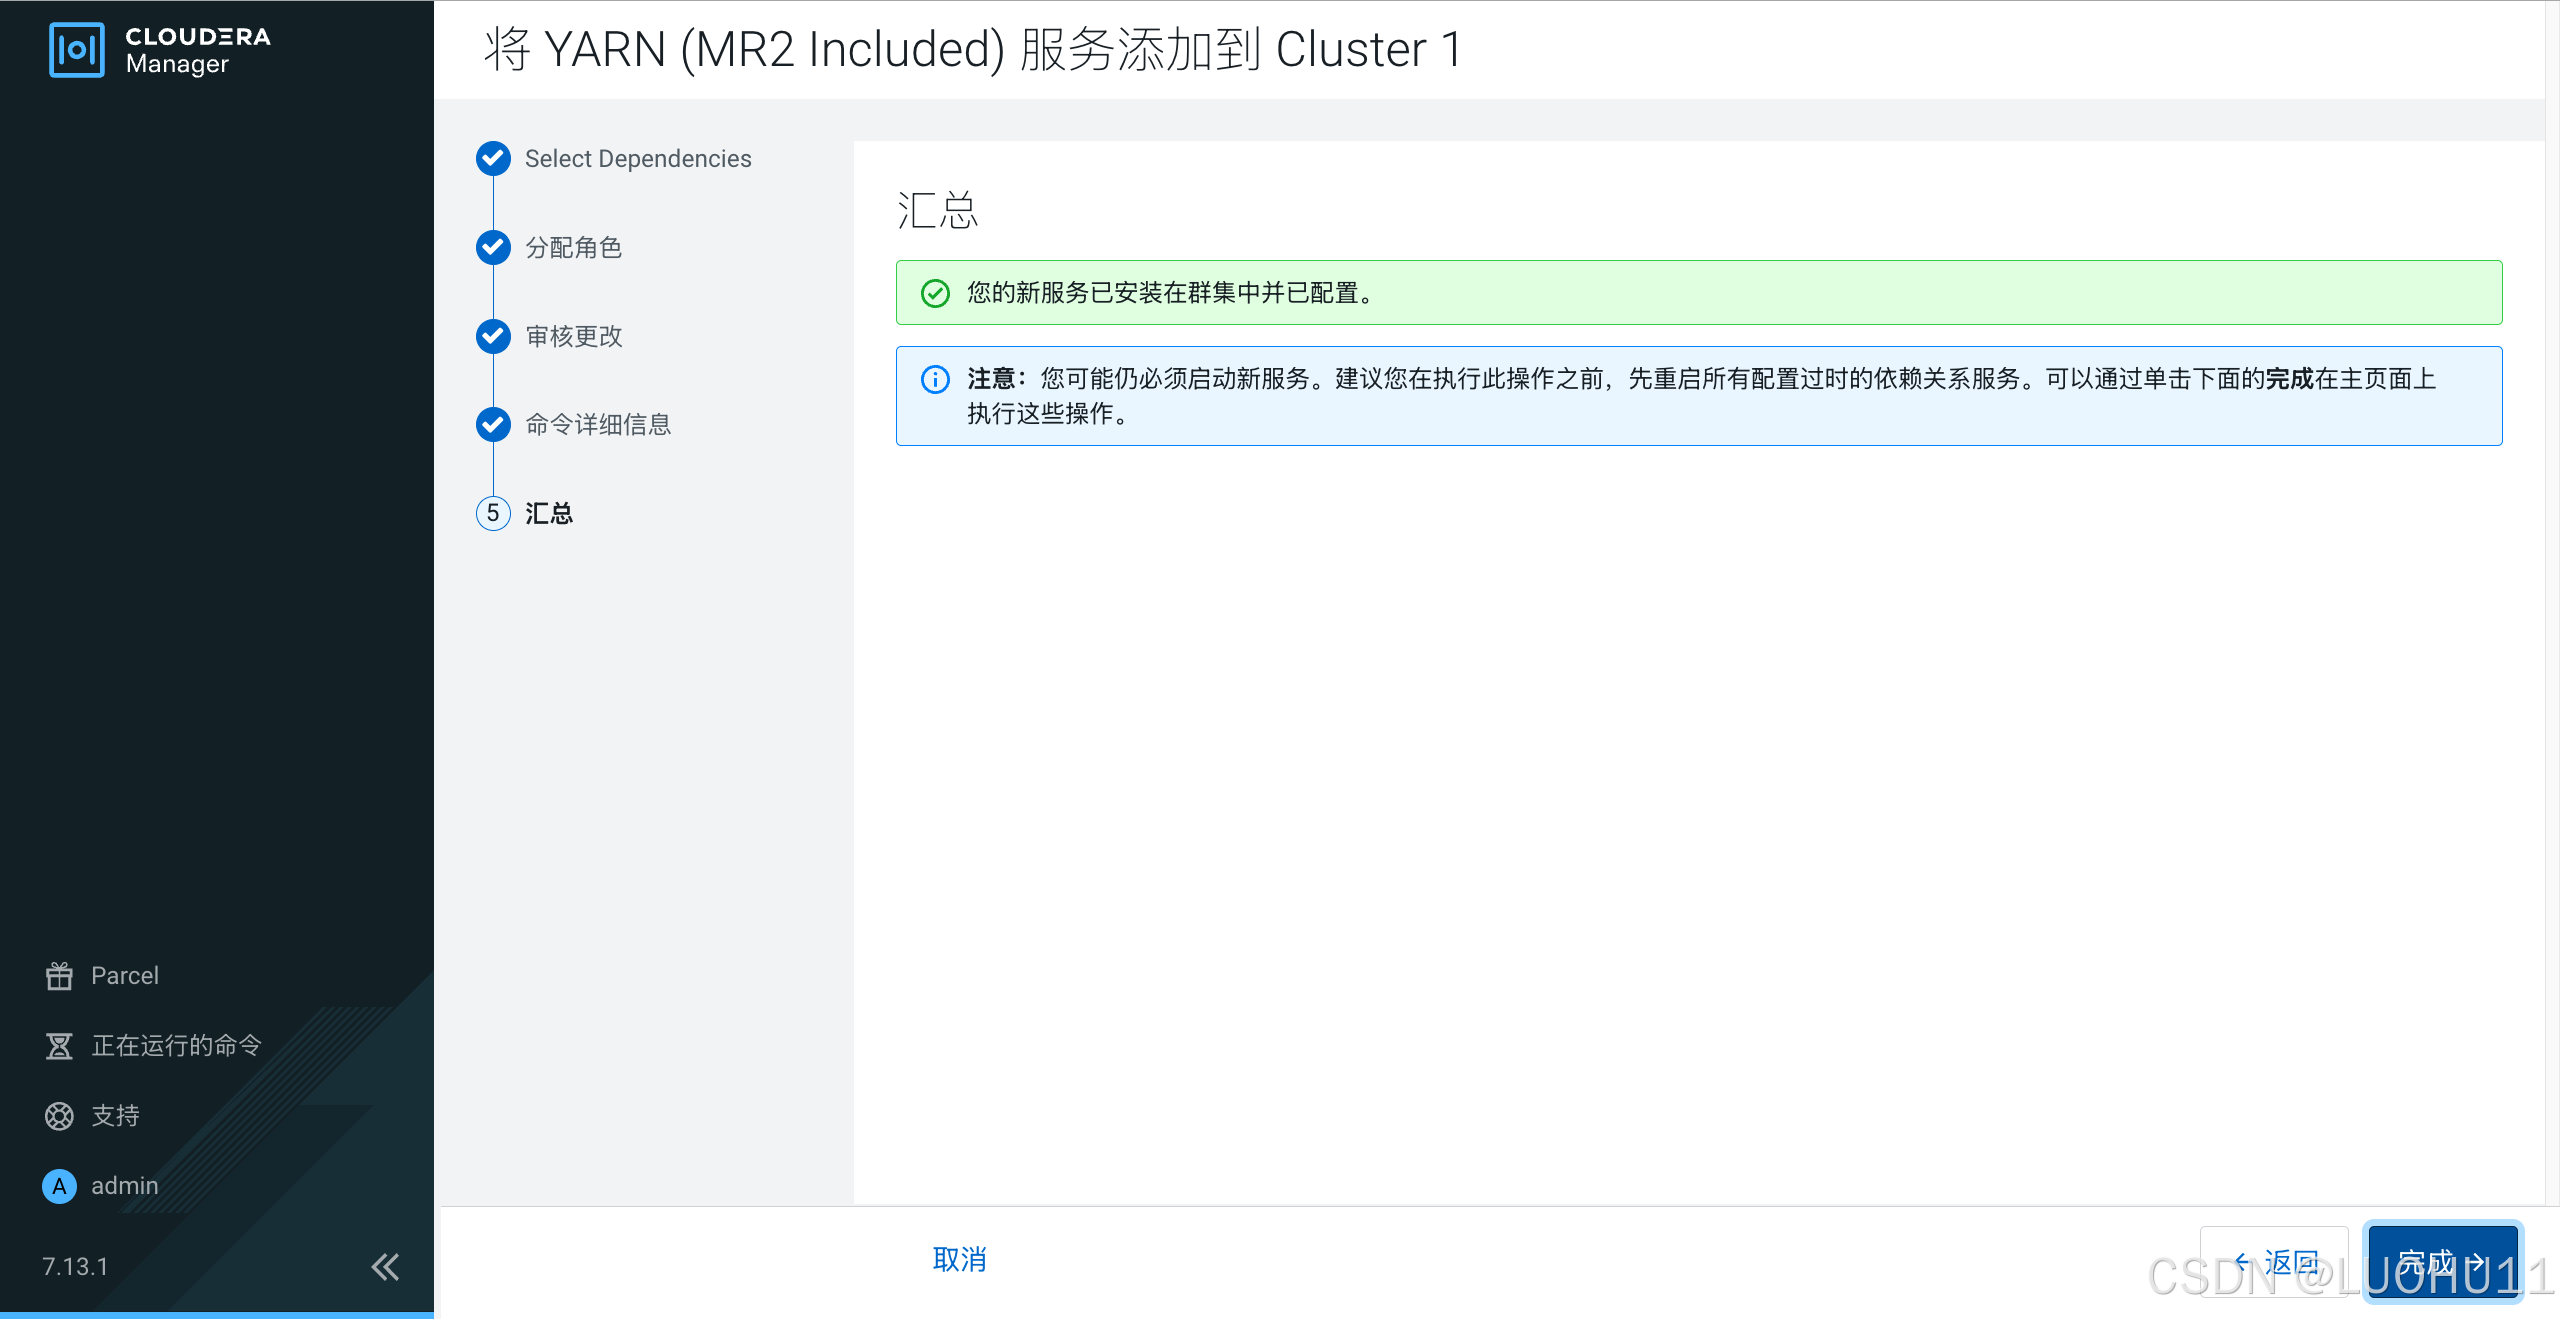
汇总
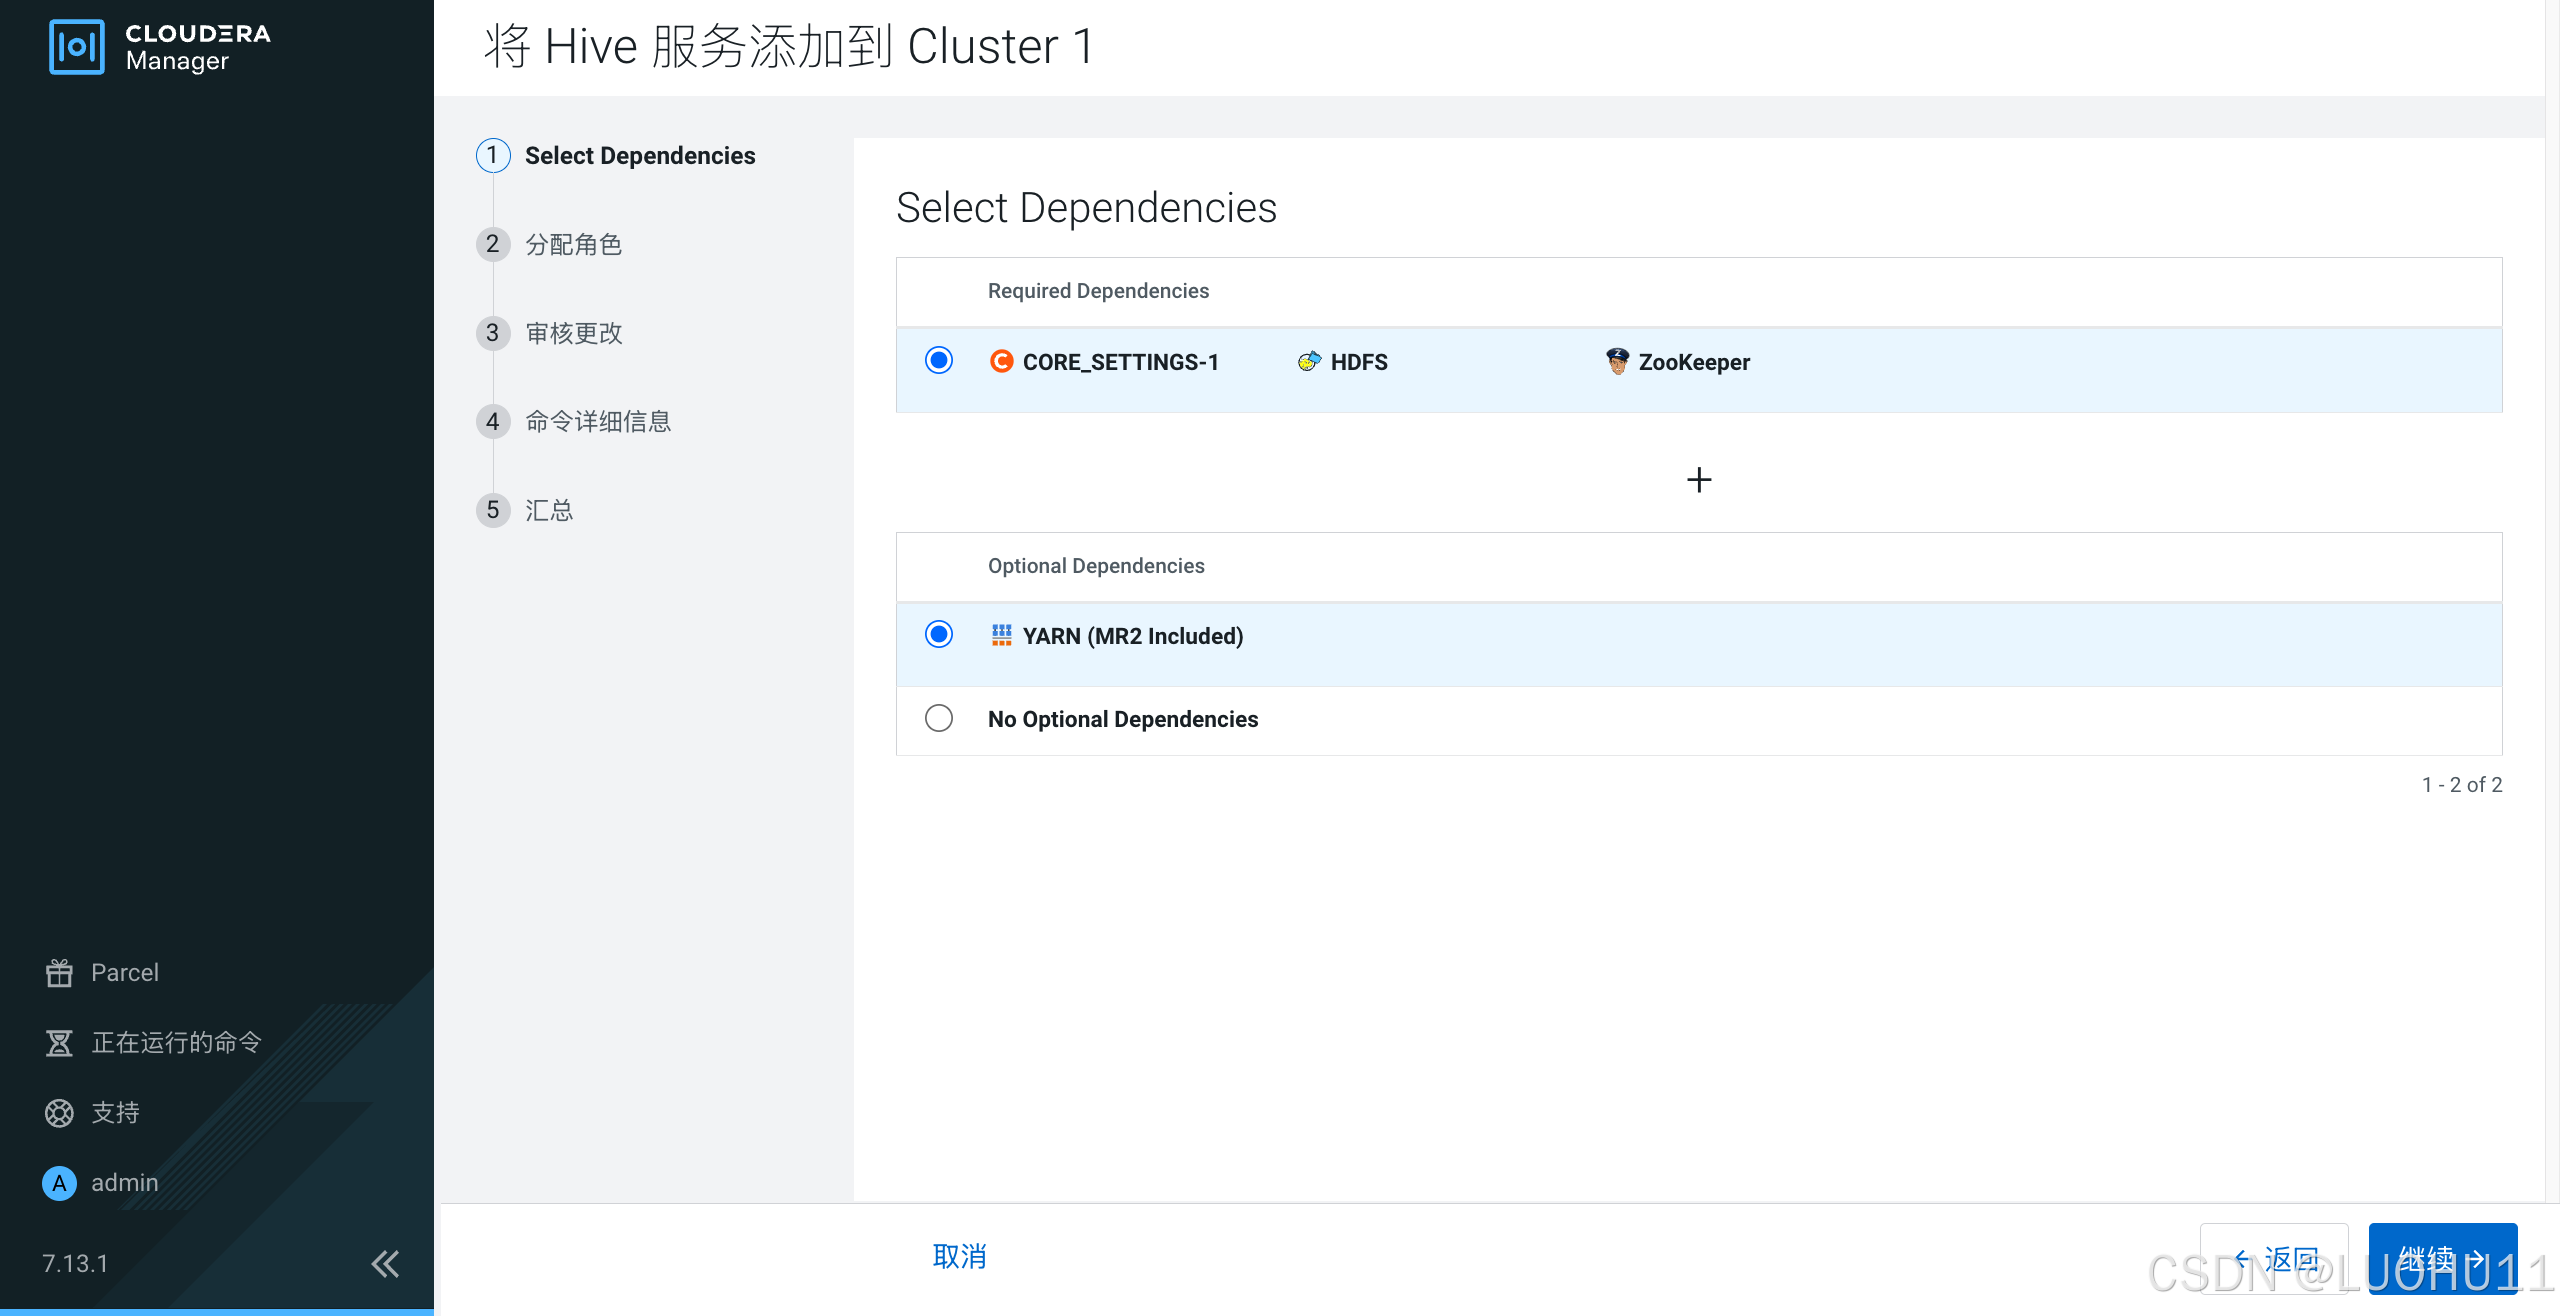
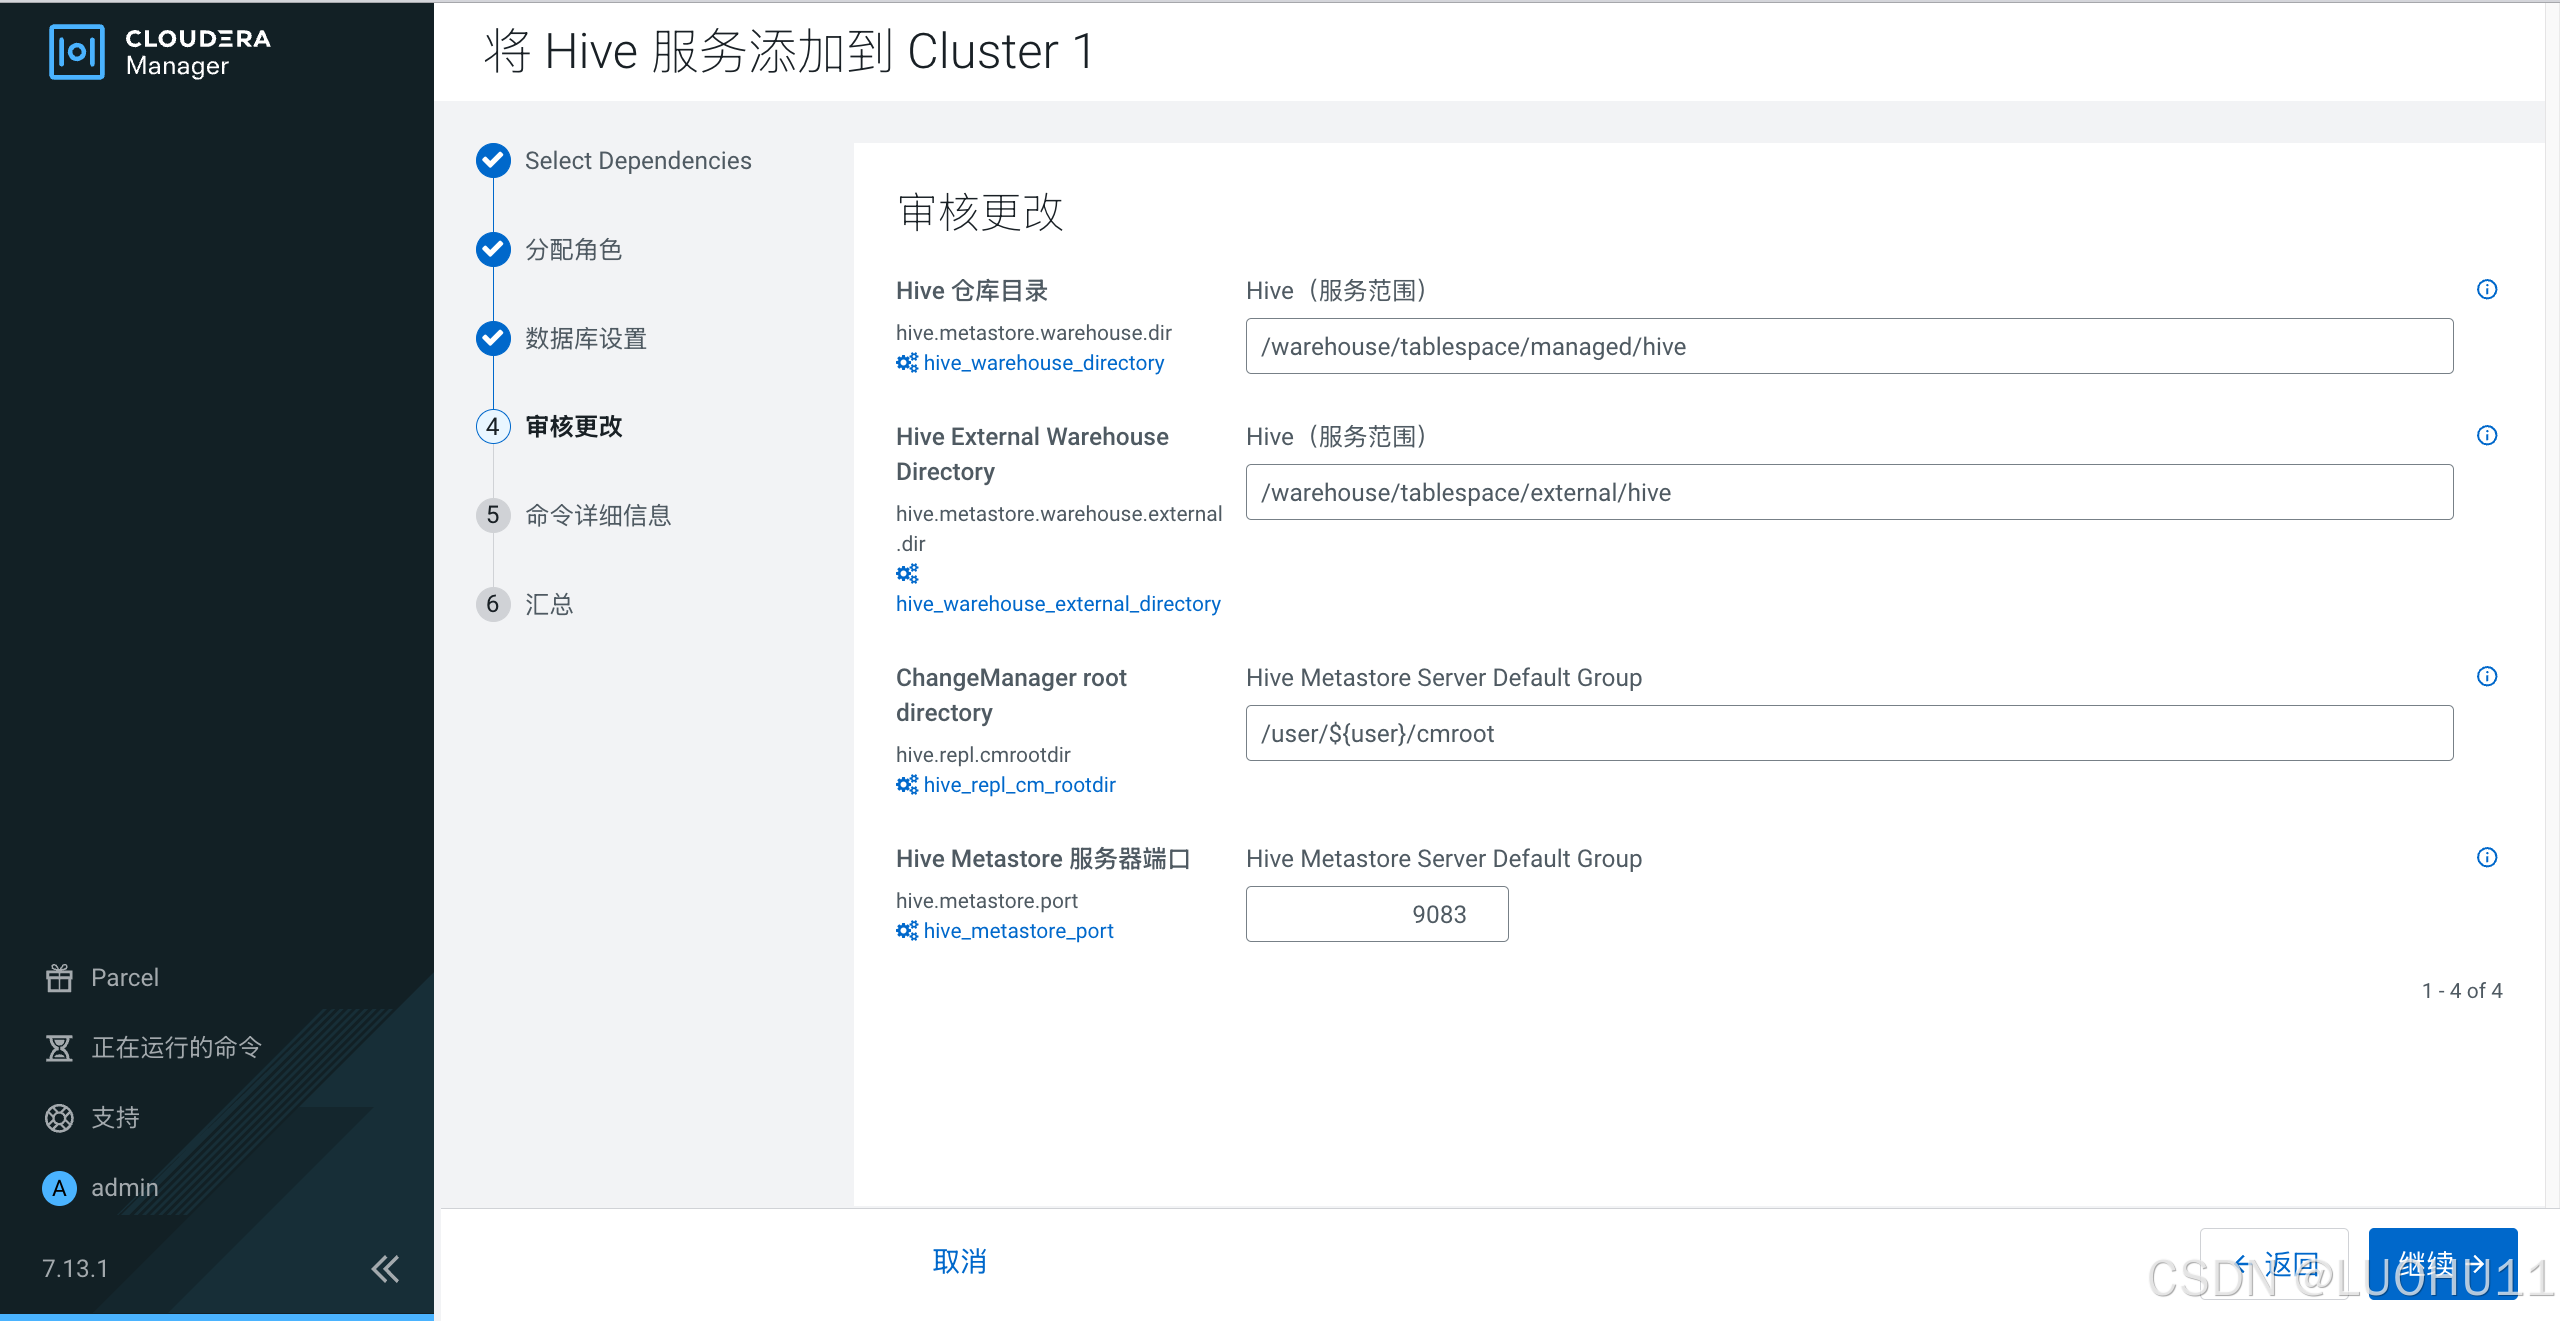
添加Hive服务
选择依赖
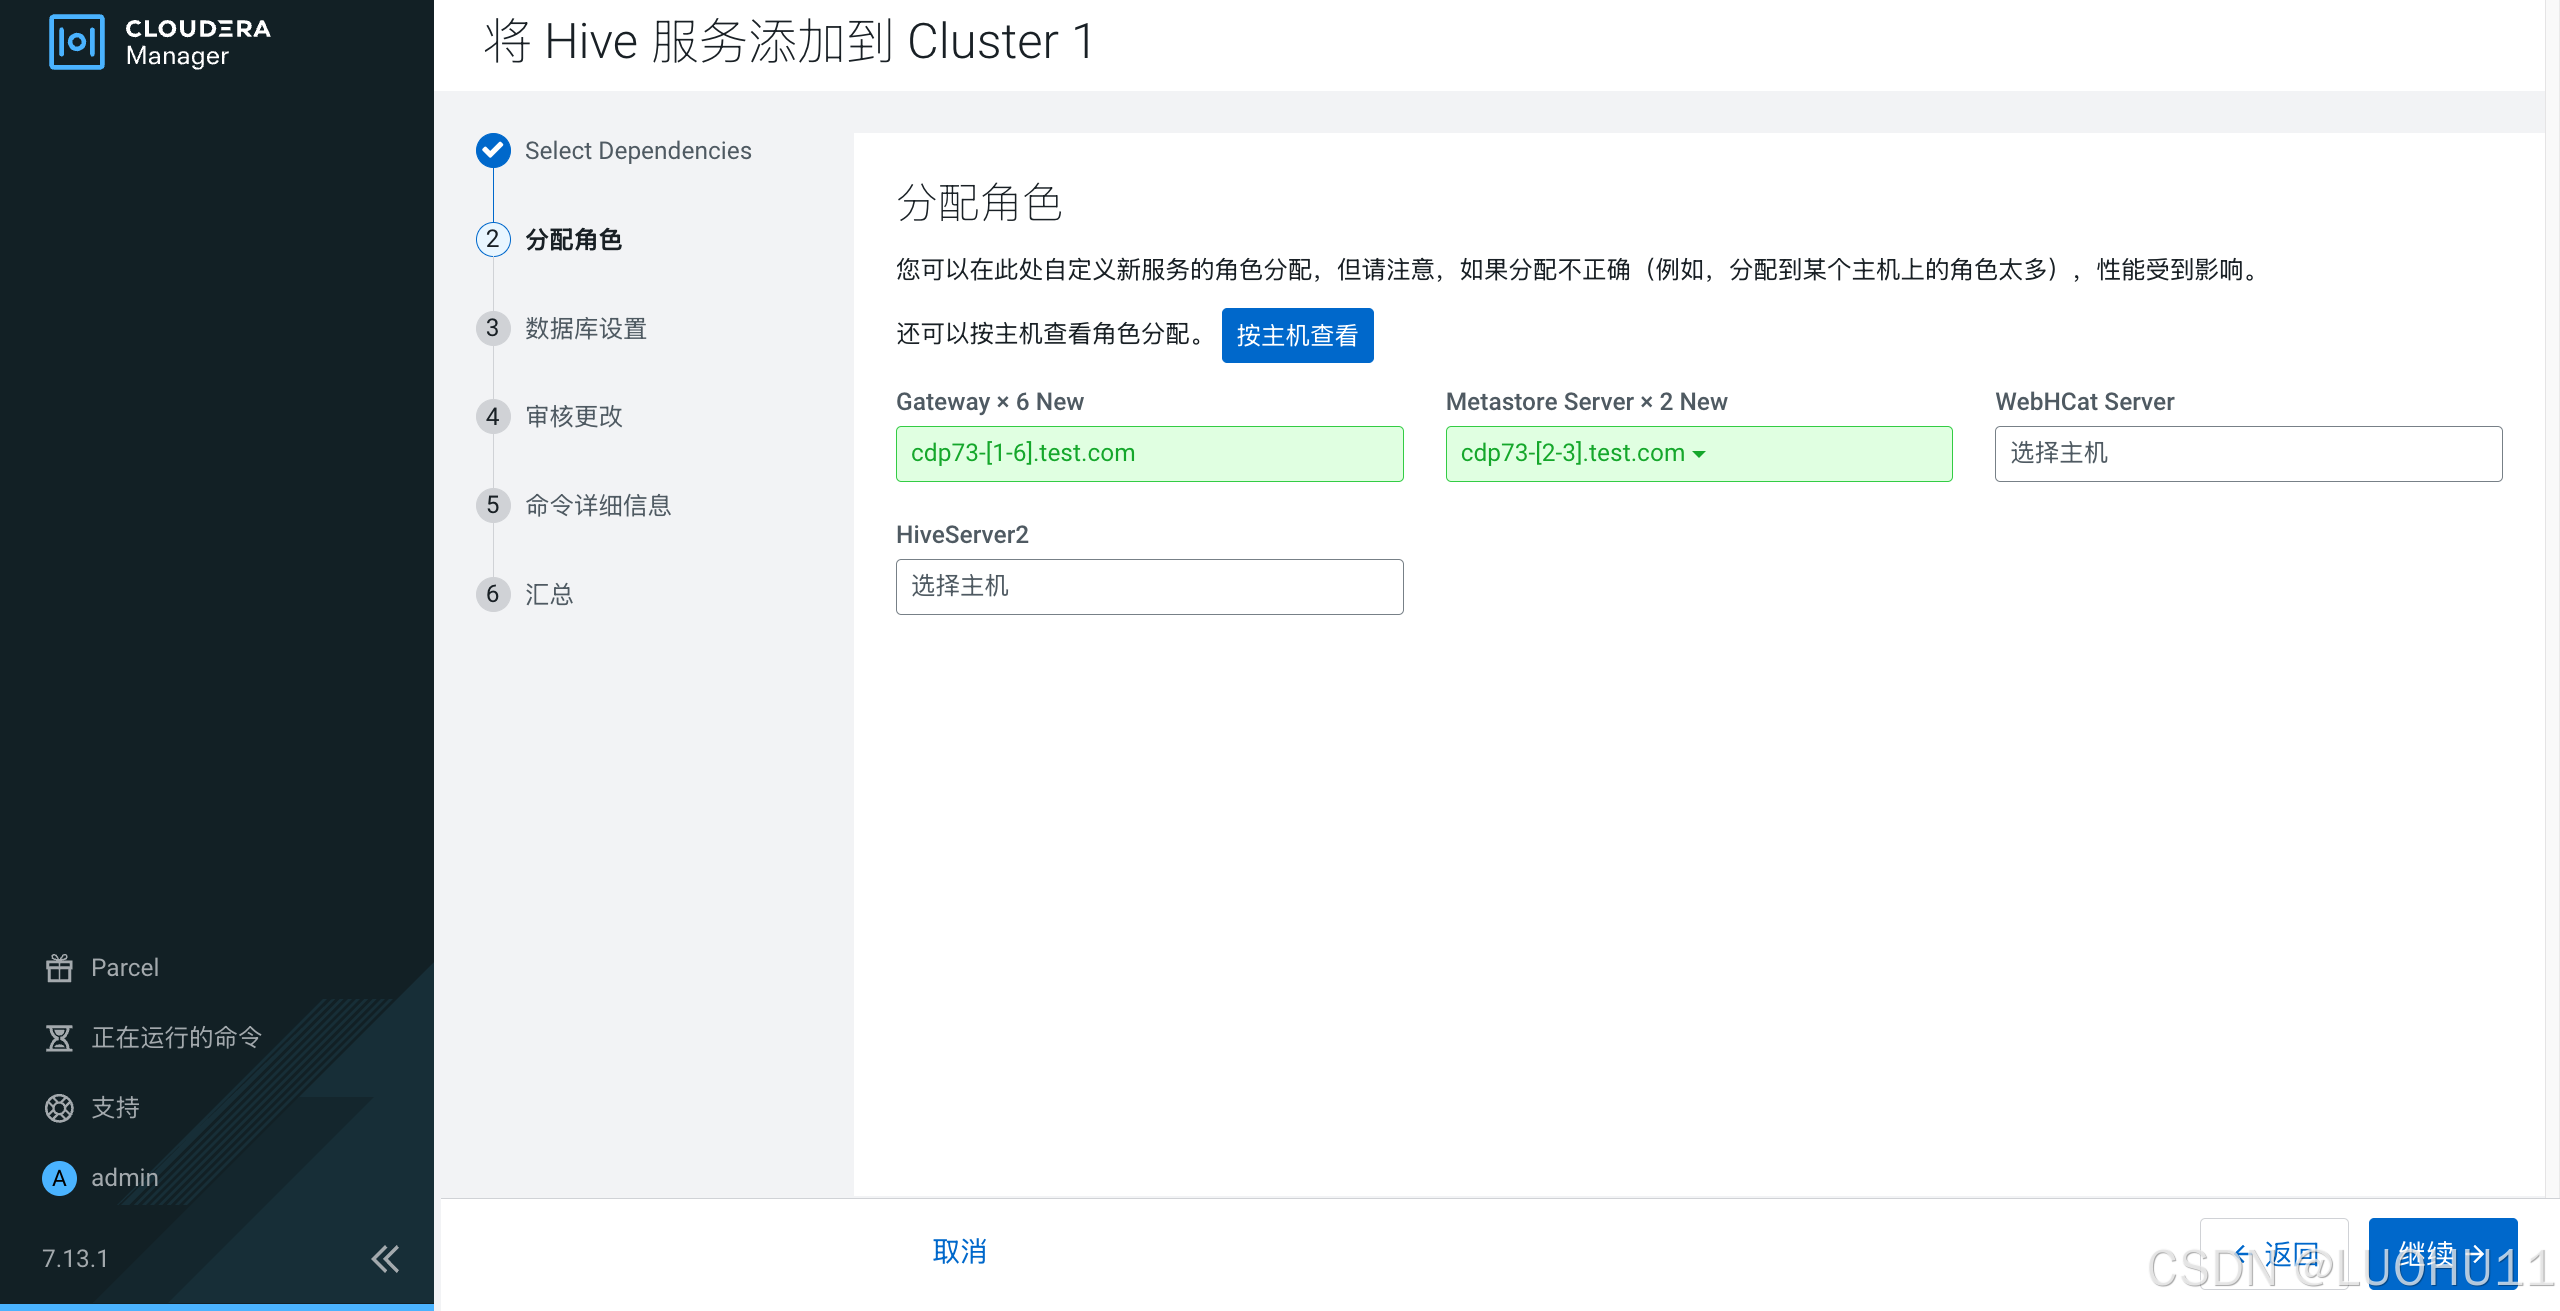
分配角色
【重要提示】在 CDP中,传统 Hive 服务中不允许有 HiveServer 2 角色实例。请仅在 Hive On Tez 服务中安装 HS2 角色实例。简而言之就是这里不用配置HiveServer 2 角色实例。
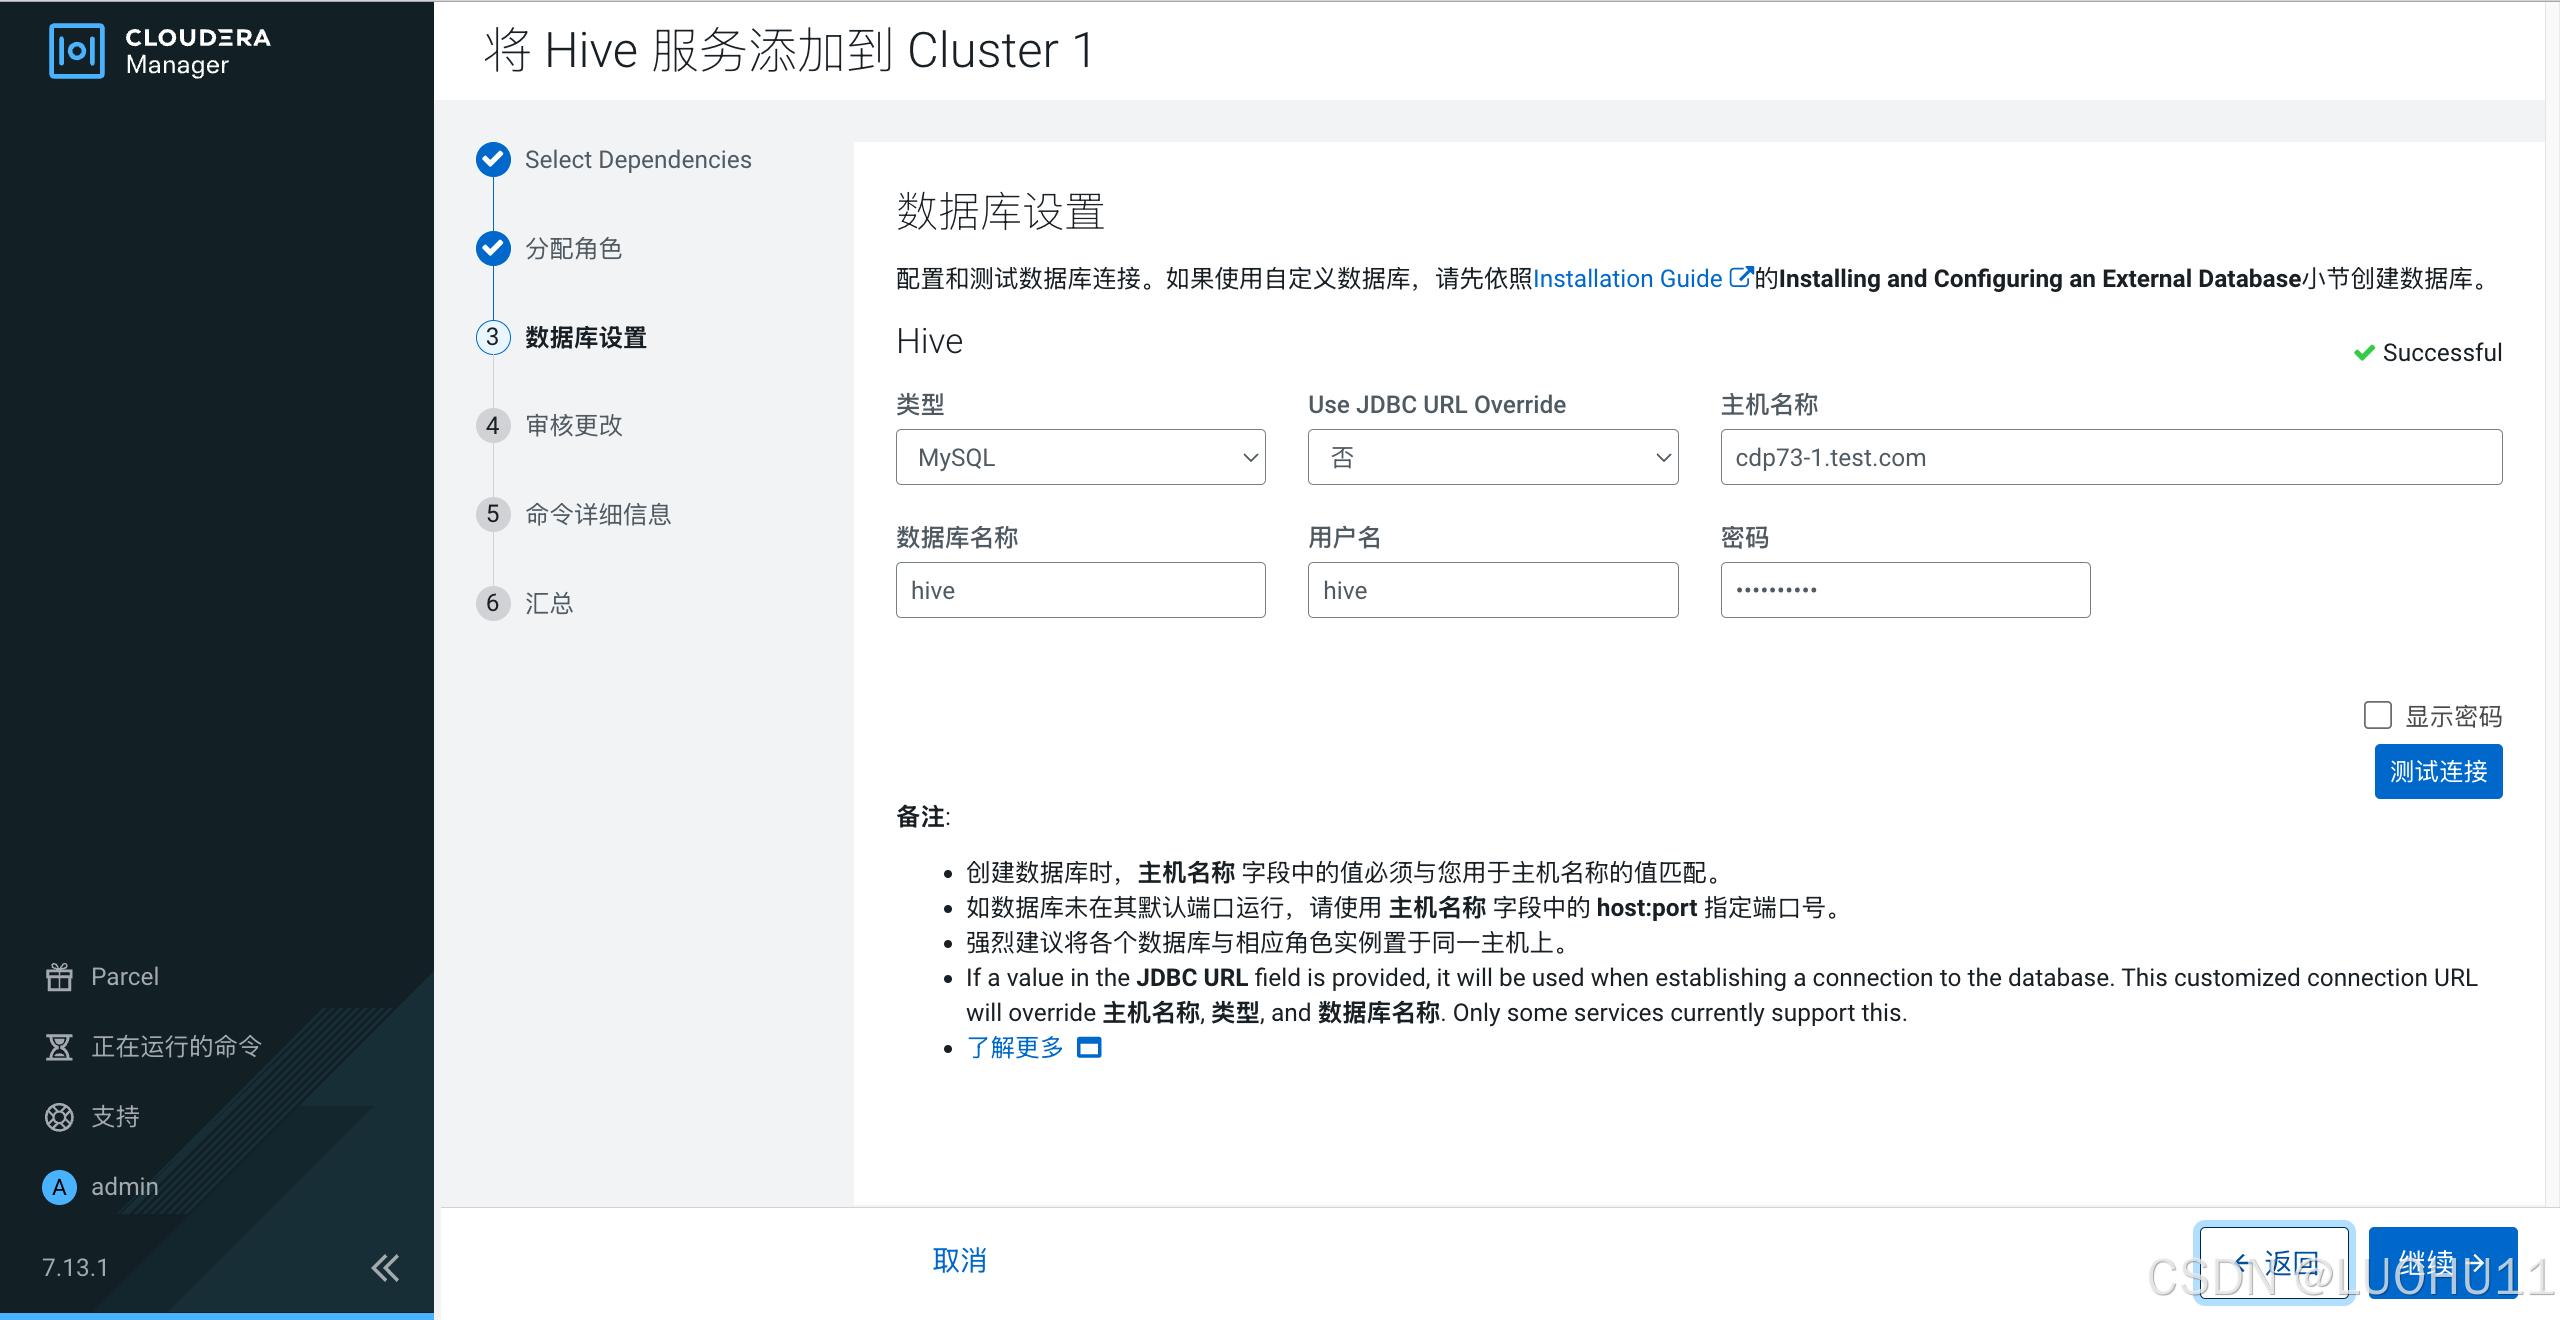
数据库设置
审核更改
命令详细信息
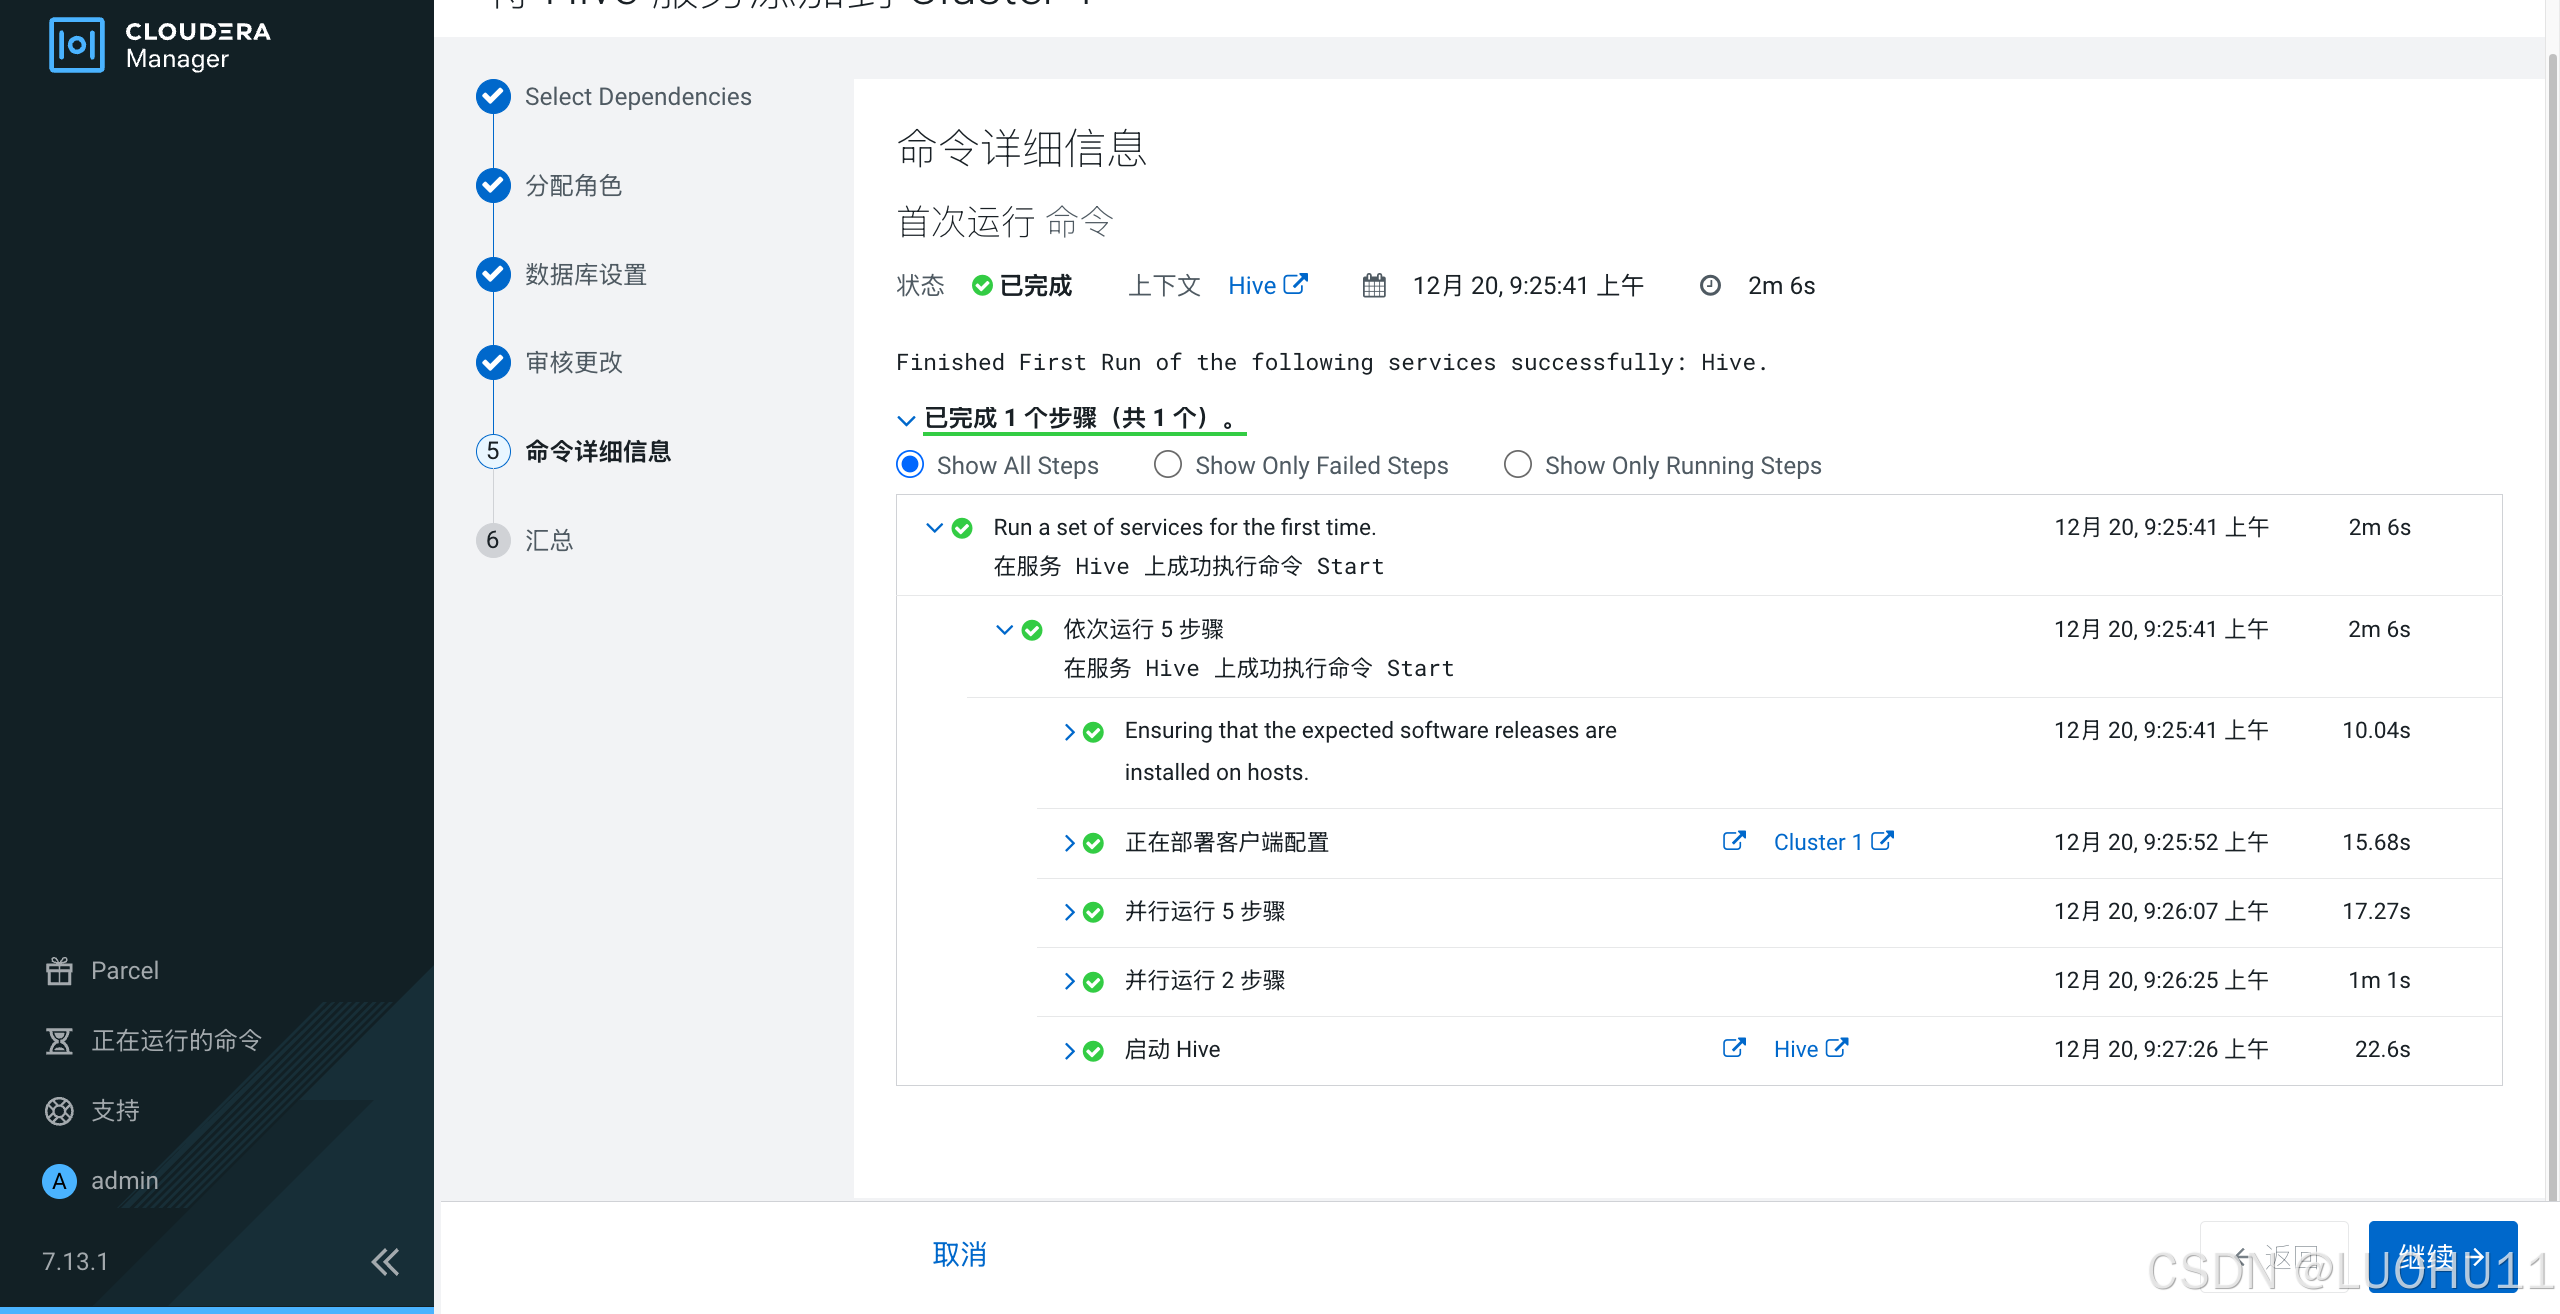
汇总

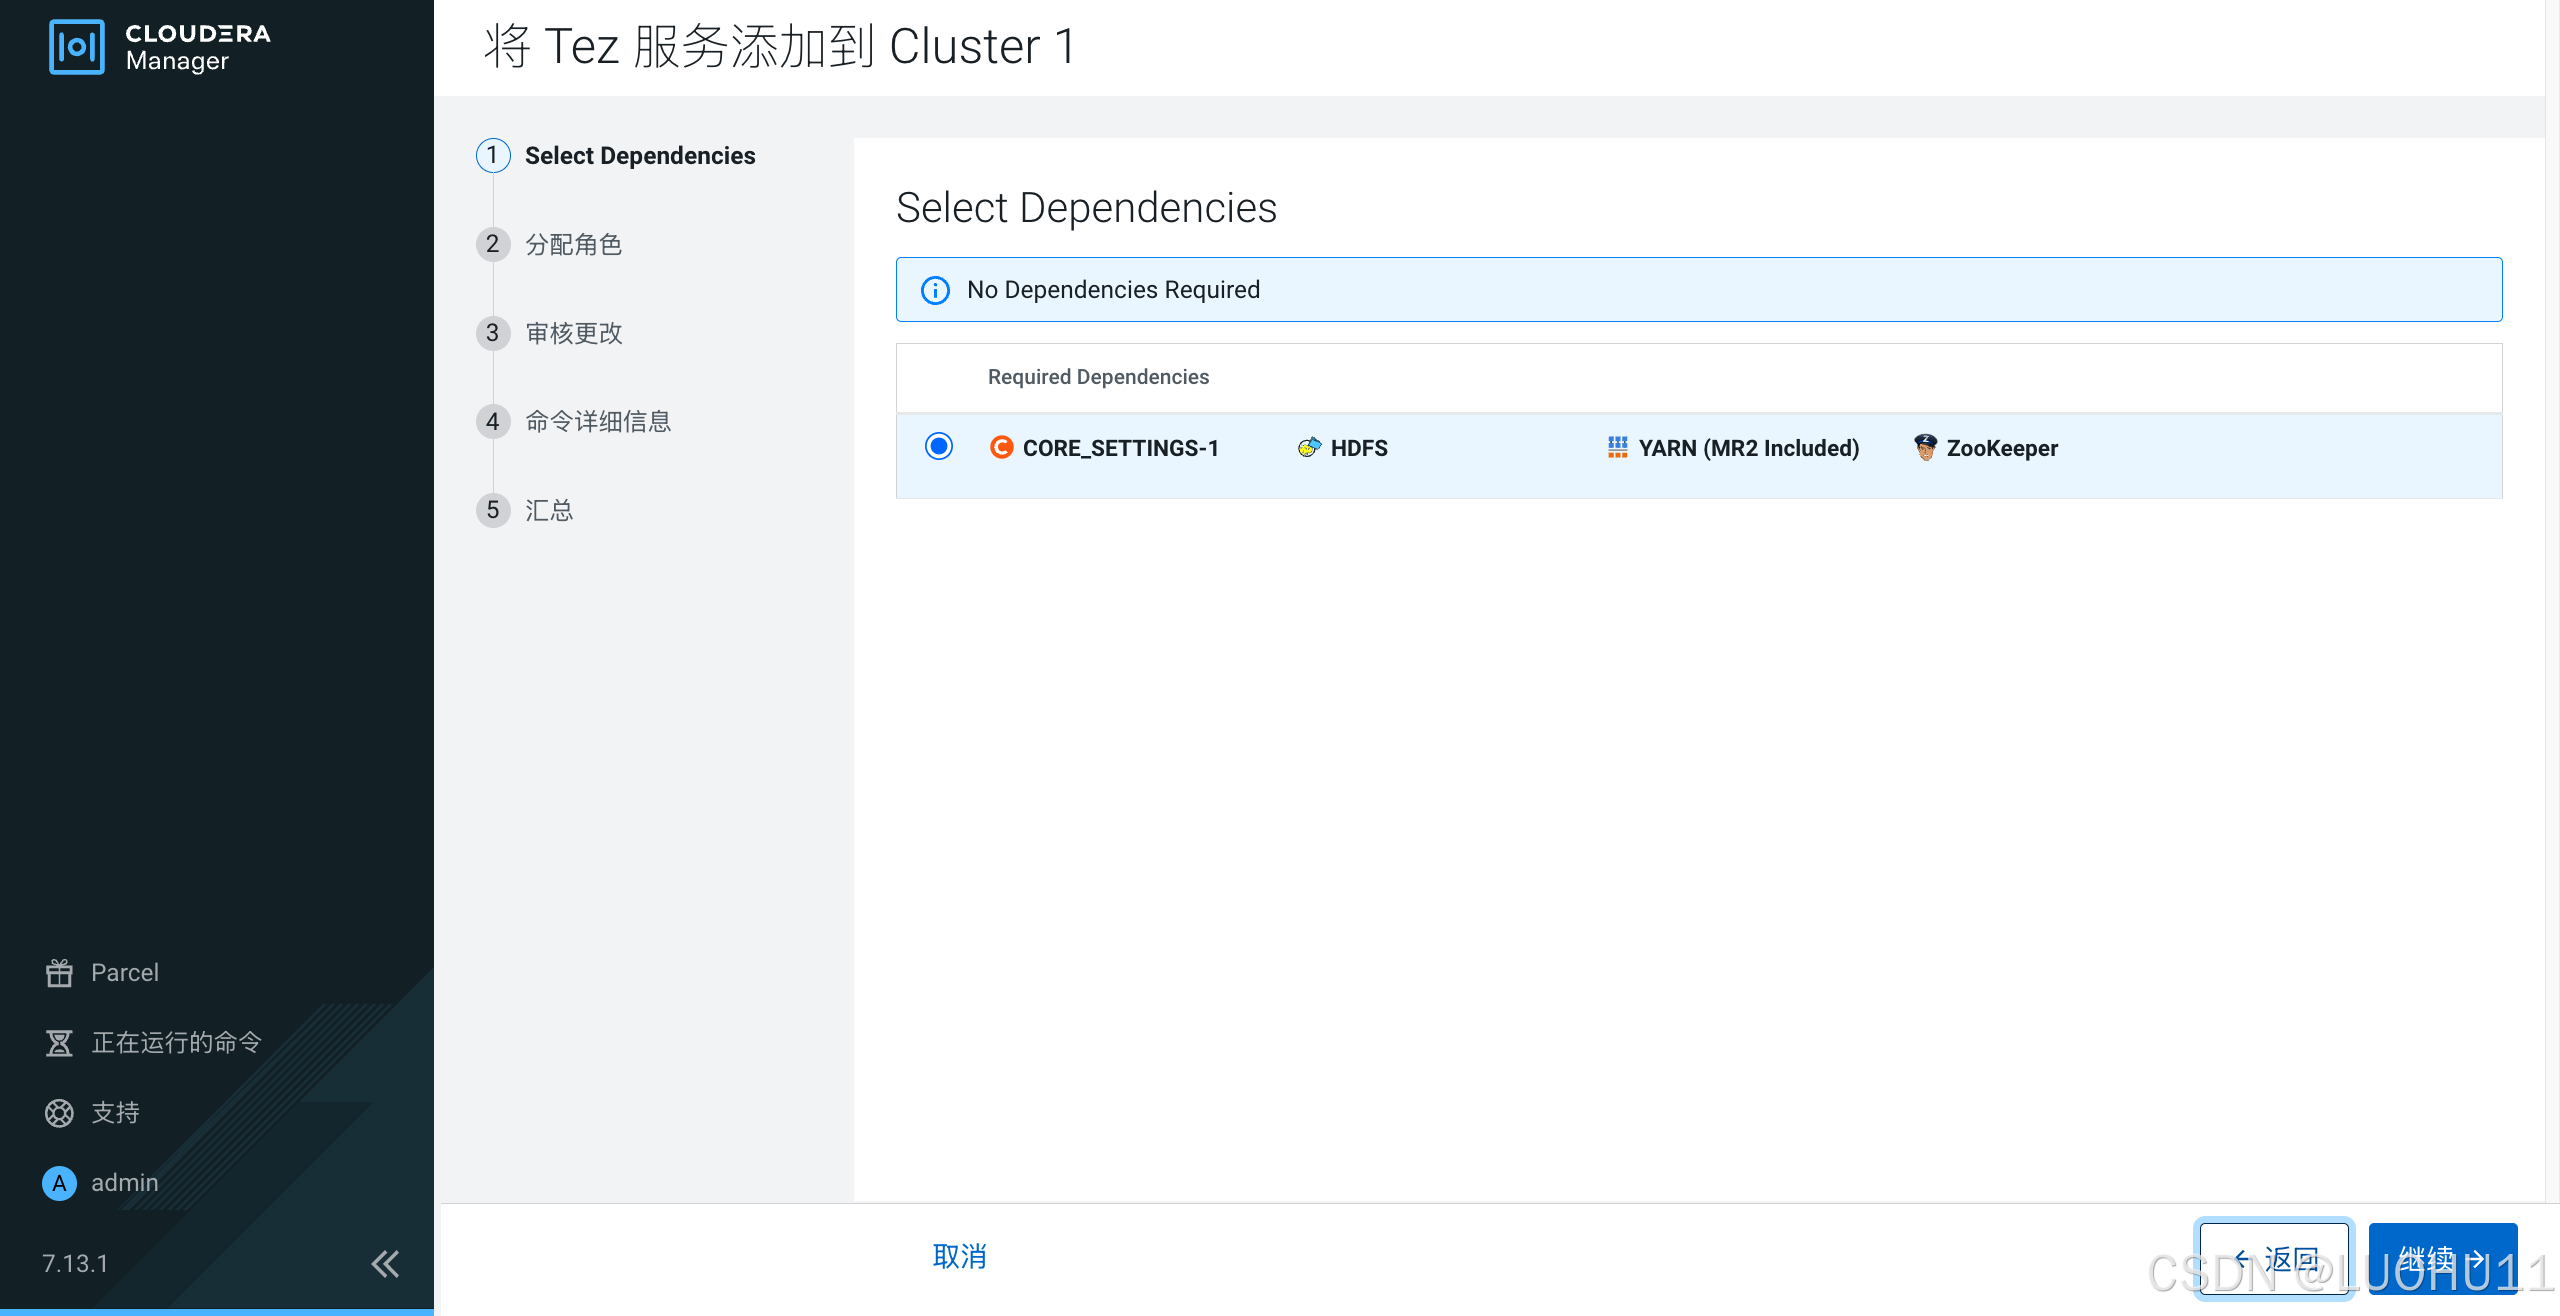
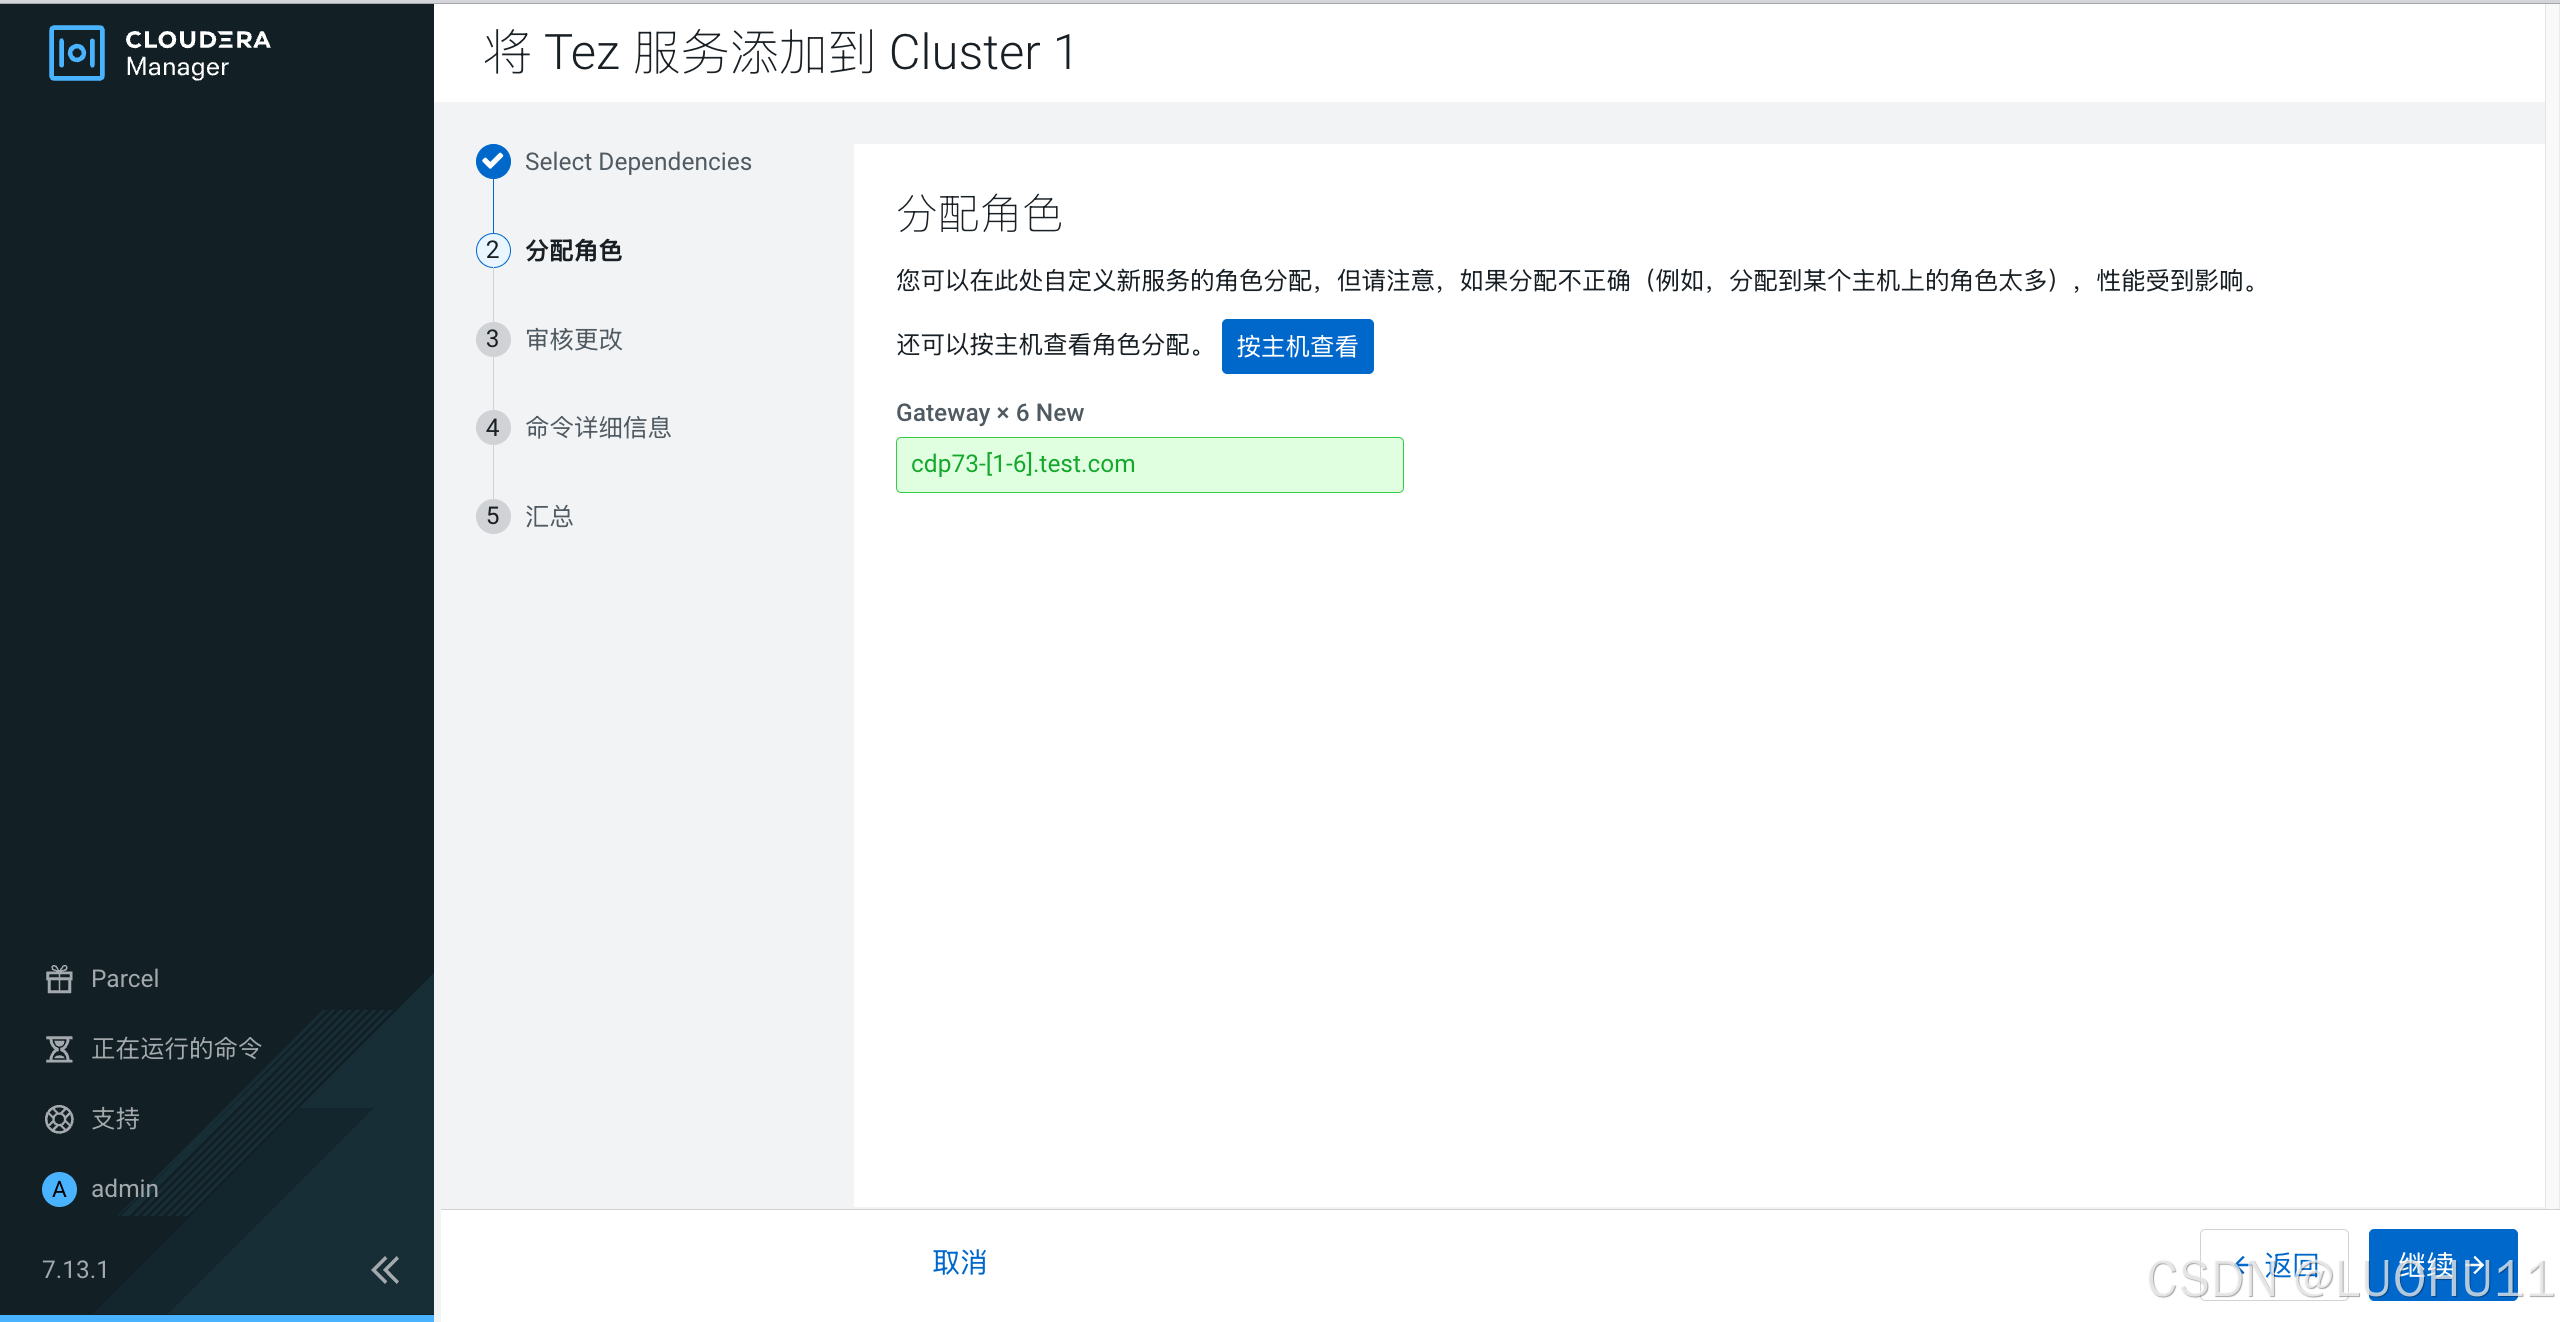
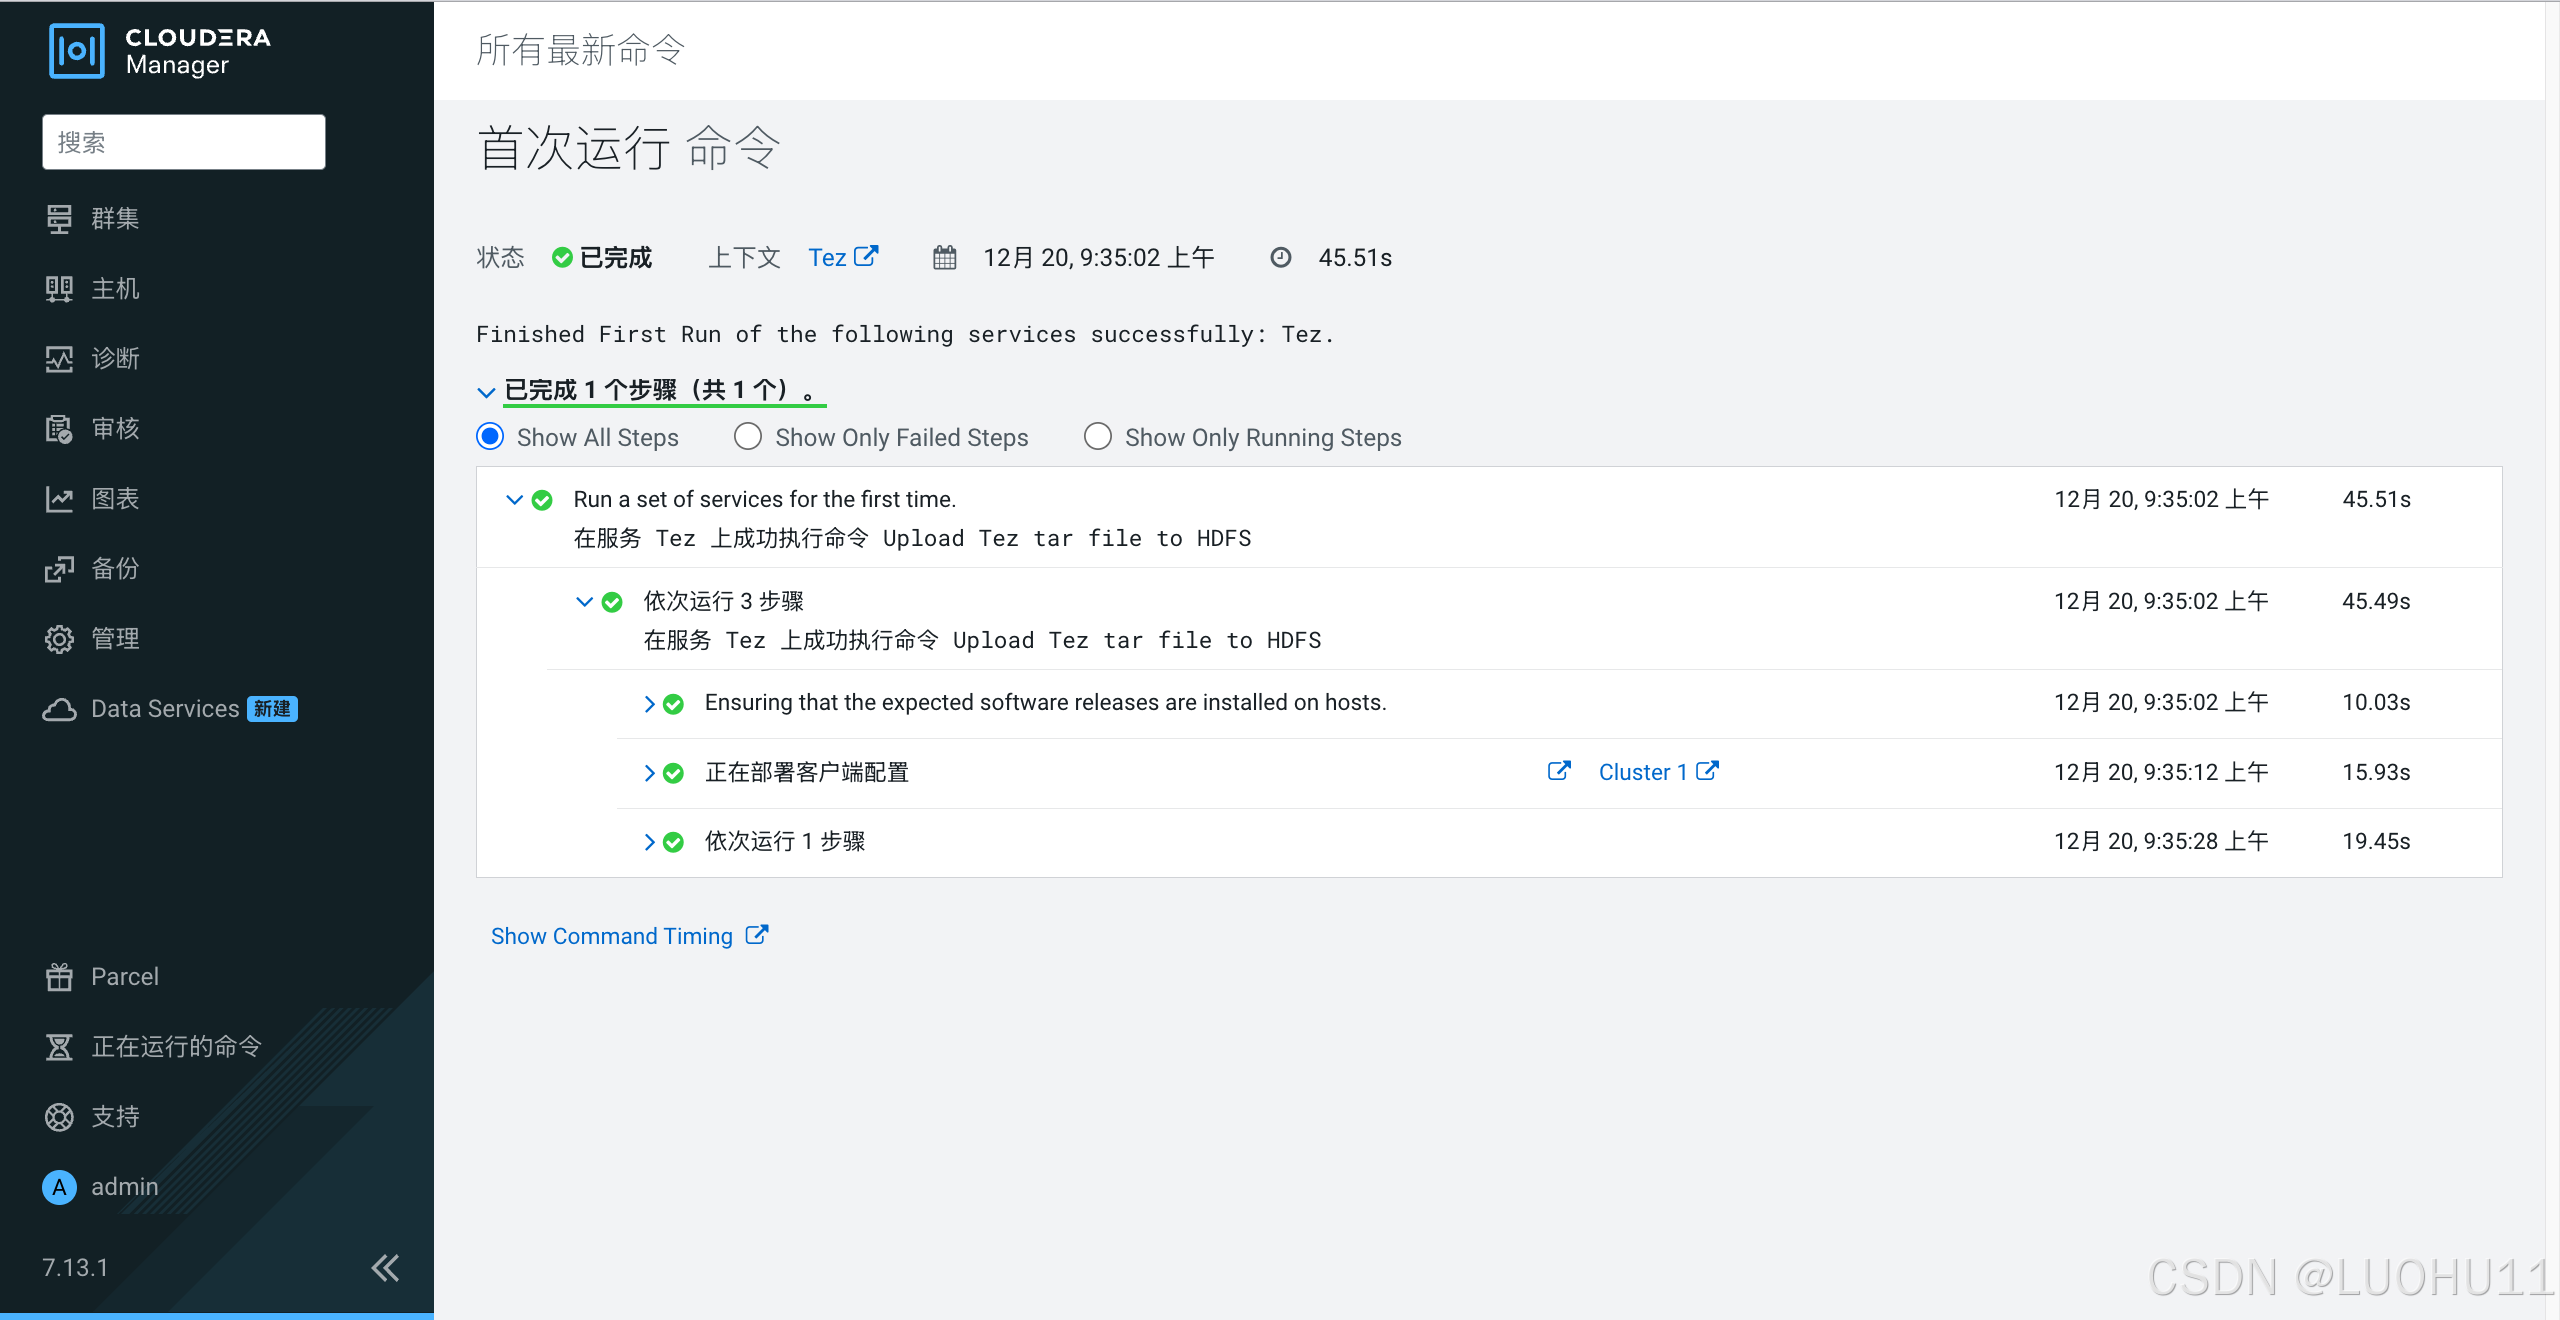
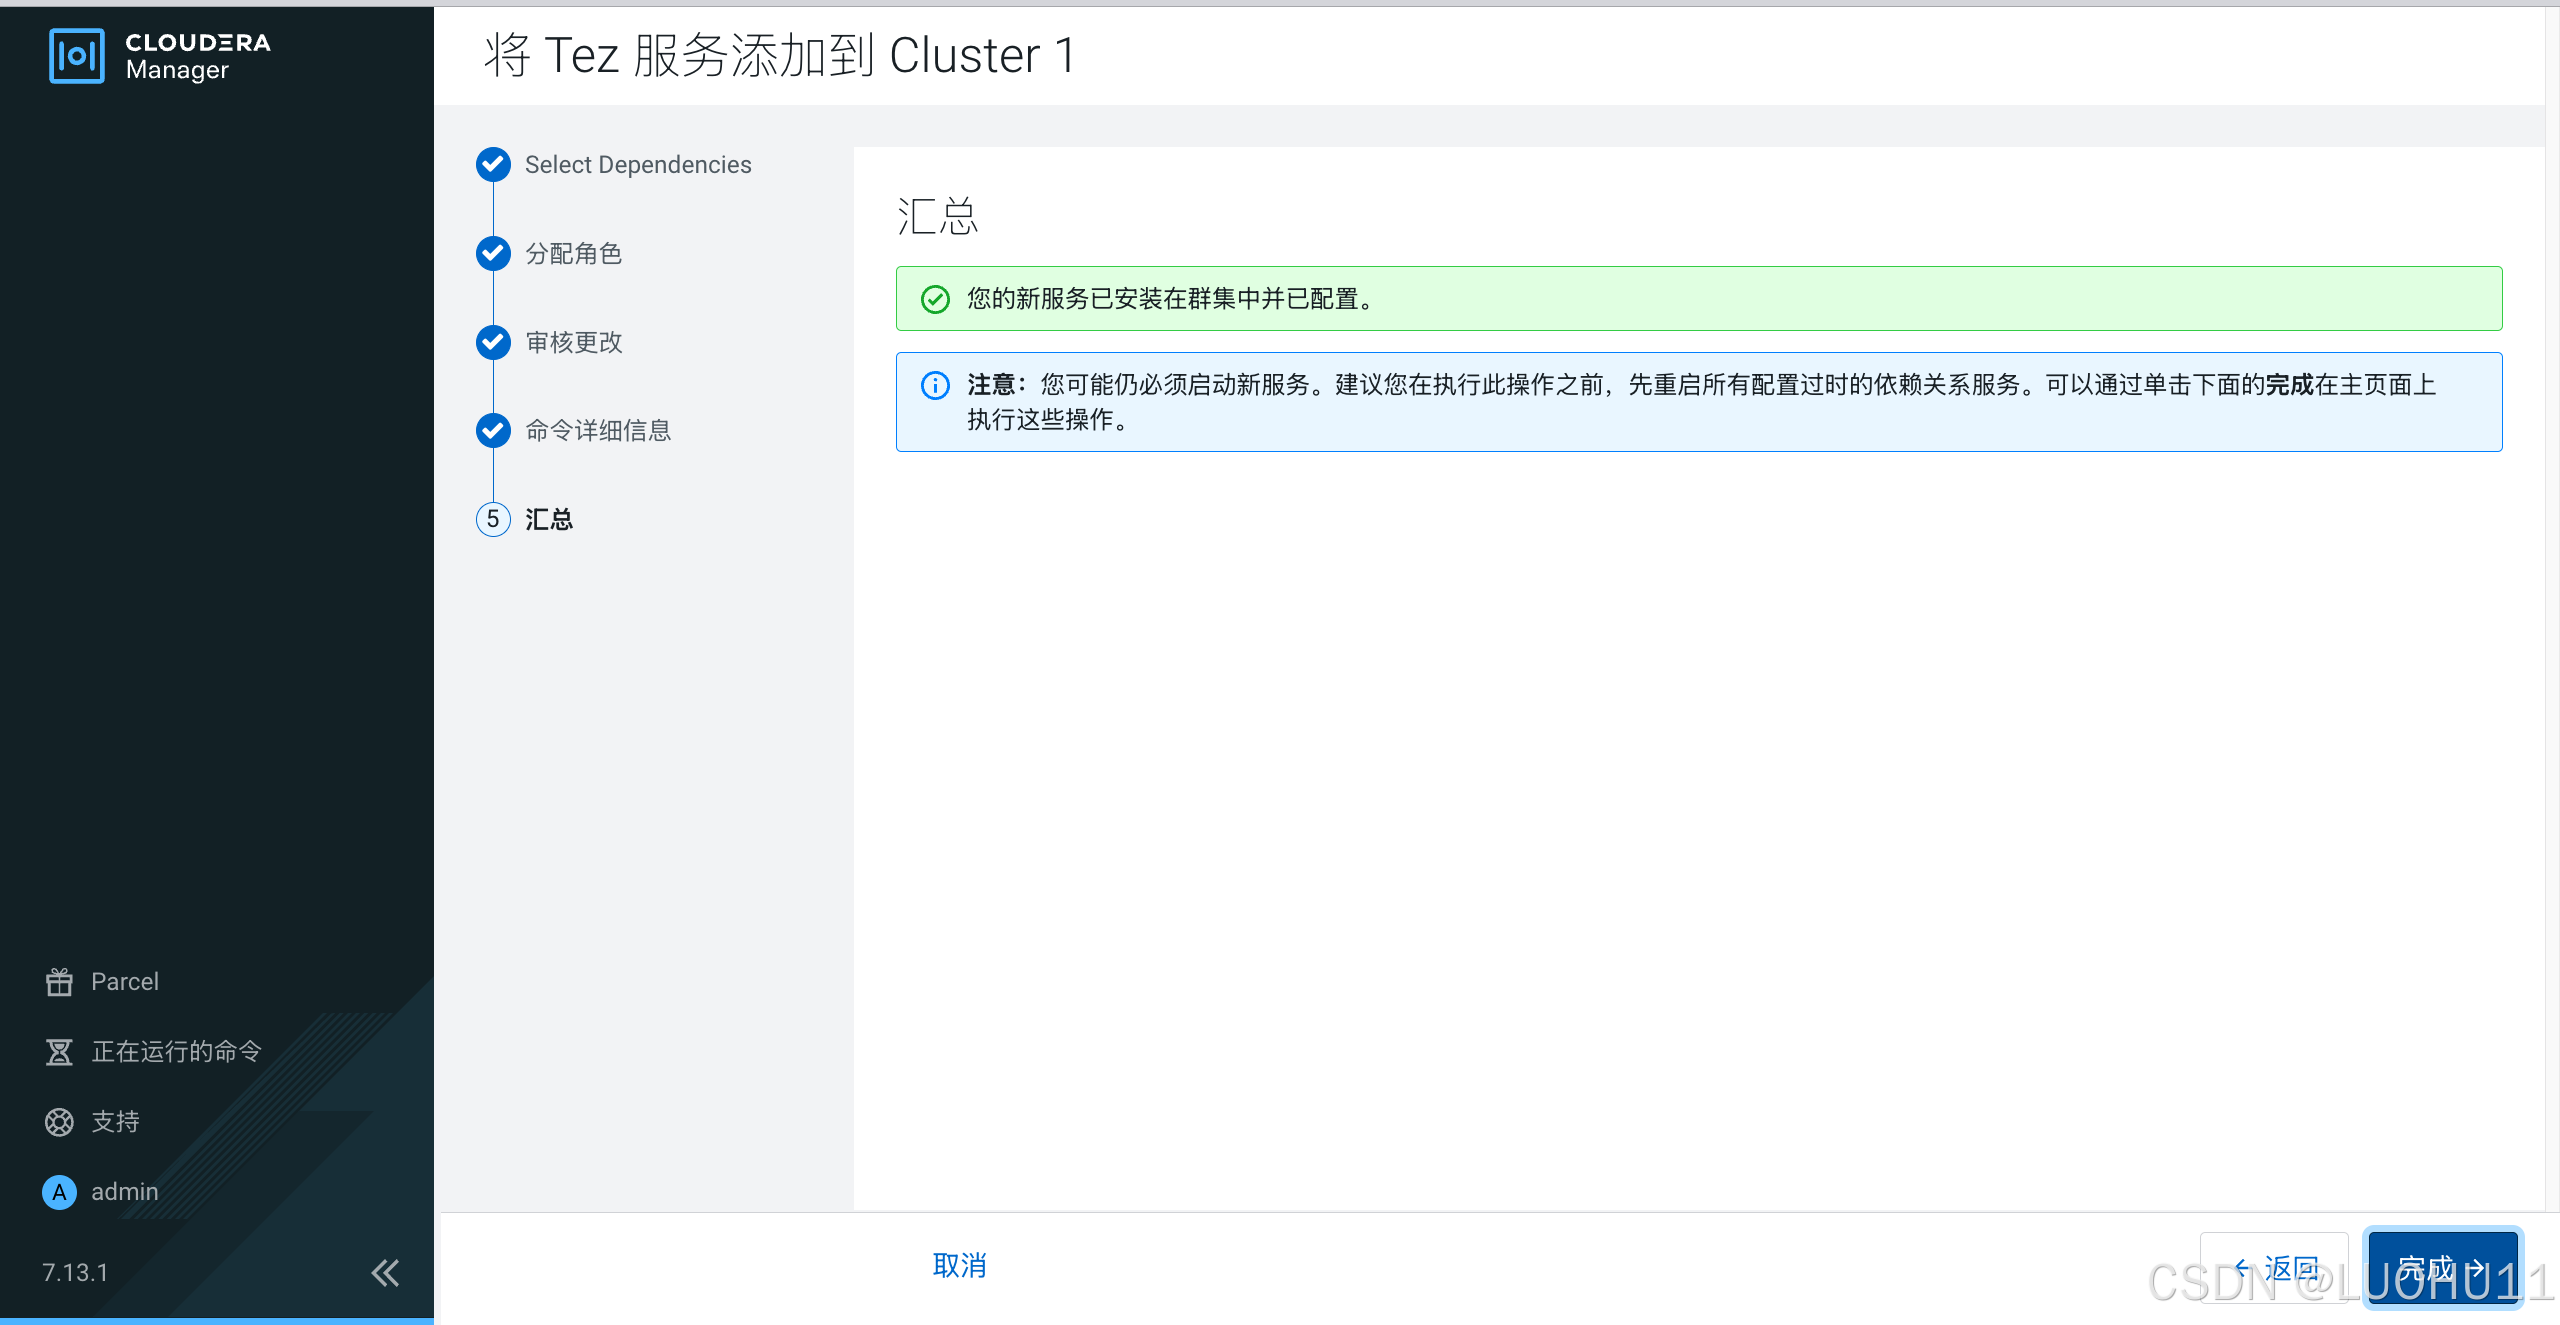
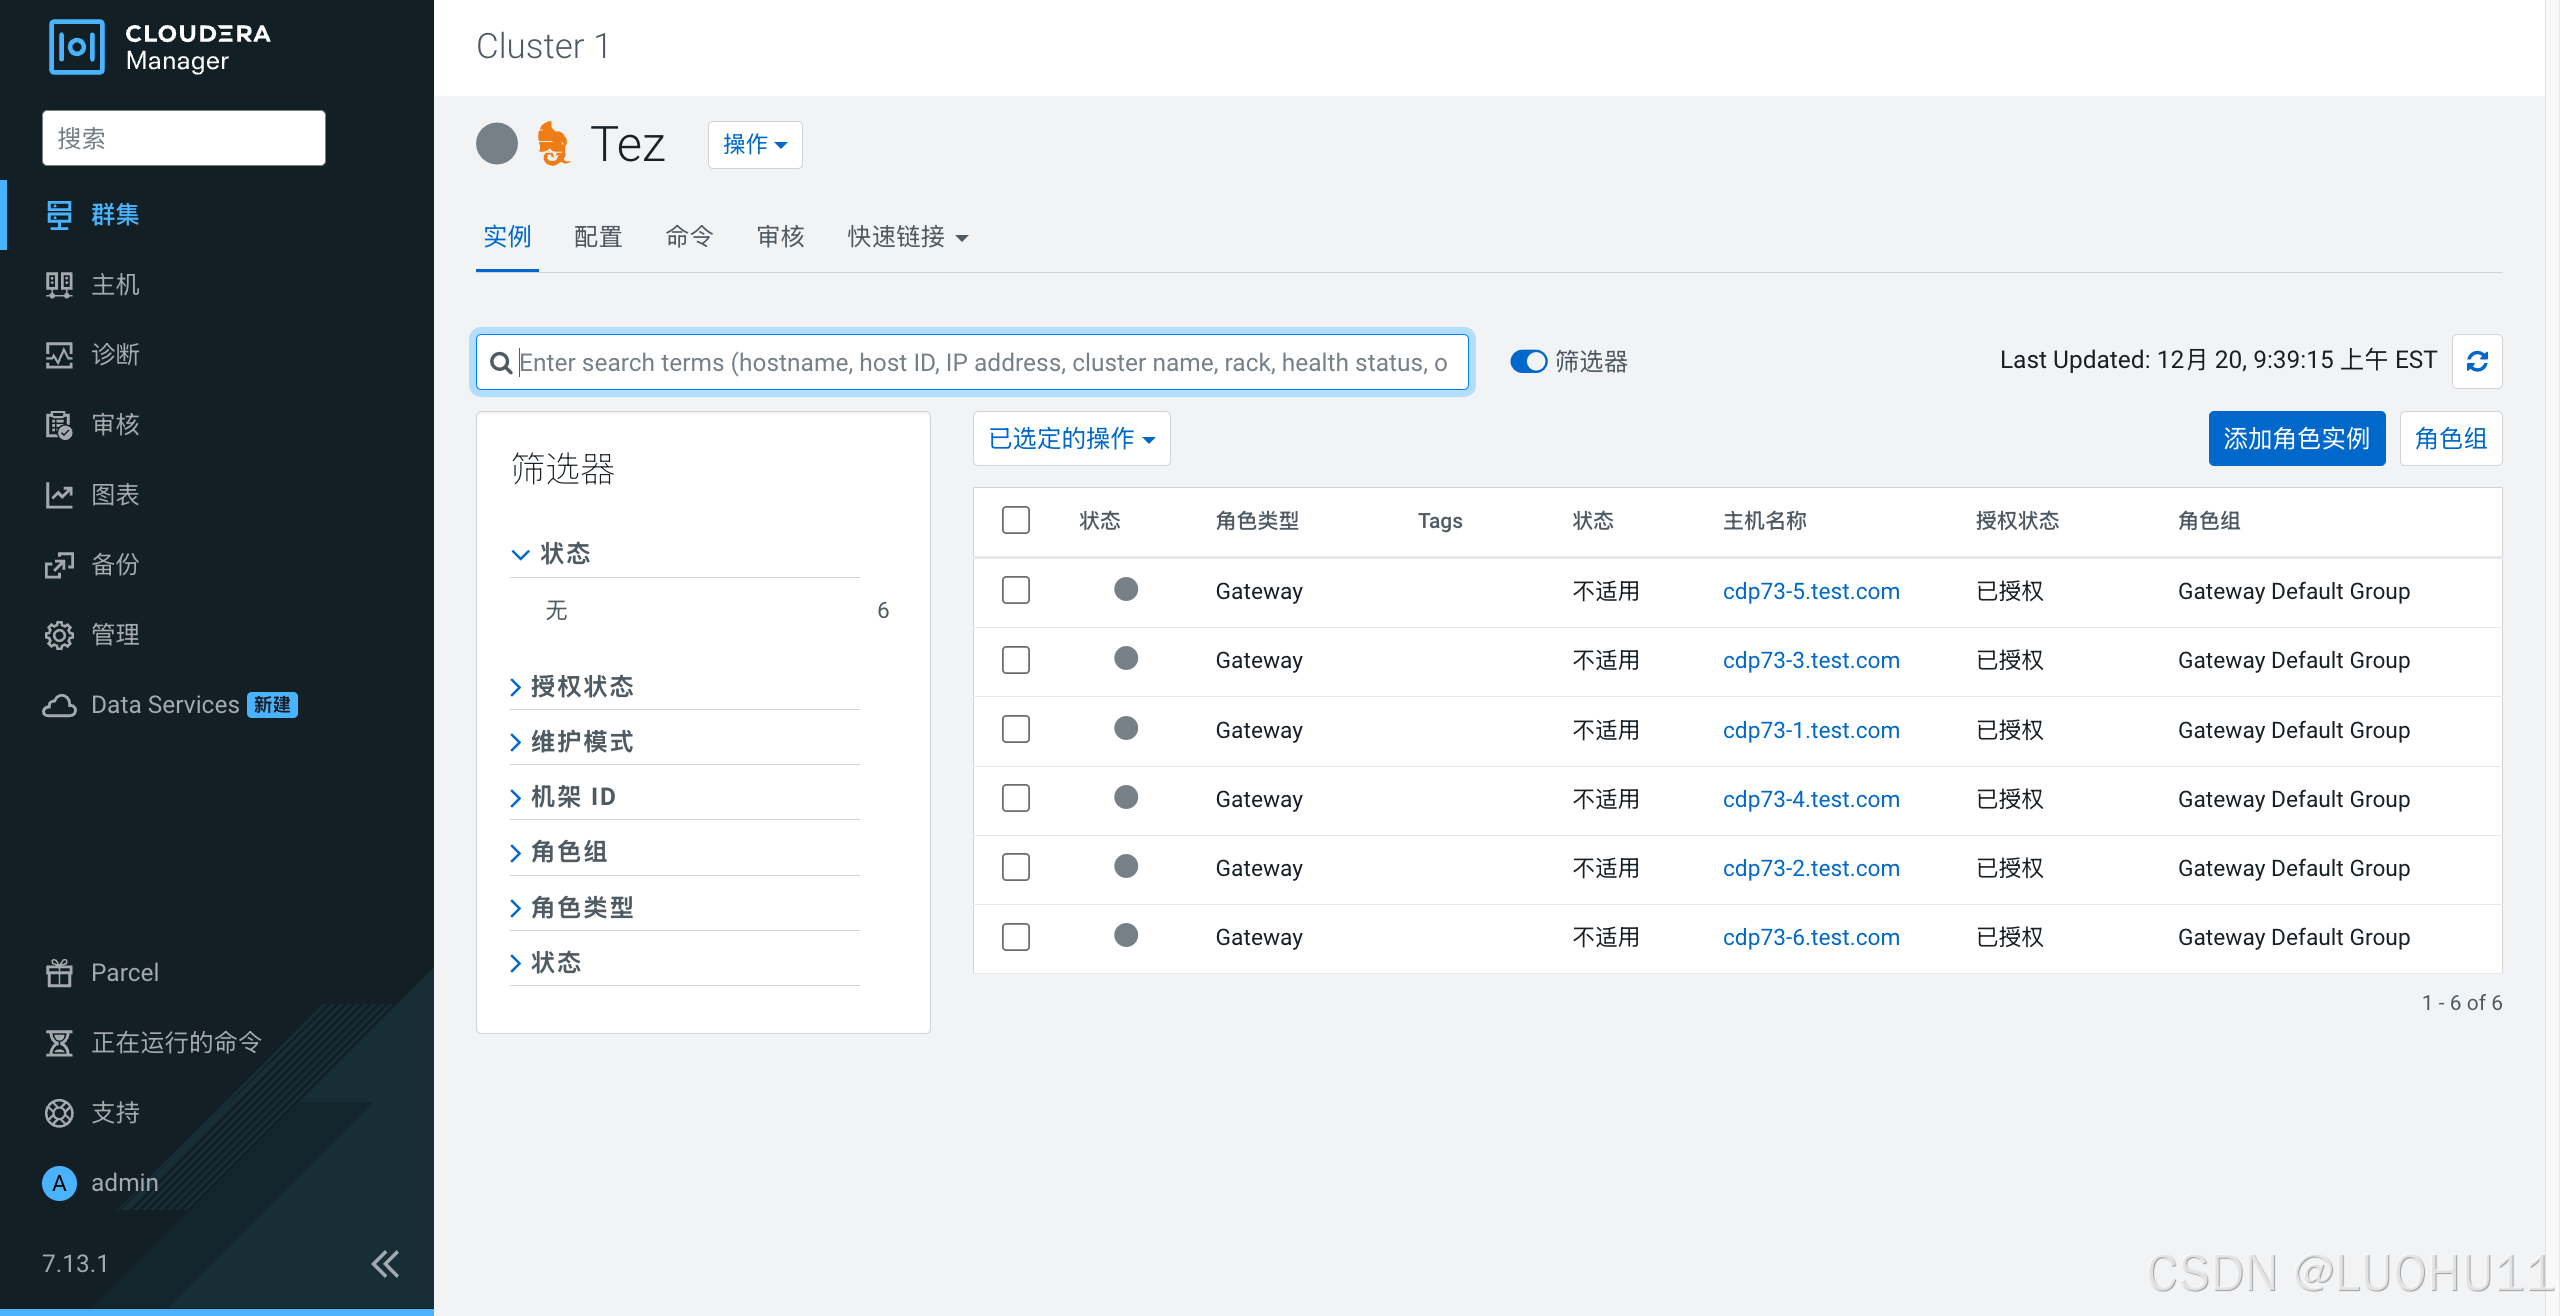
添加Tez服务
选择依赖
分配角色
审核更改
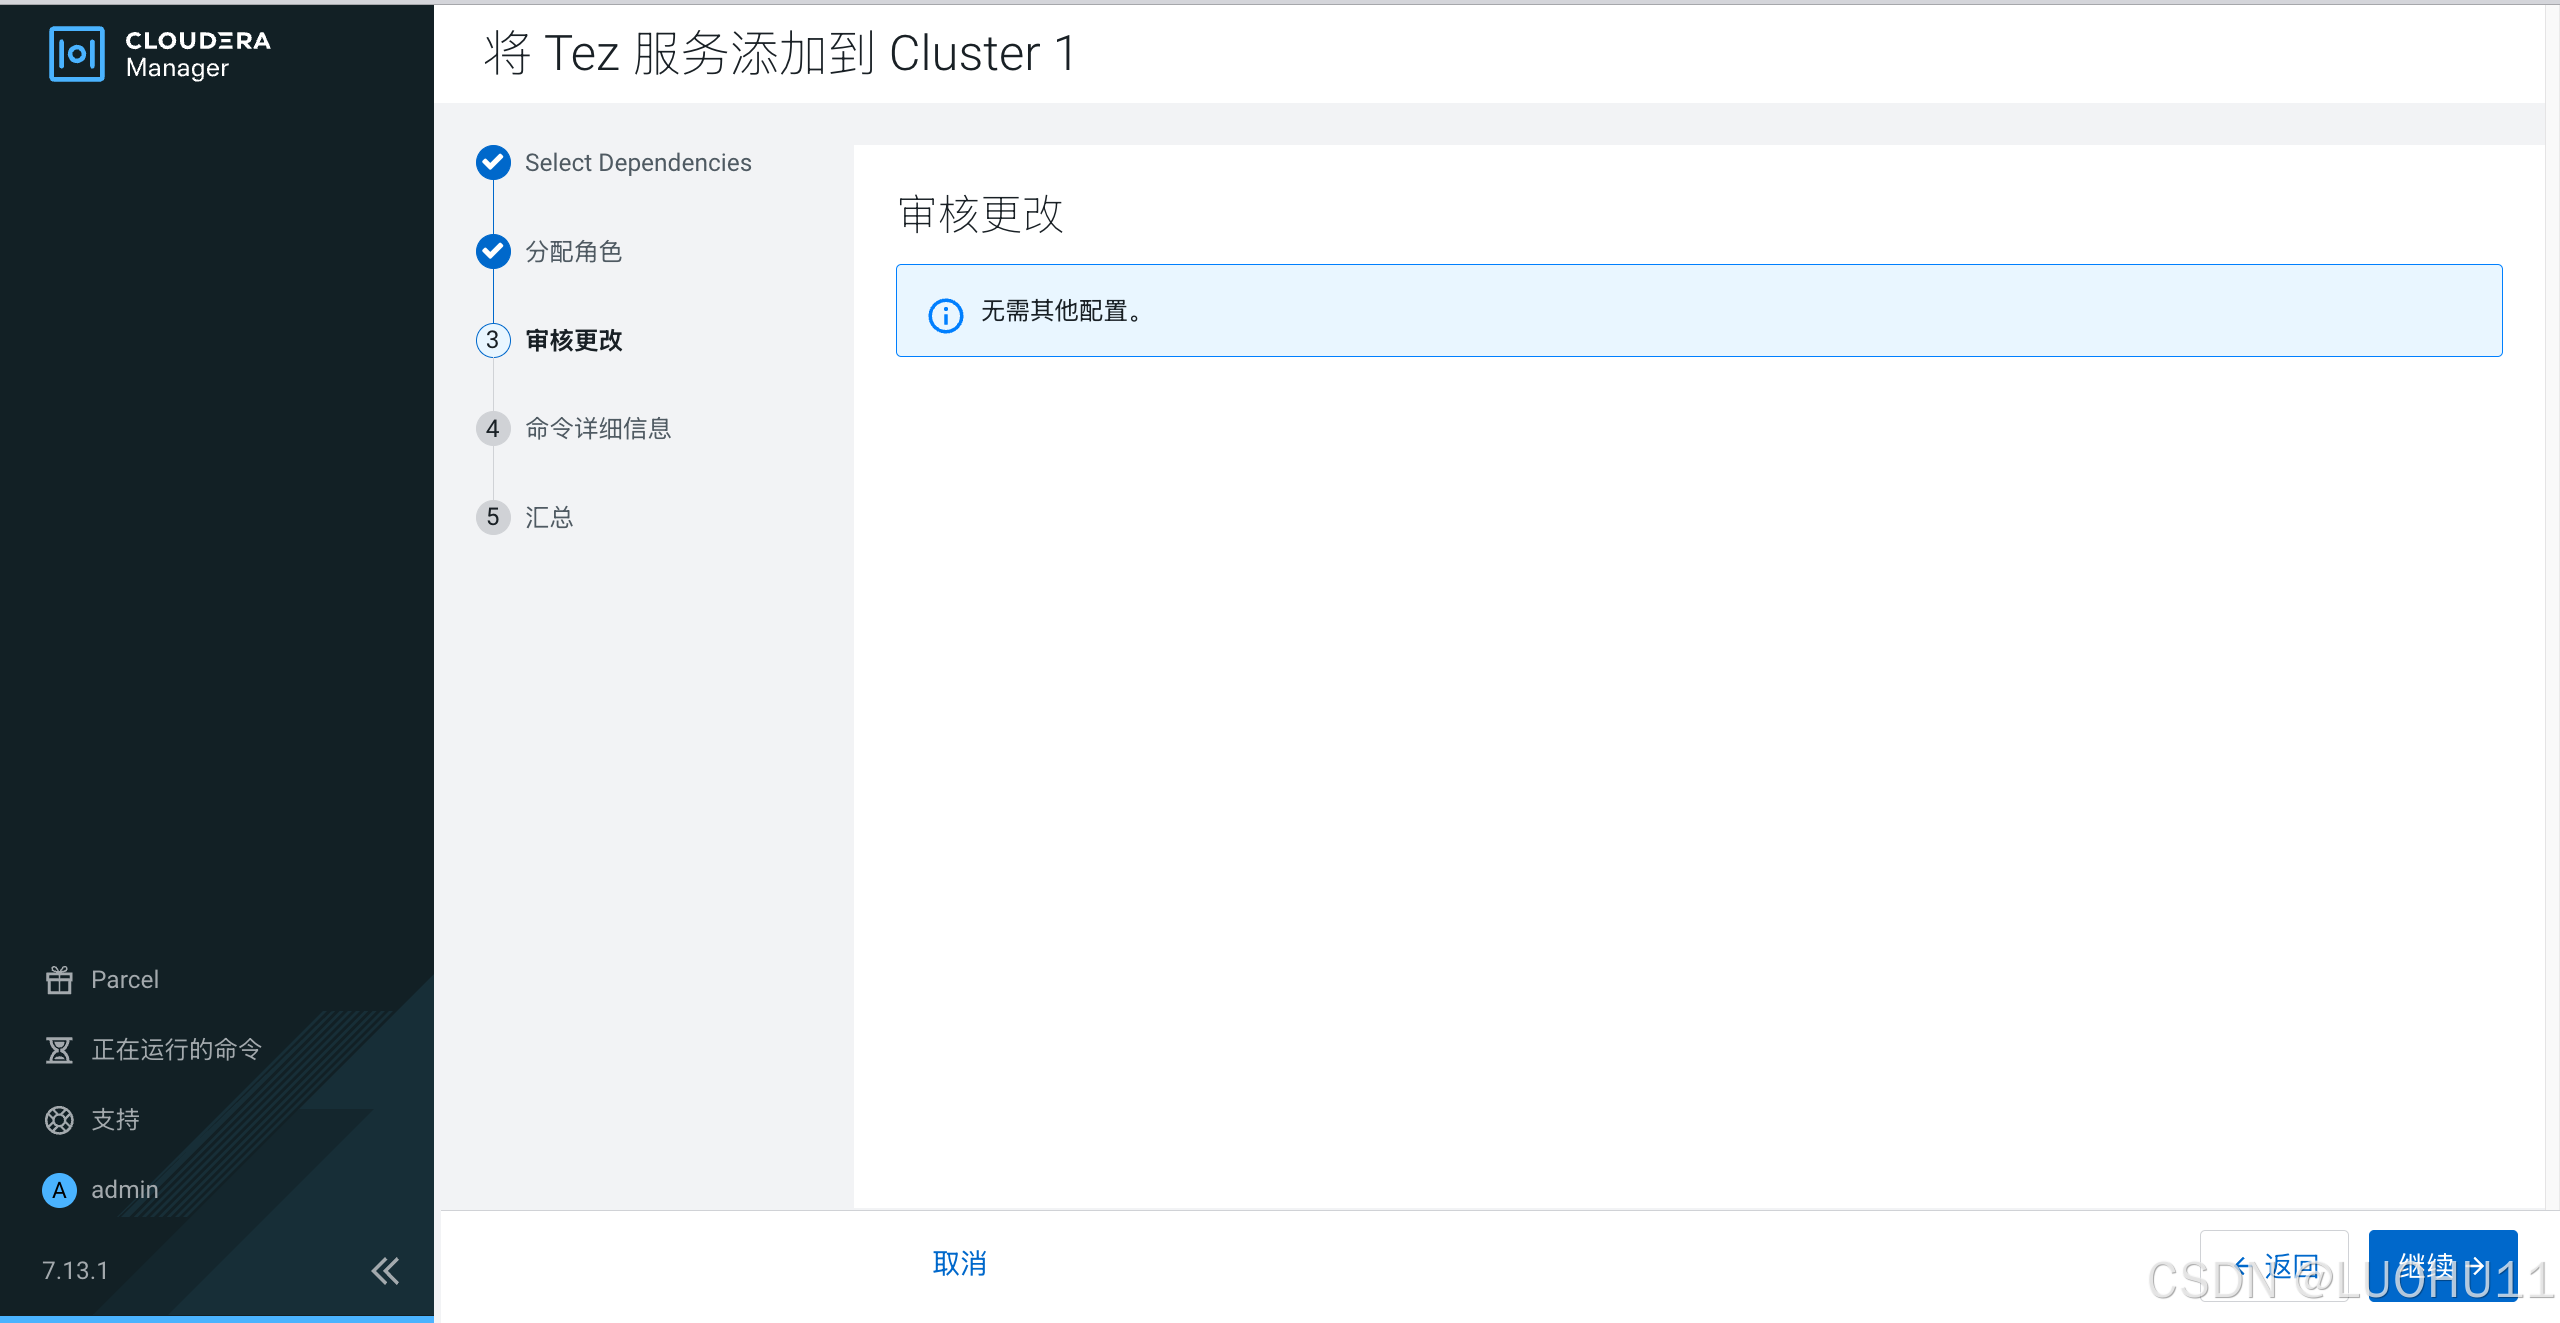
汇总
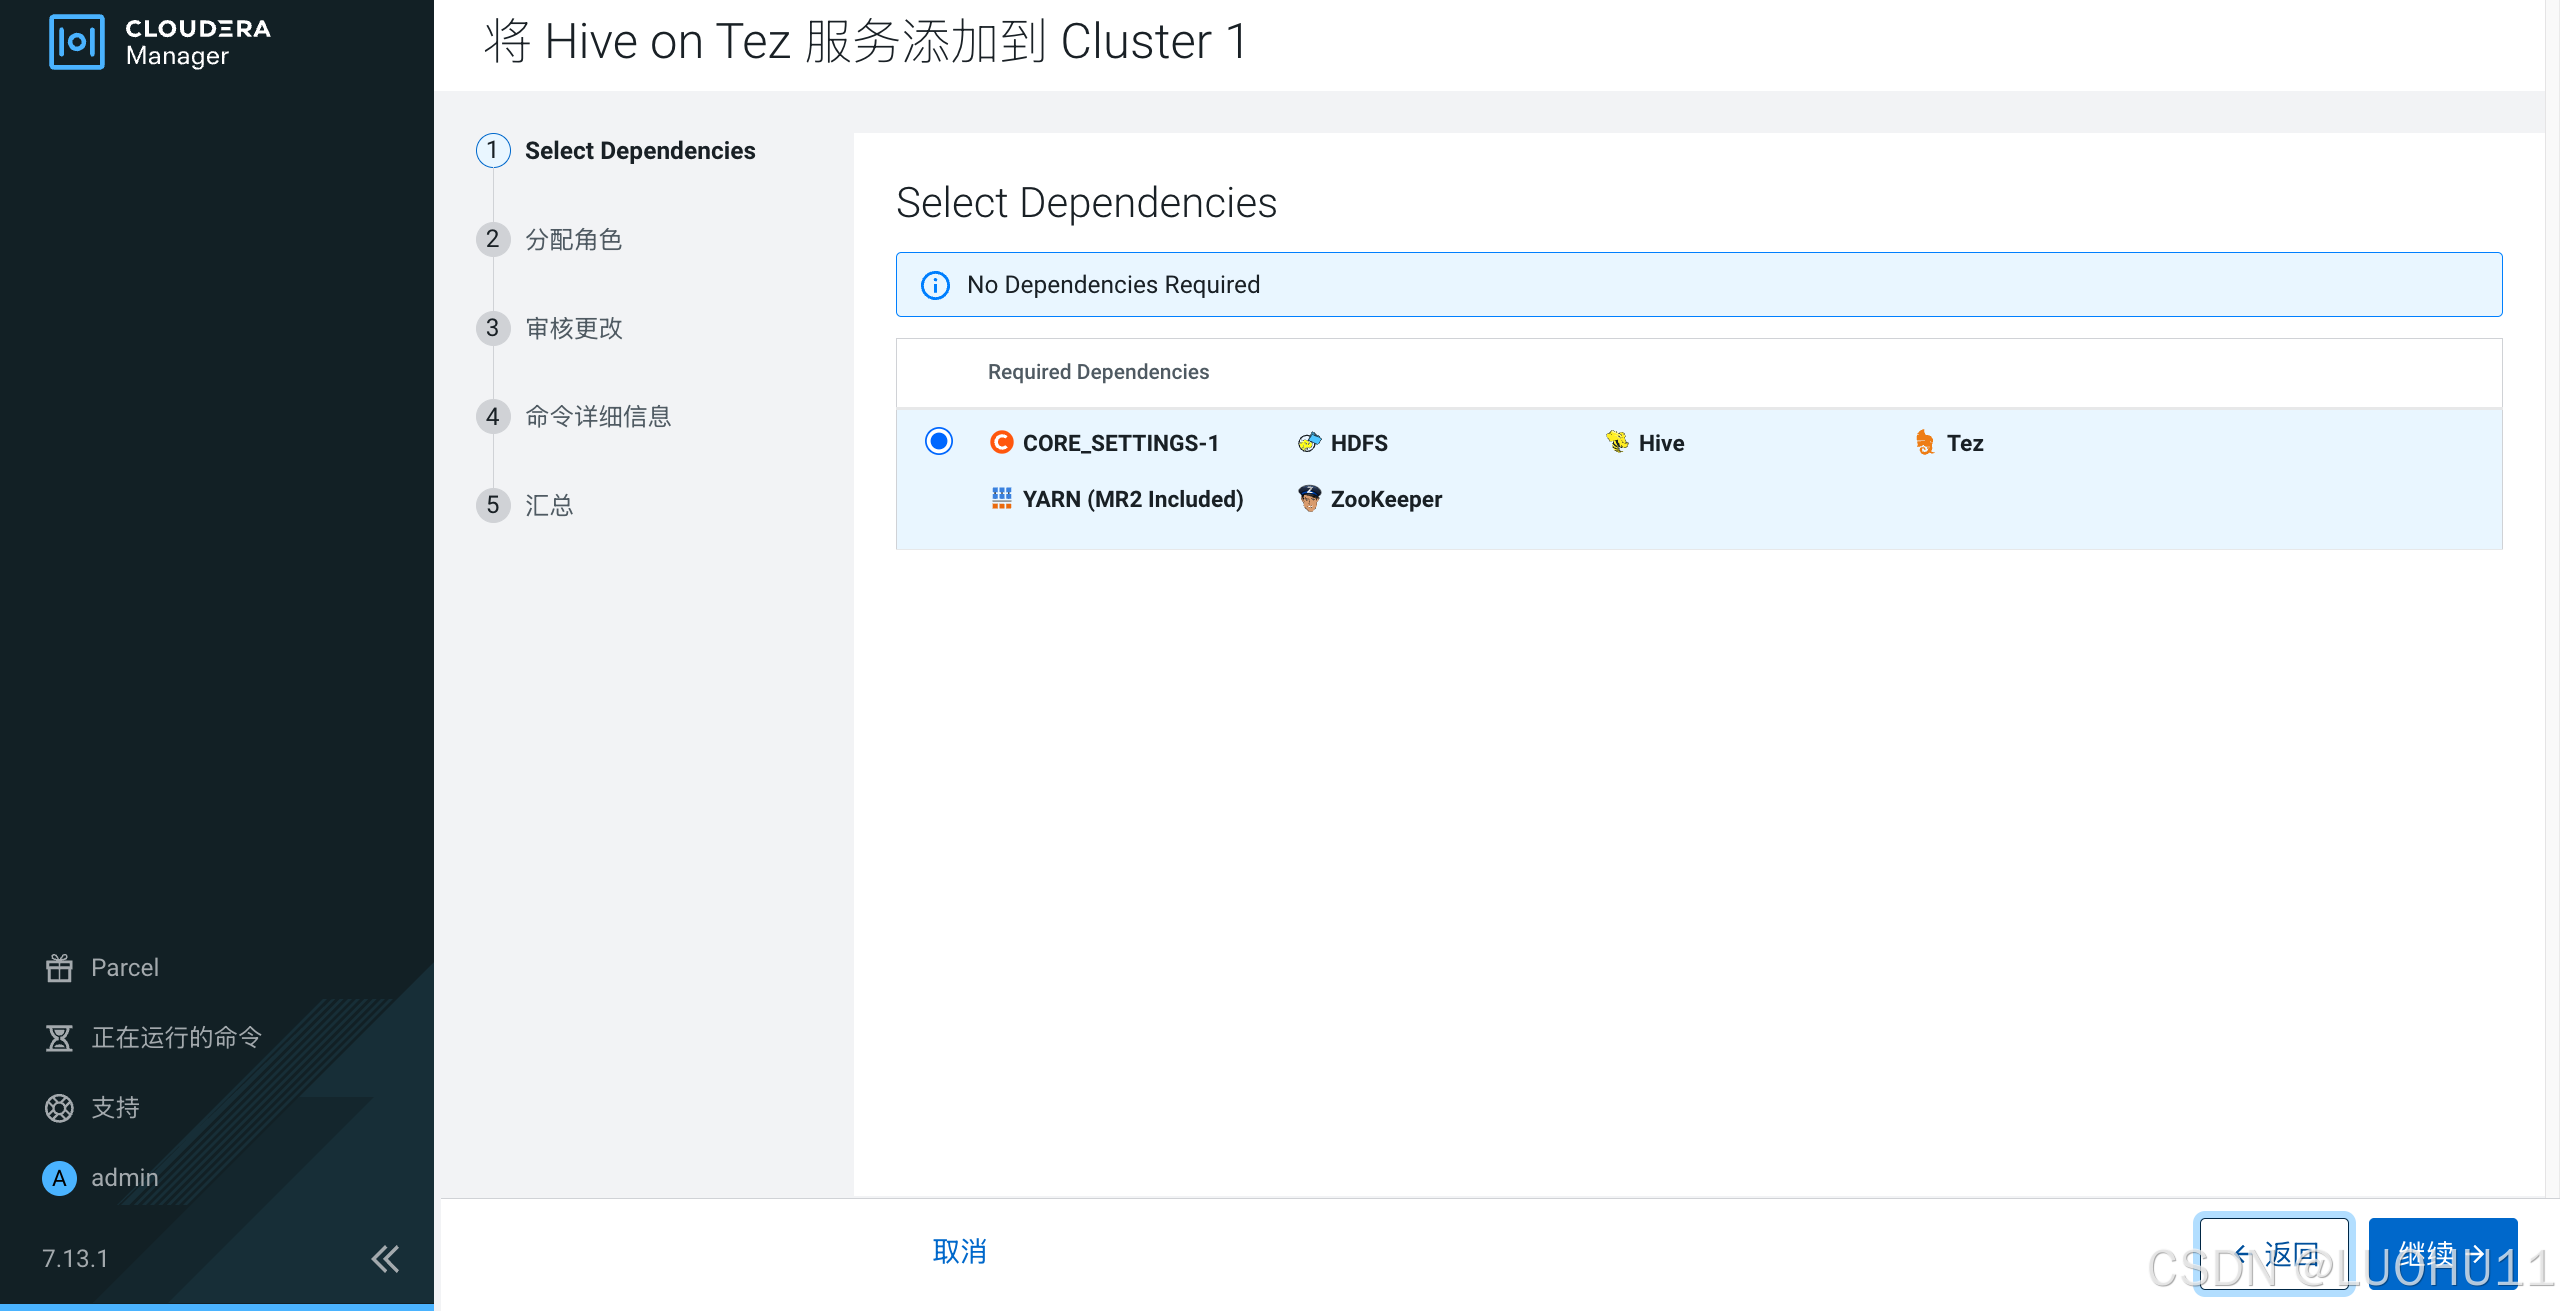
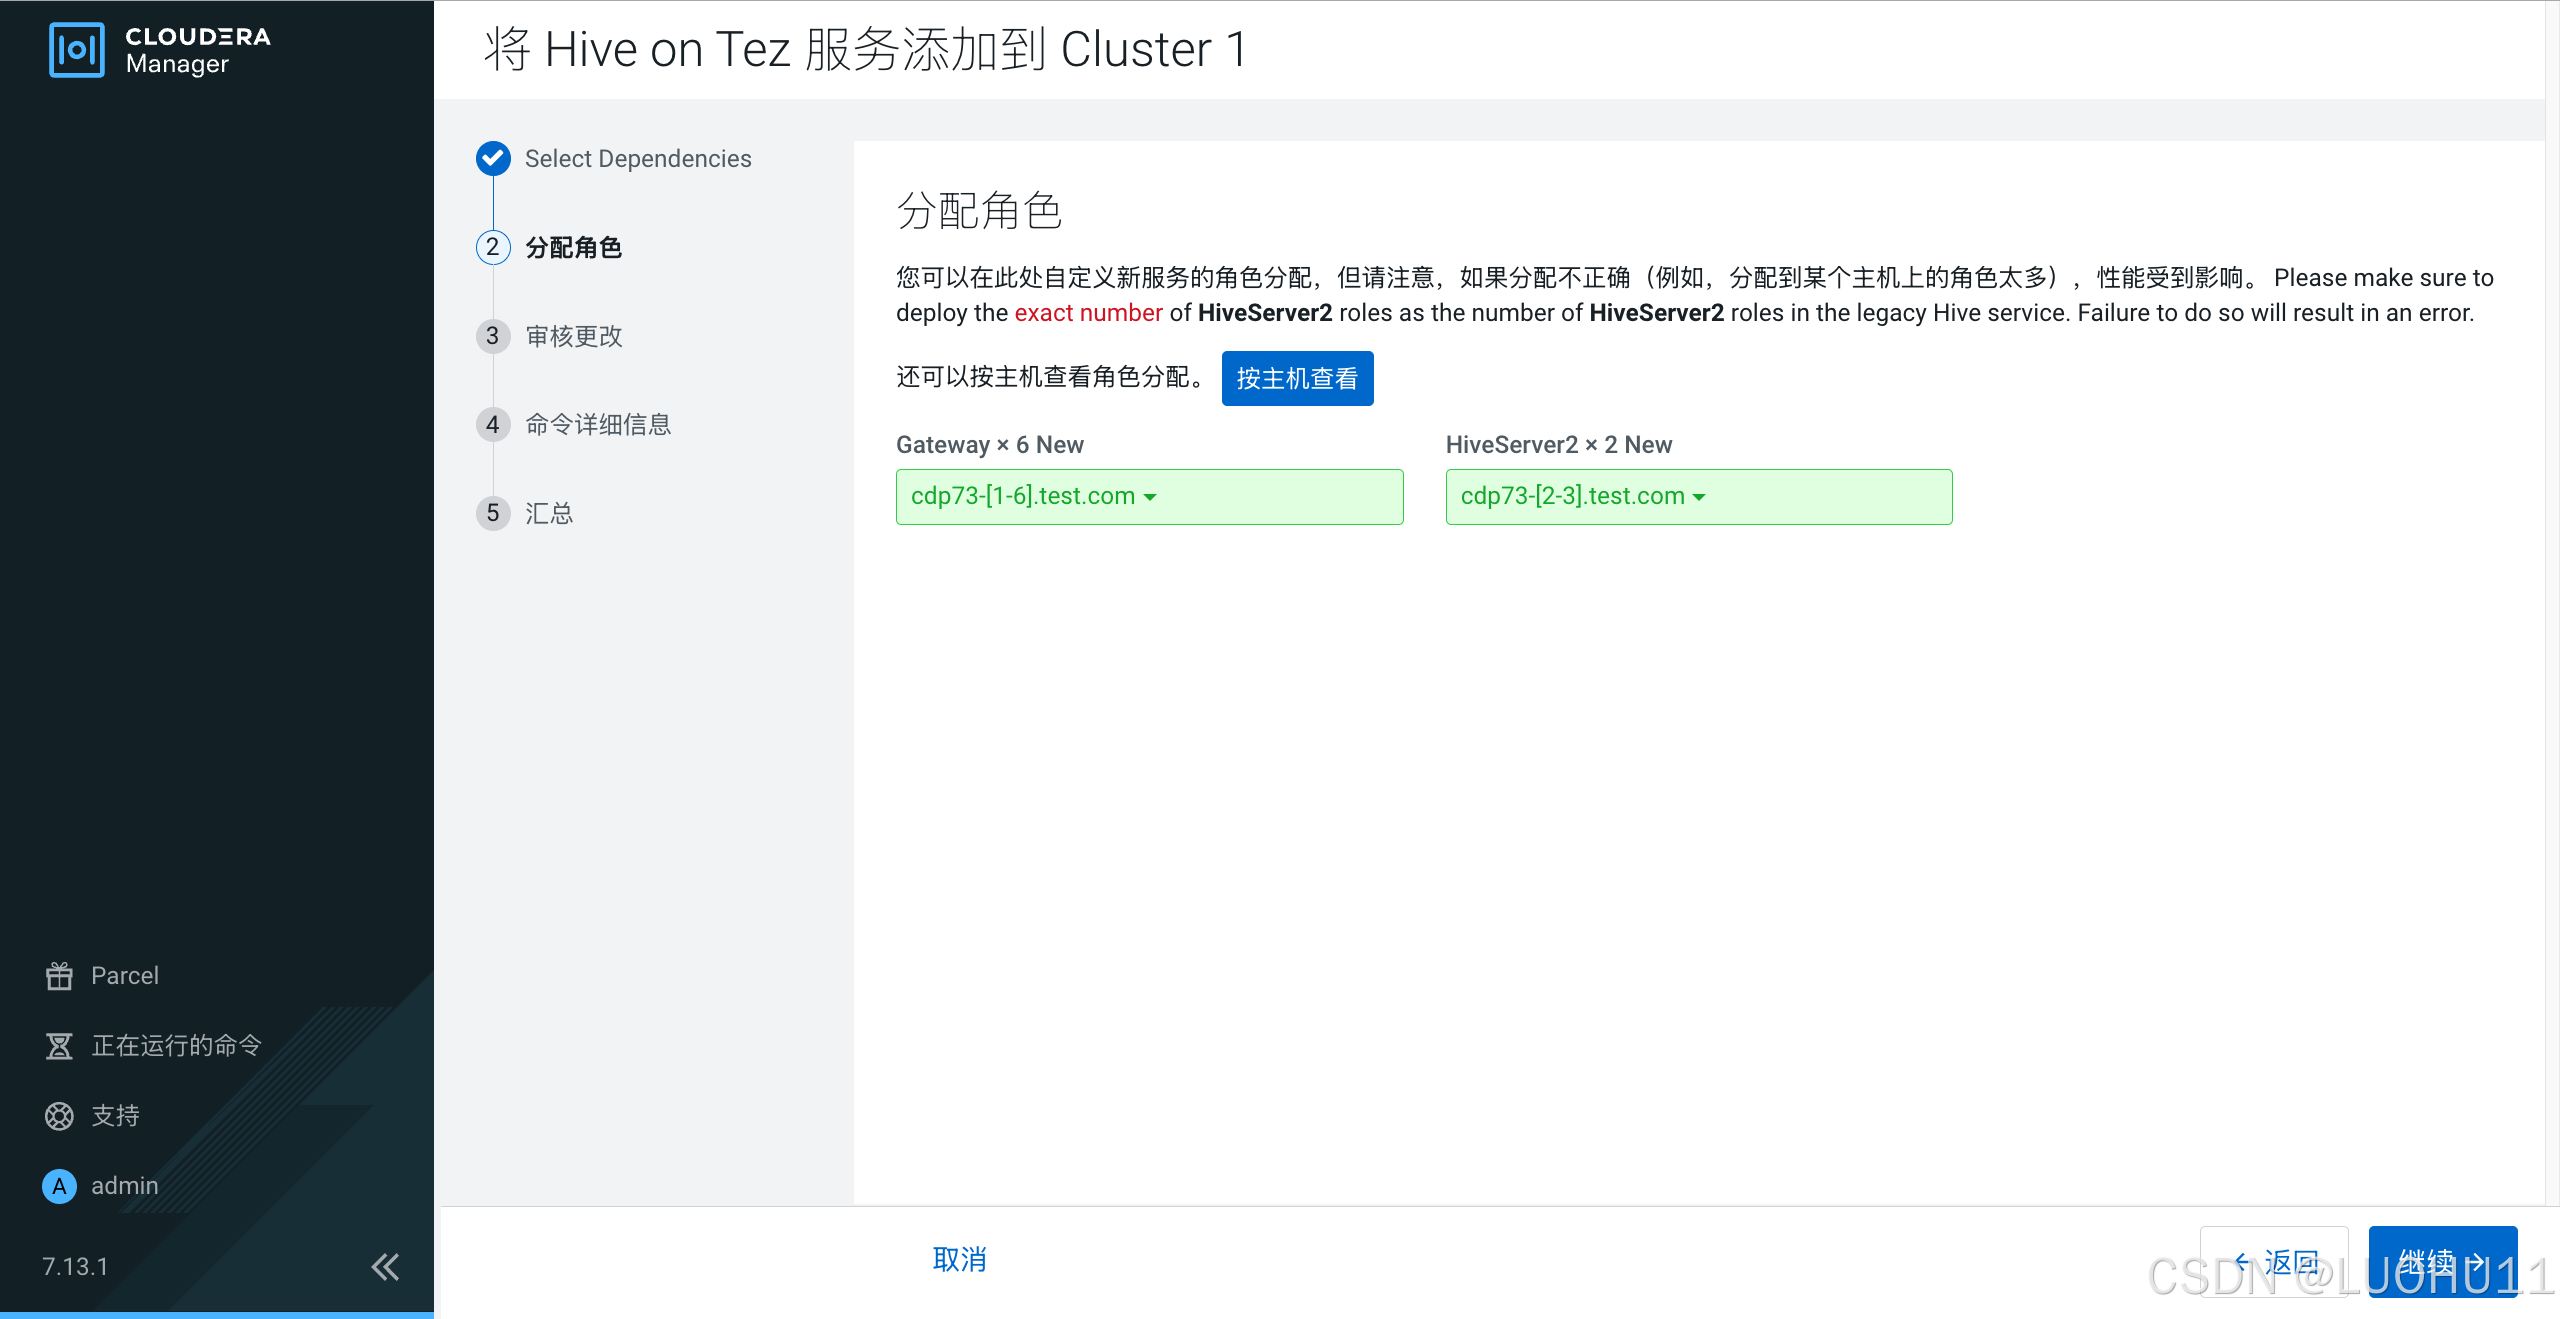
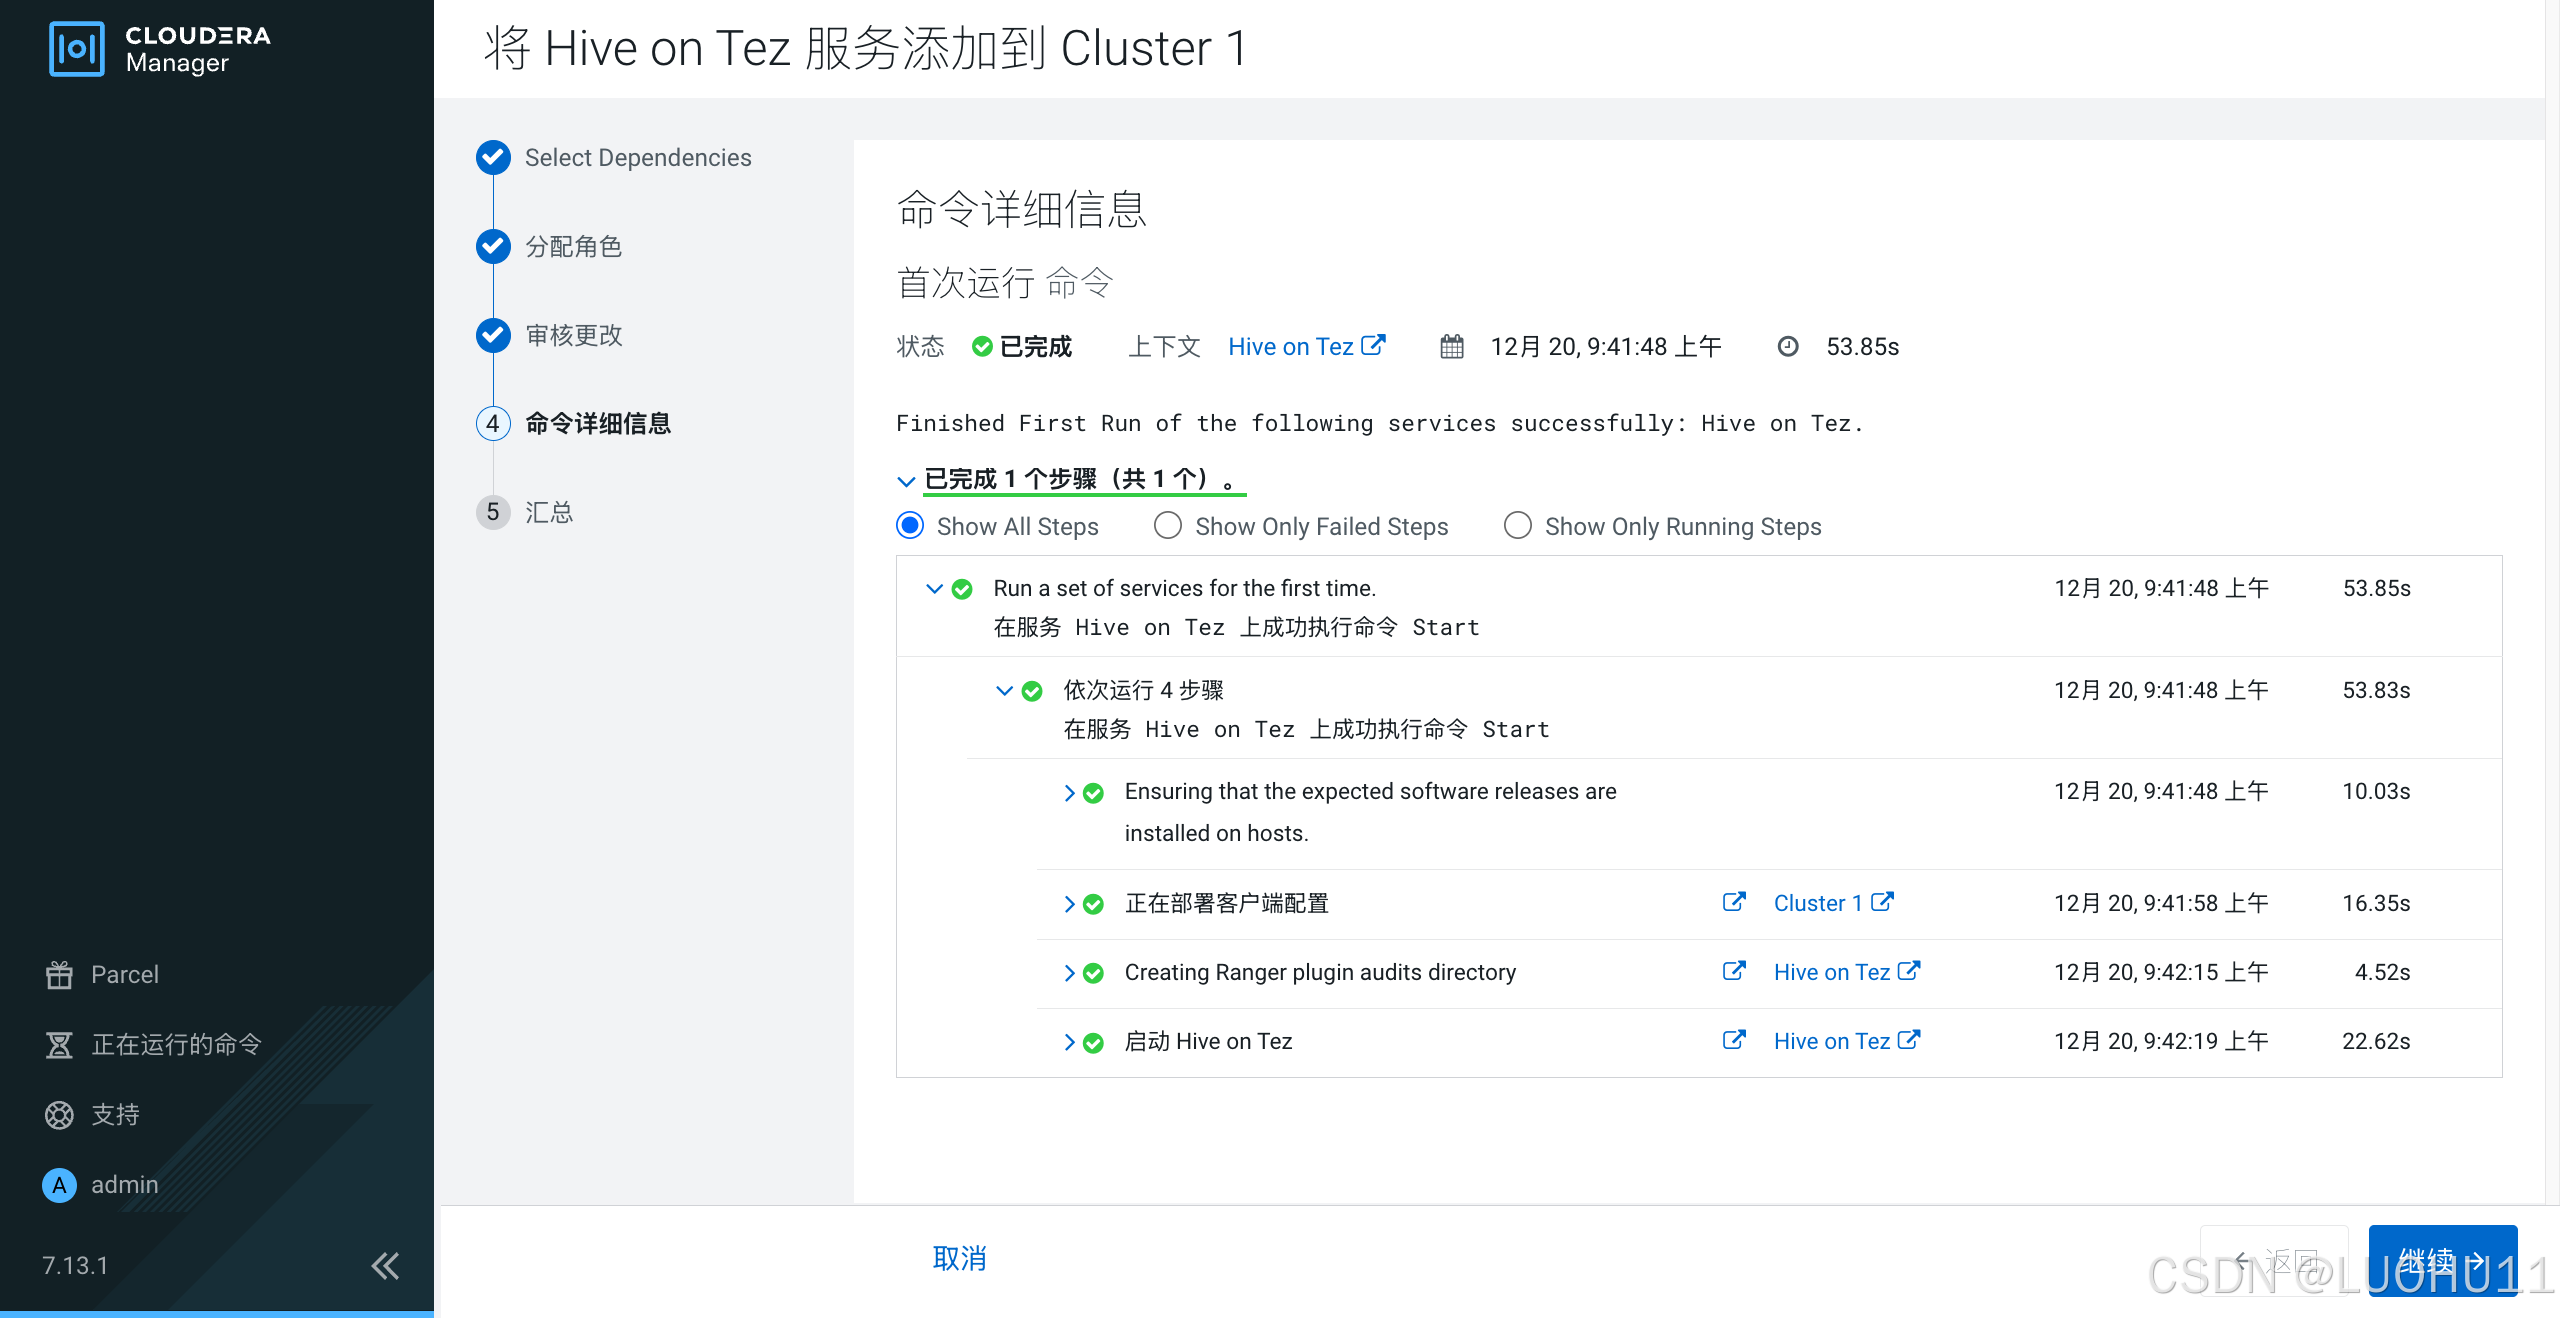
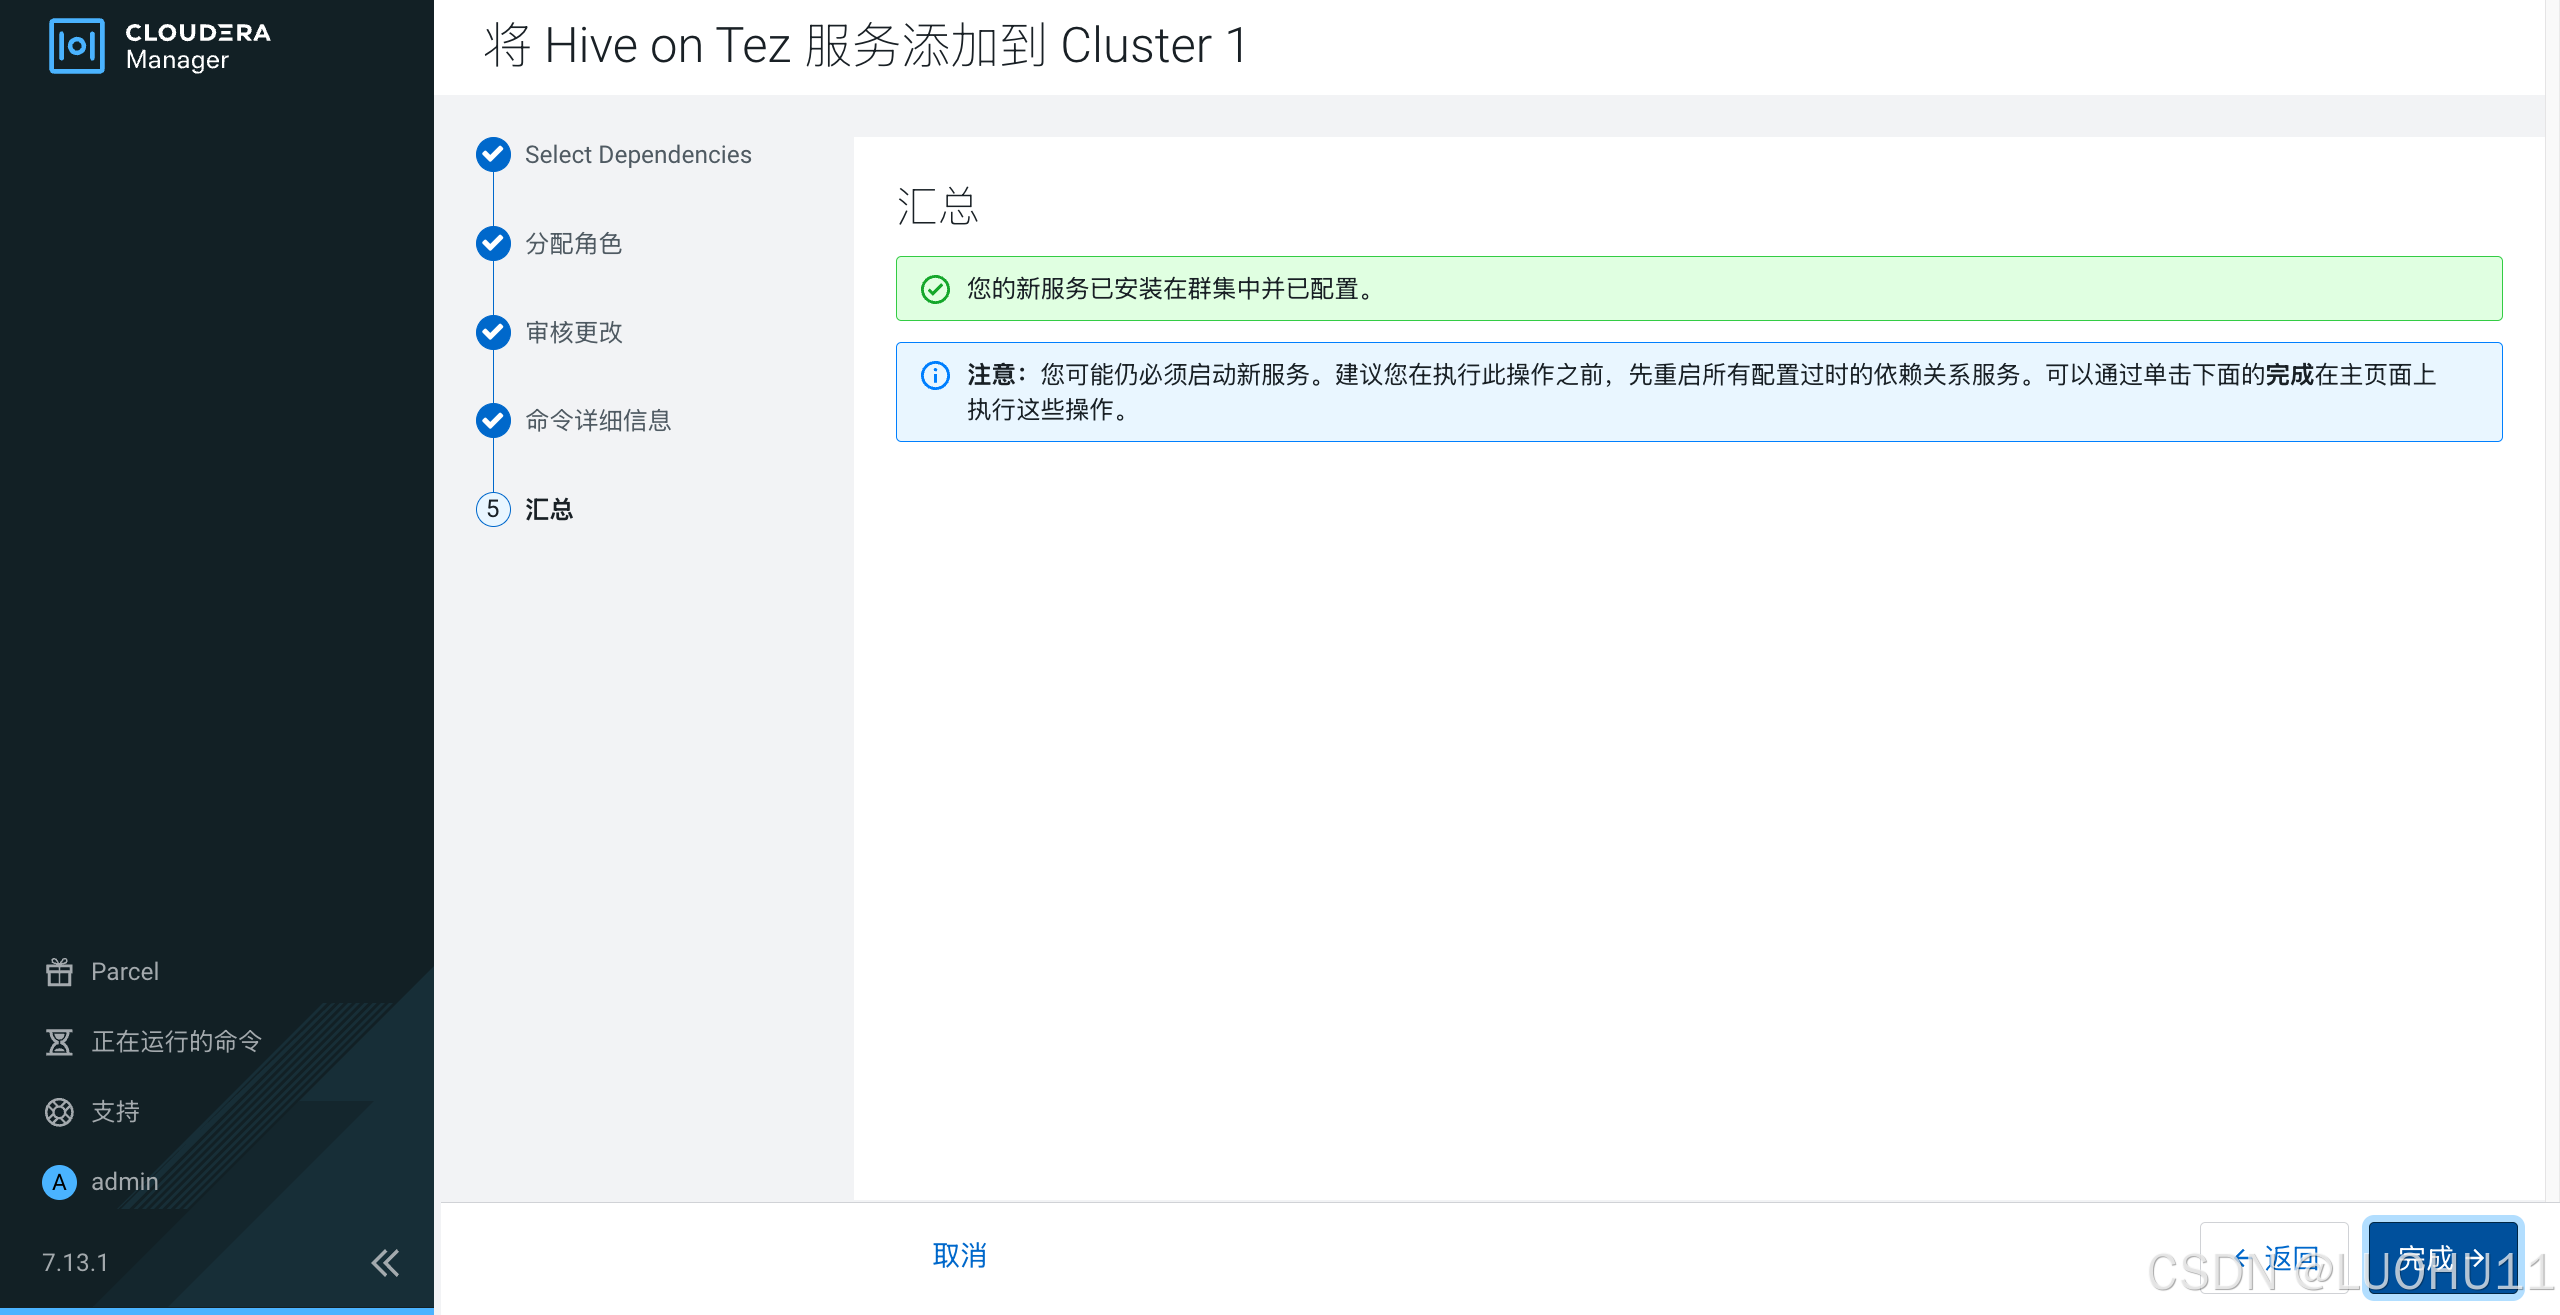
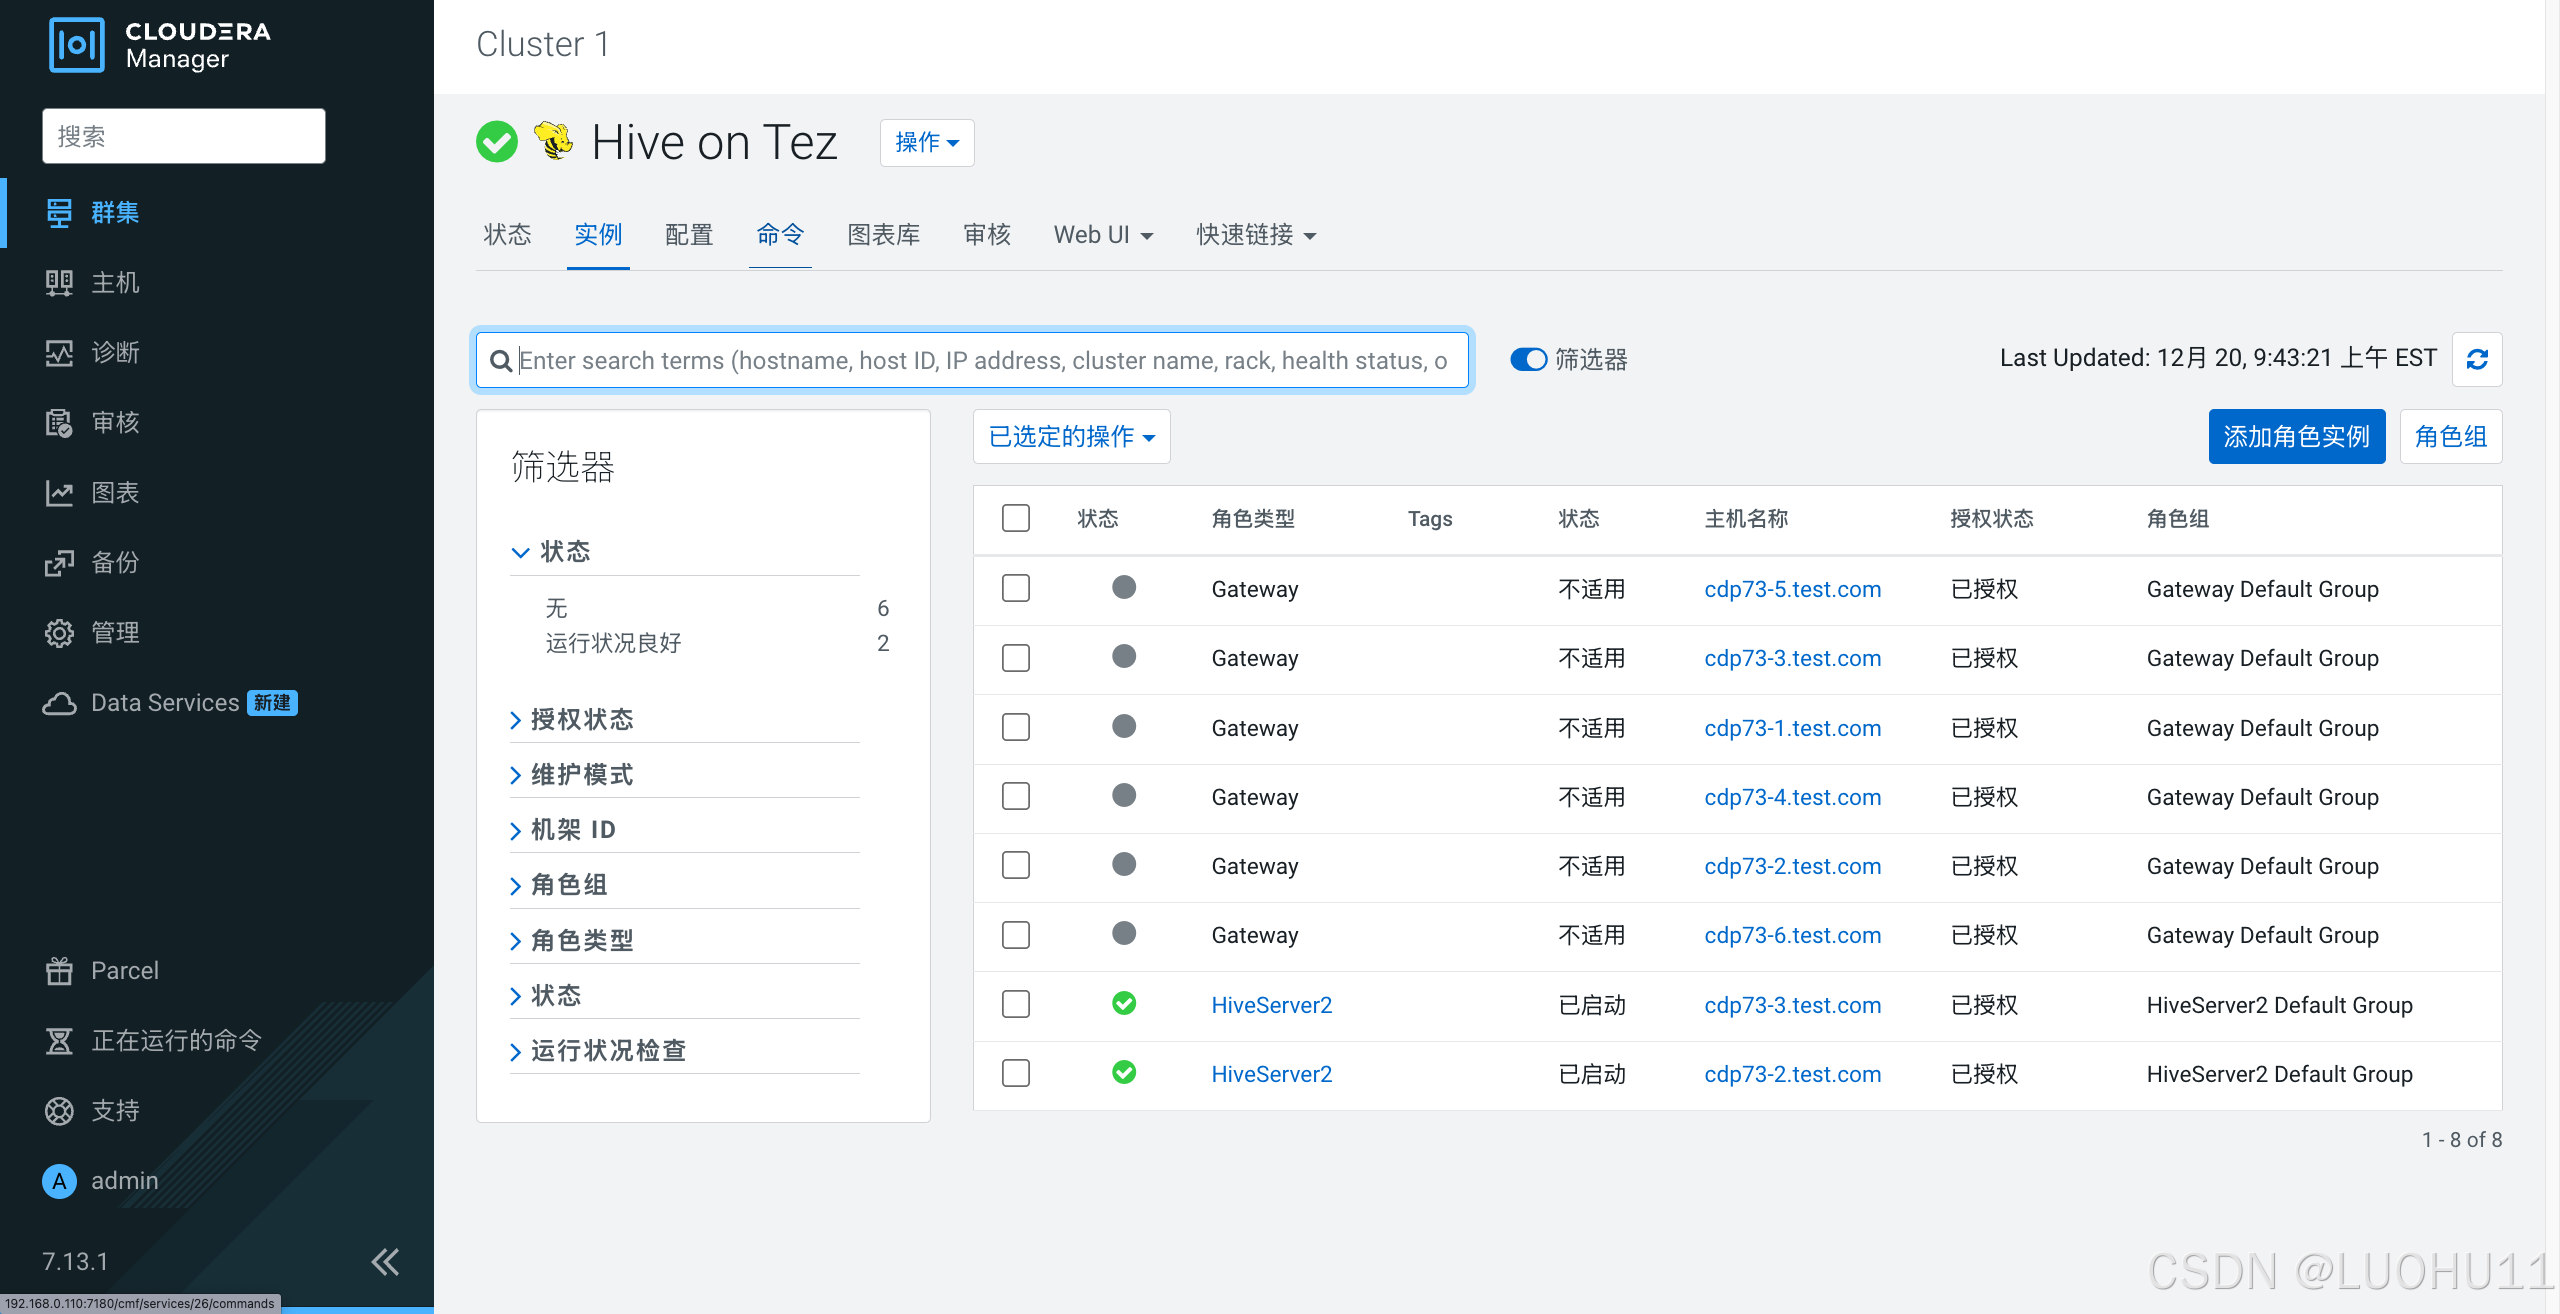
添加Hive on Tez服务
选择依赖
分配角色
审核更改

命令详细信息
汇总
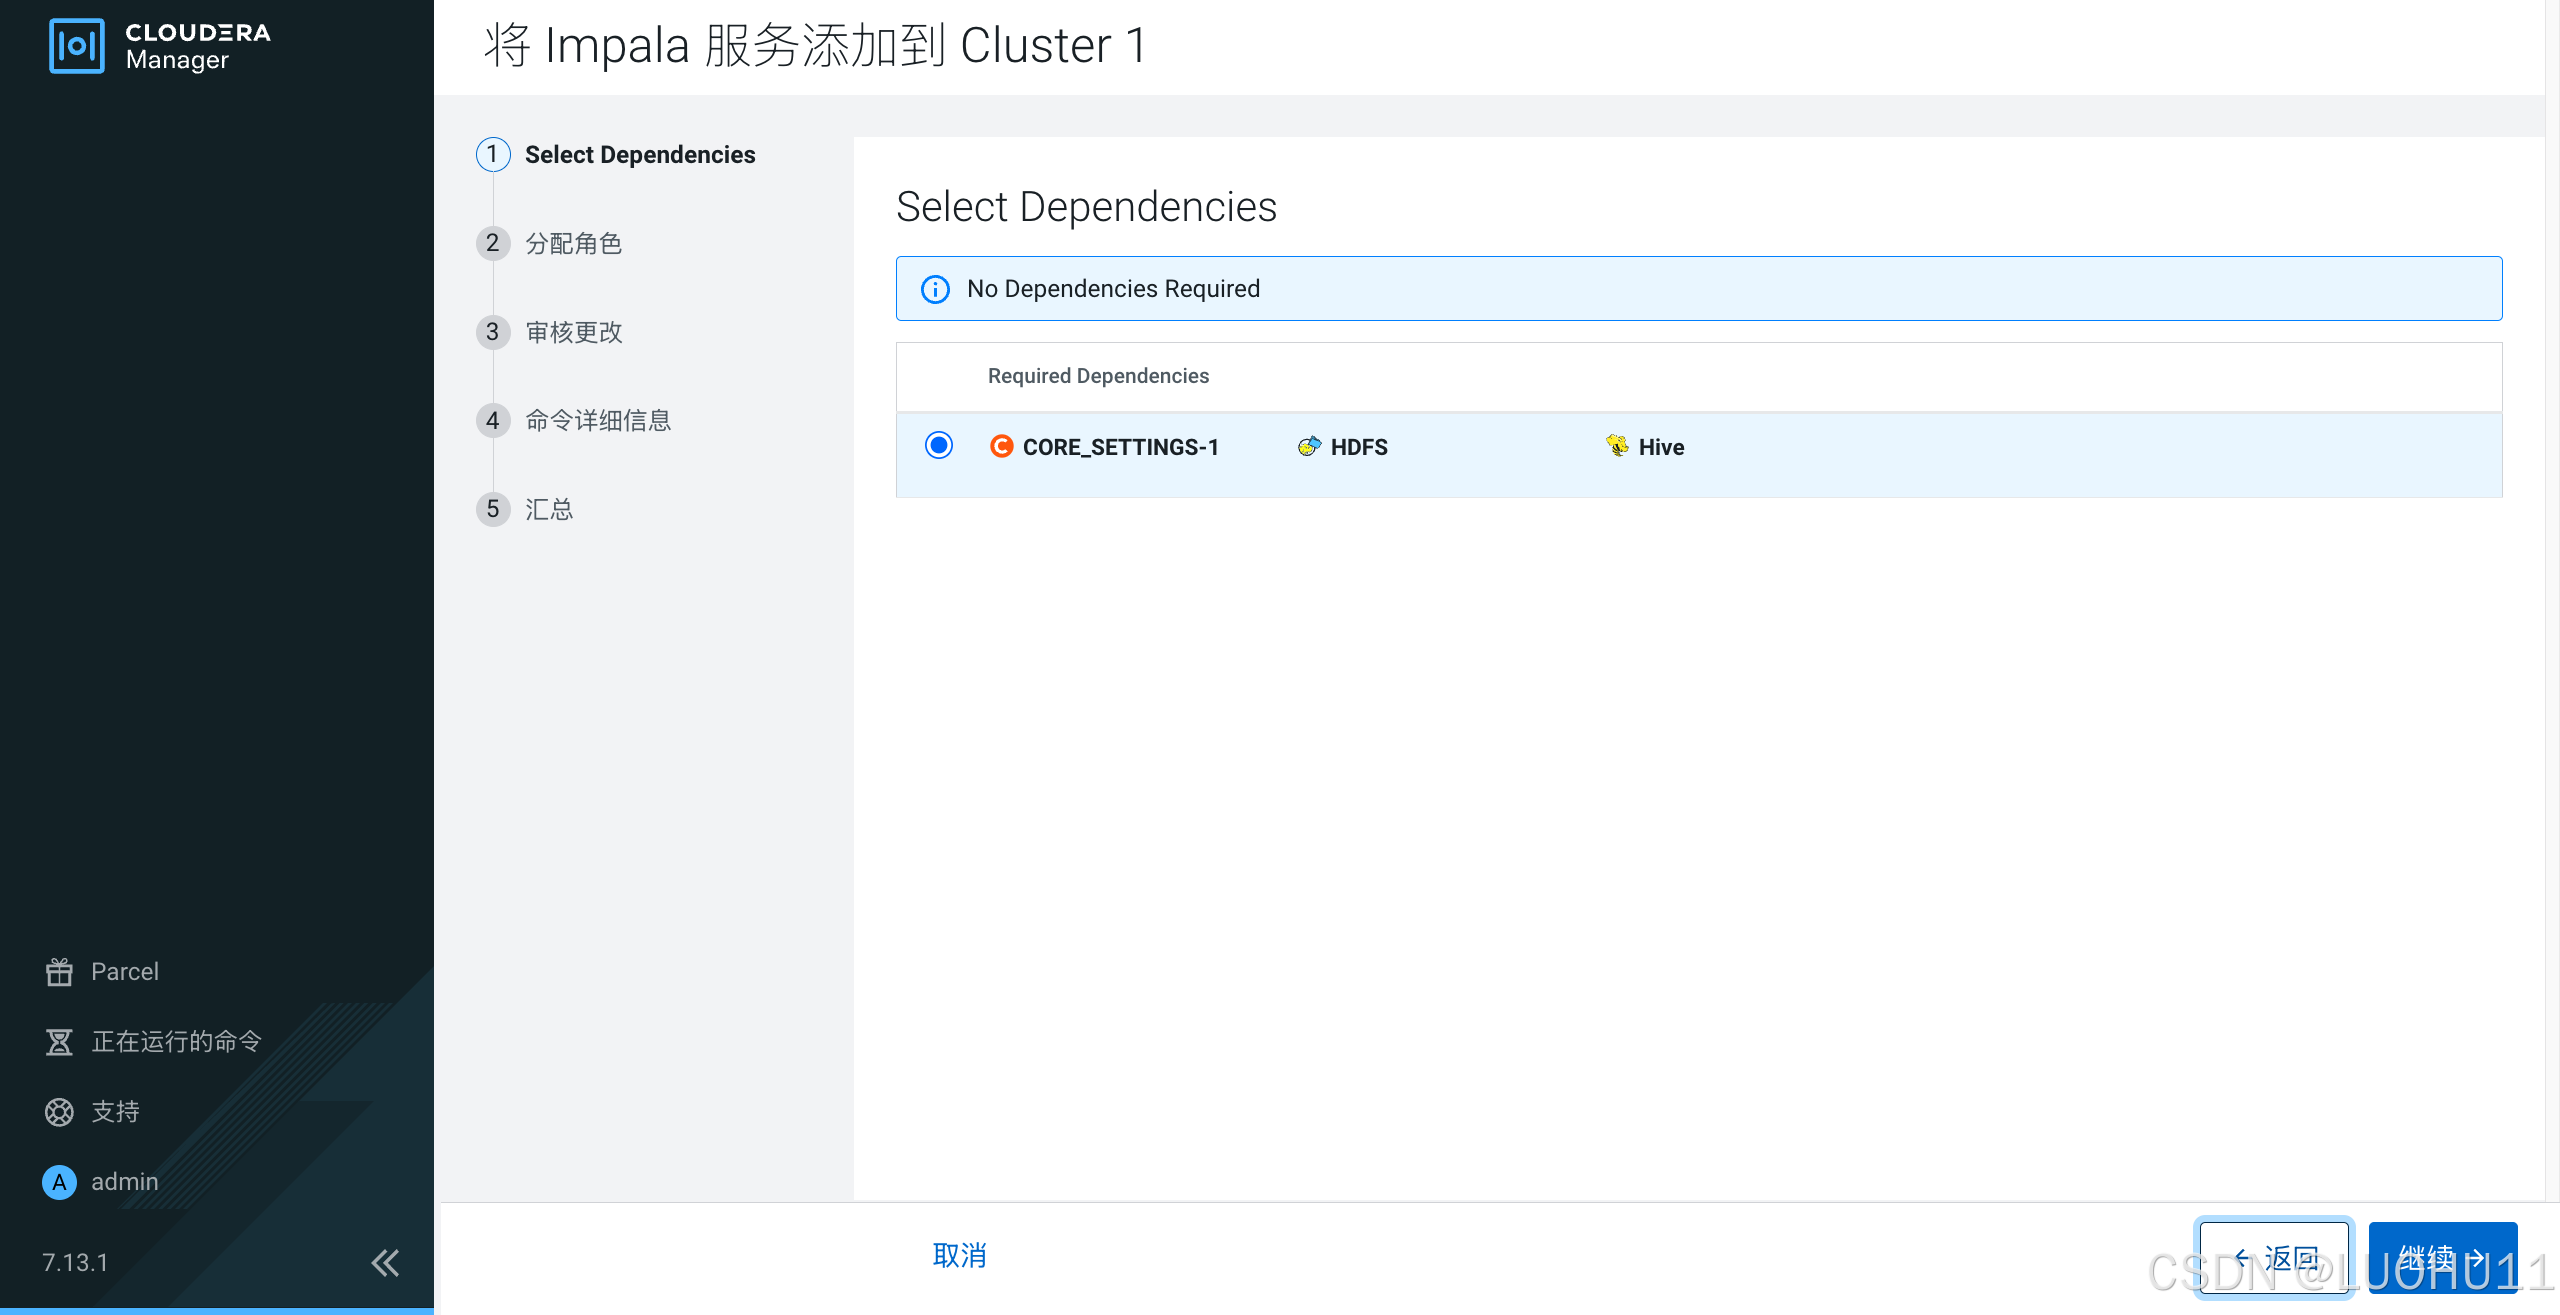
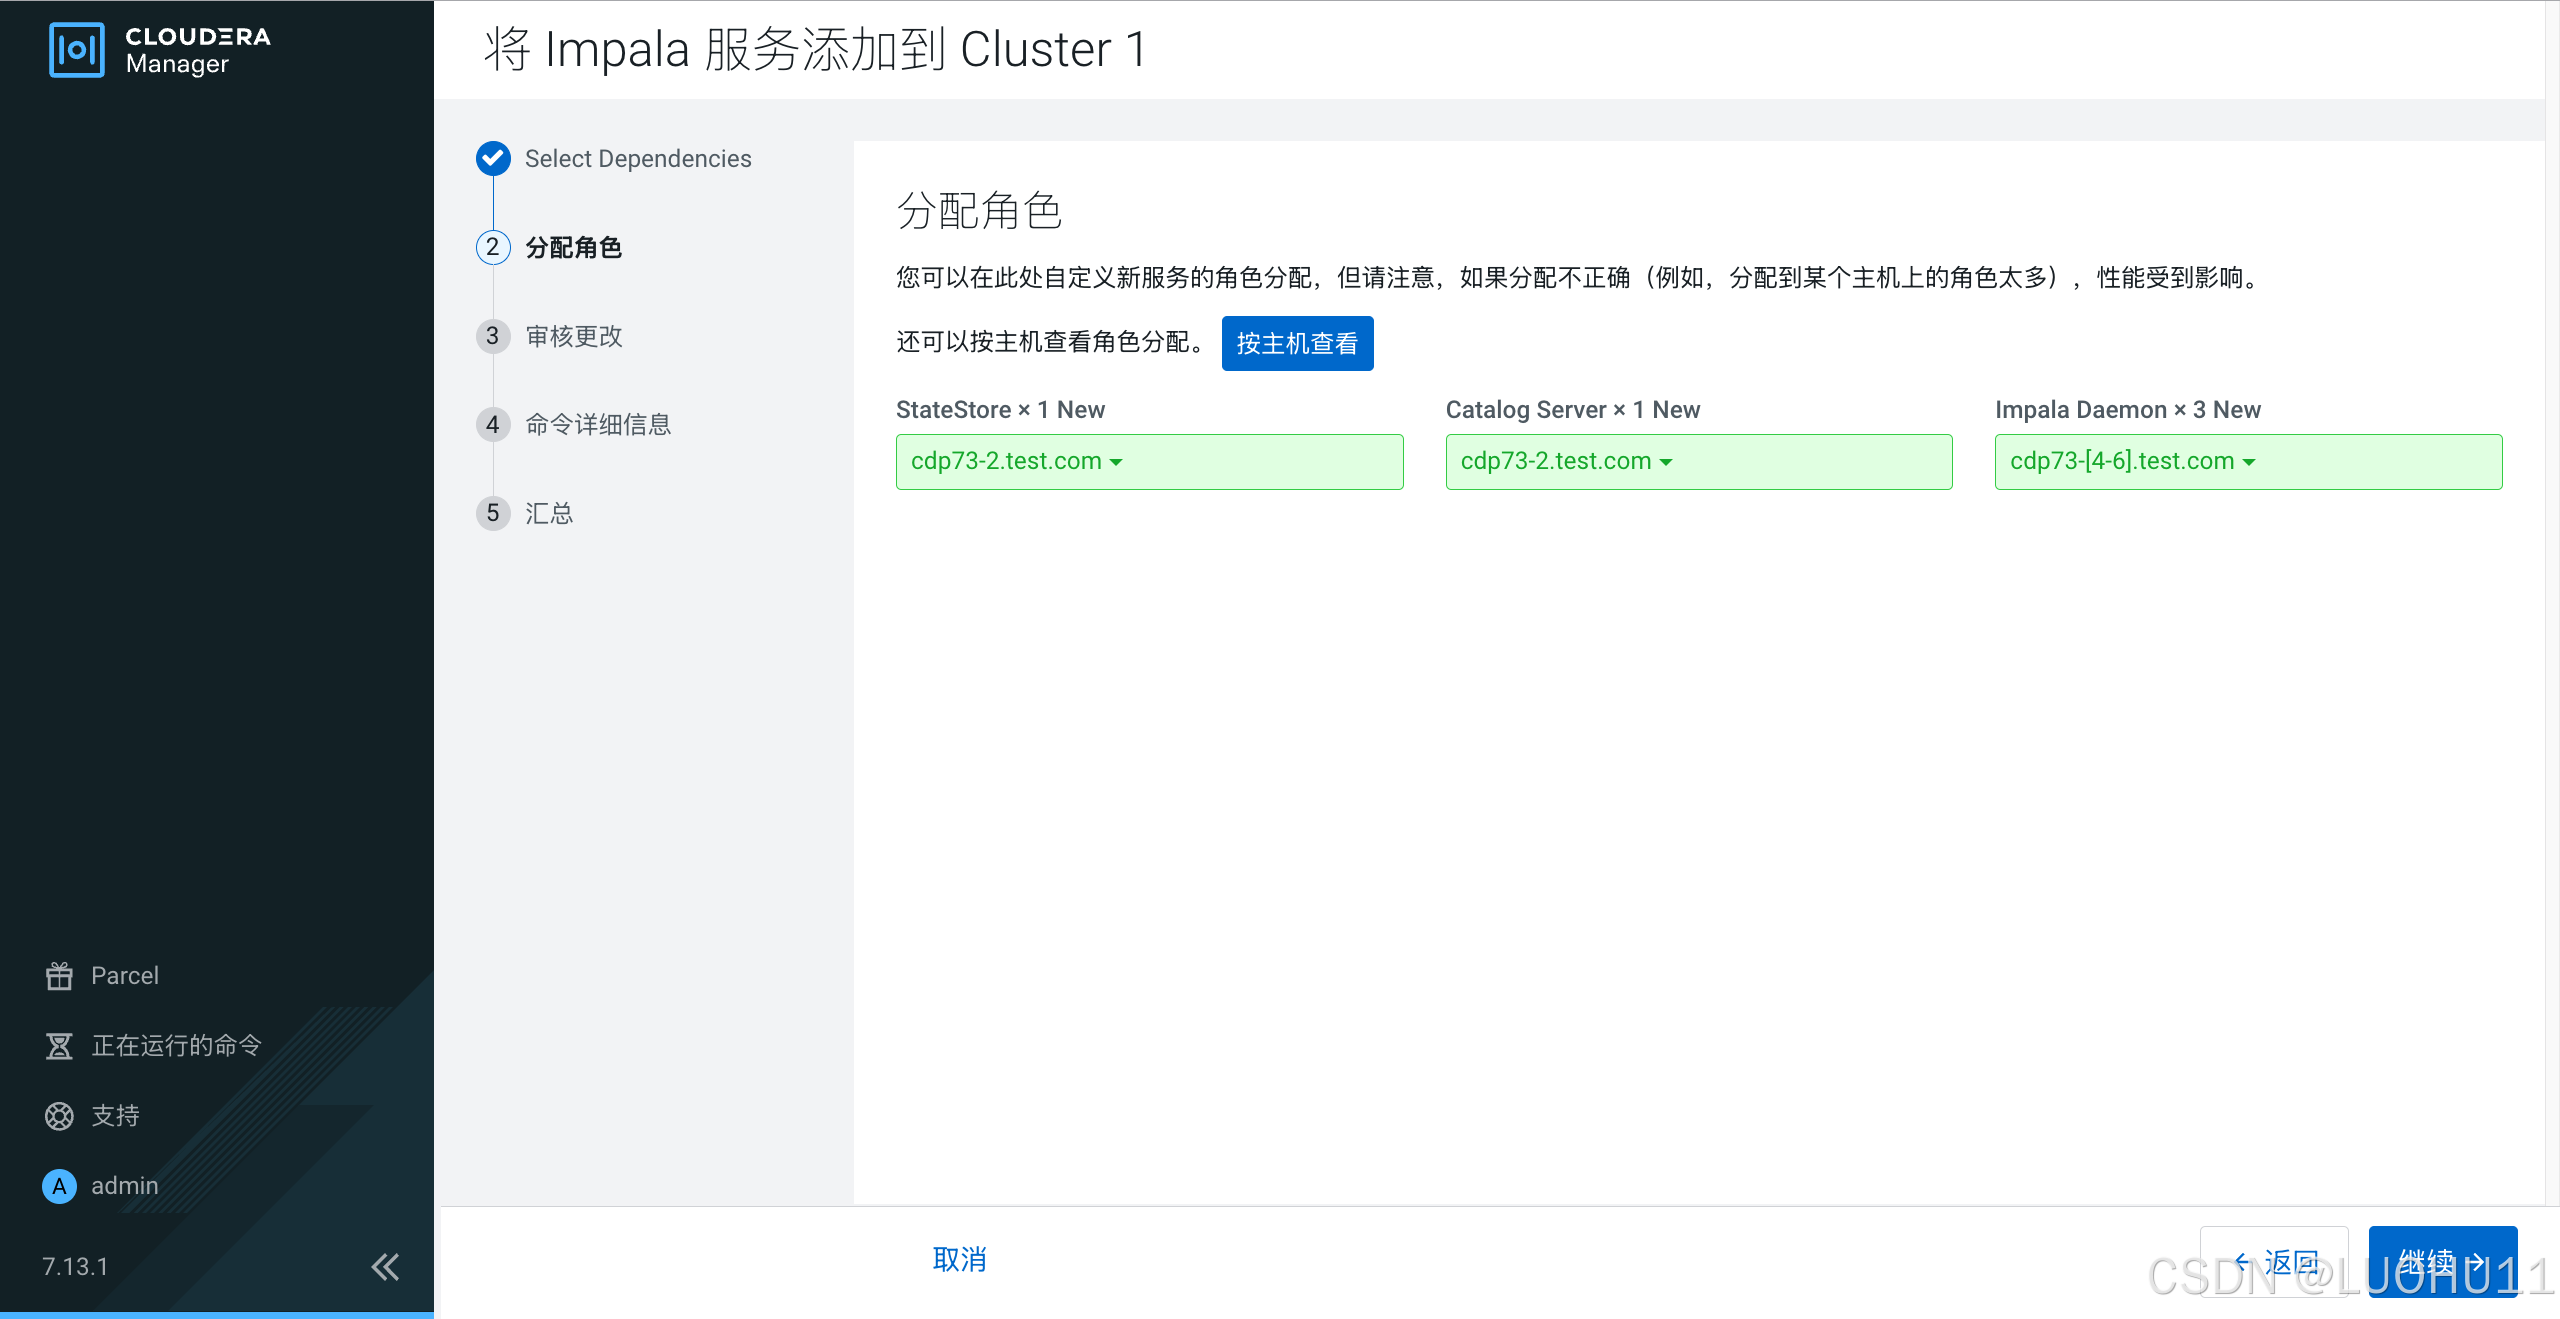
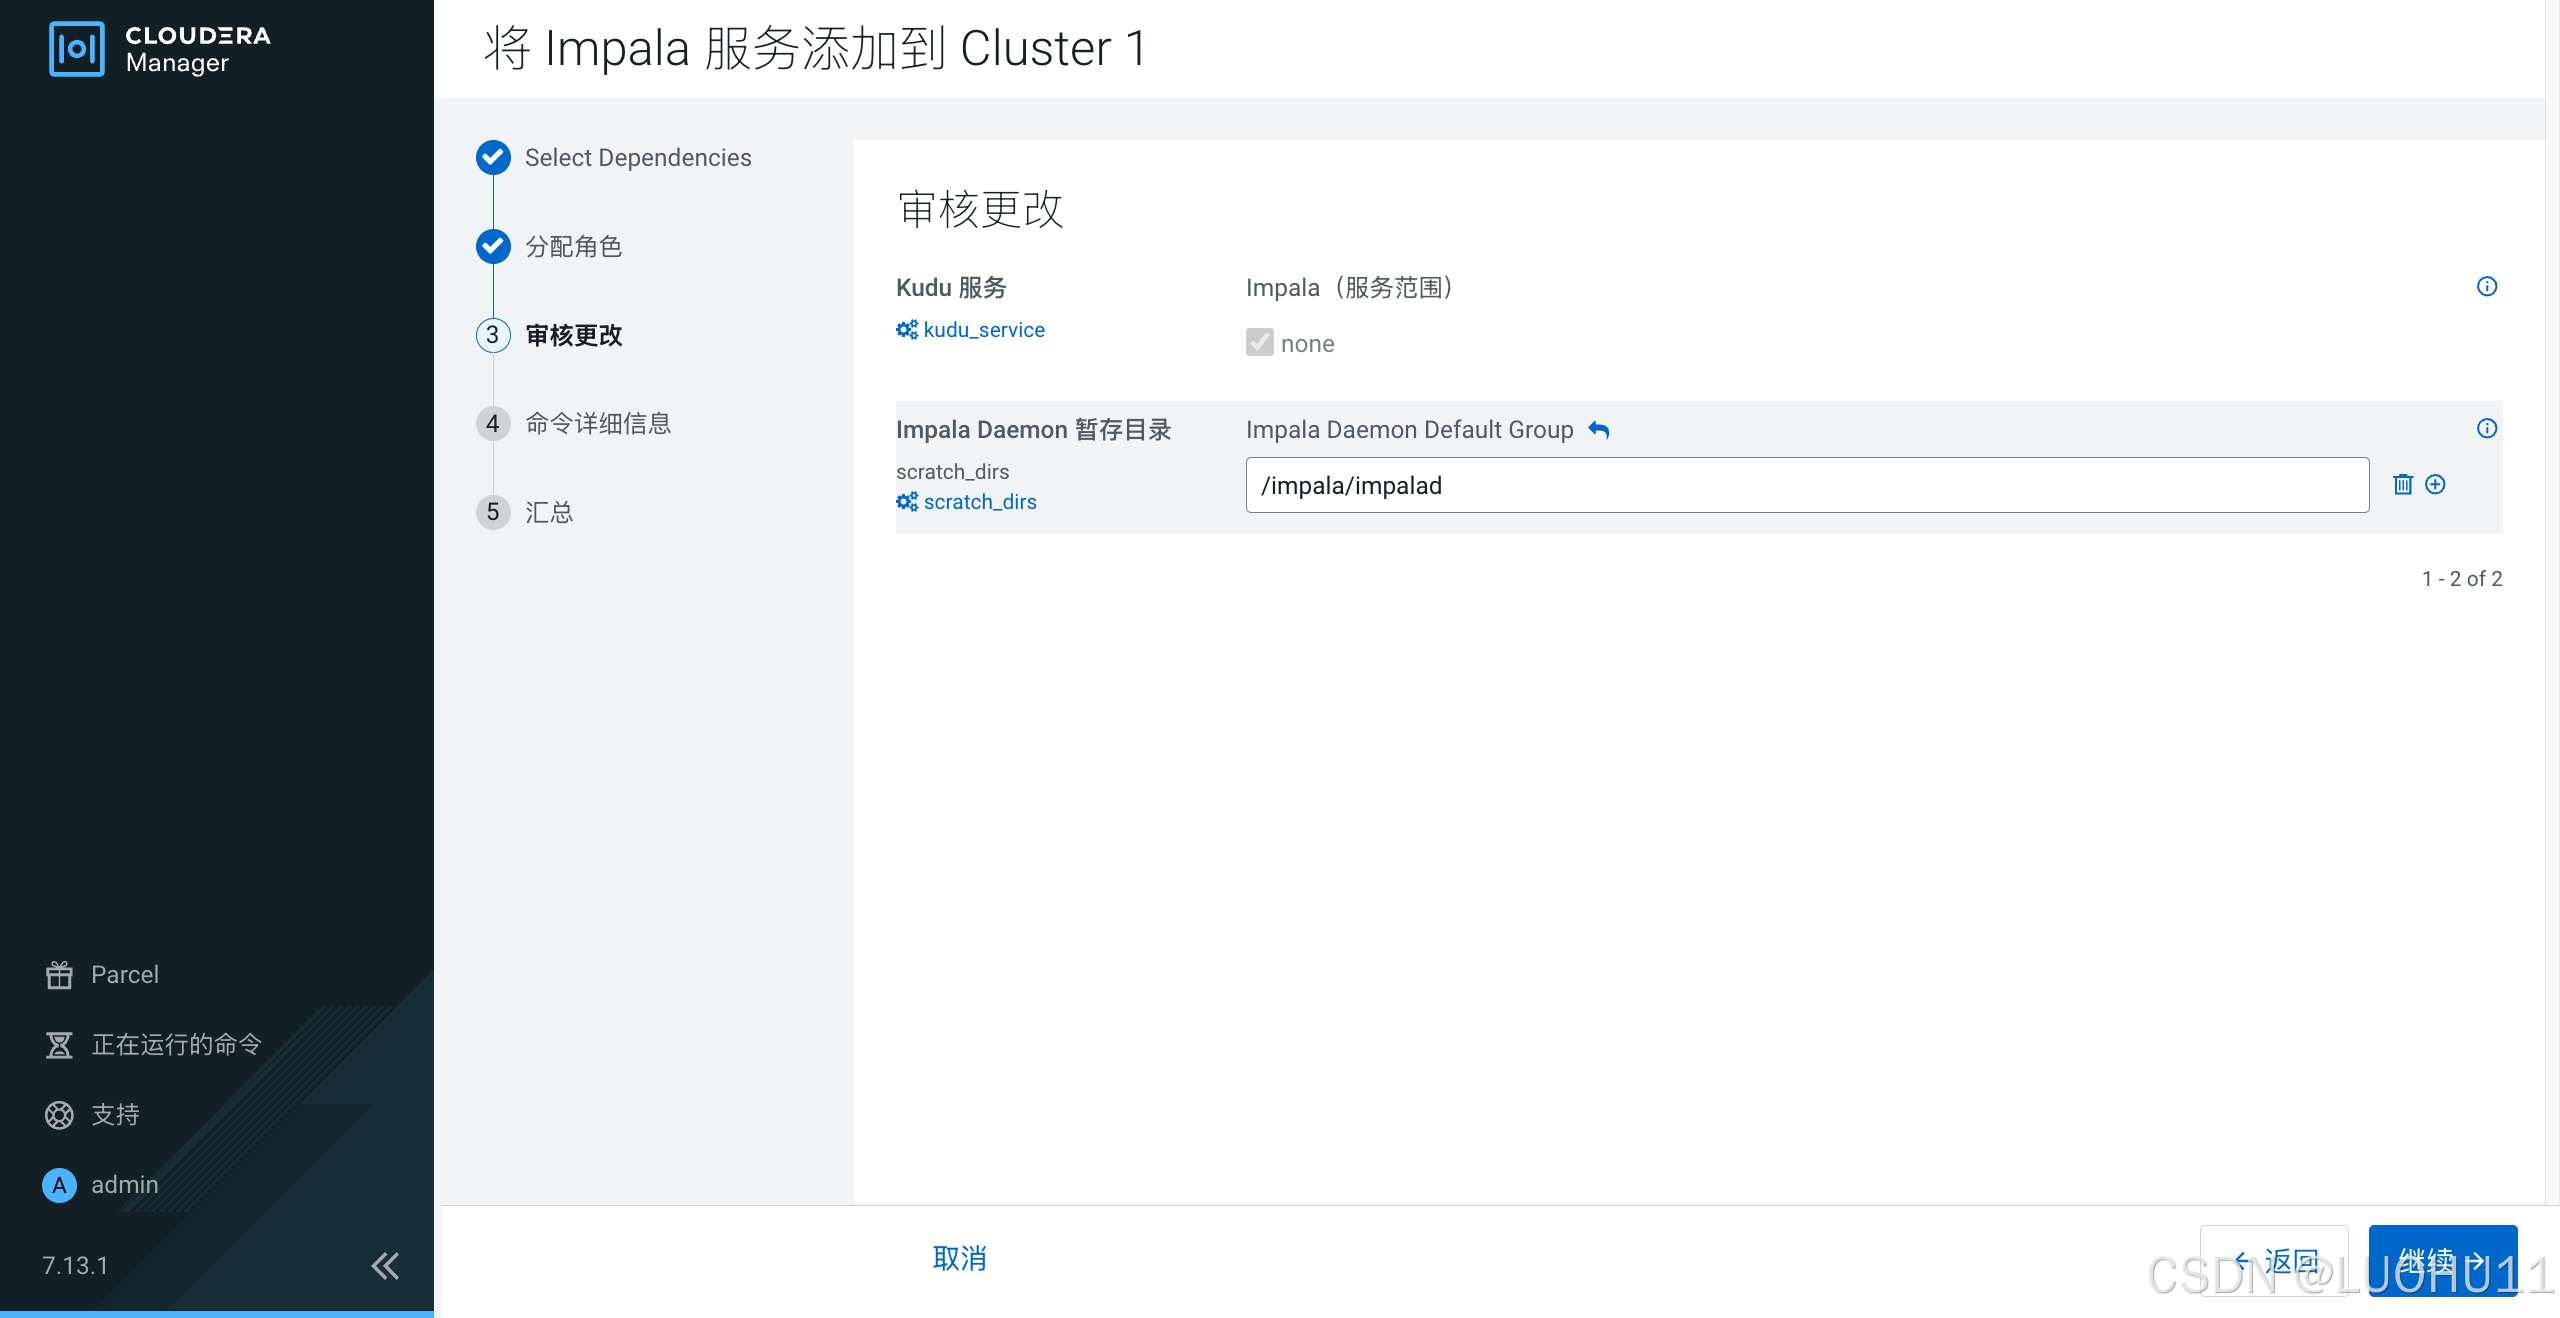
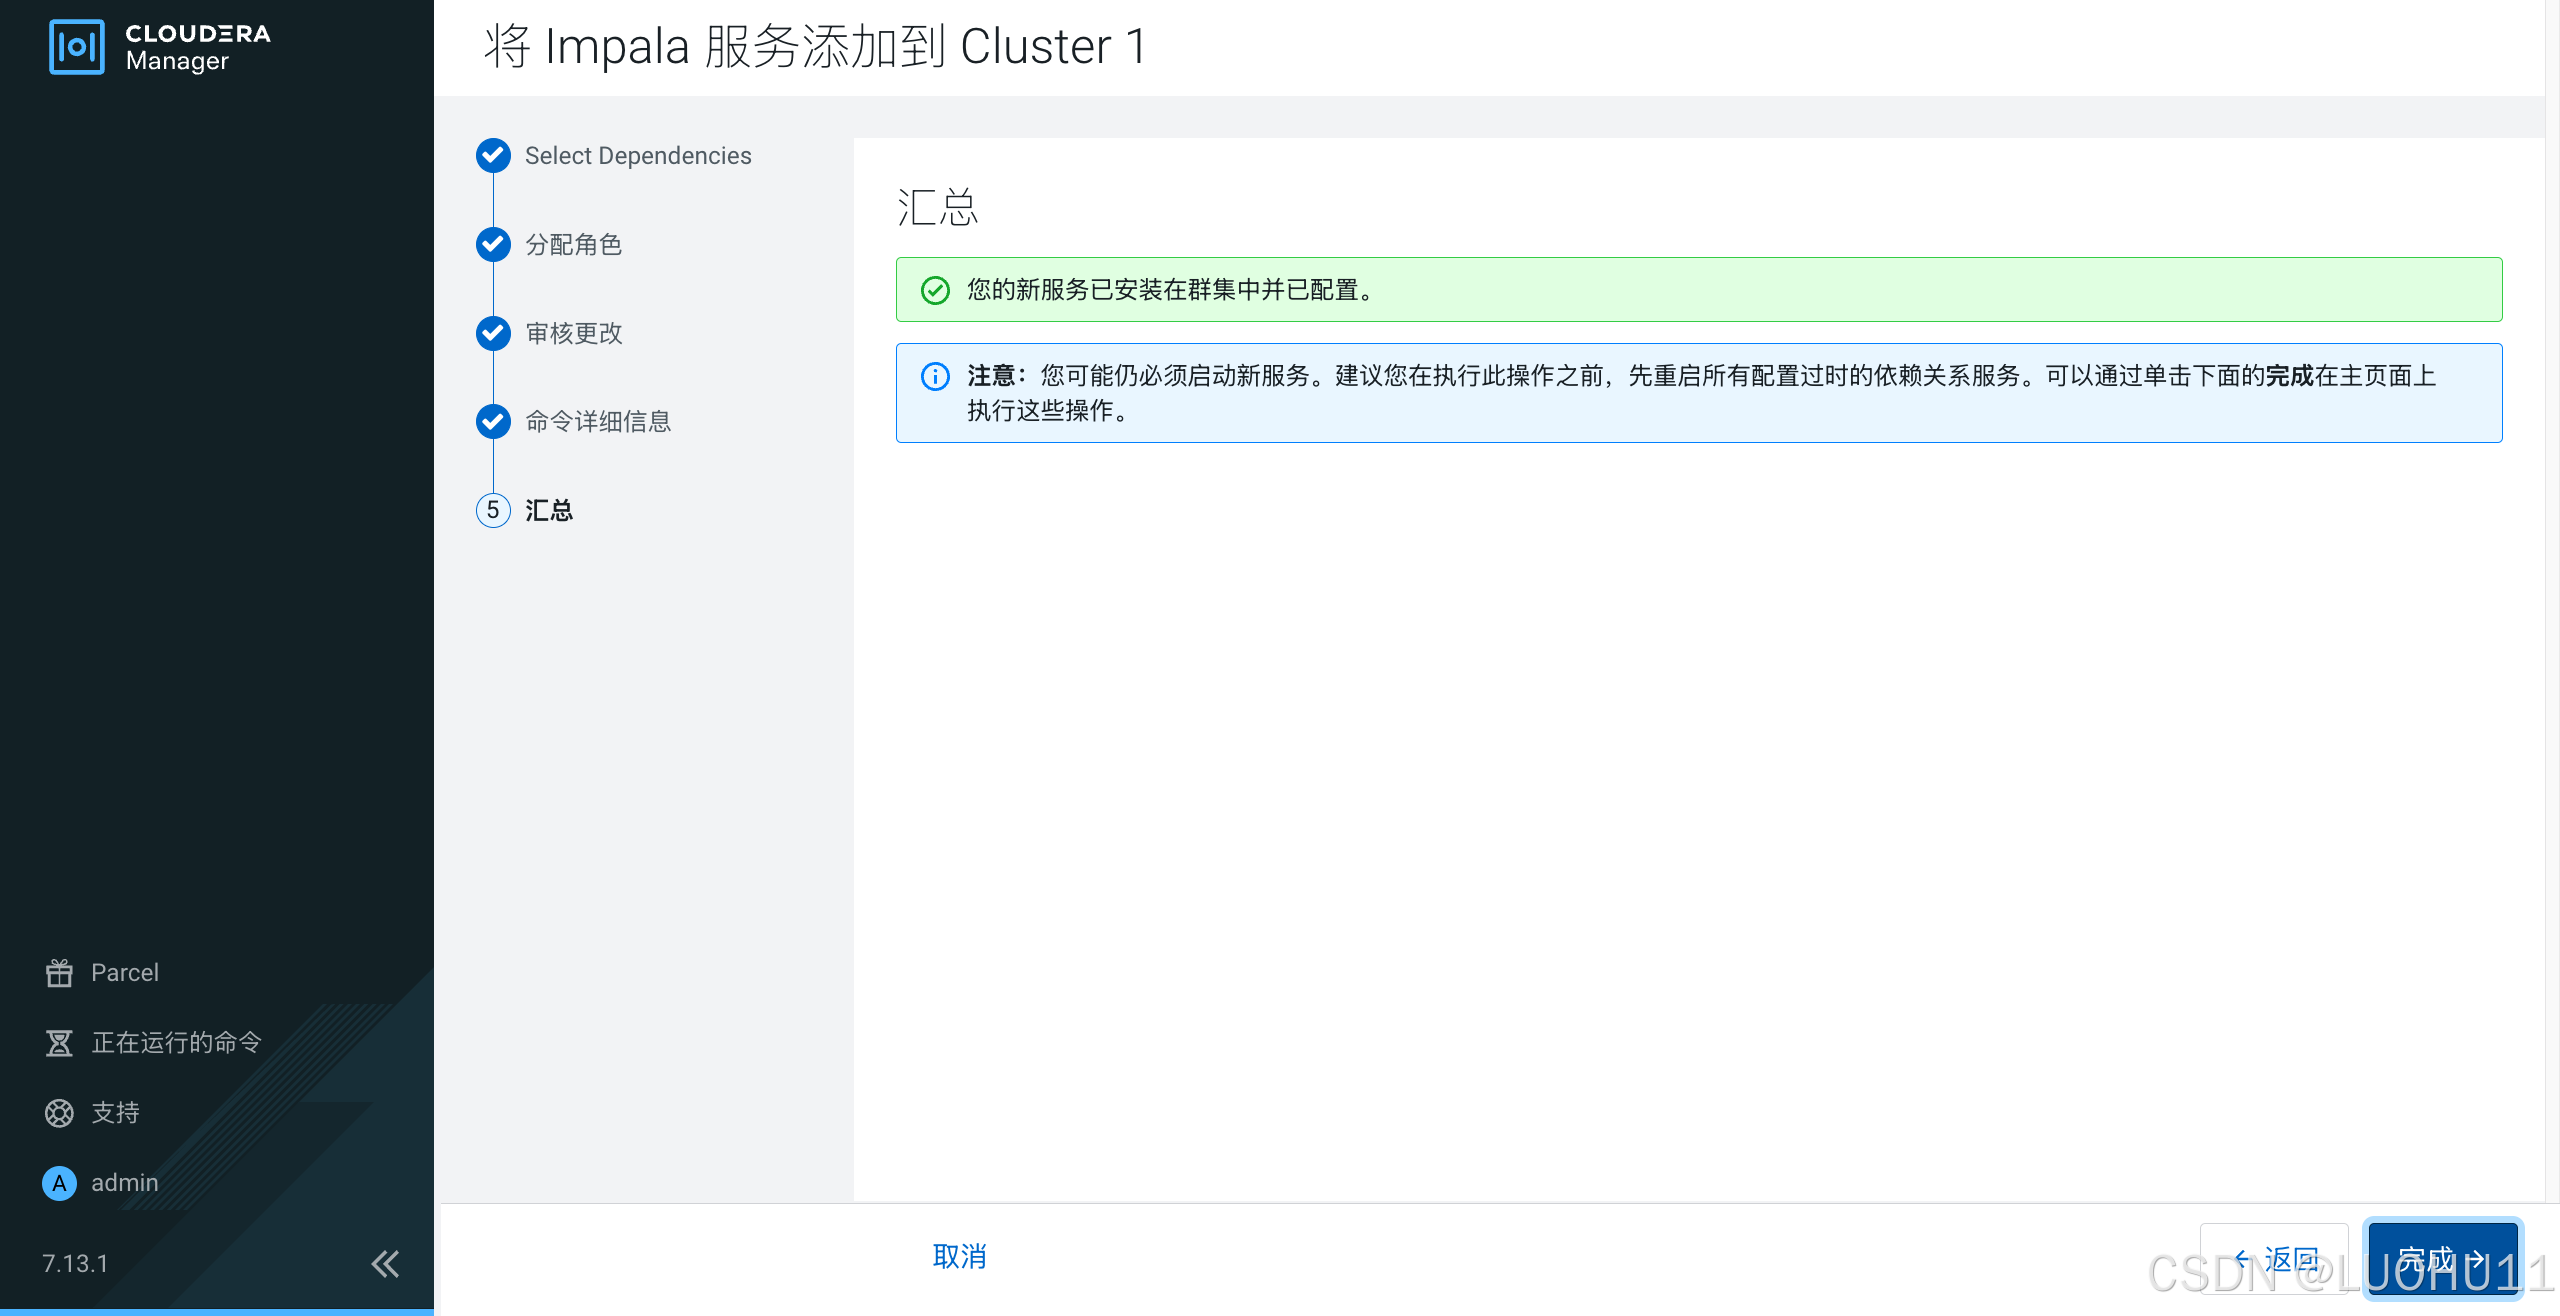
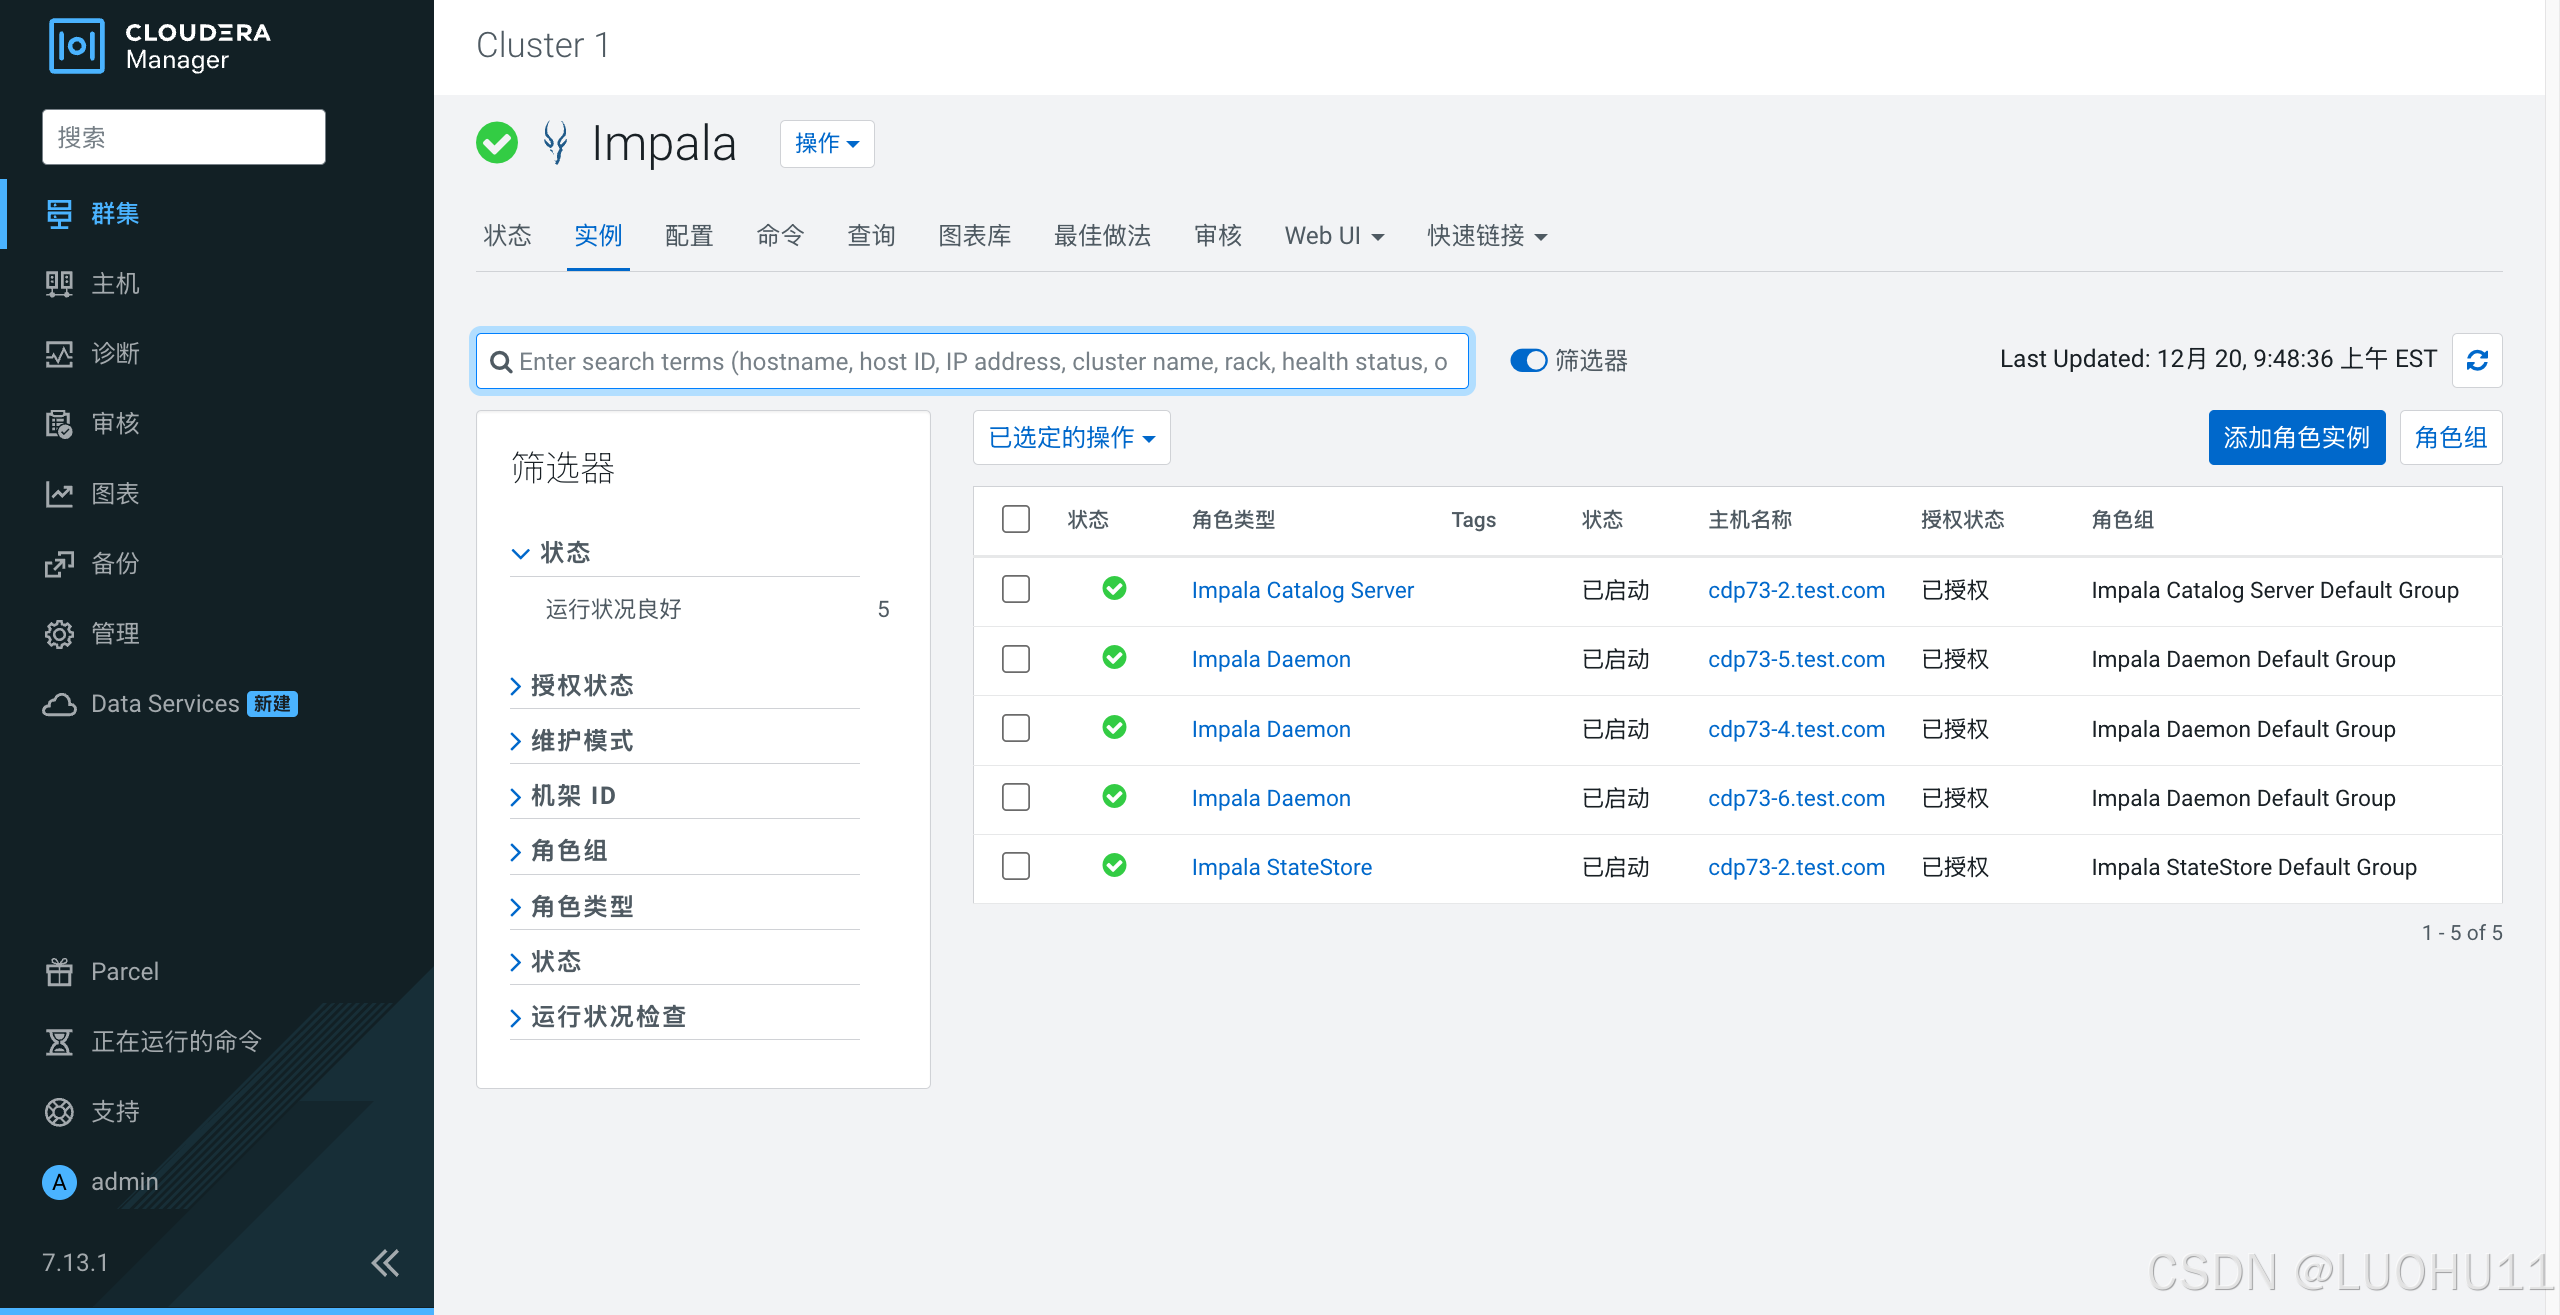
添加Impala服务
选择依赖
分配角色
审核更改
命令详细信息

汇总
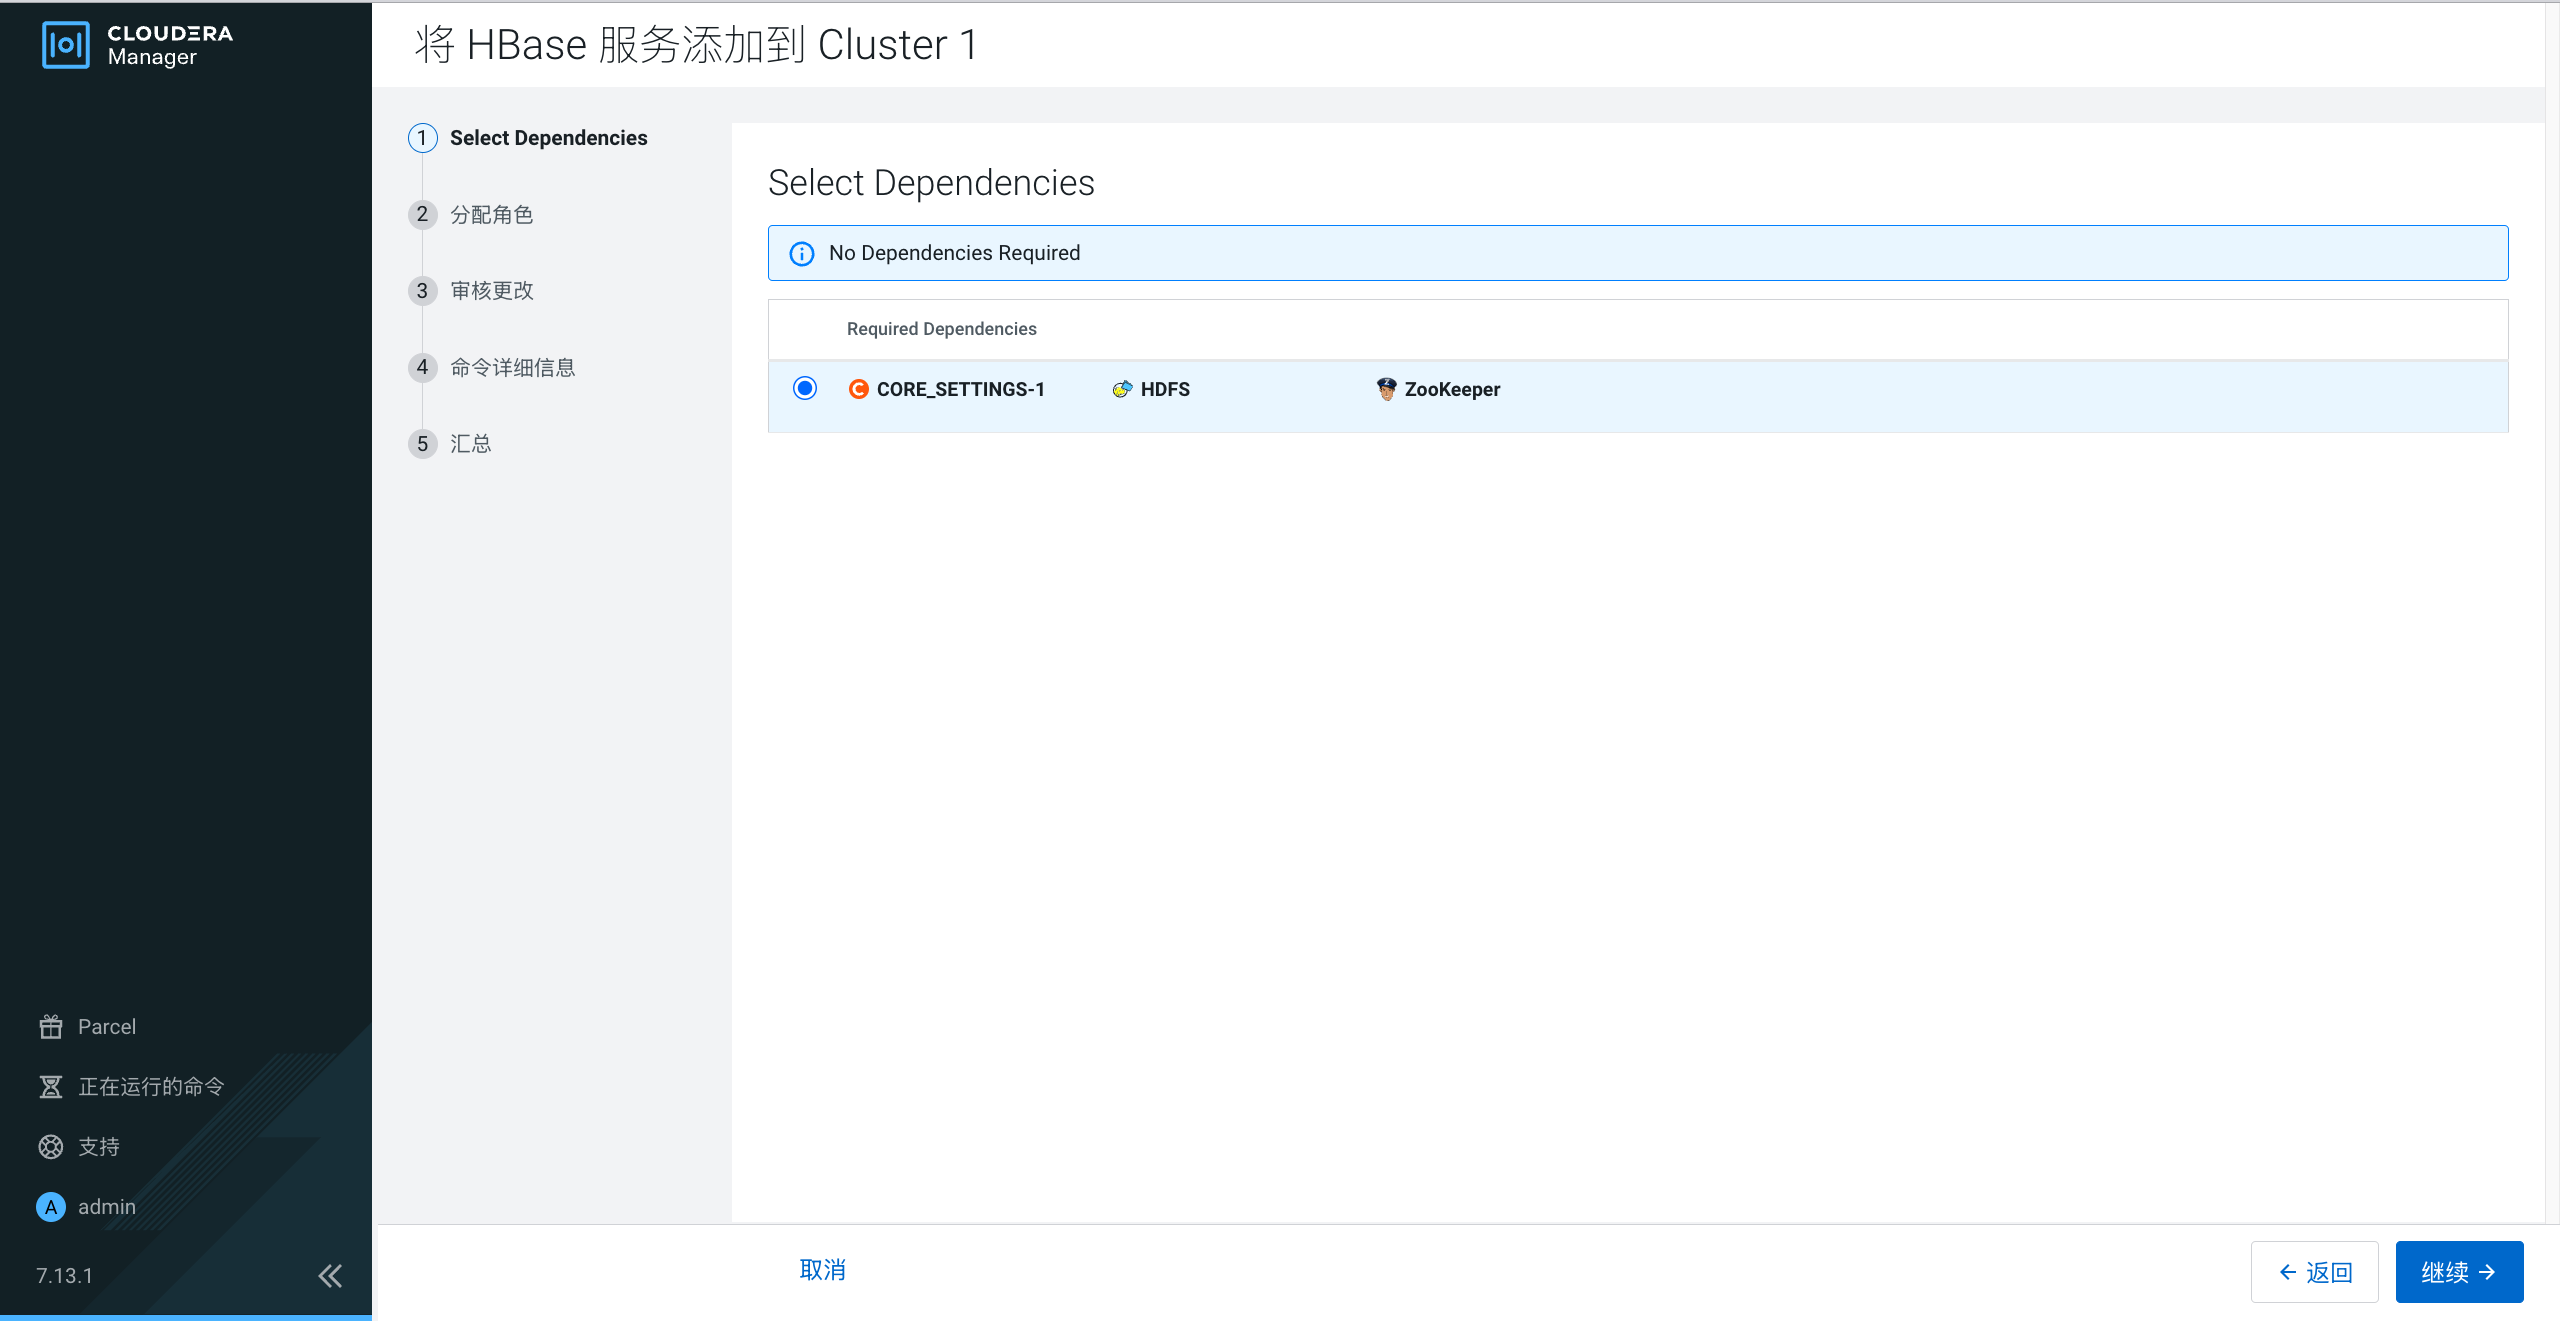
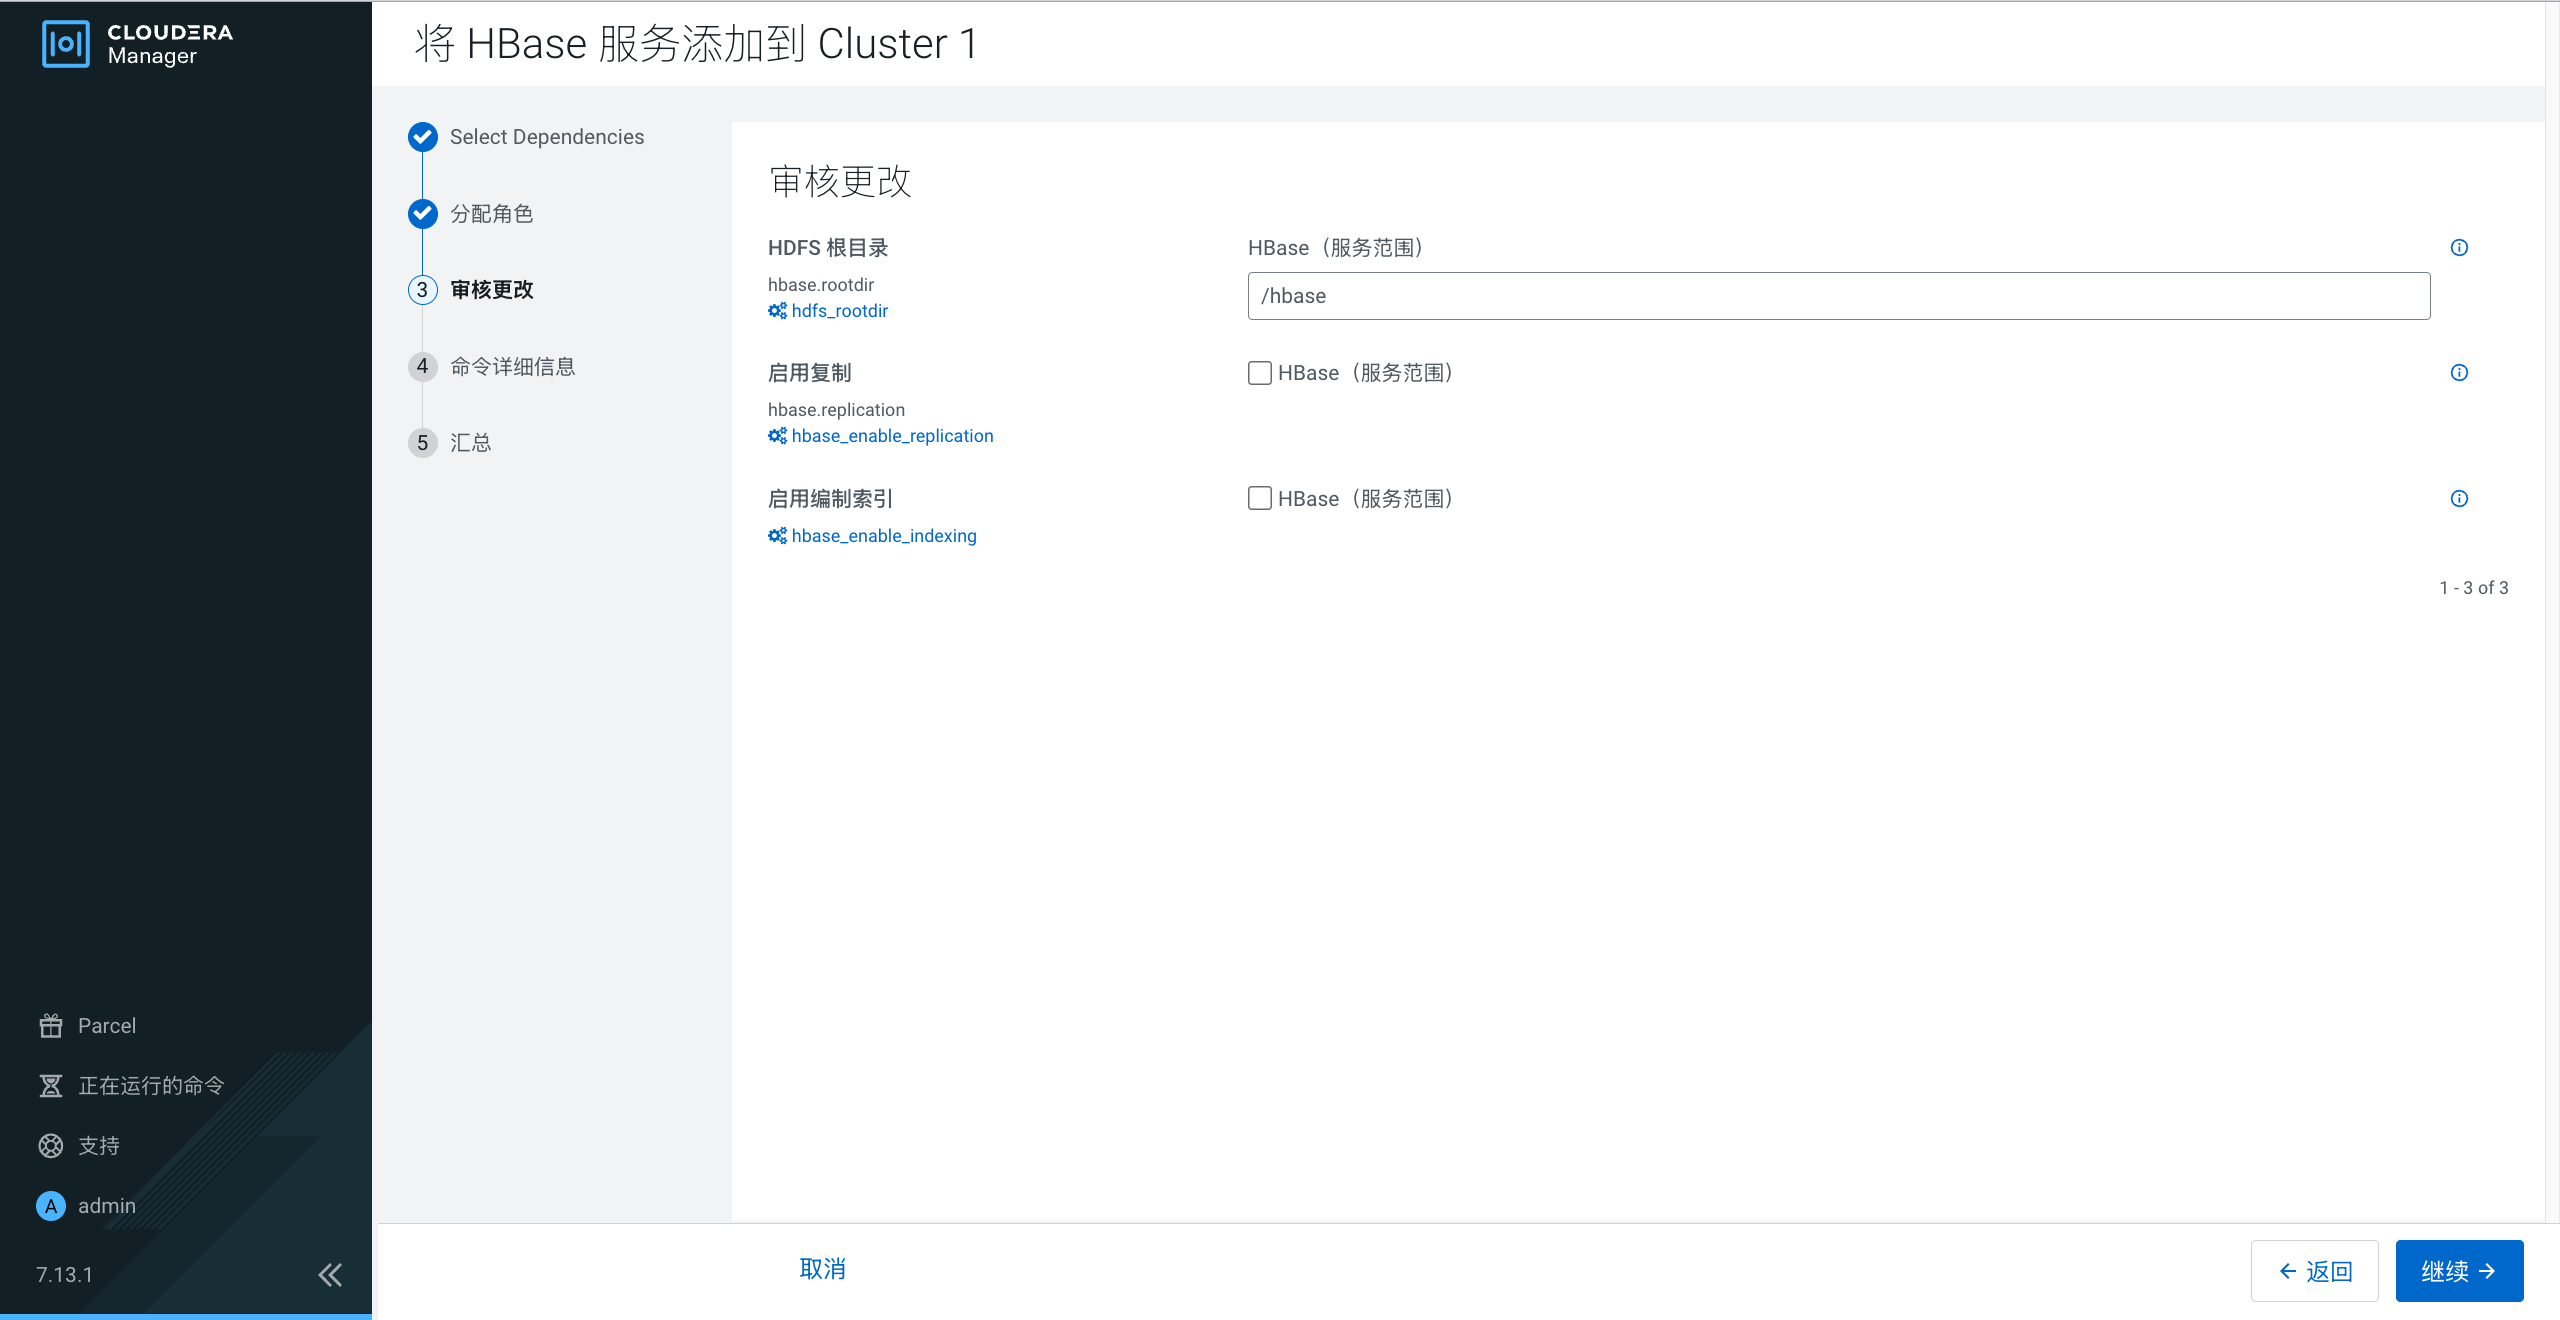
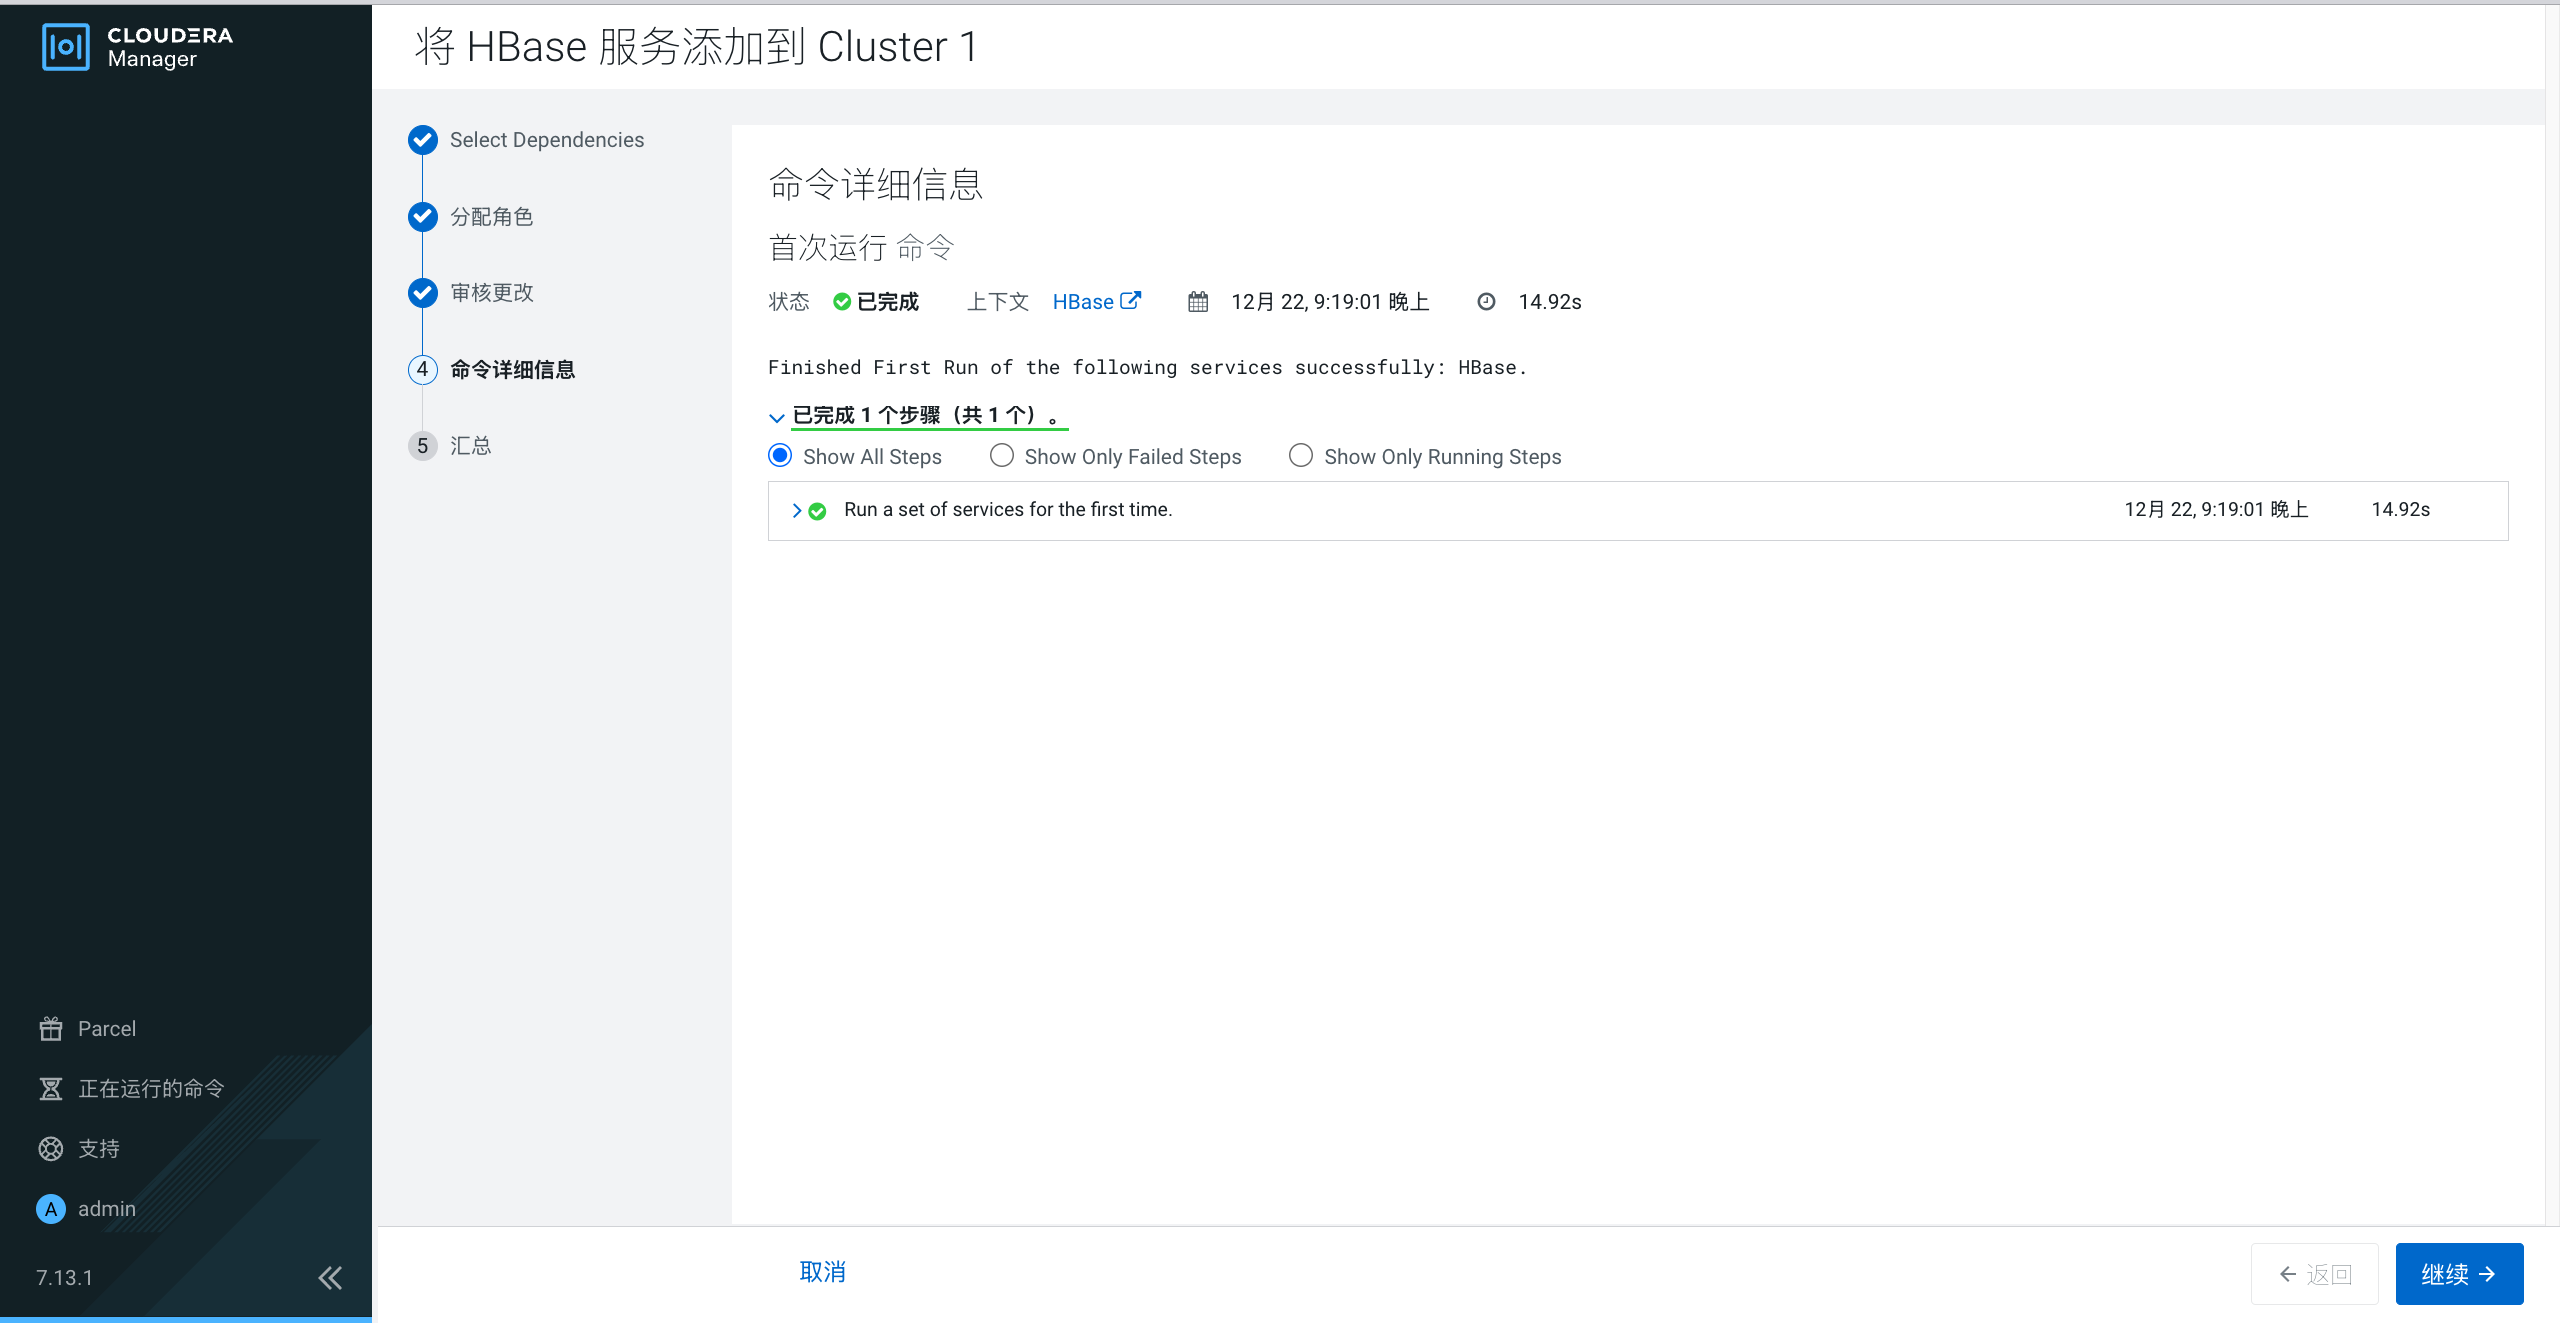
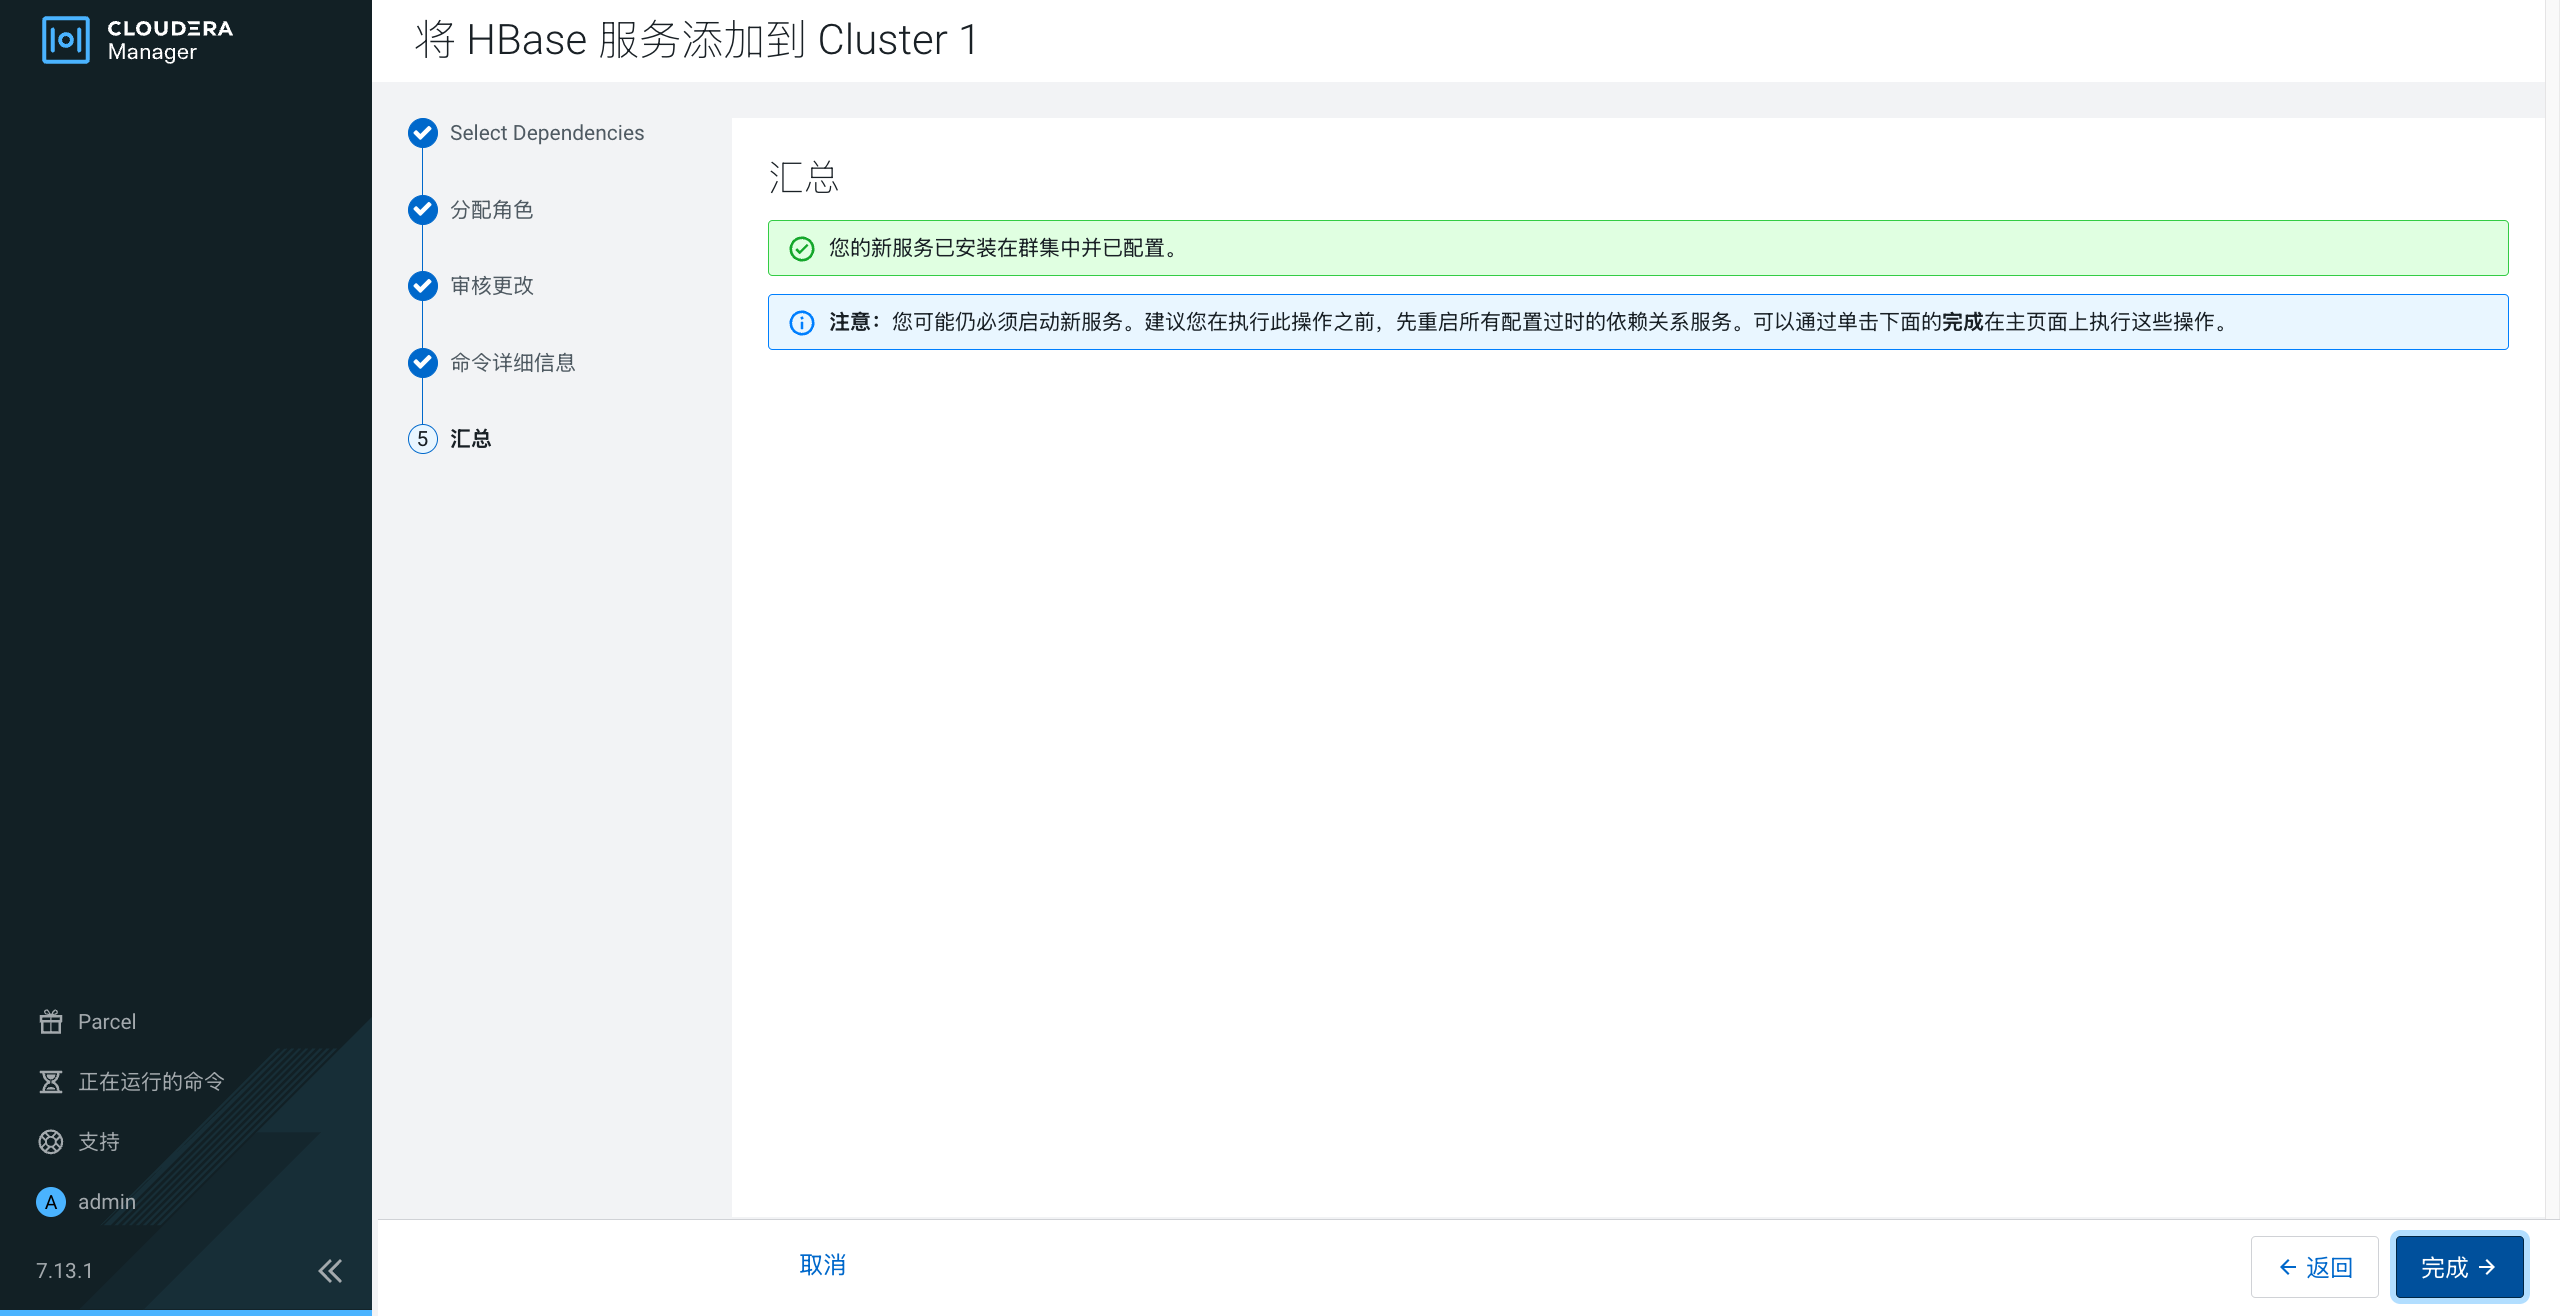
添加Hbase服务

选择依赖
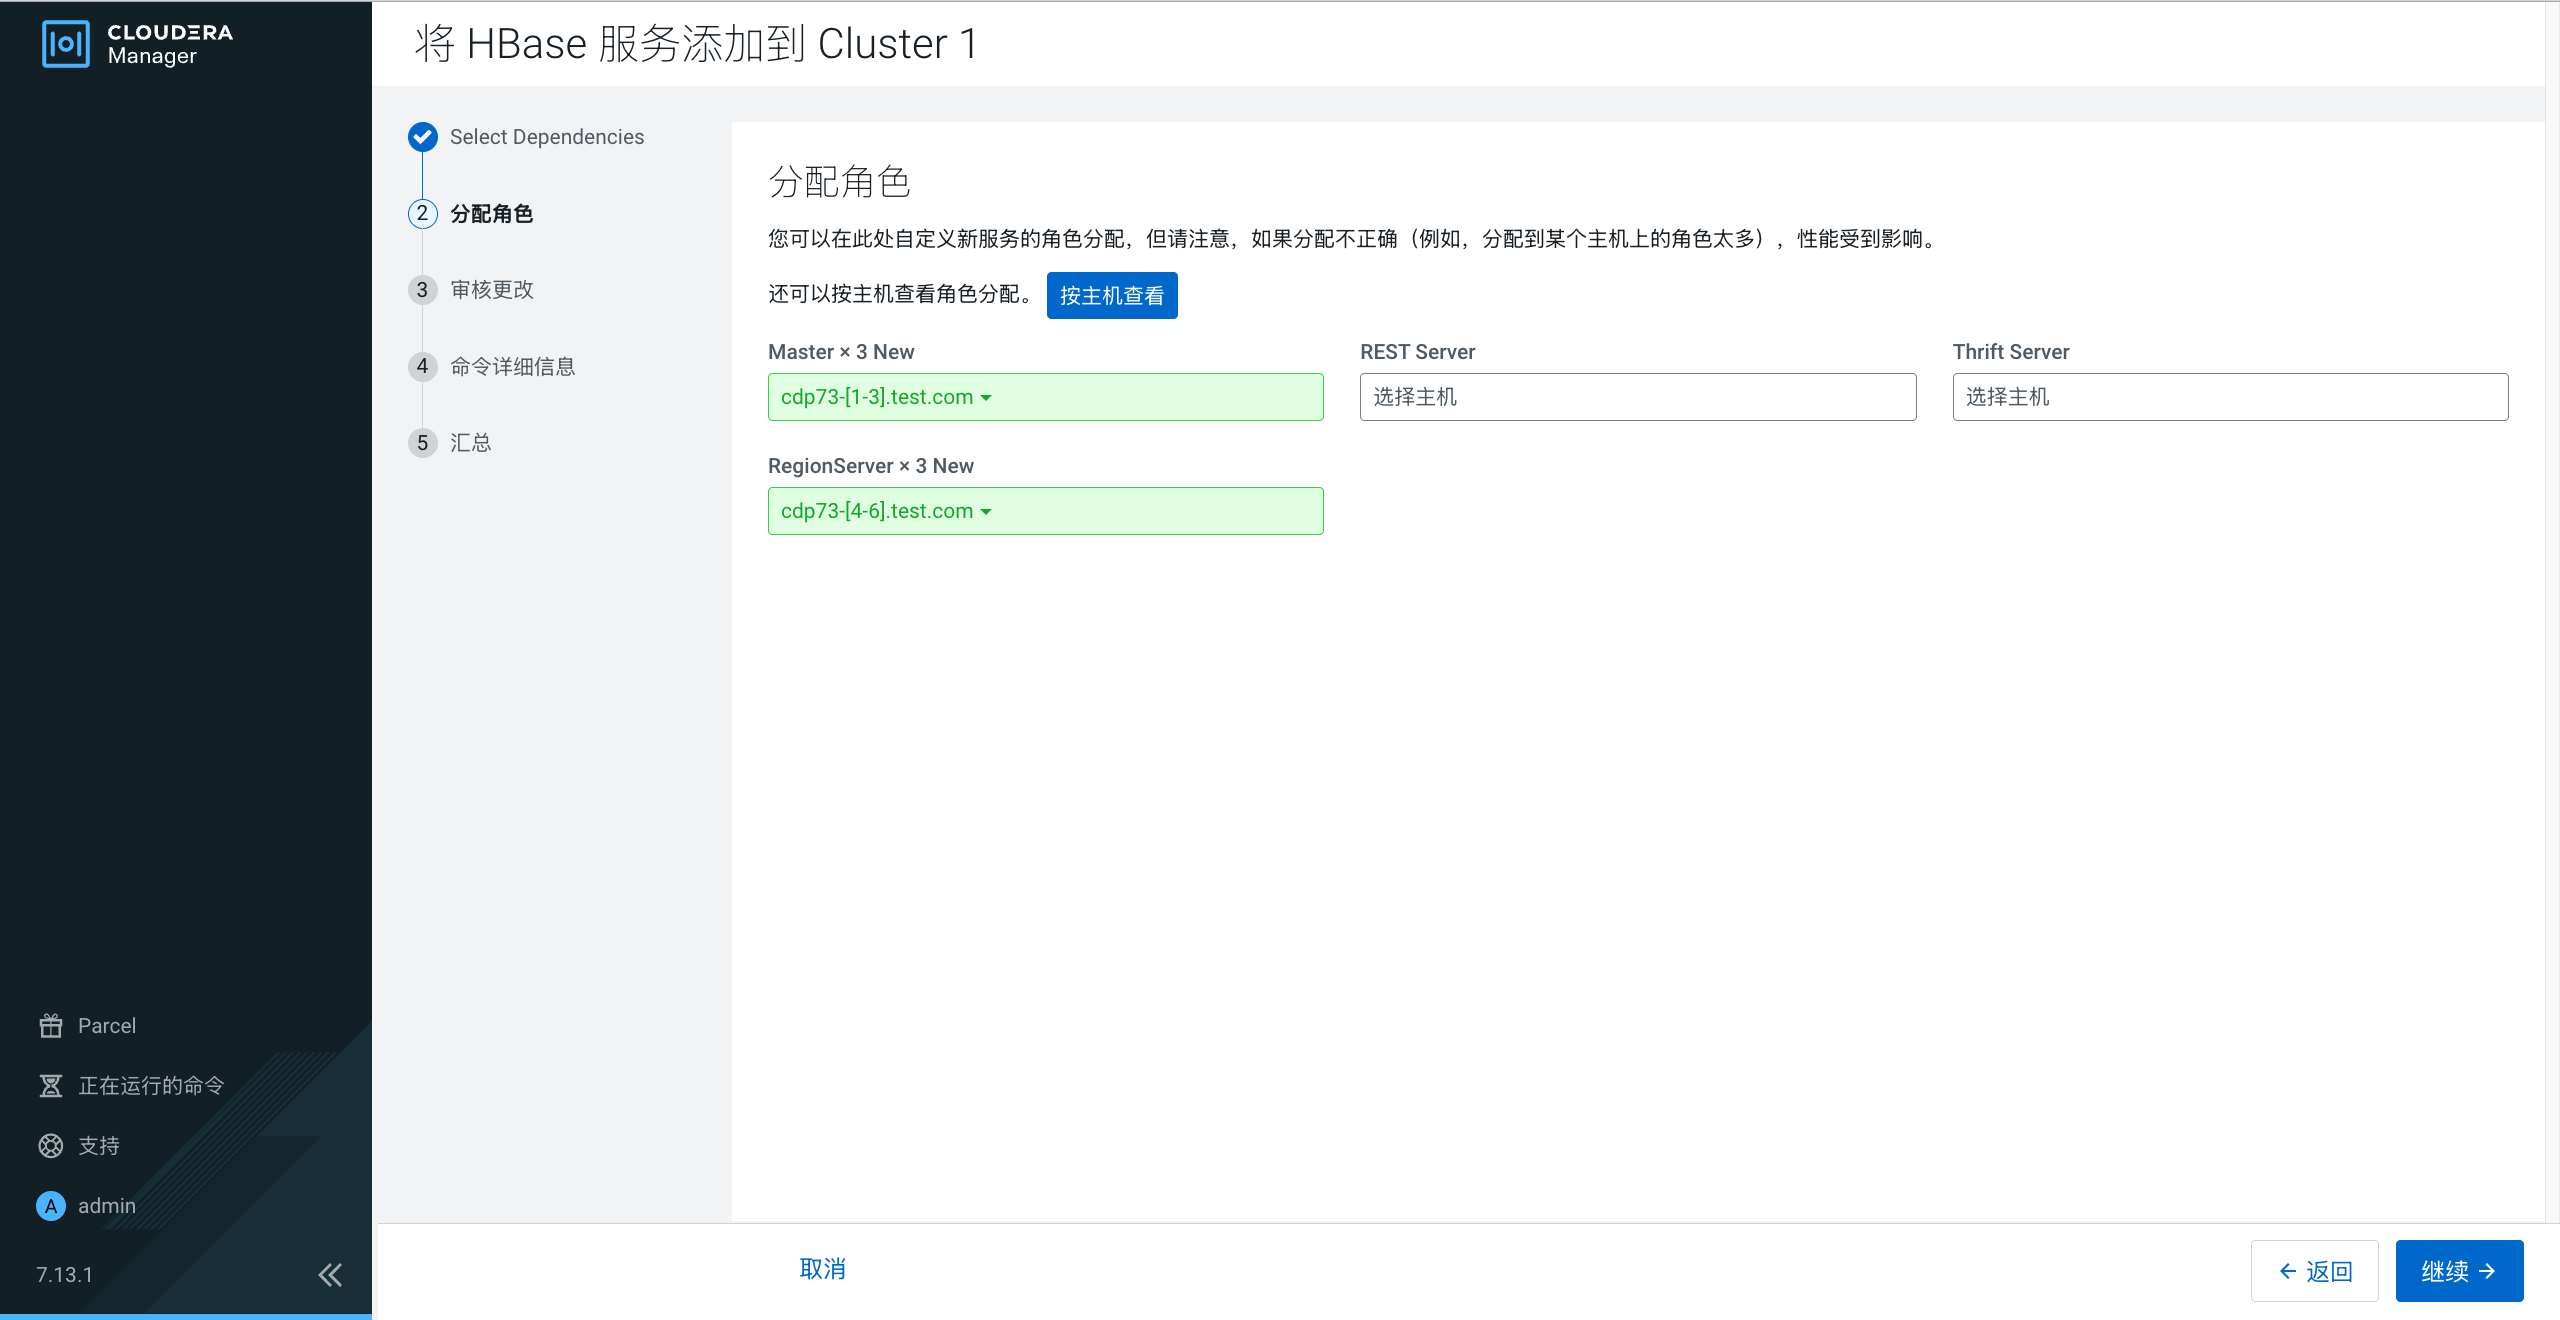
分配角色
审核更改
命令详细信息
汇总
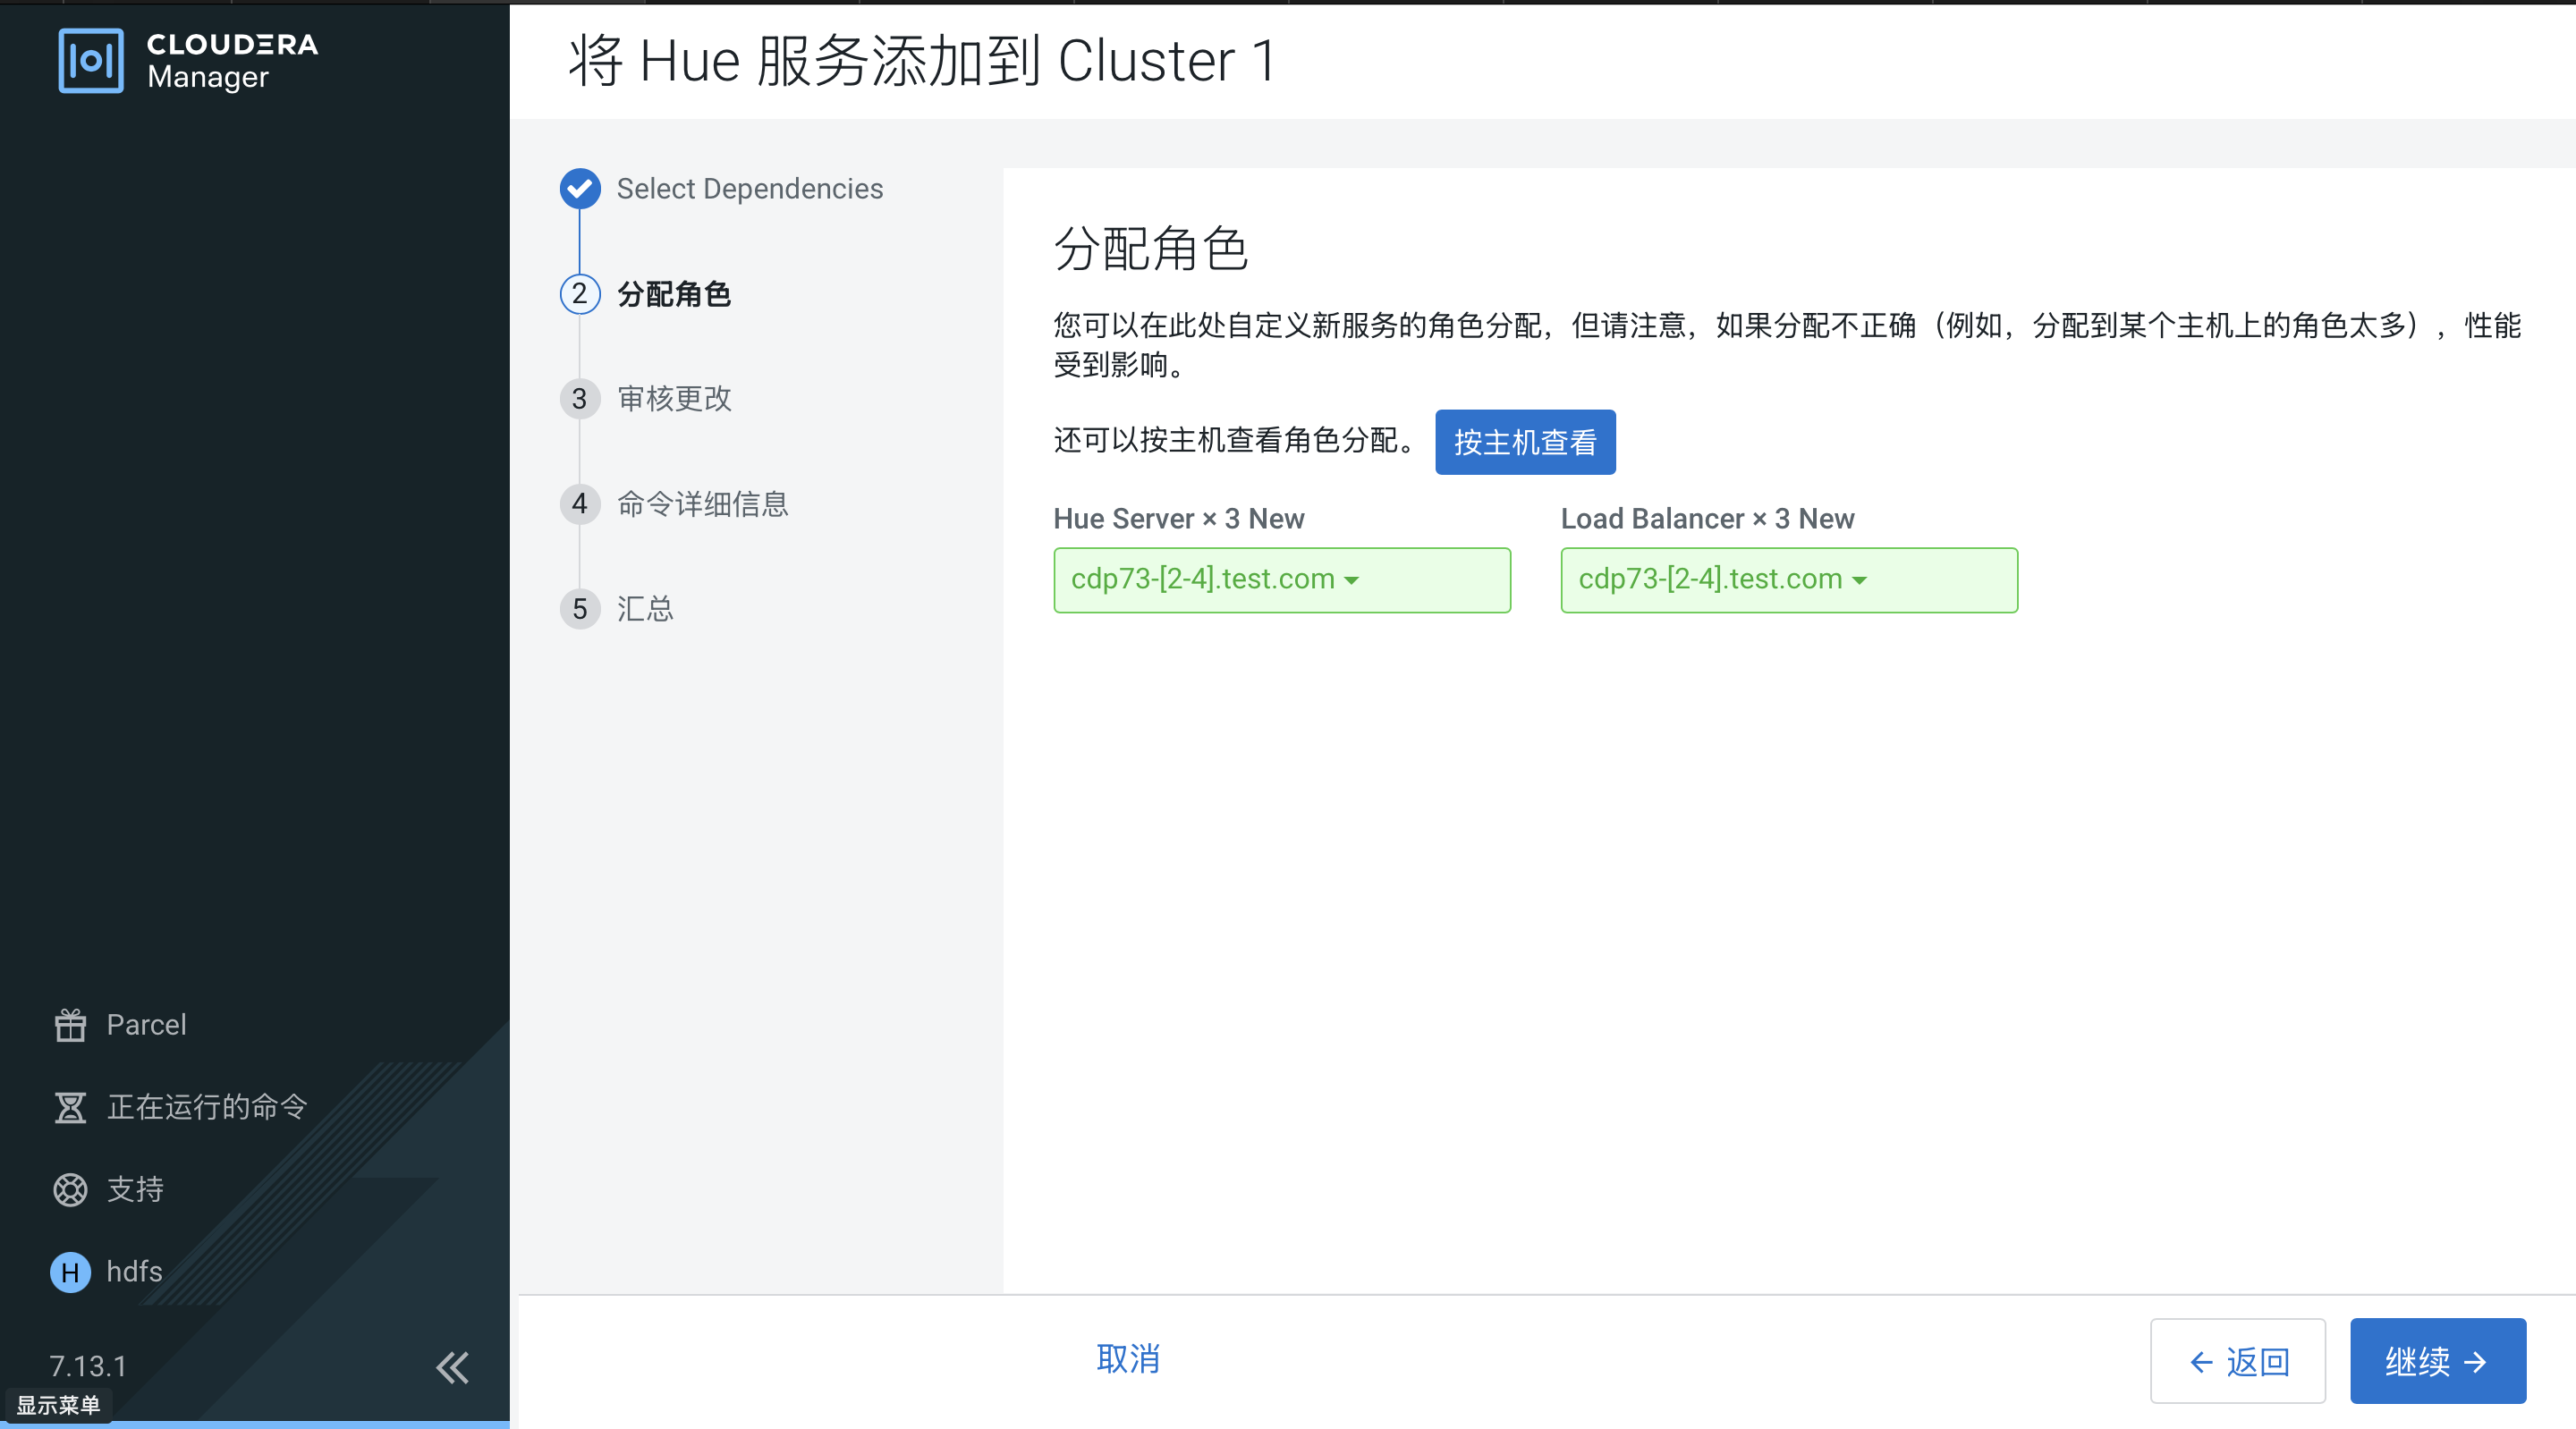
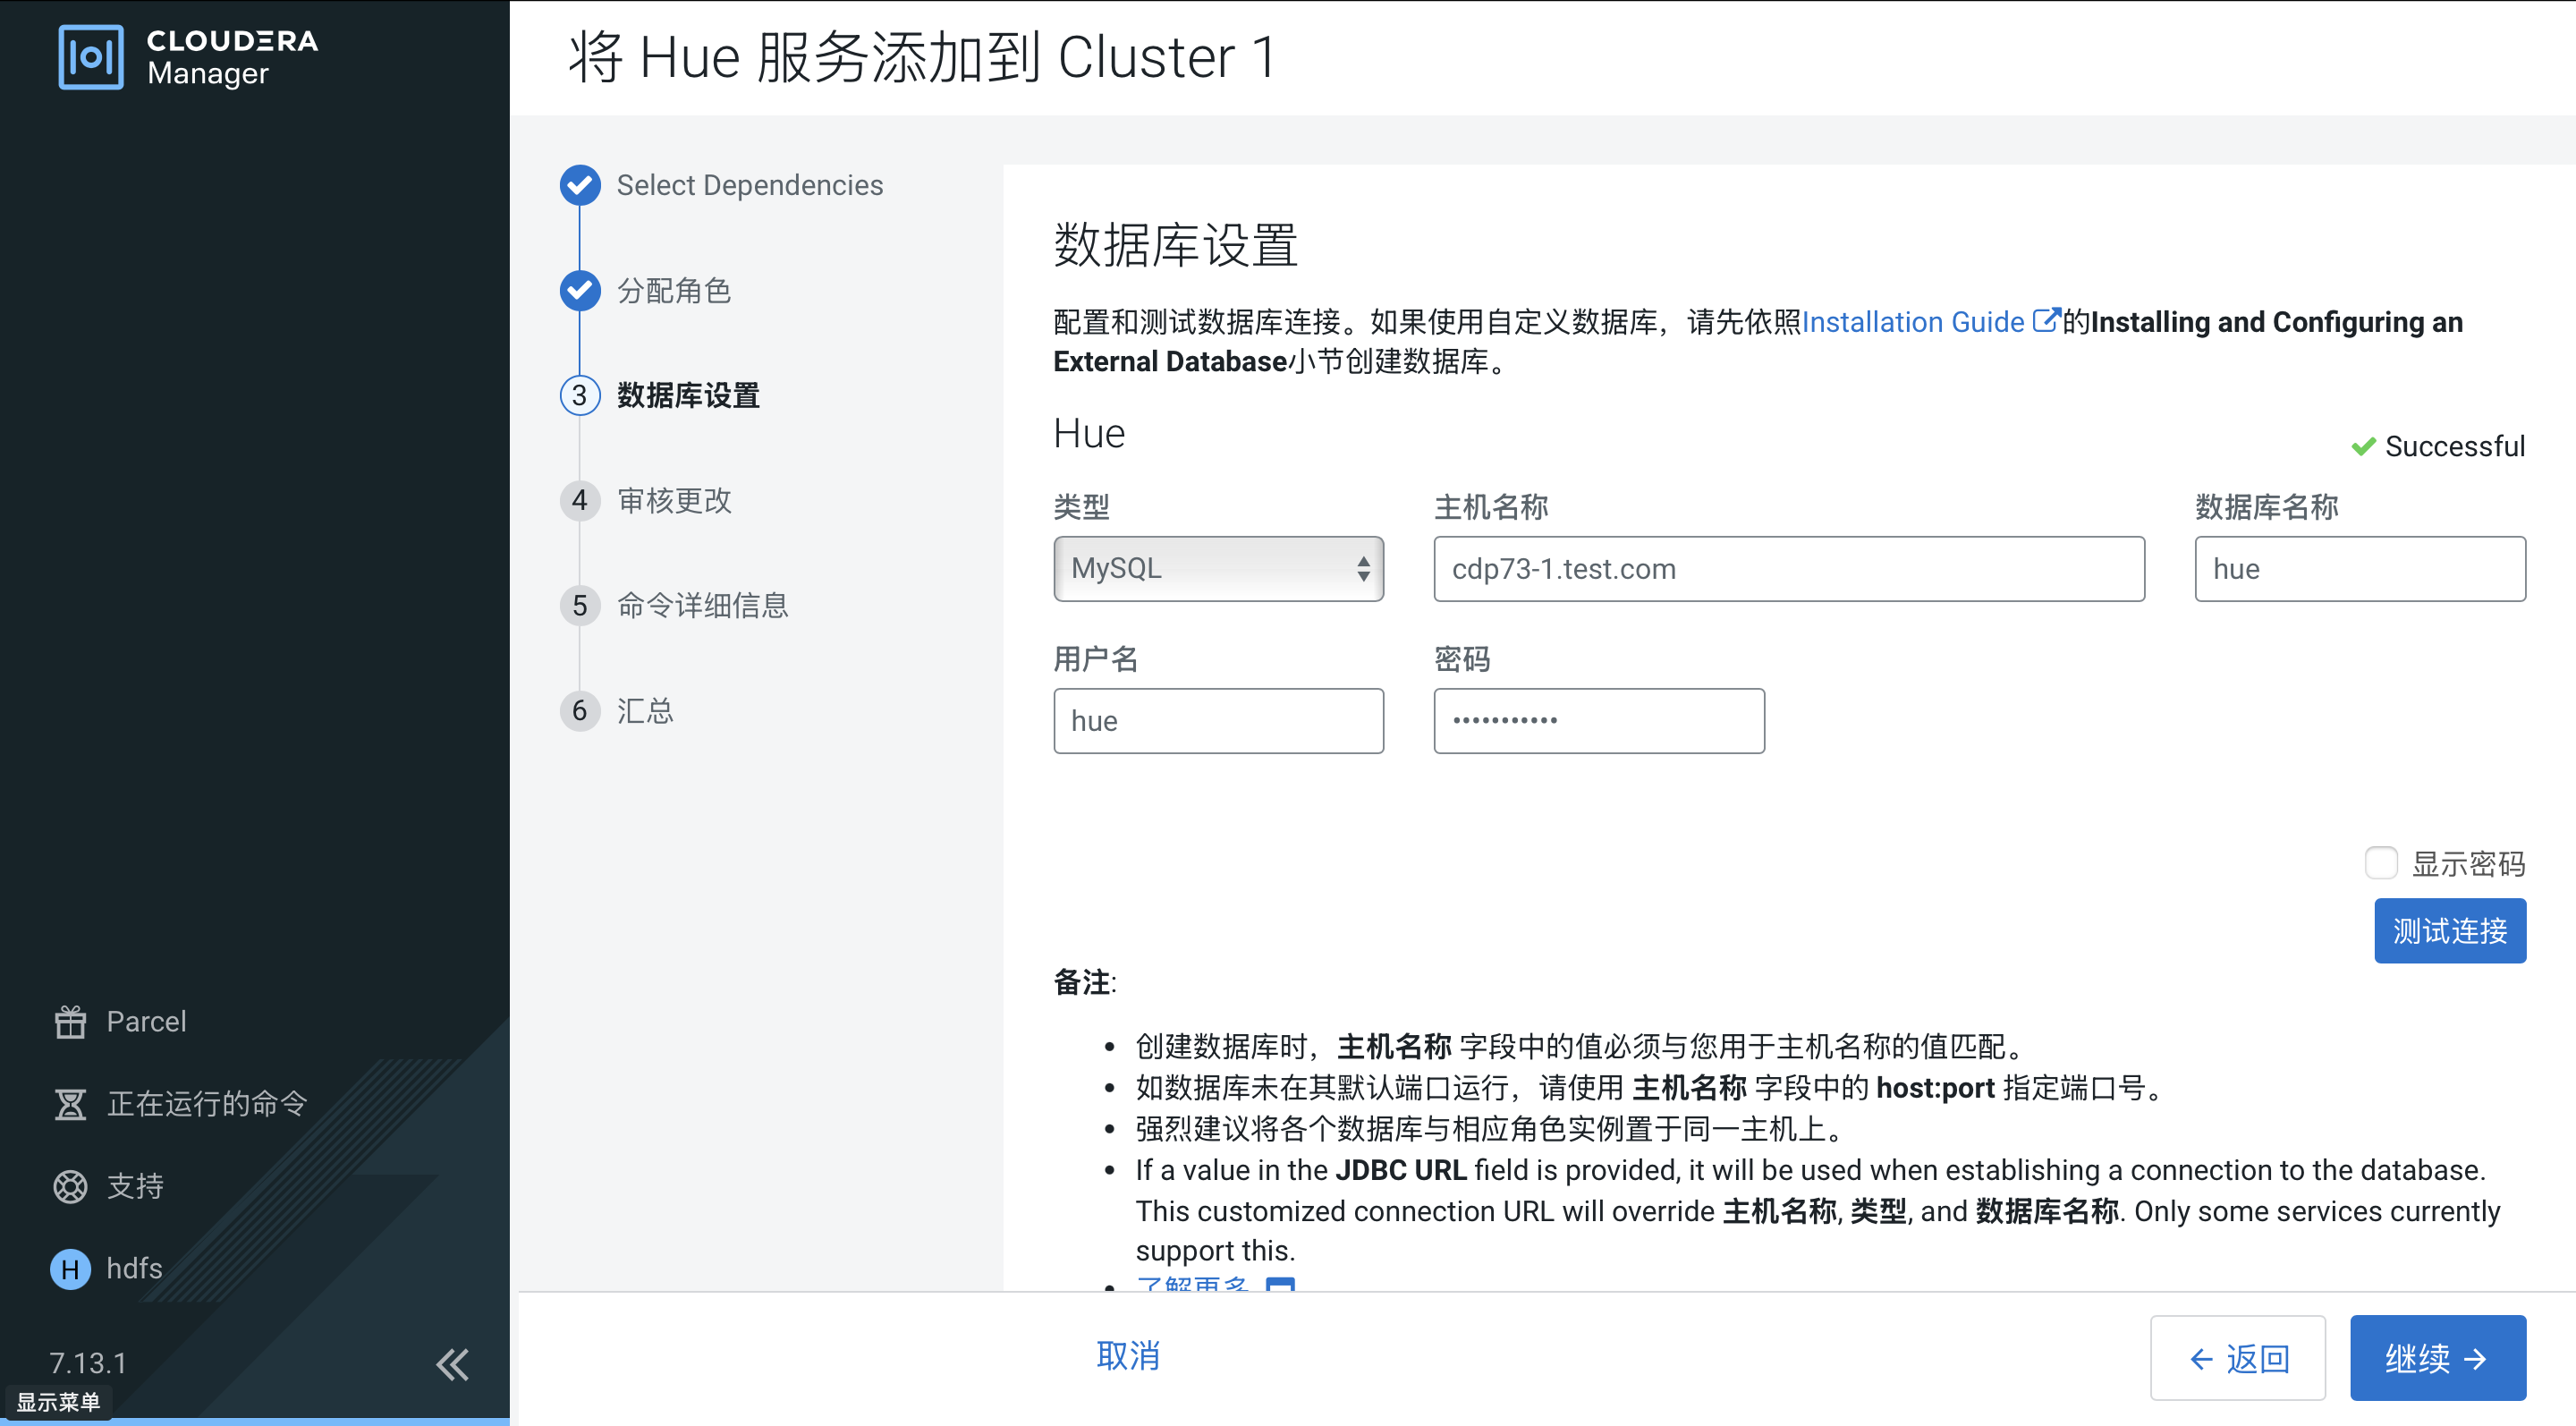
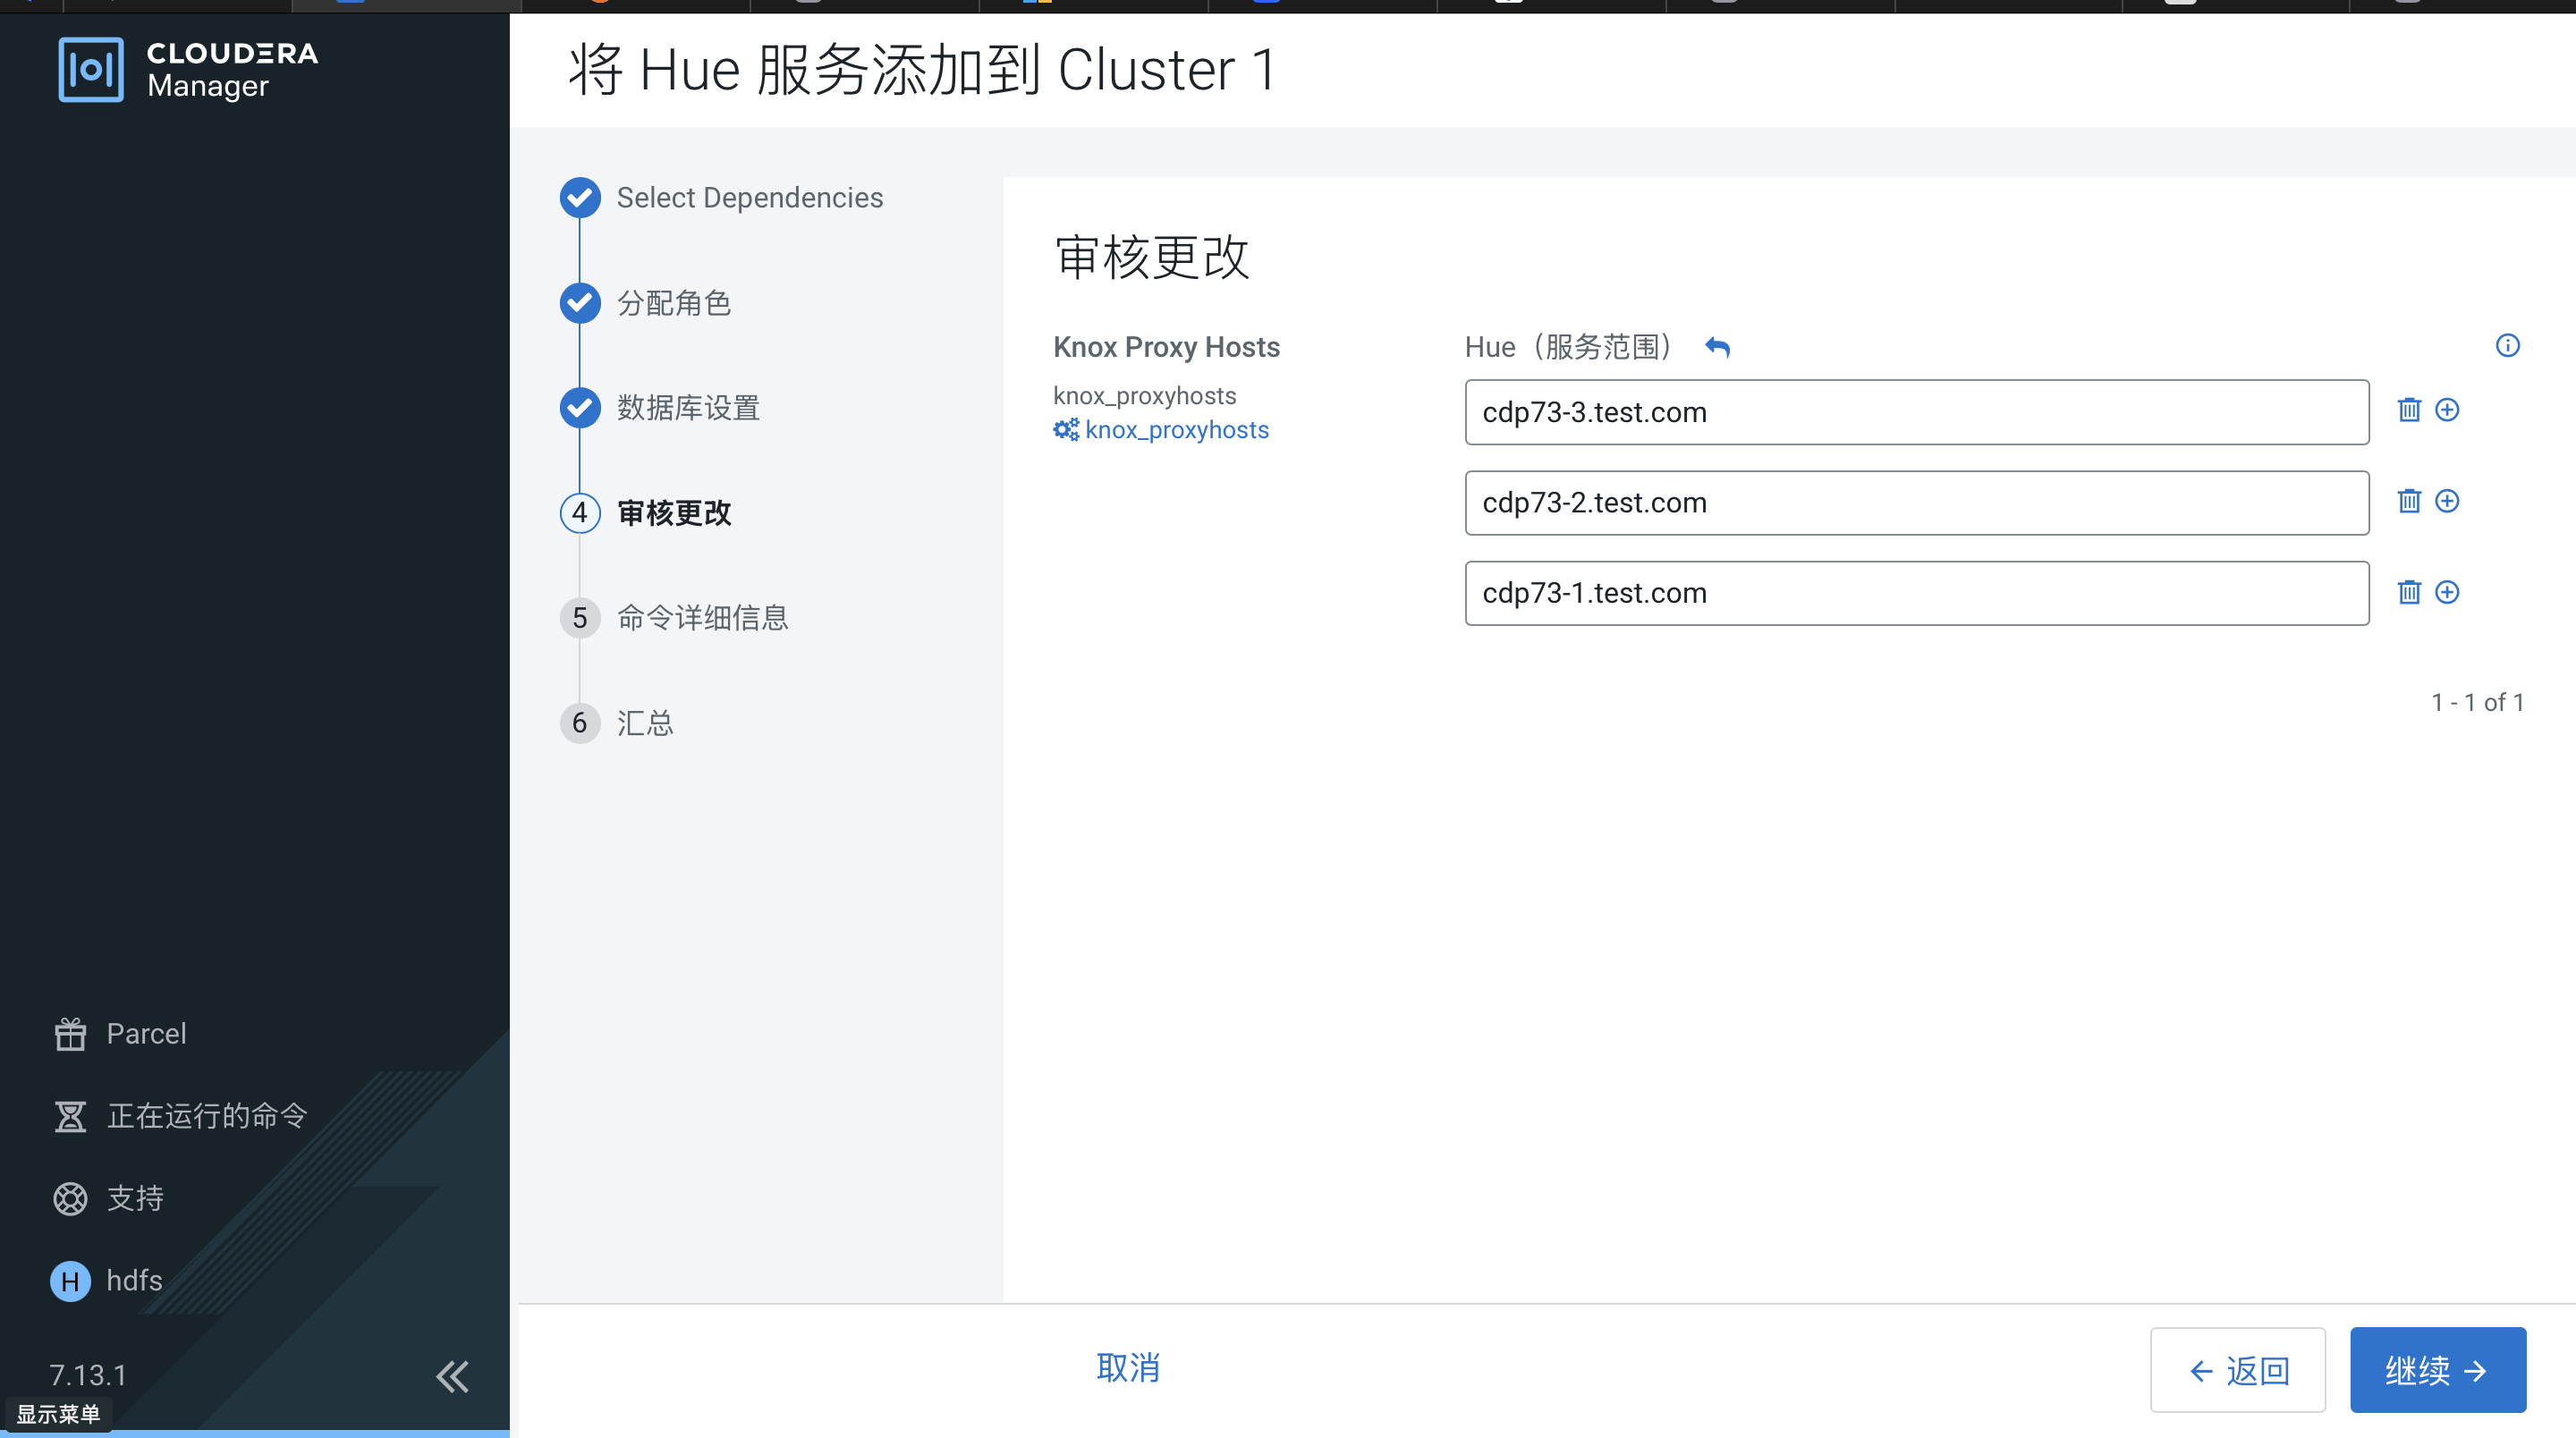
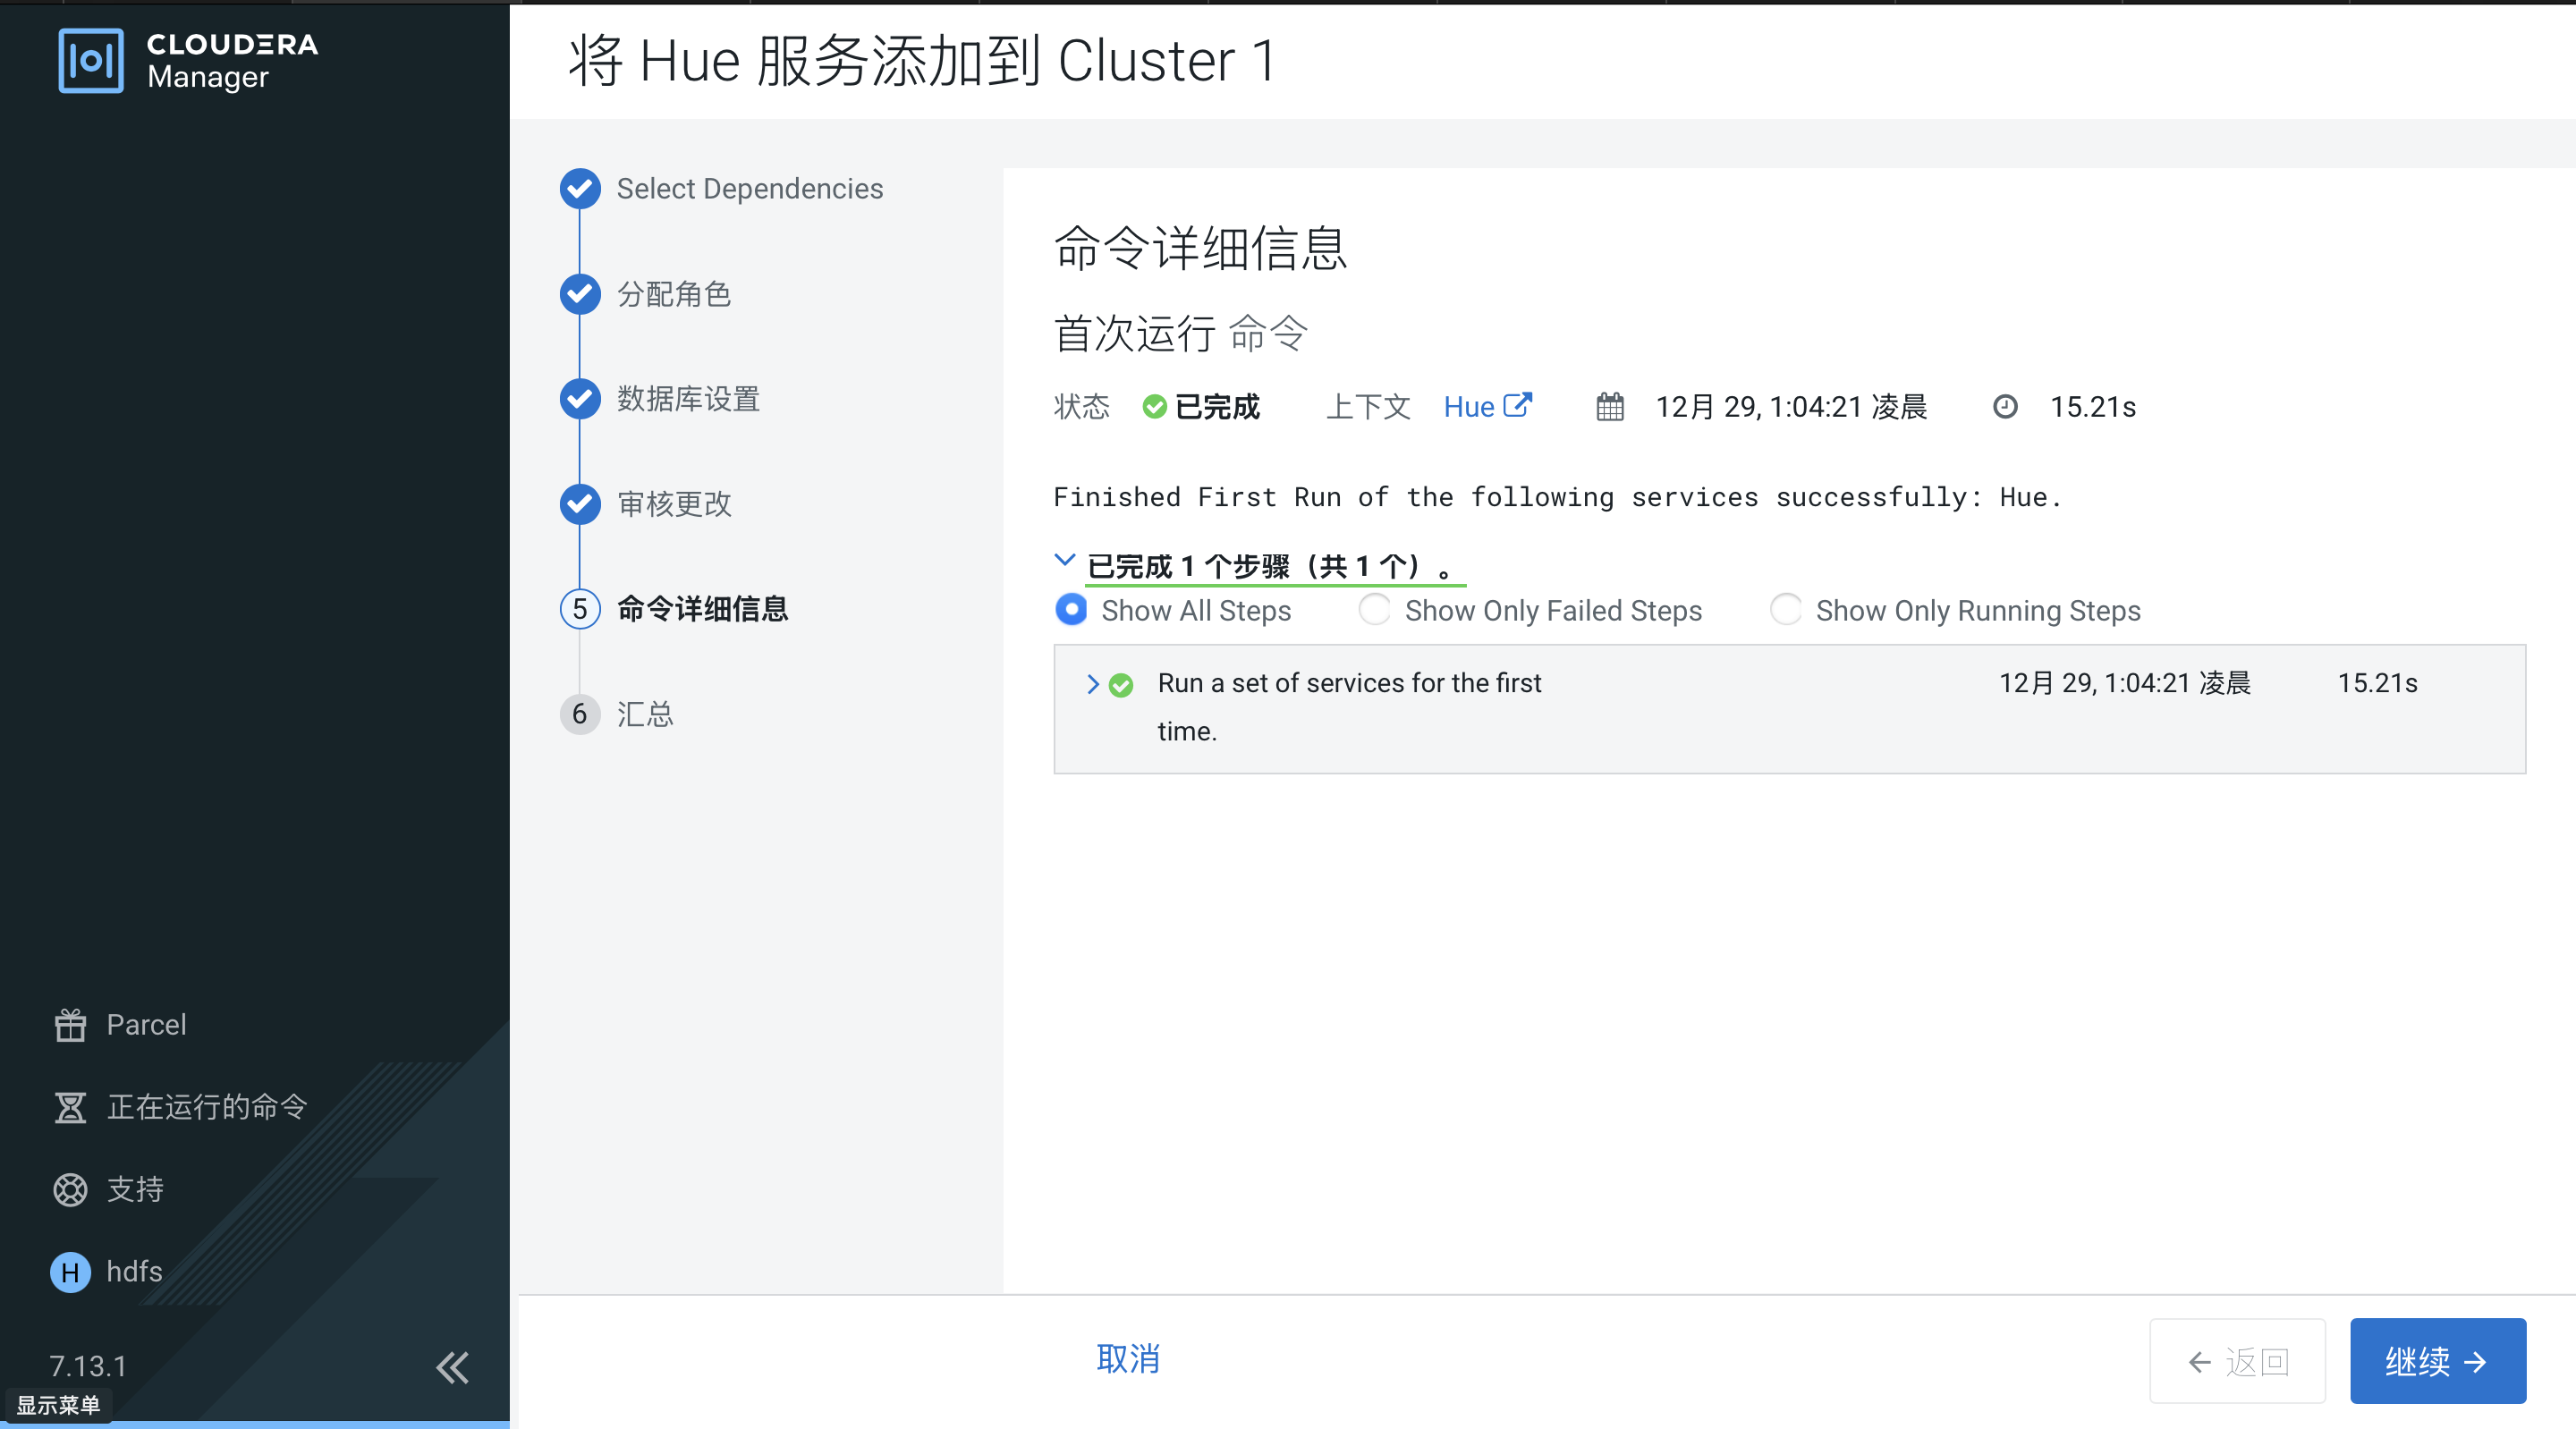
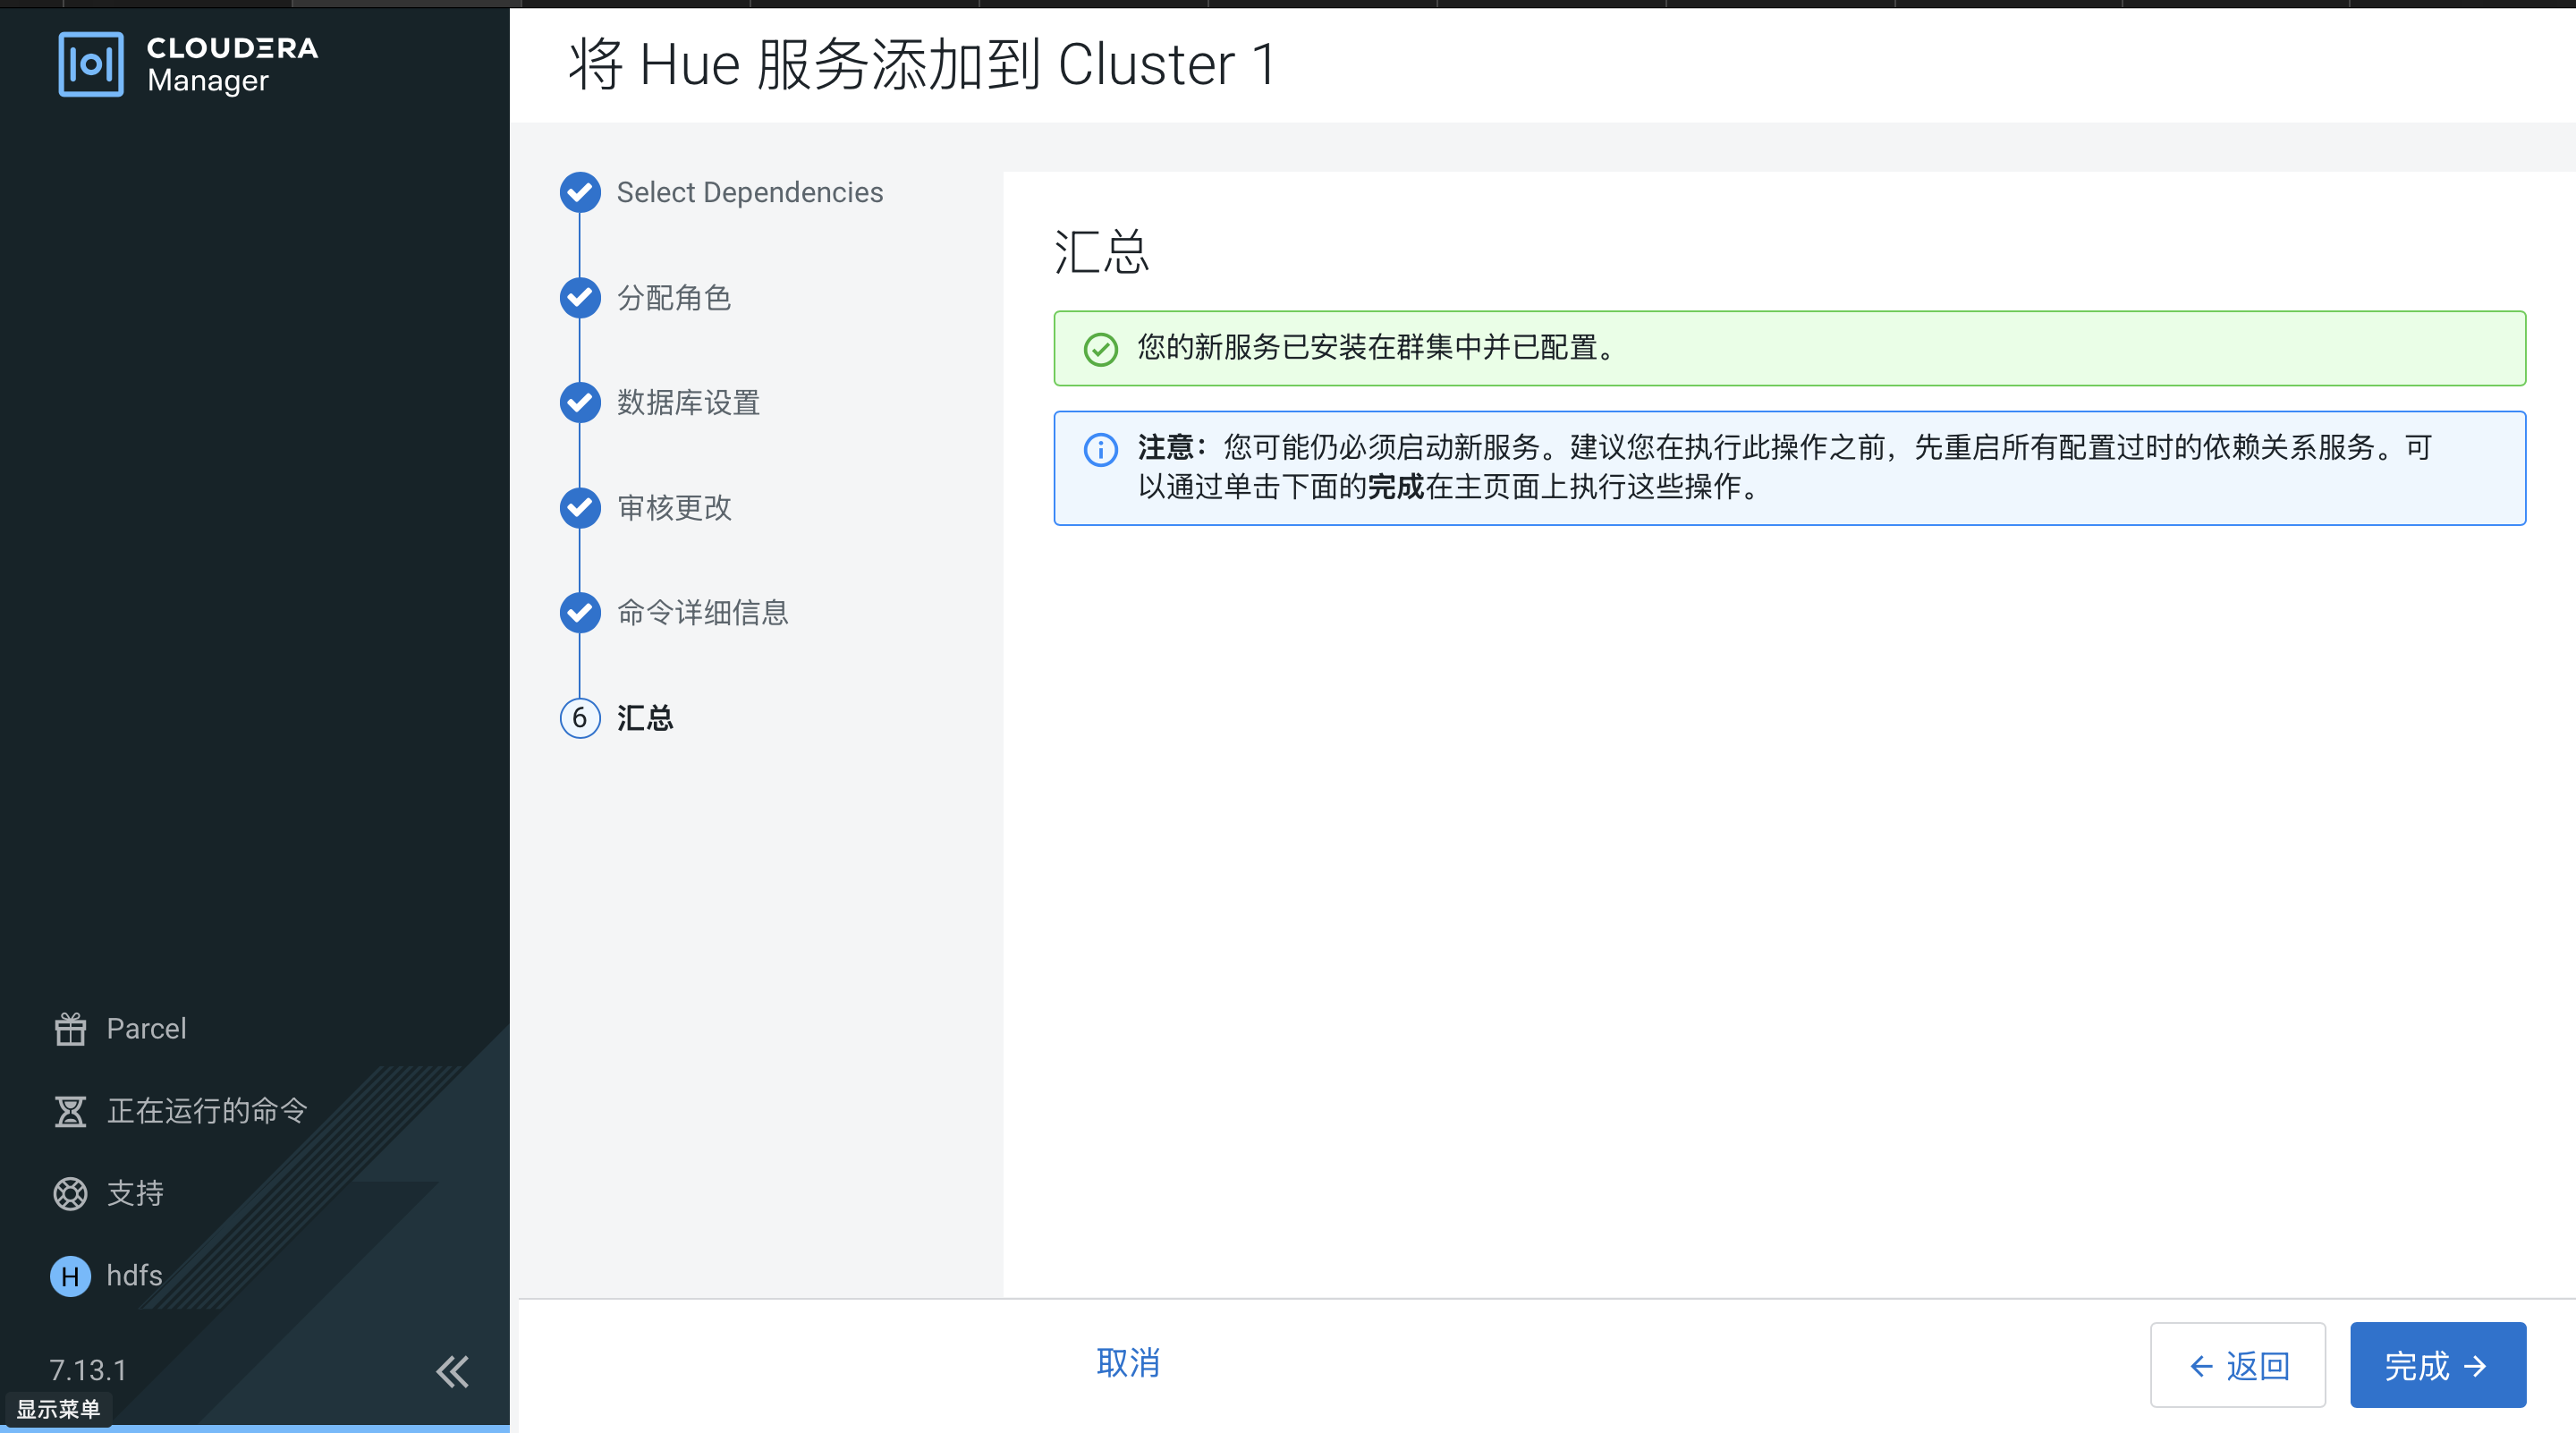
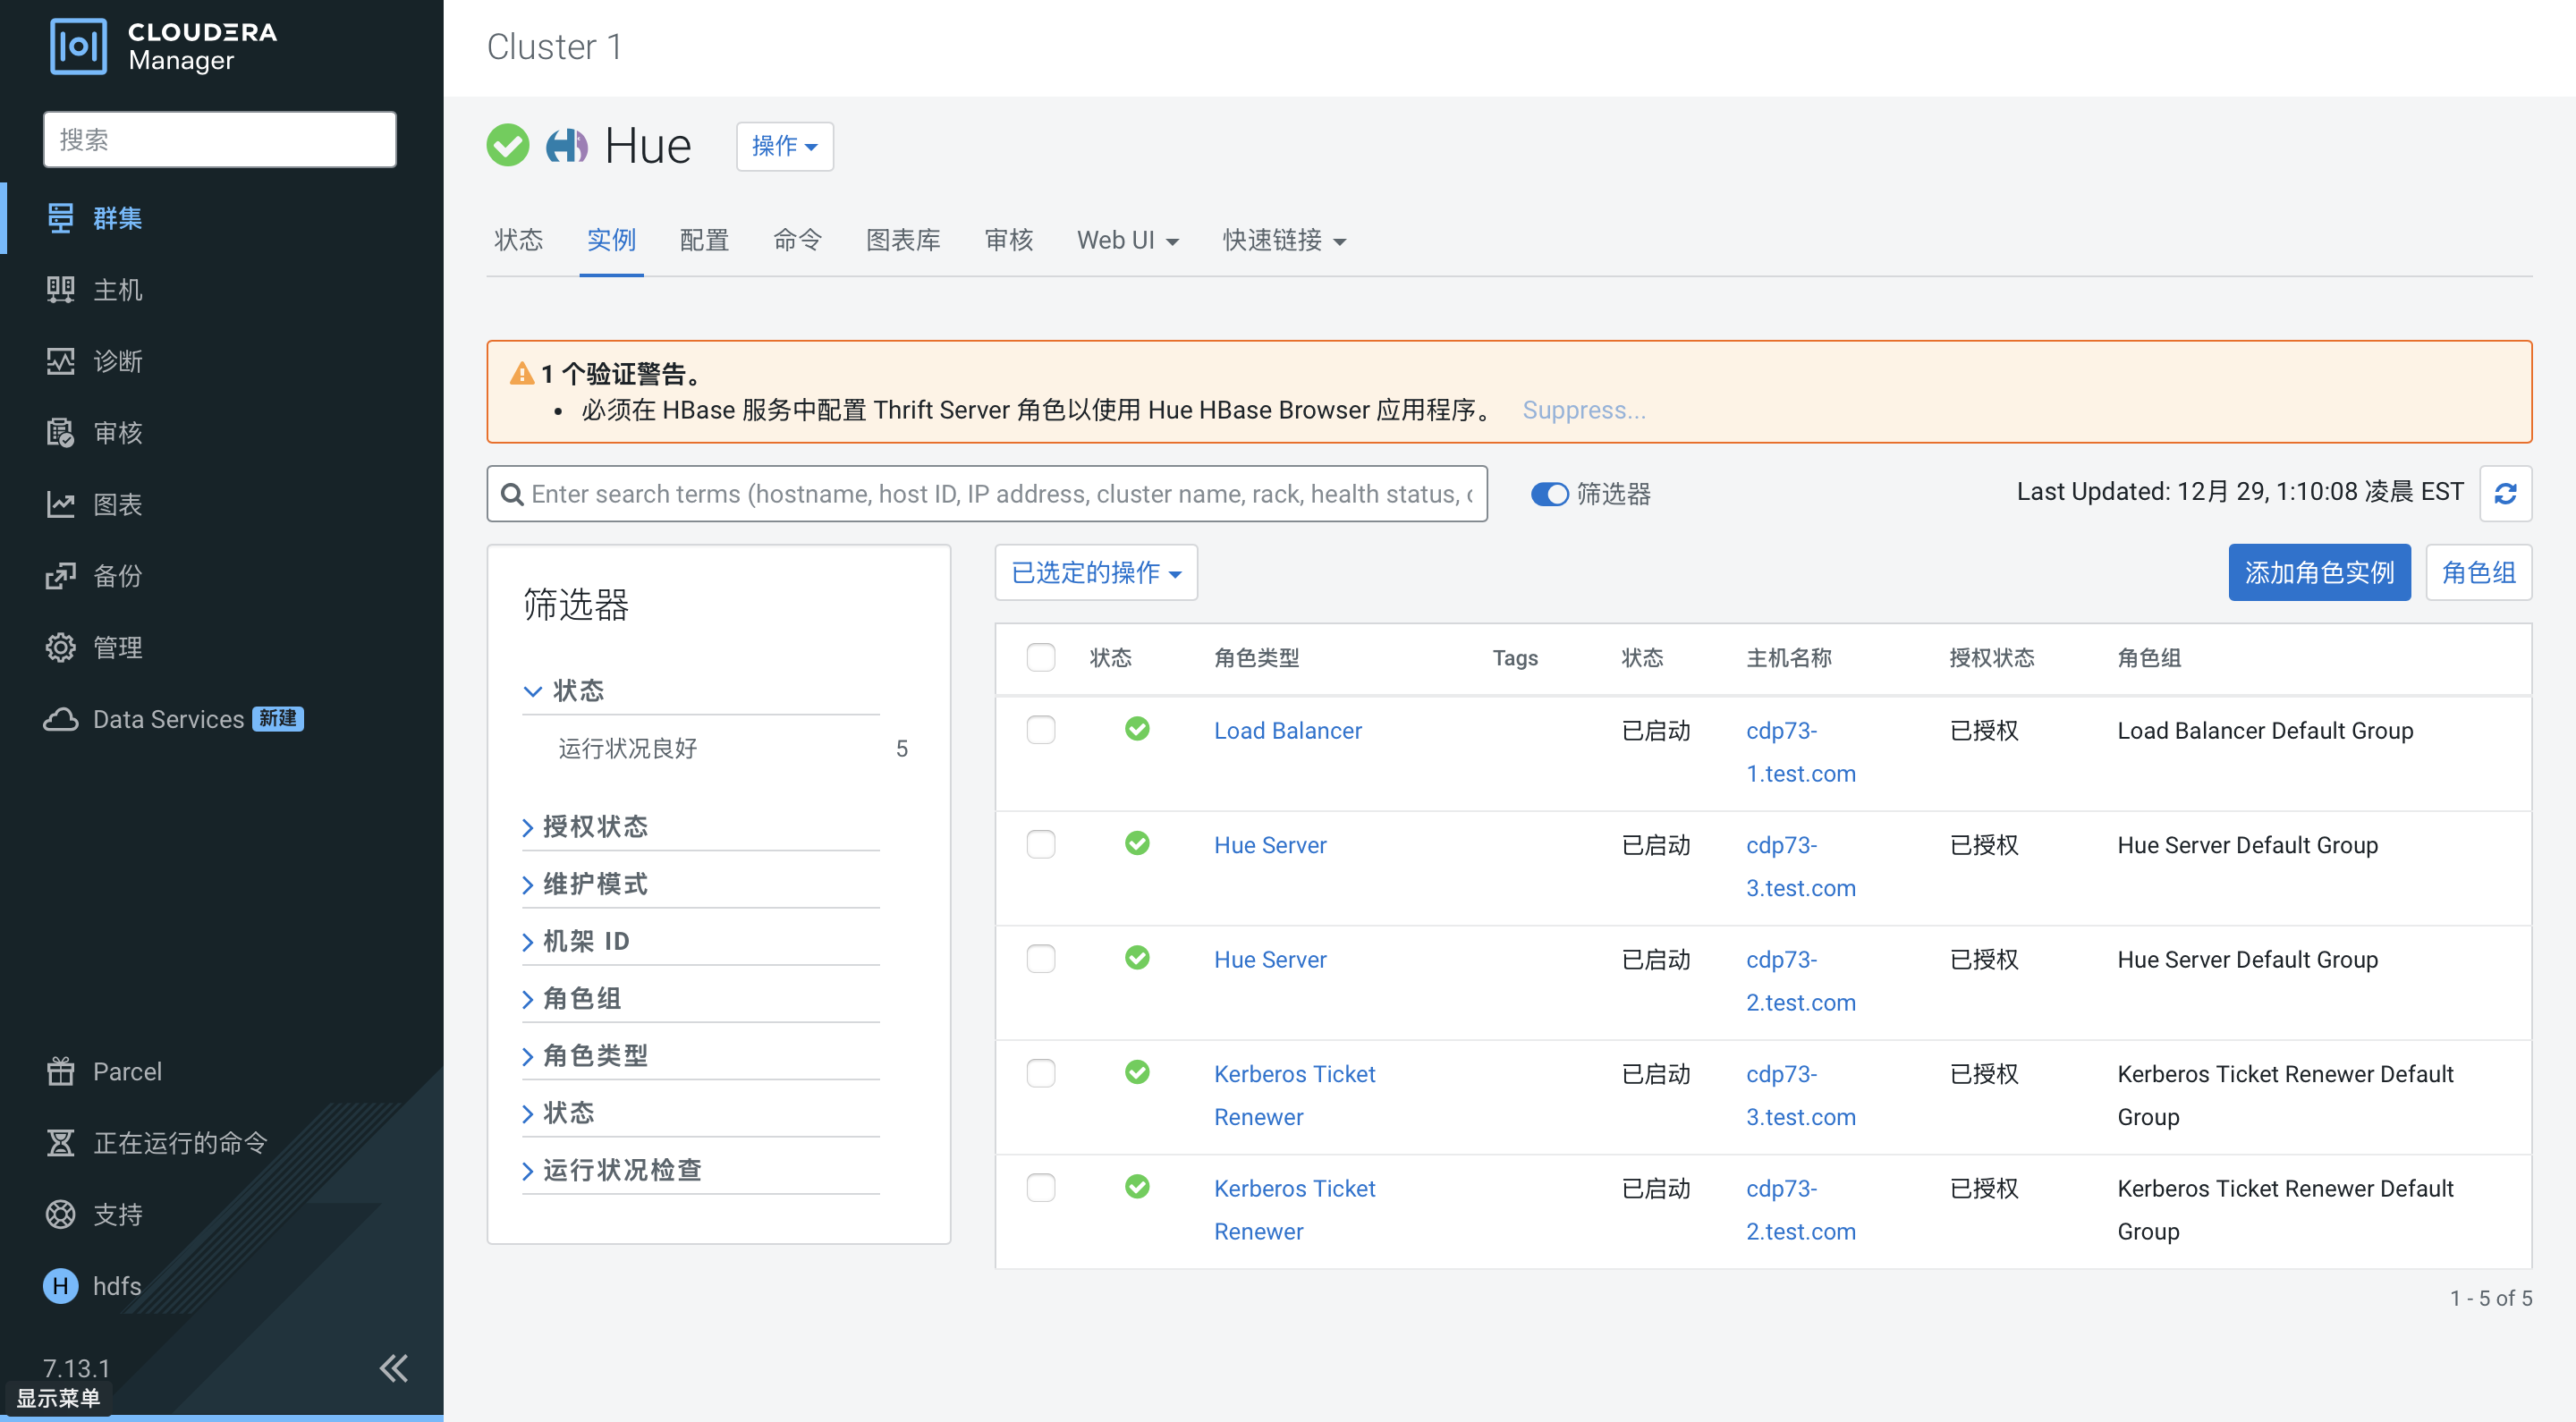
添加Hue服务
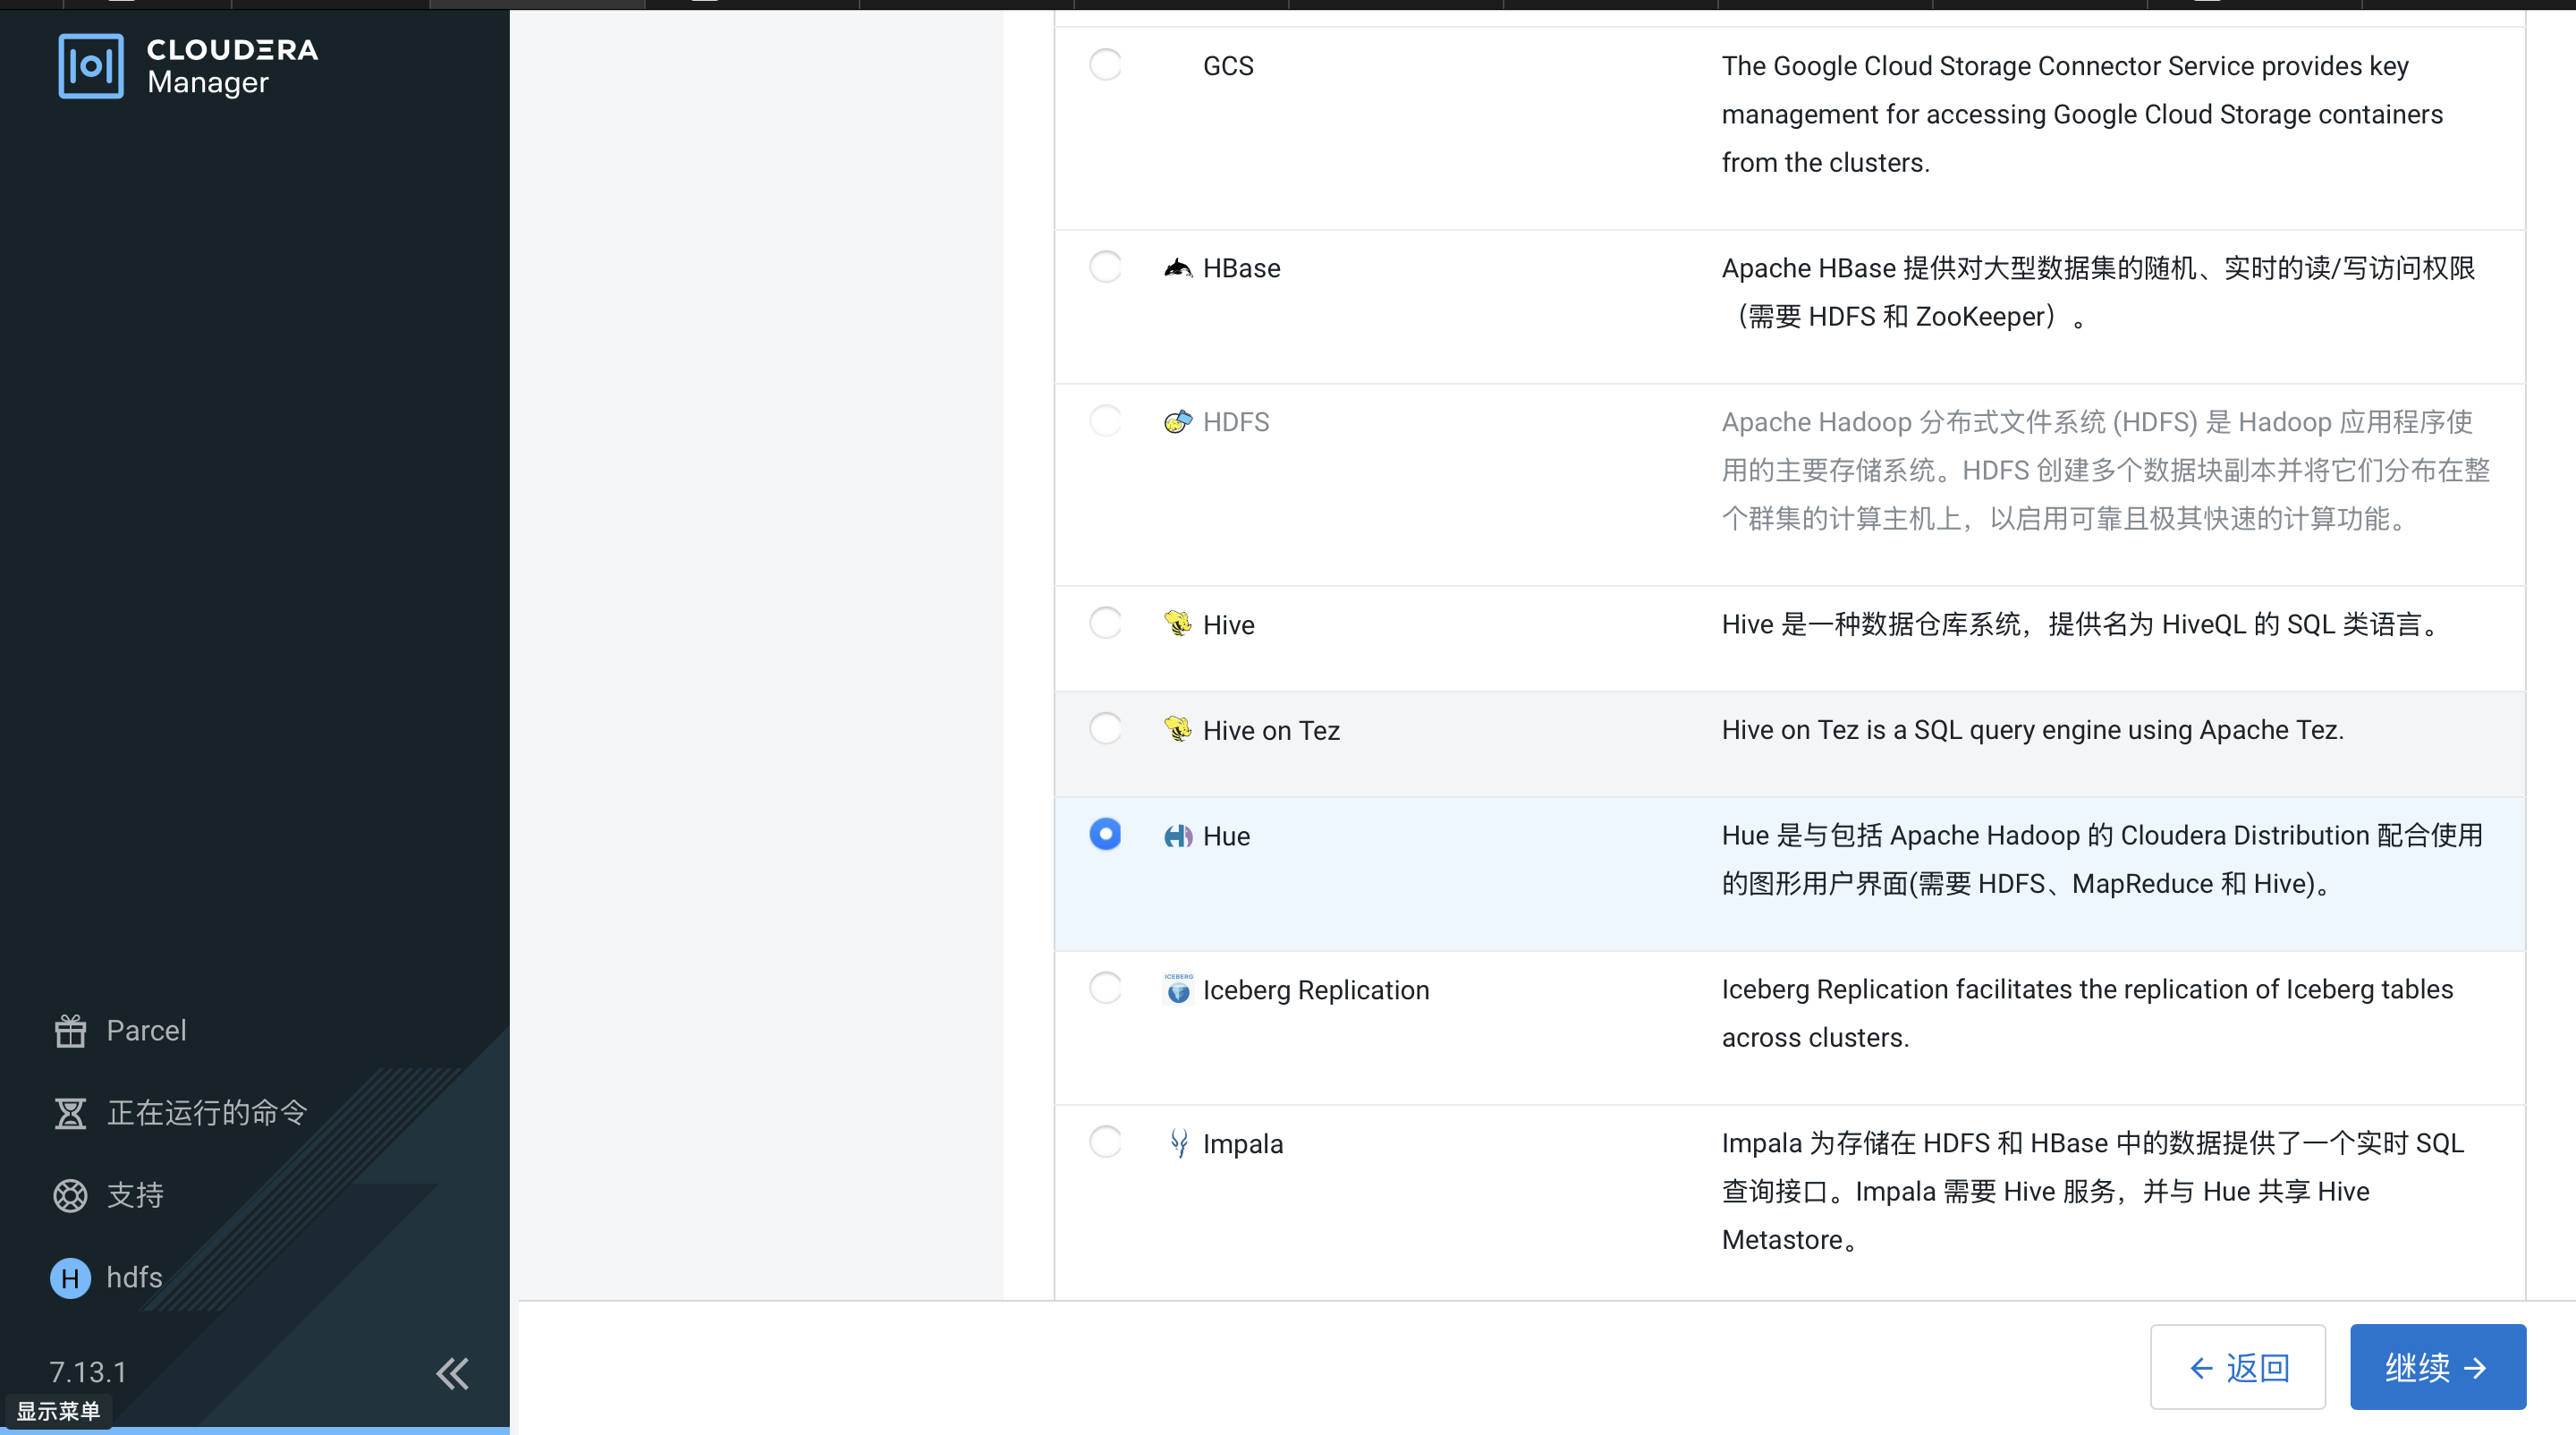
选择依赖

分配角色
数据库设置
审核更改
命令详细信息
汇总
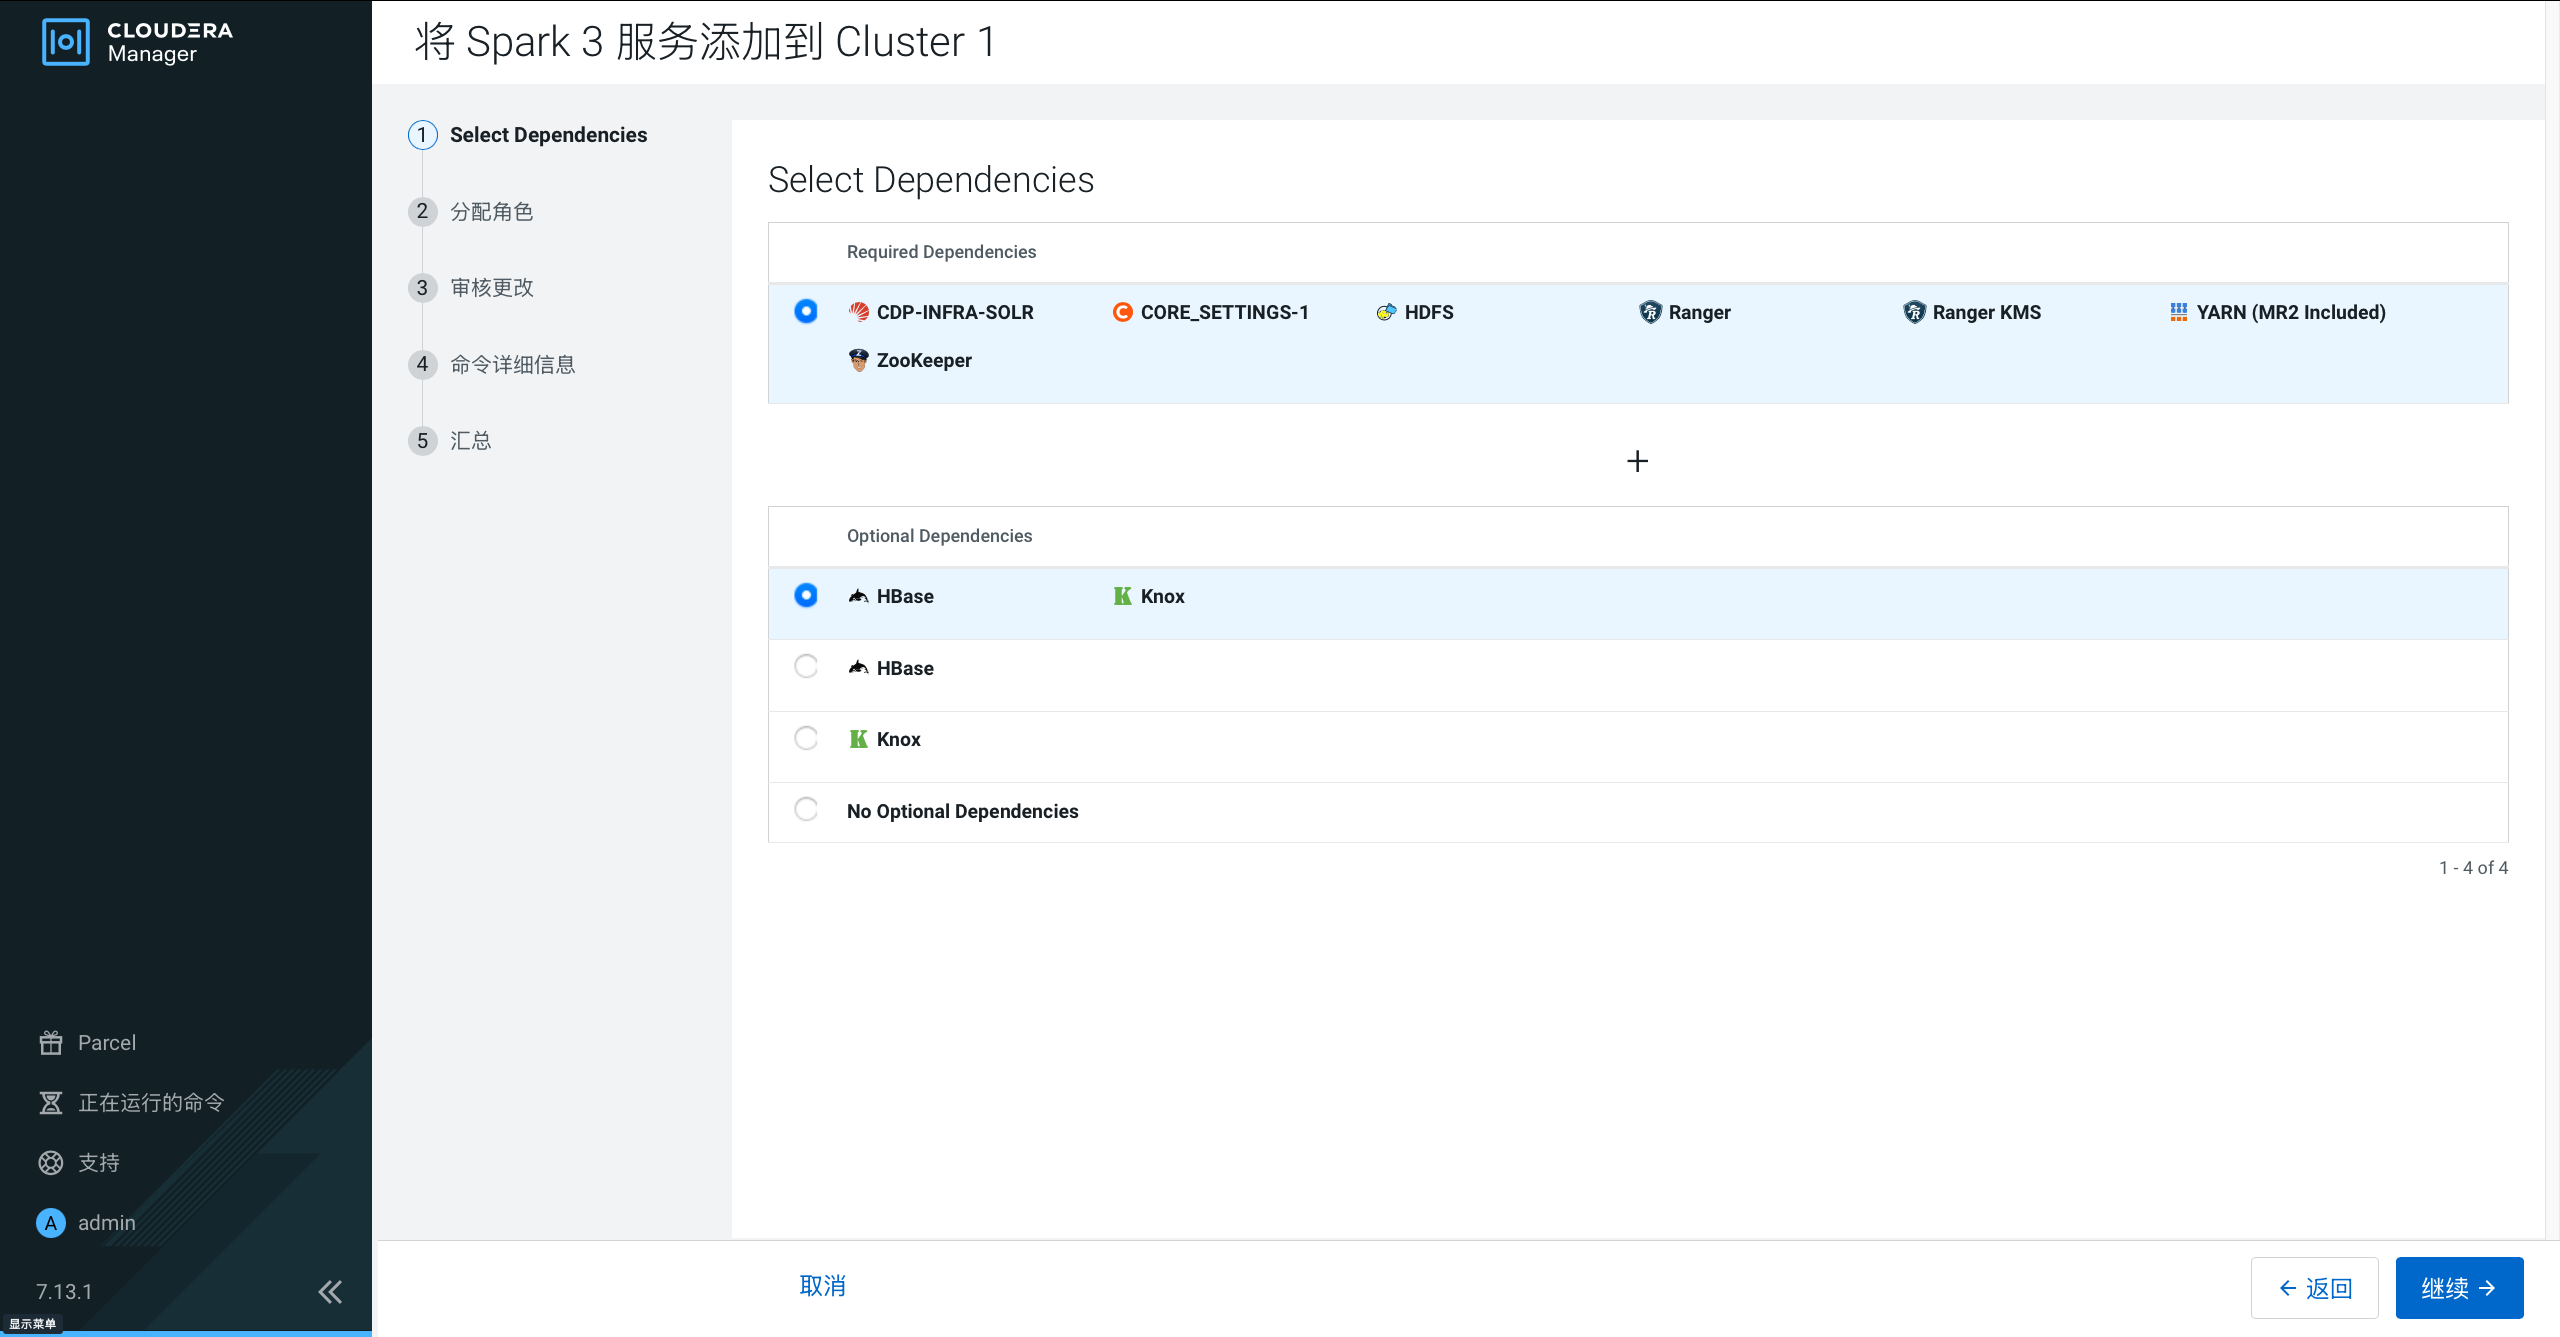
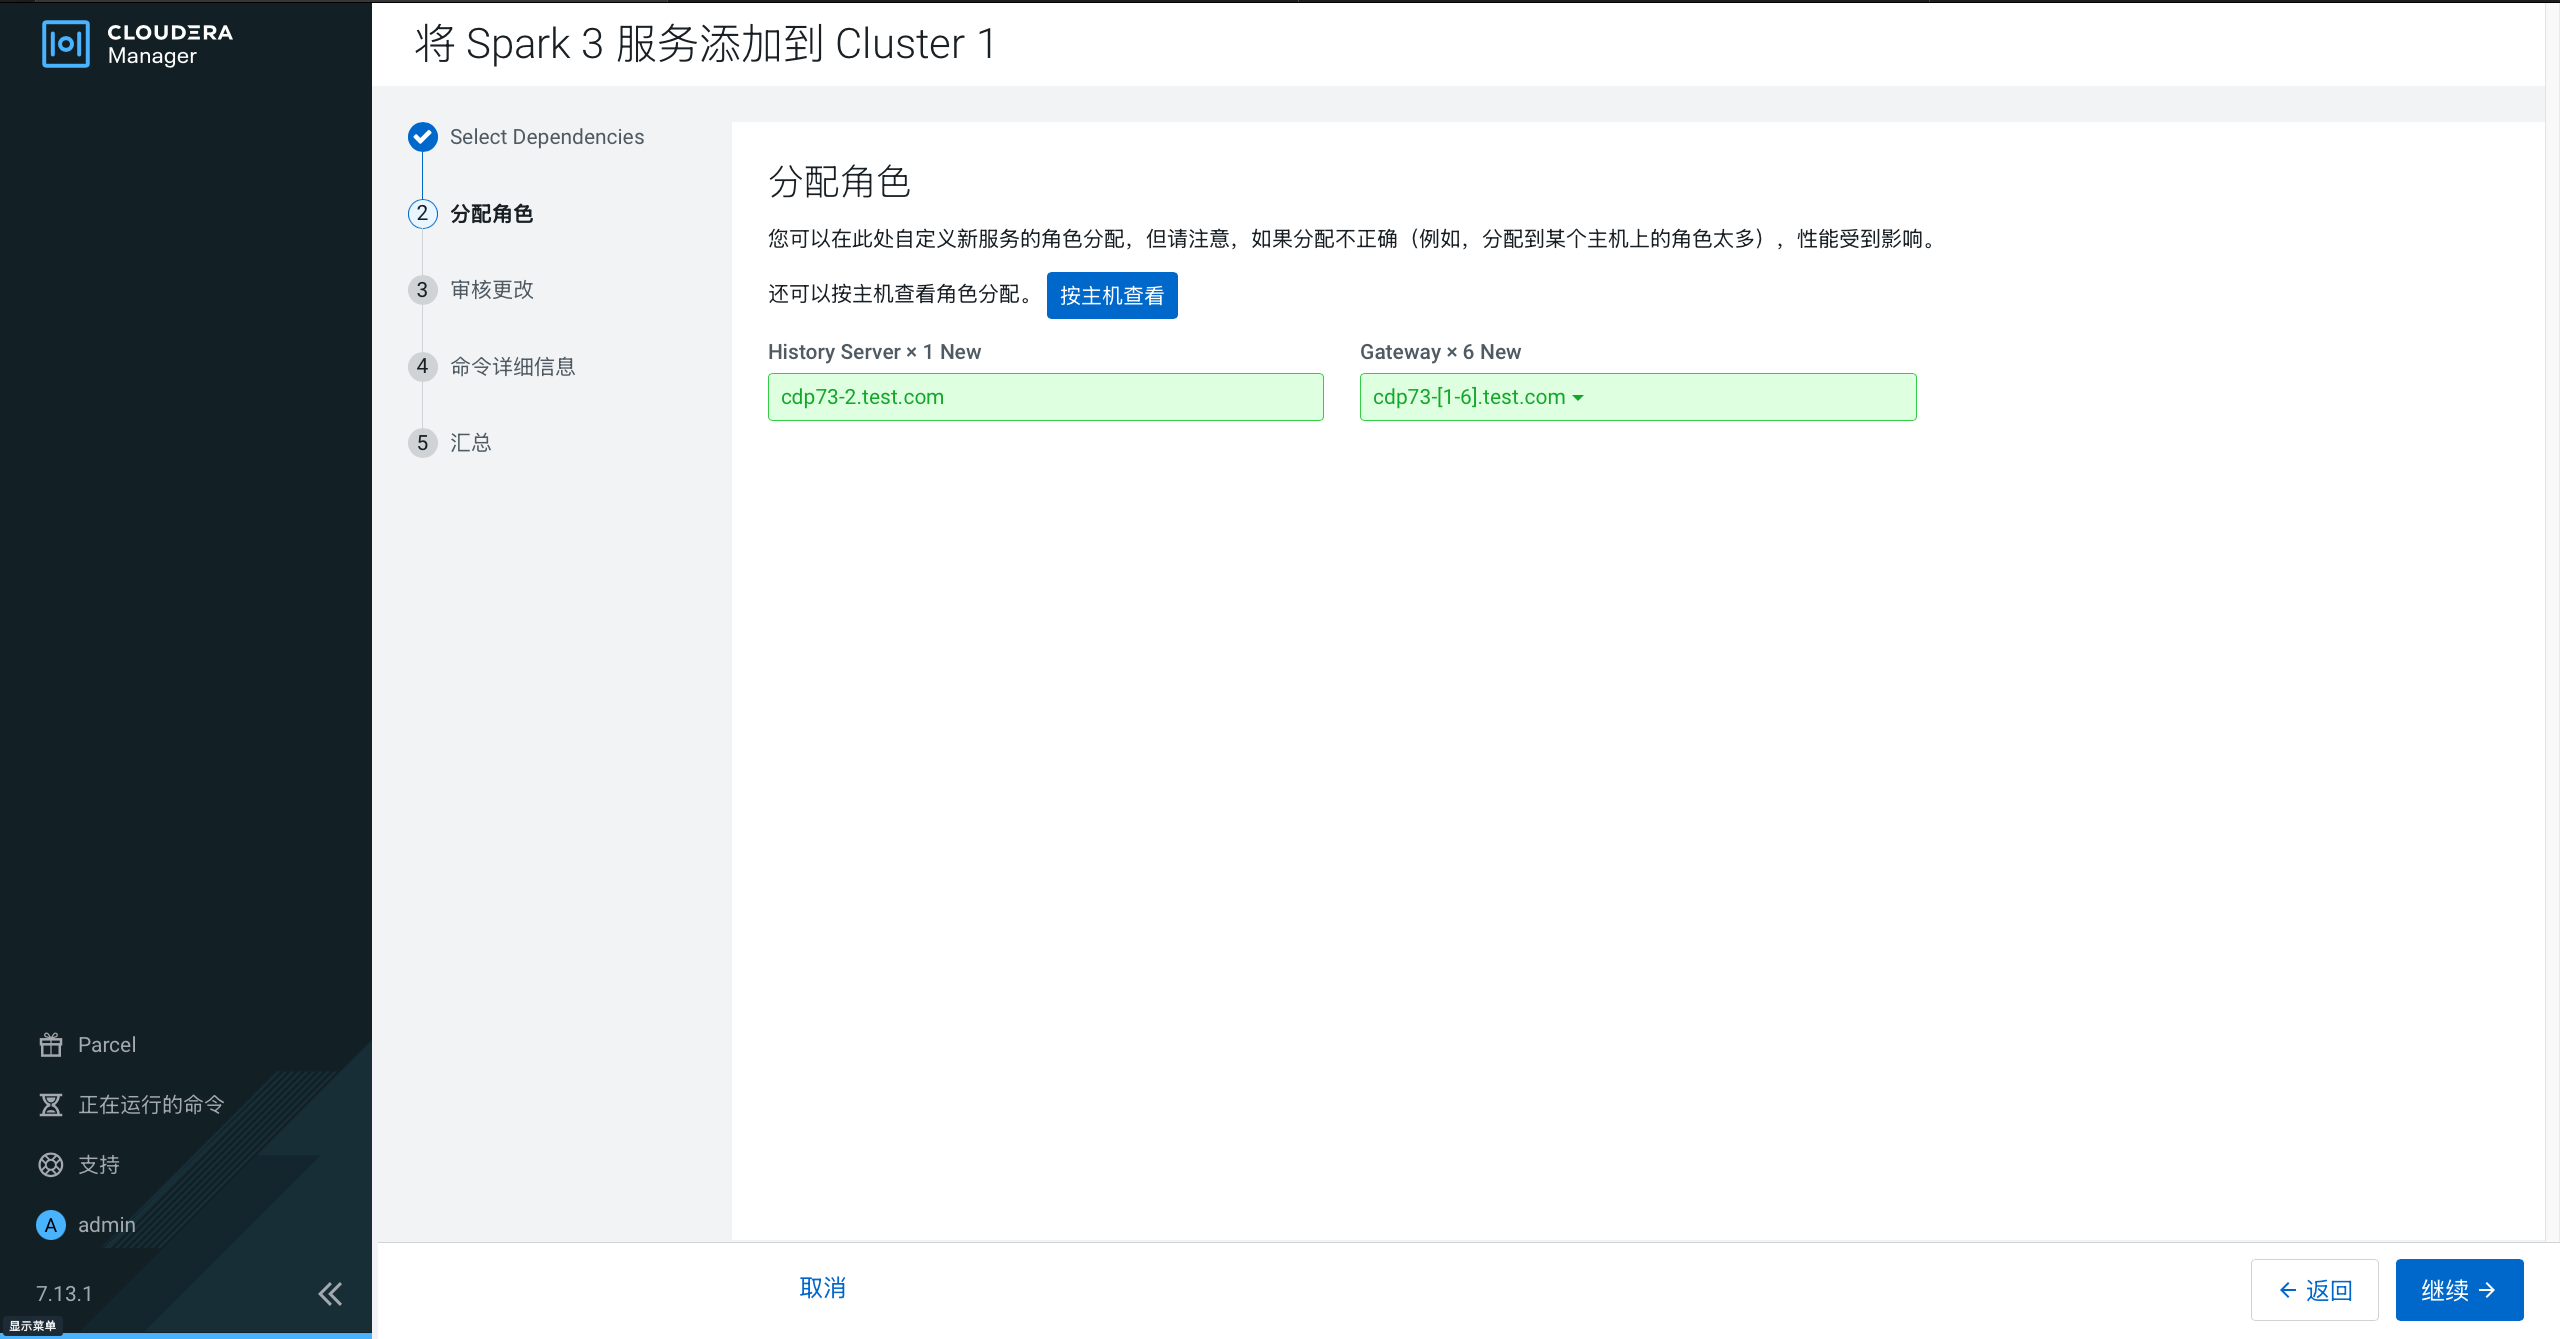
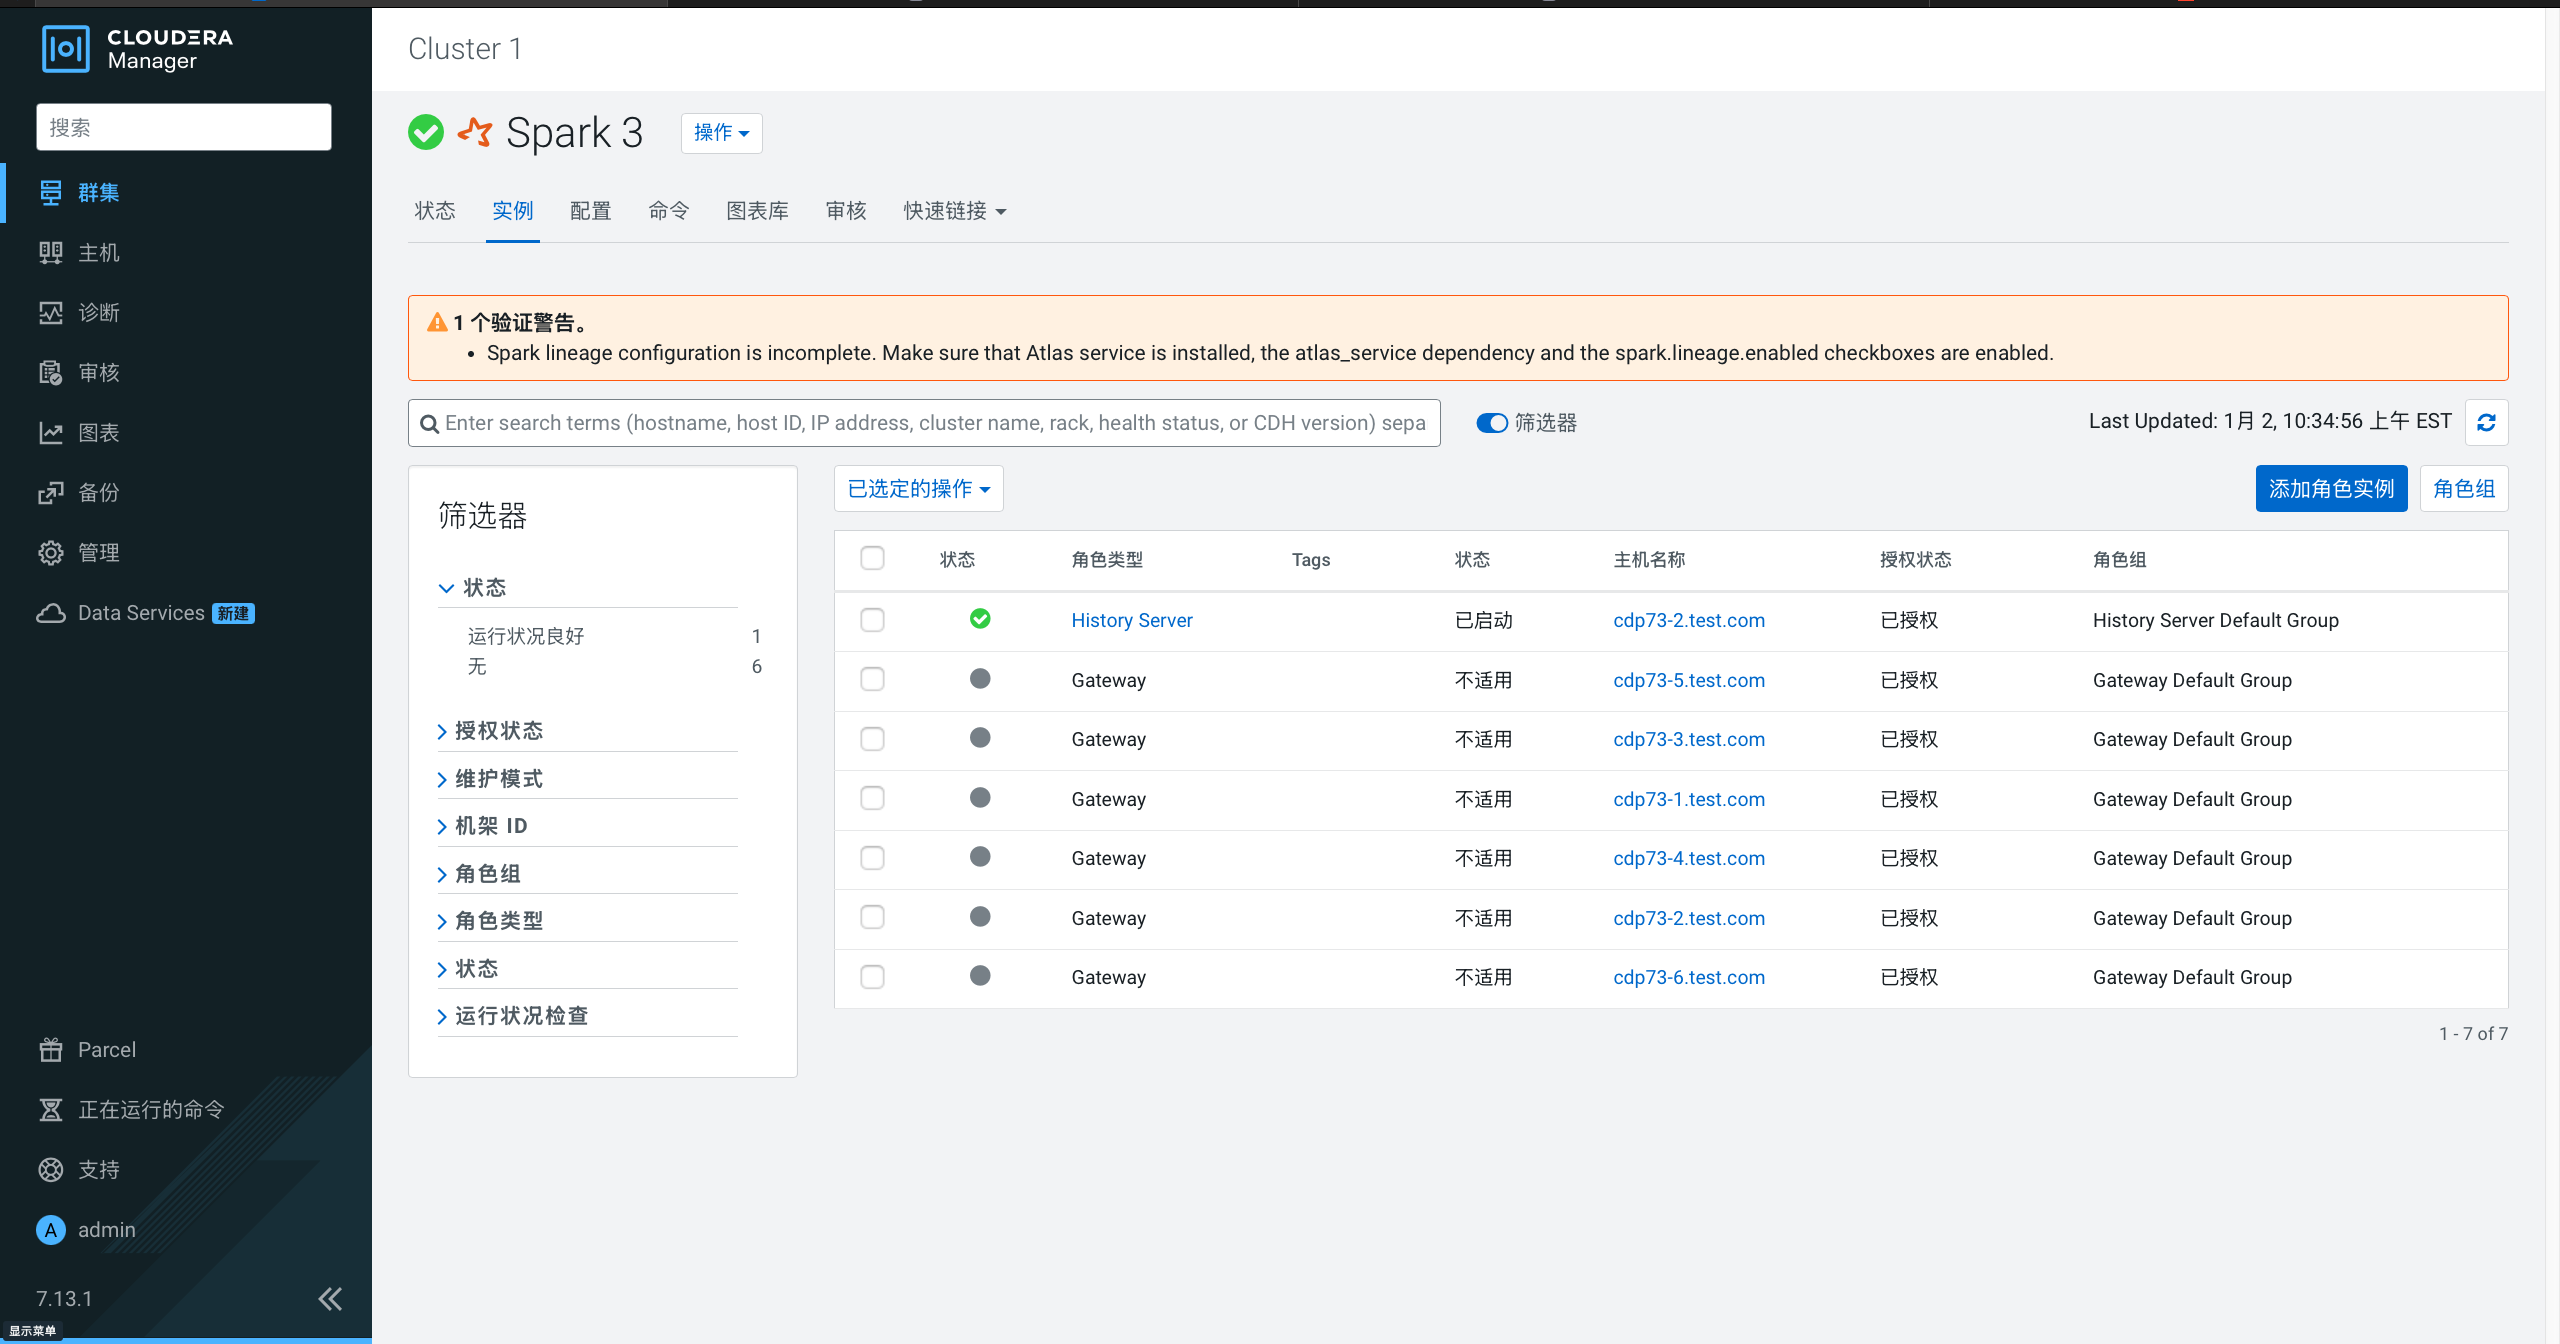
添加Spark服务
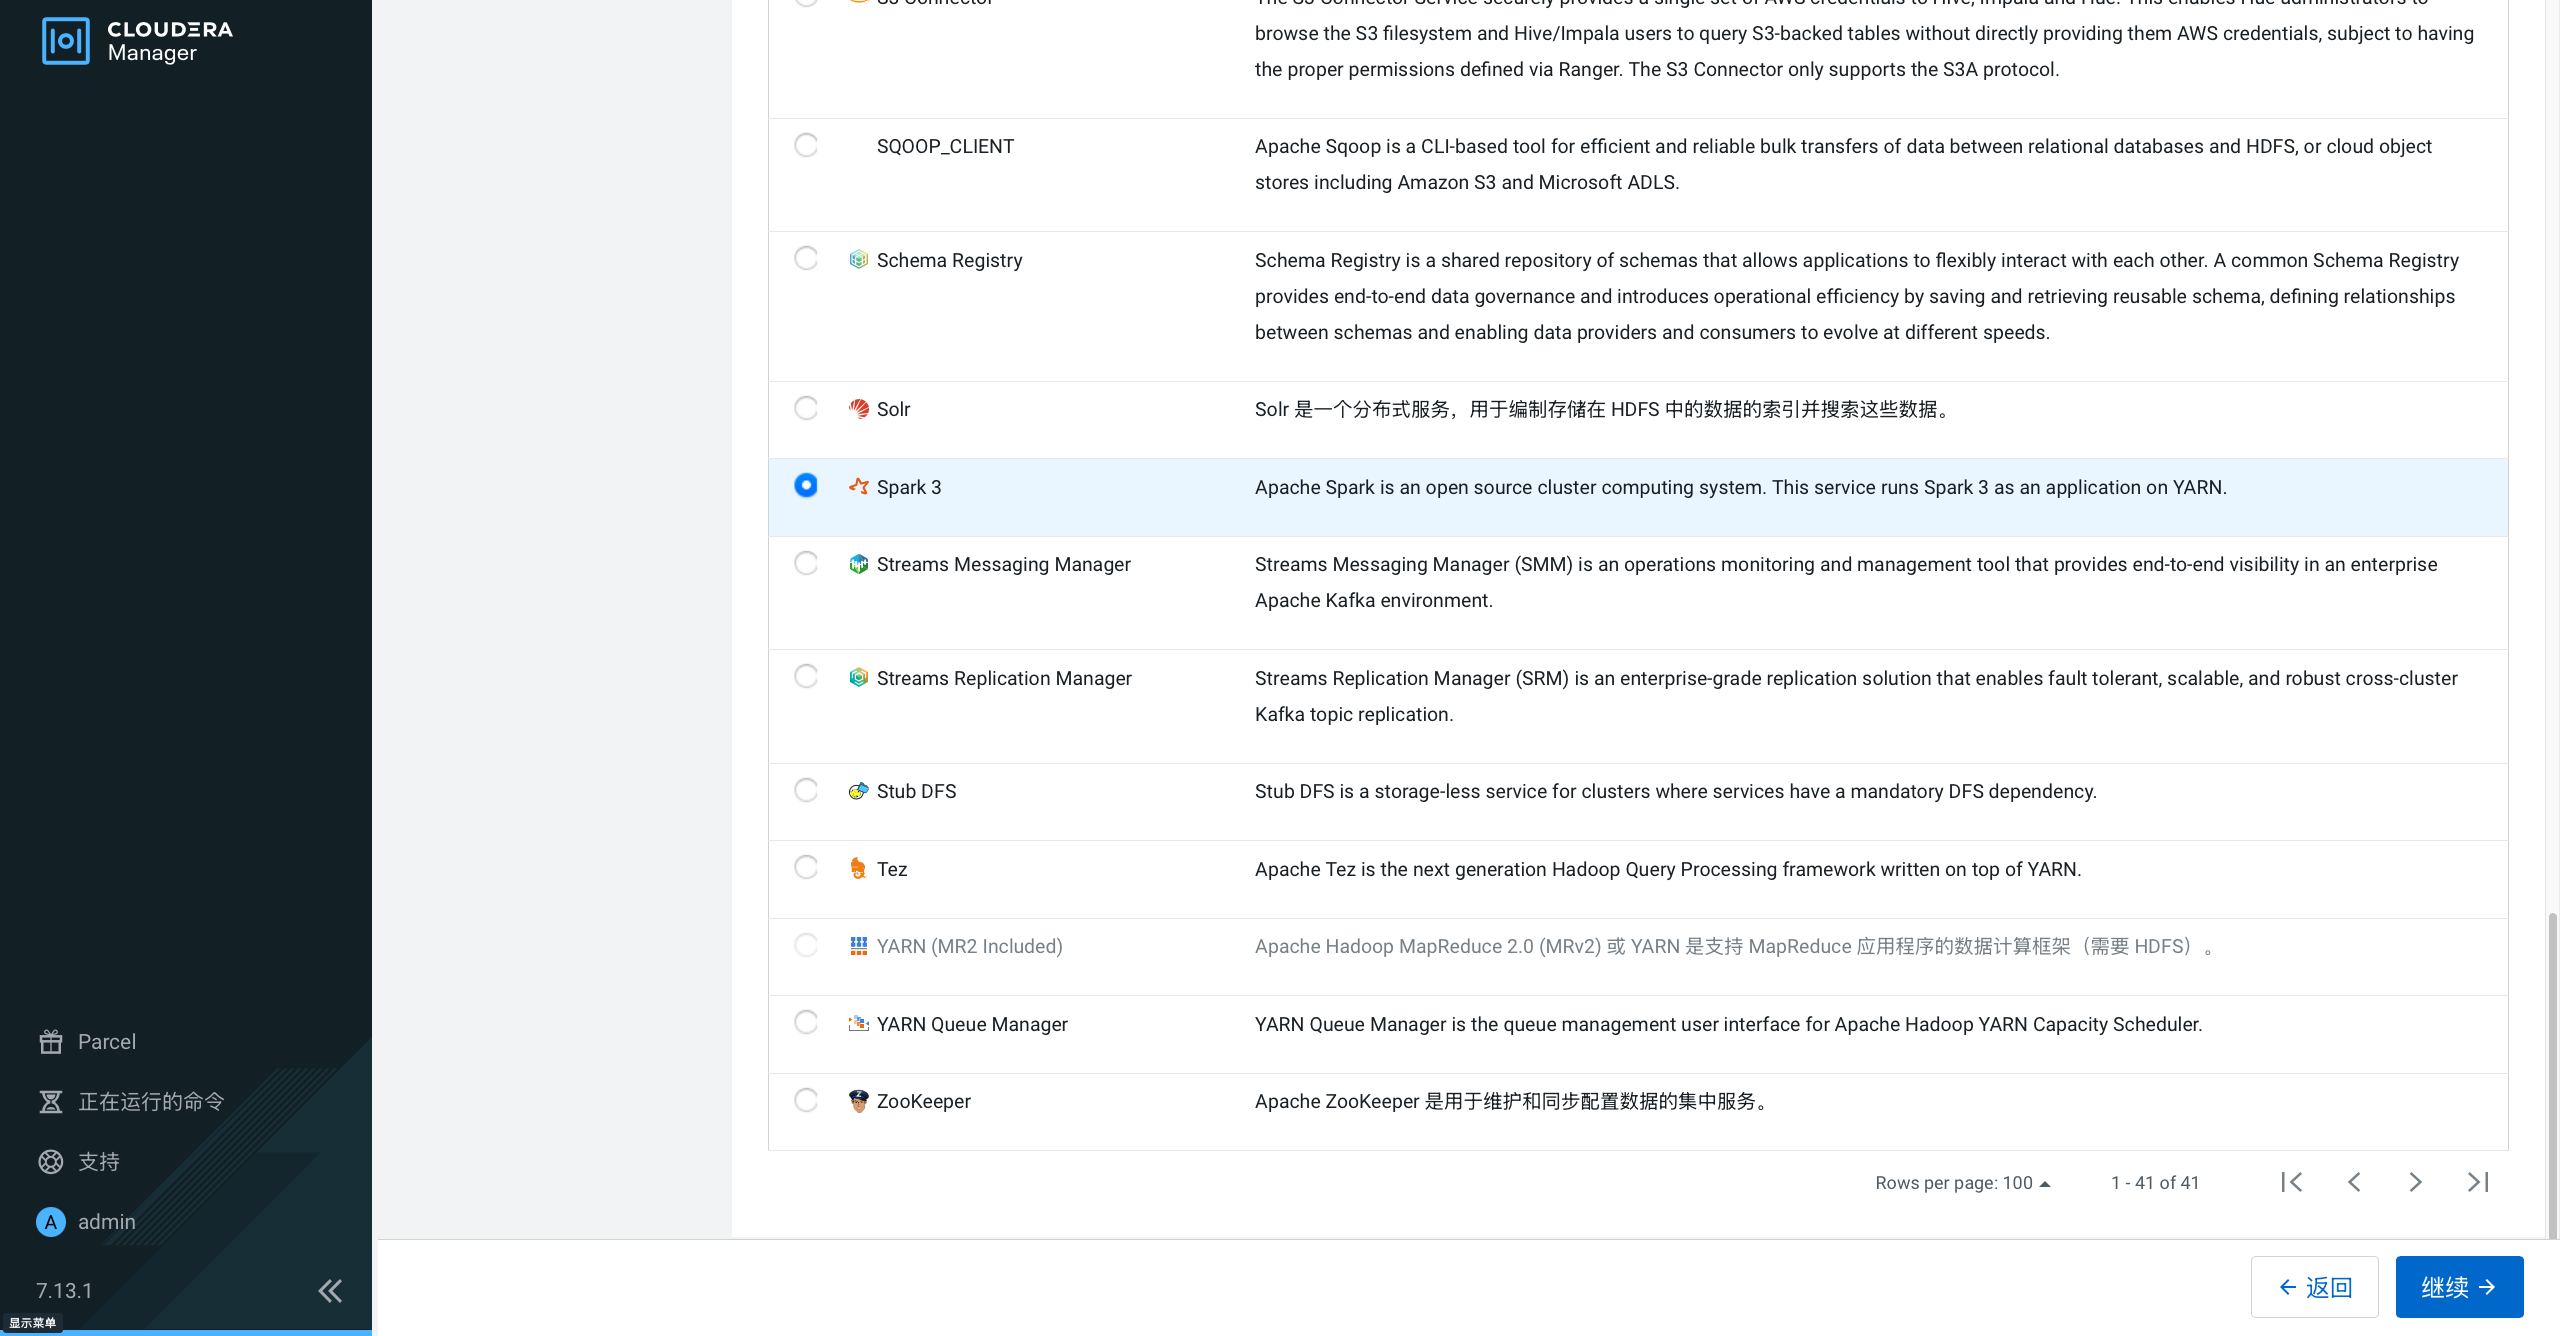
选择依赖
分配角色
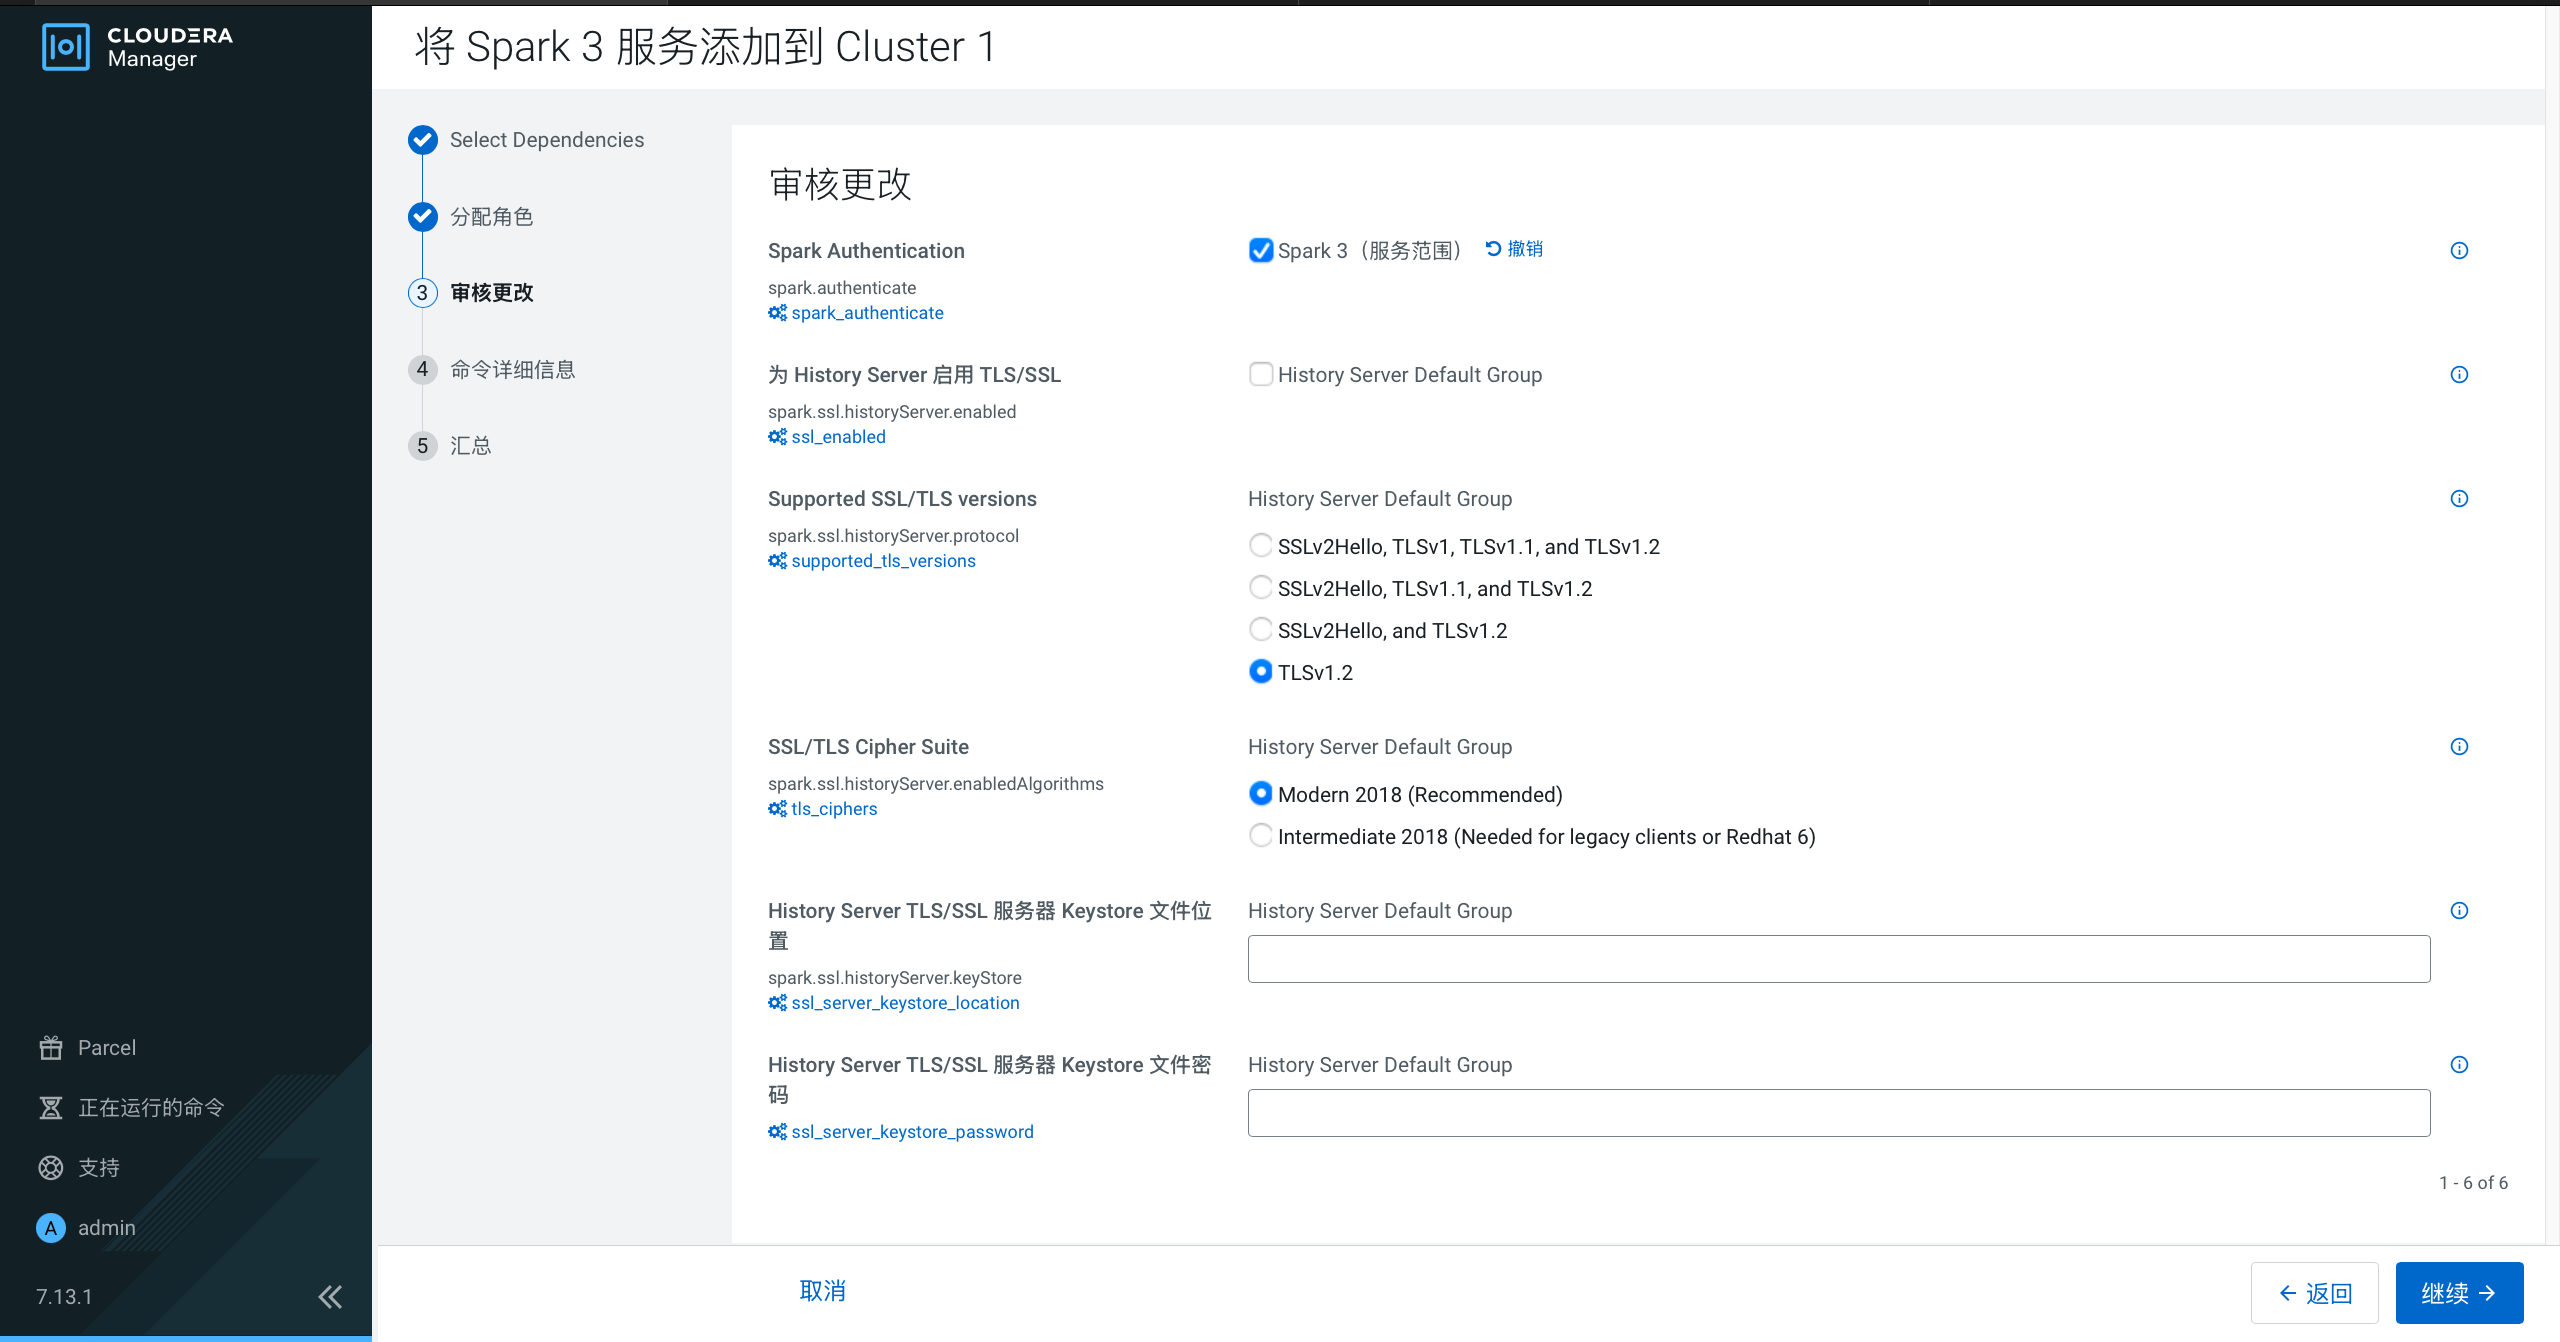
审核更改
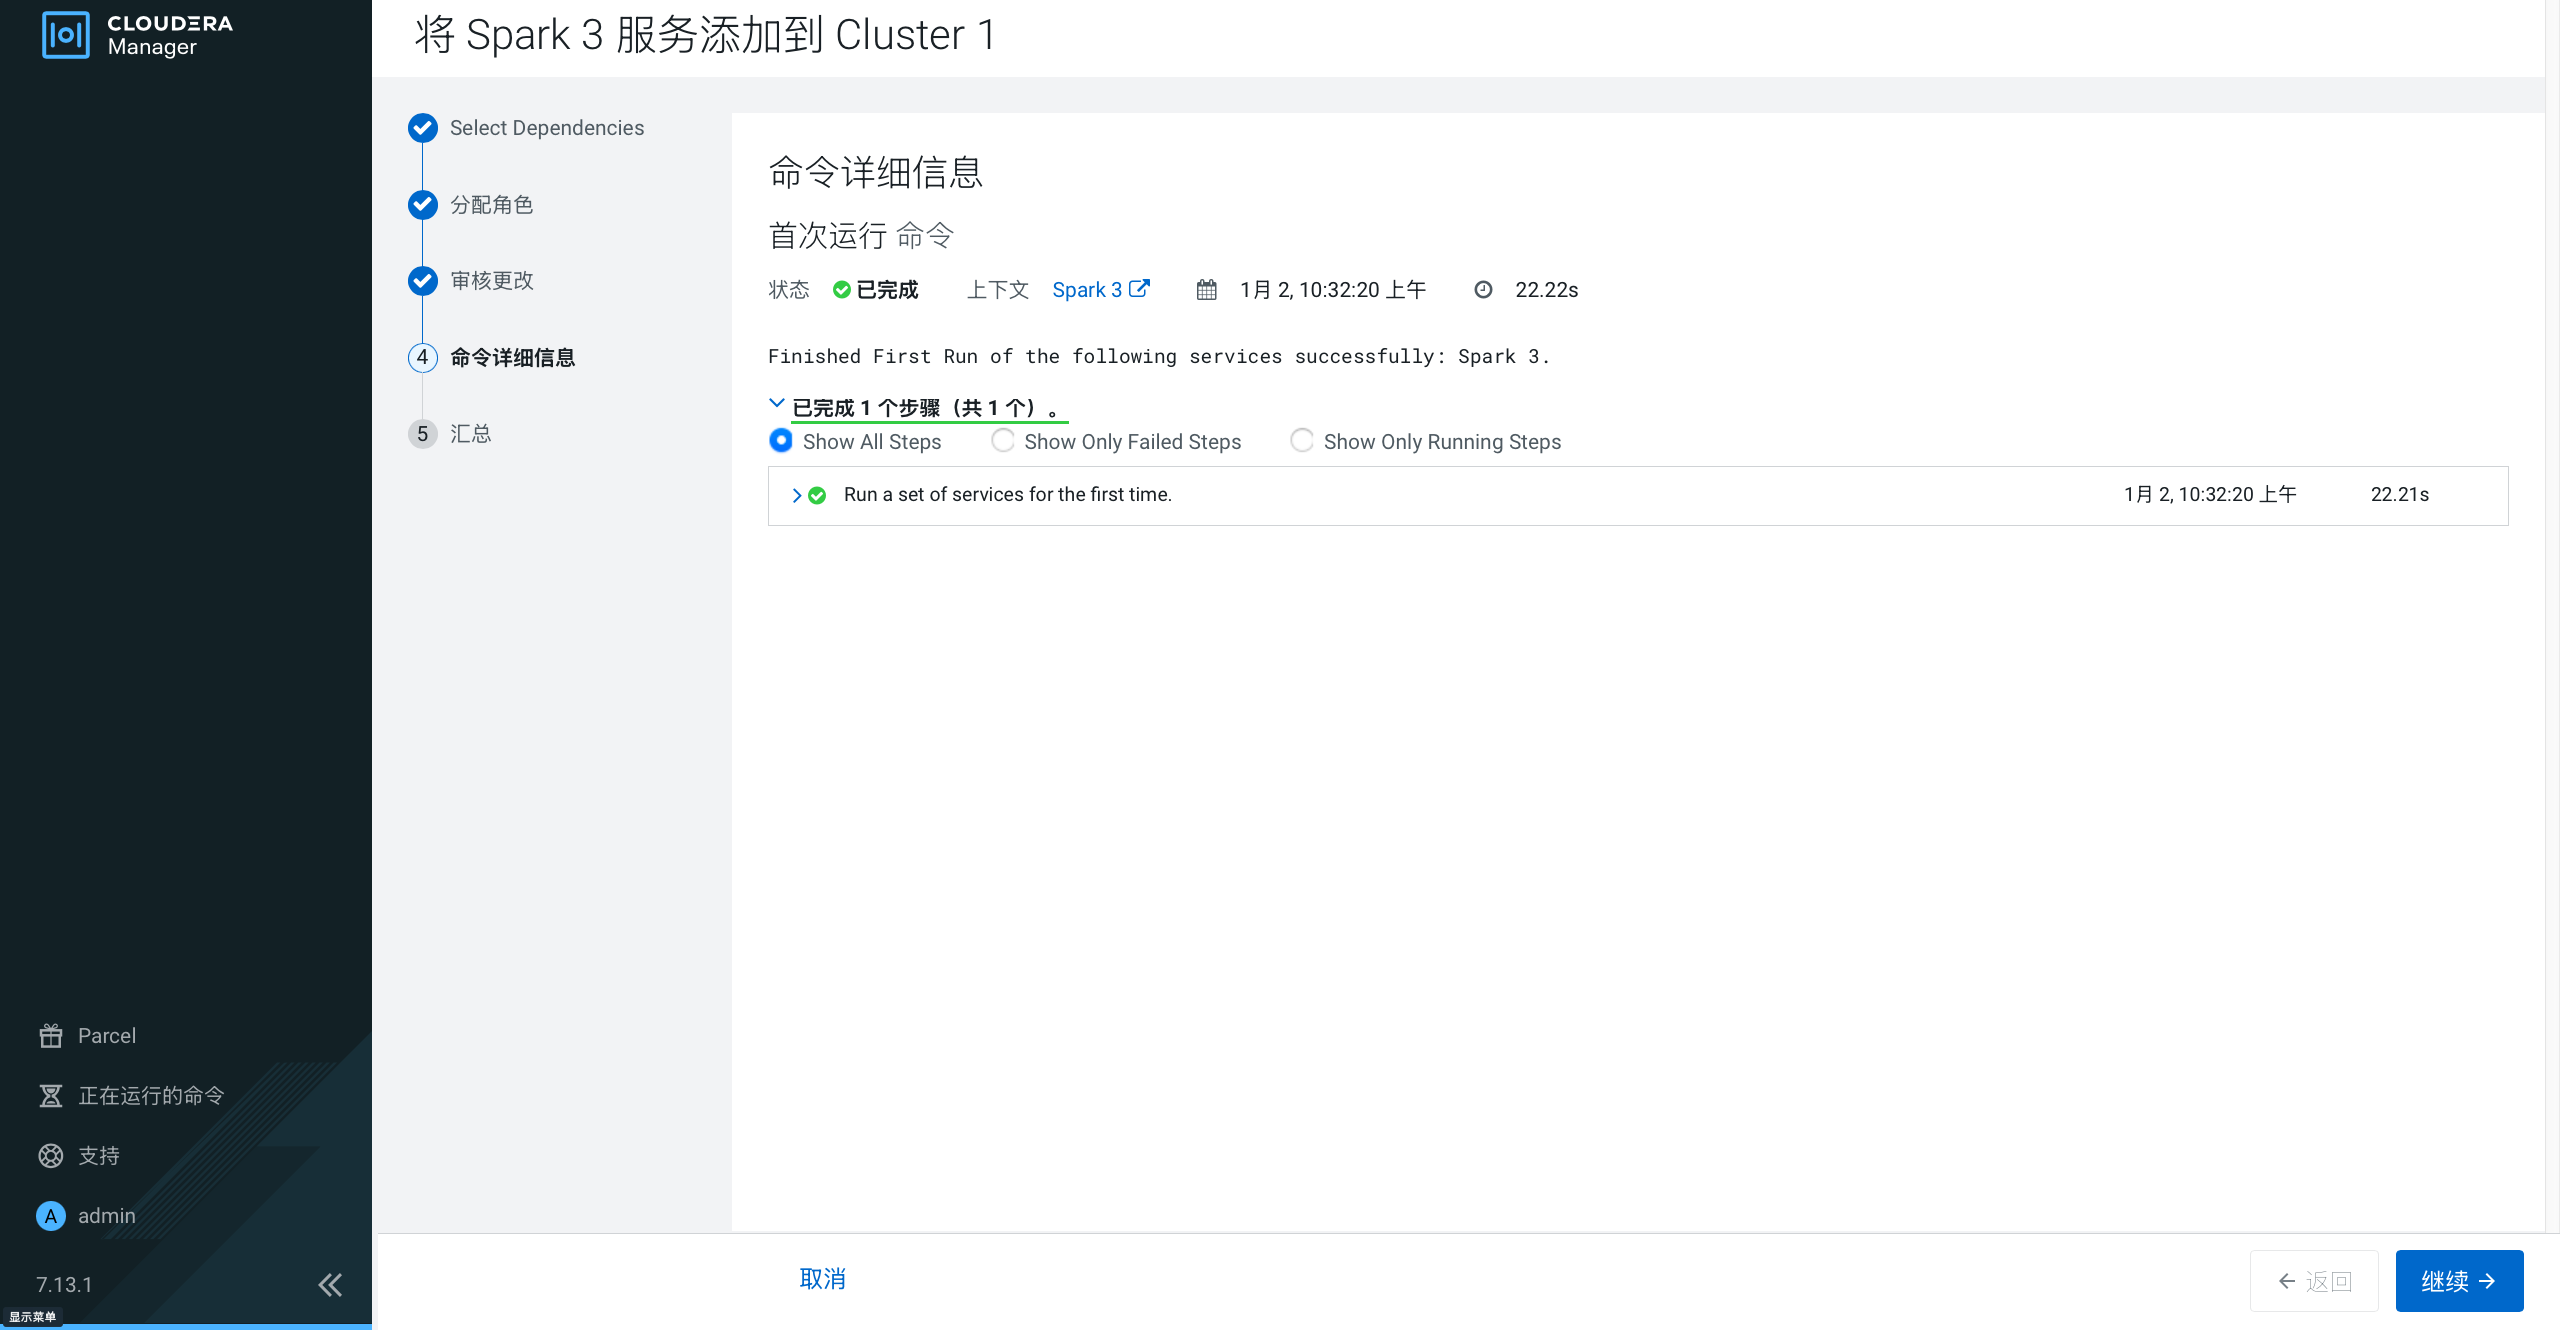
命令详细信息
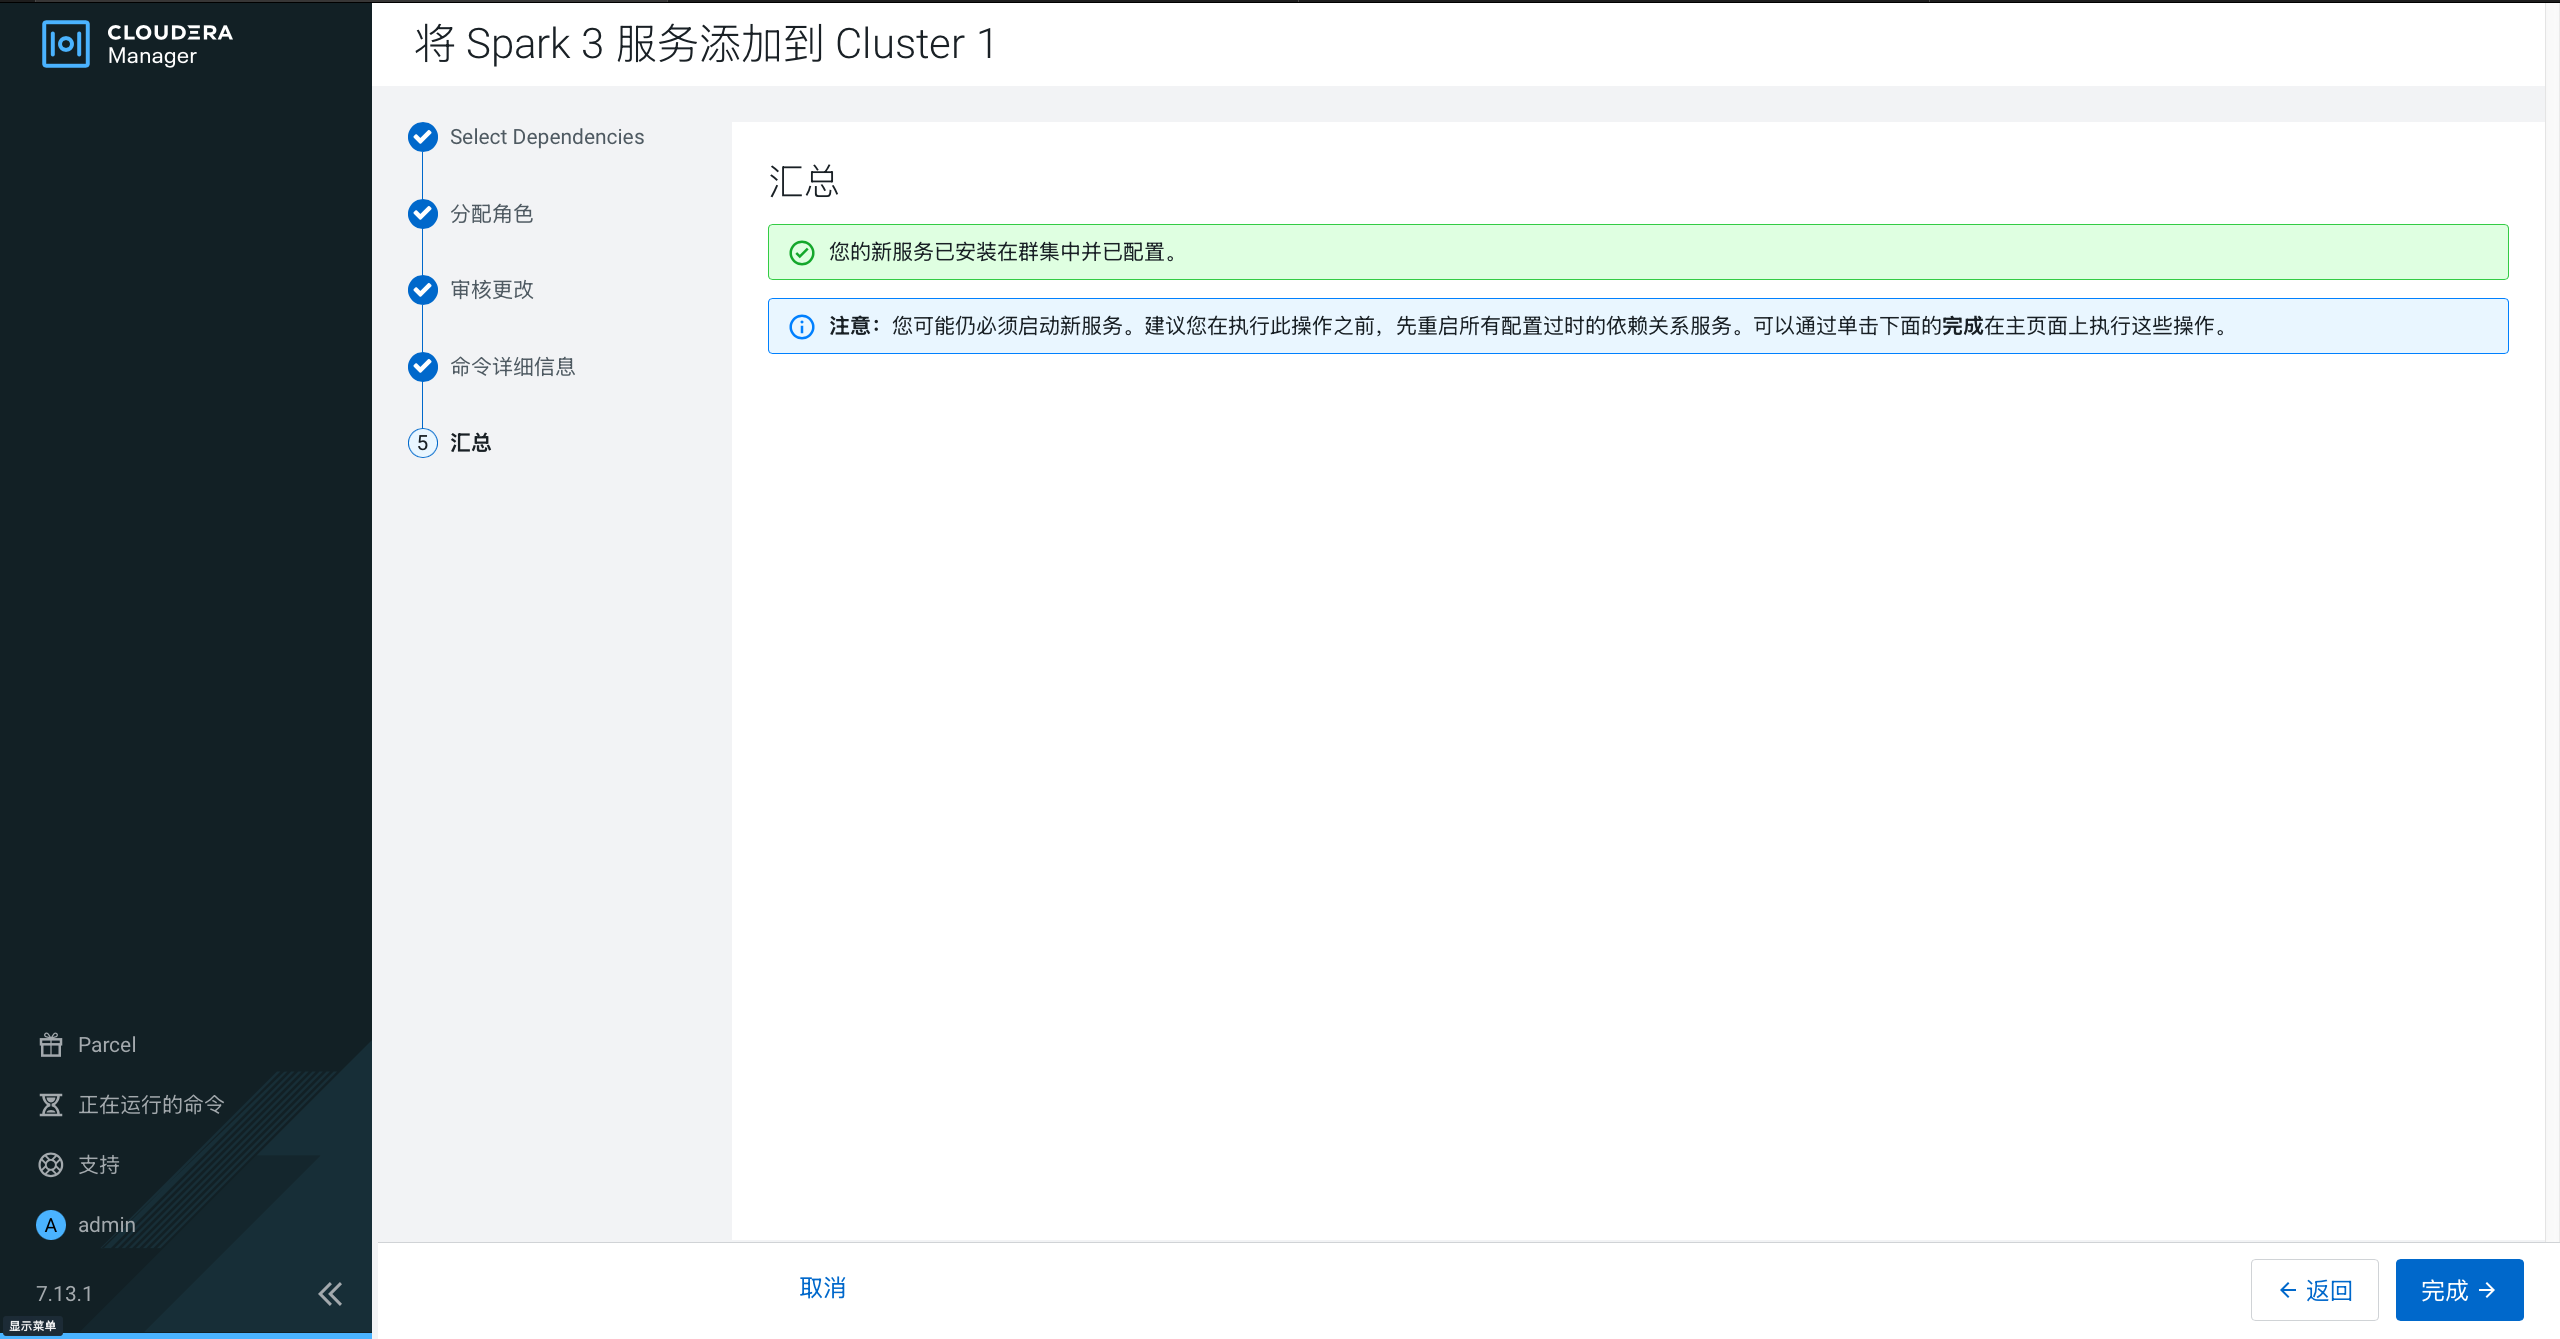
汇总
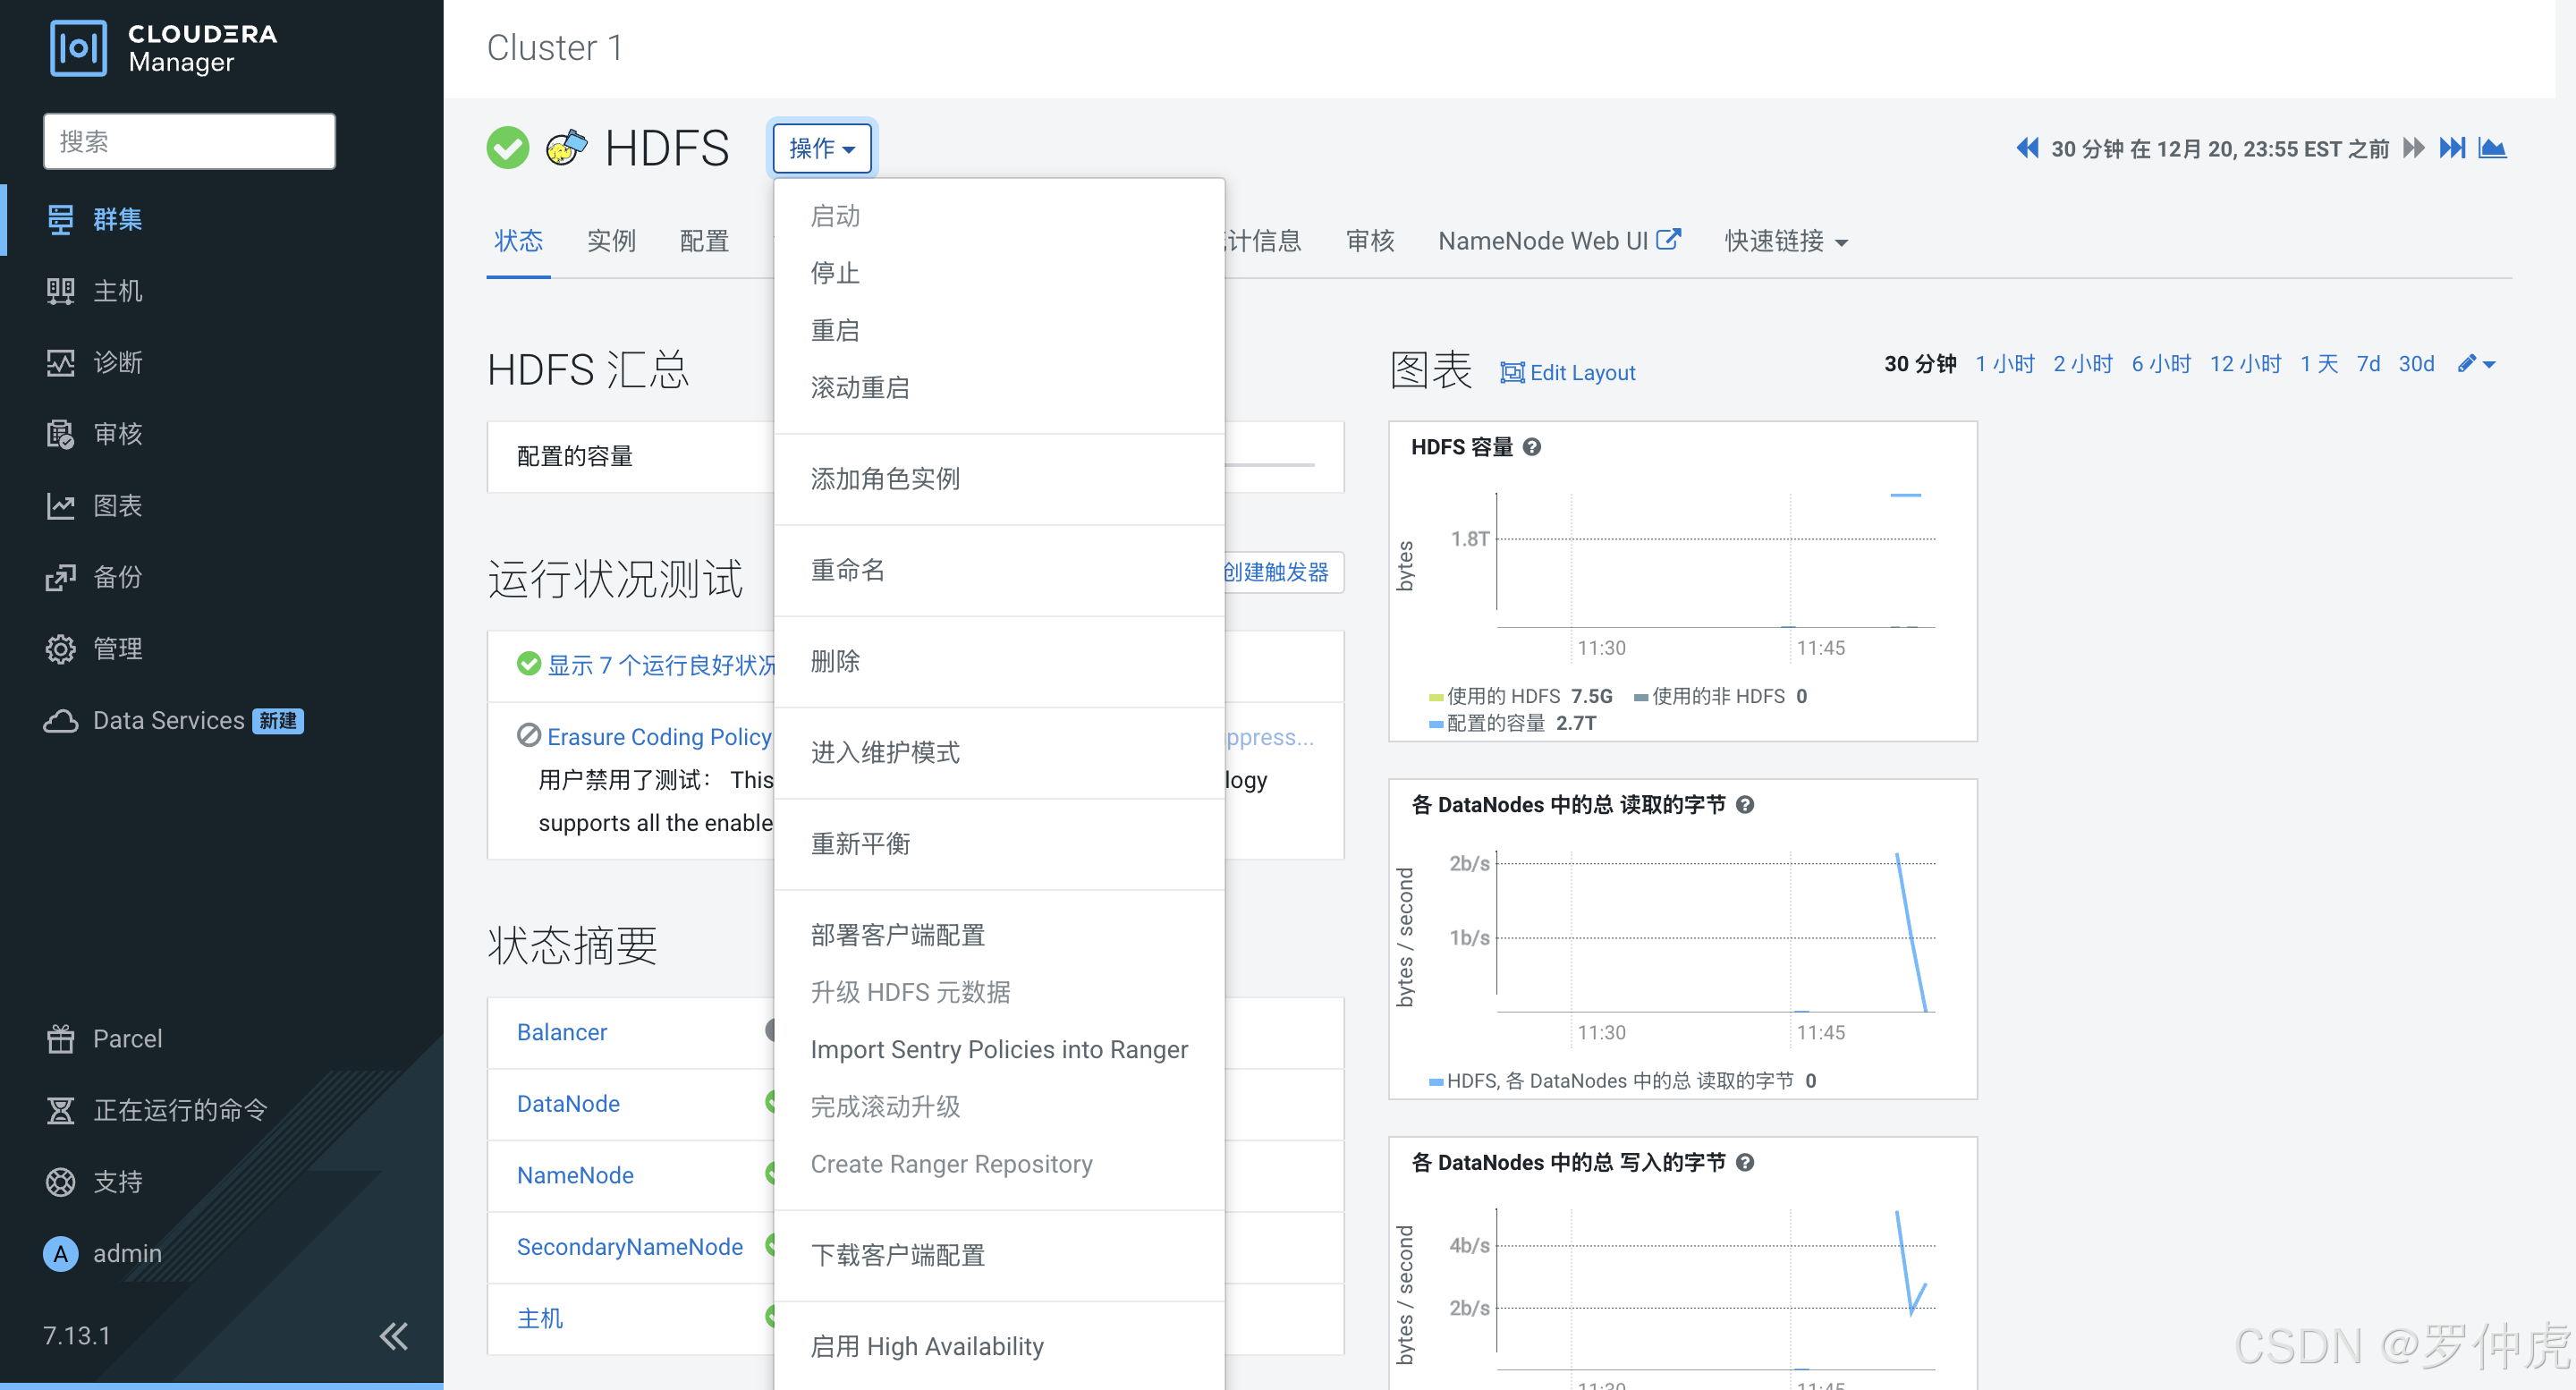
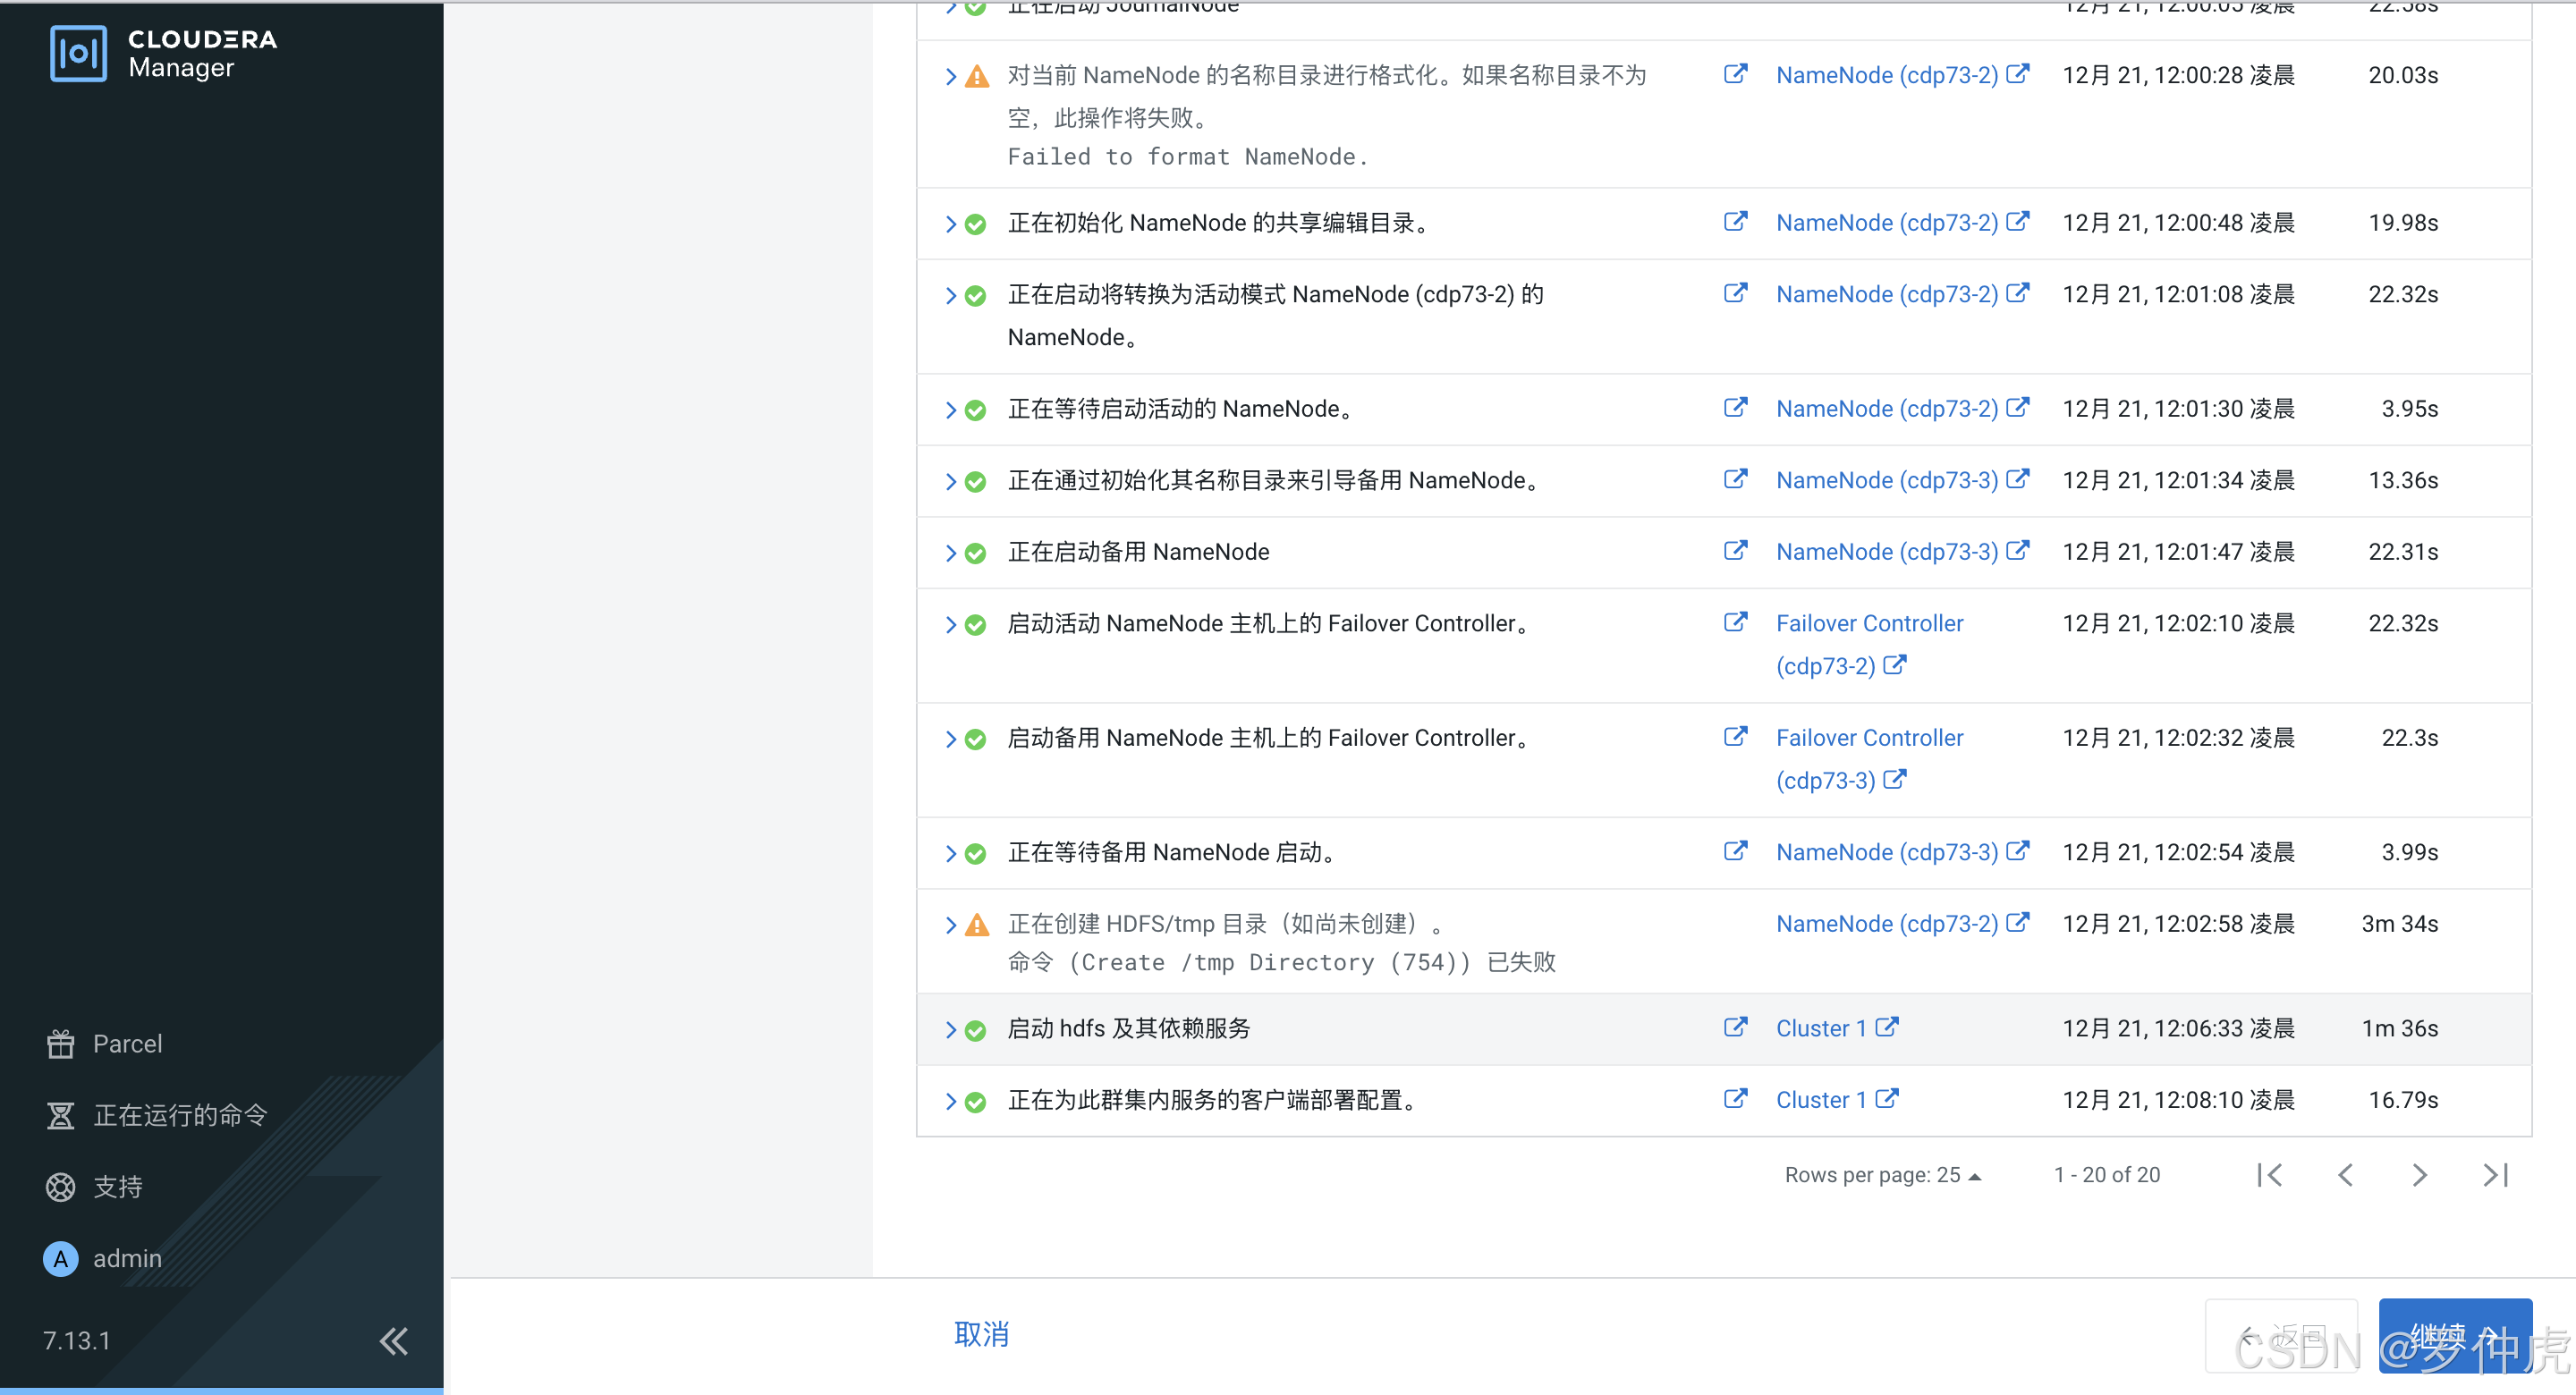
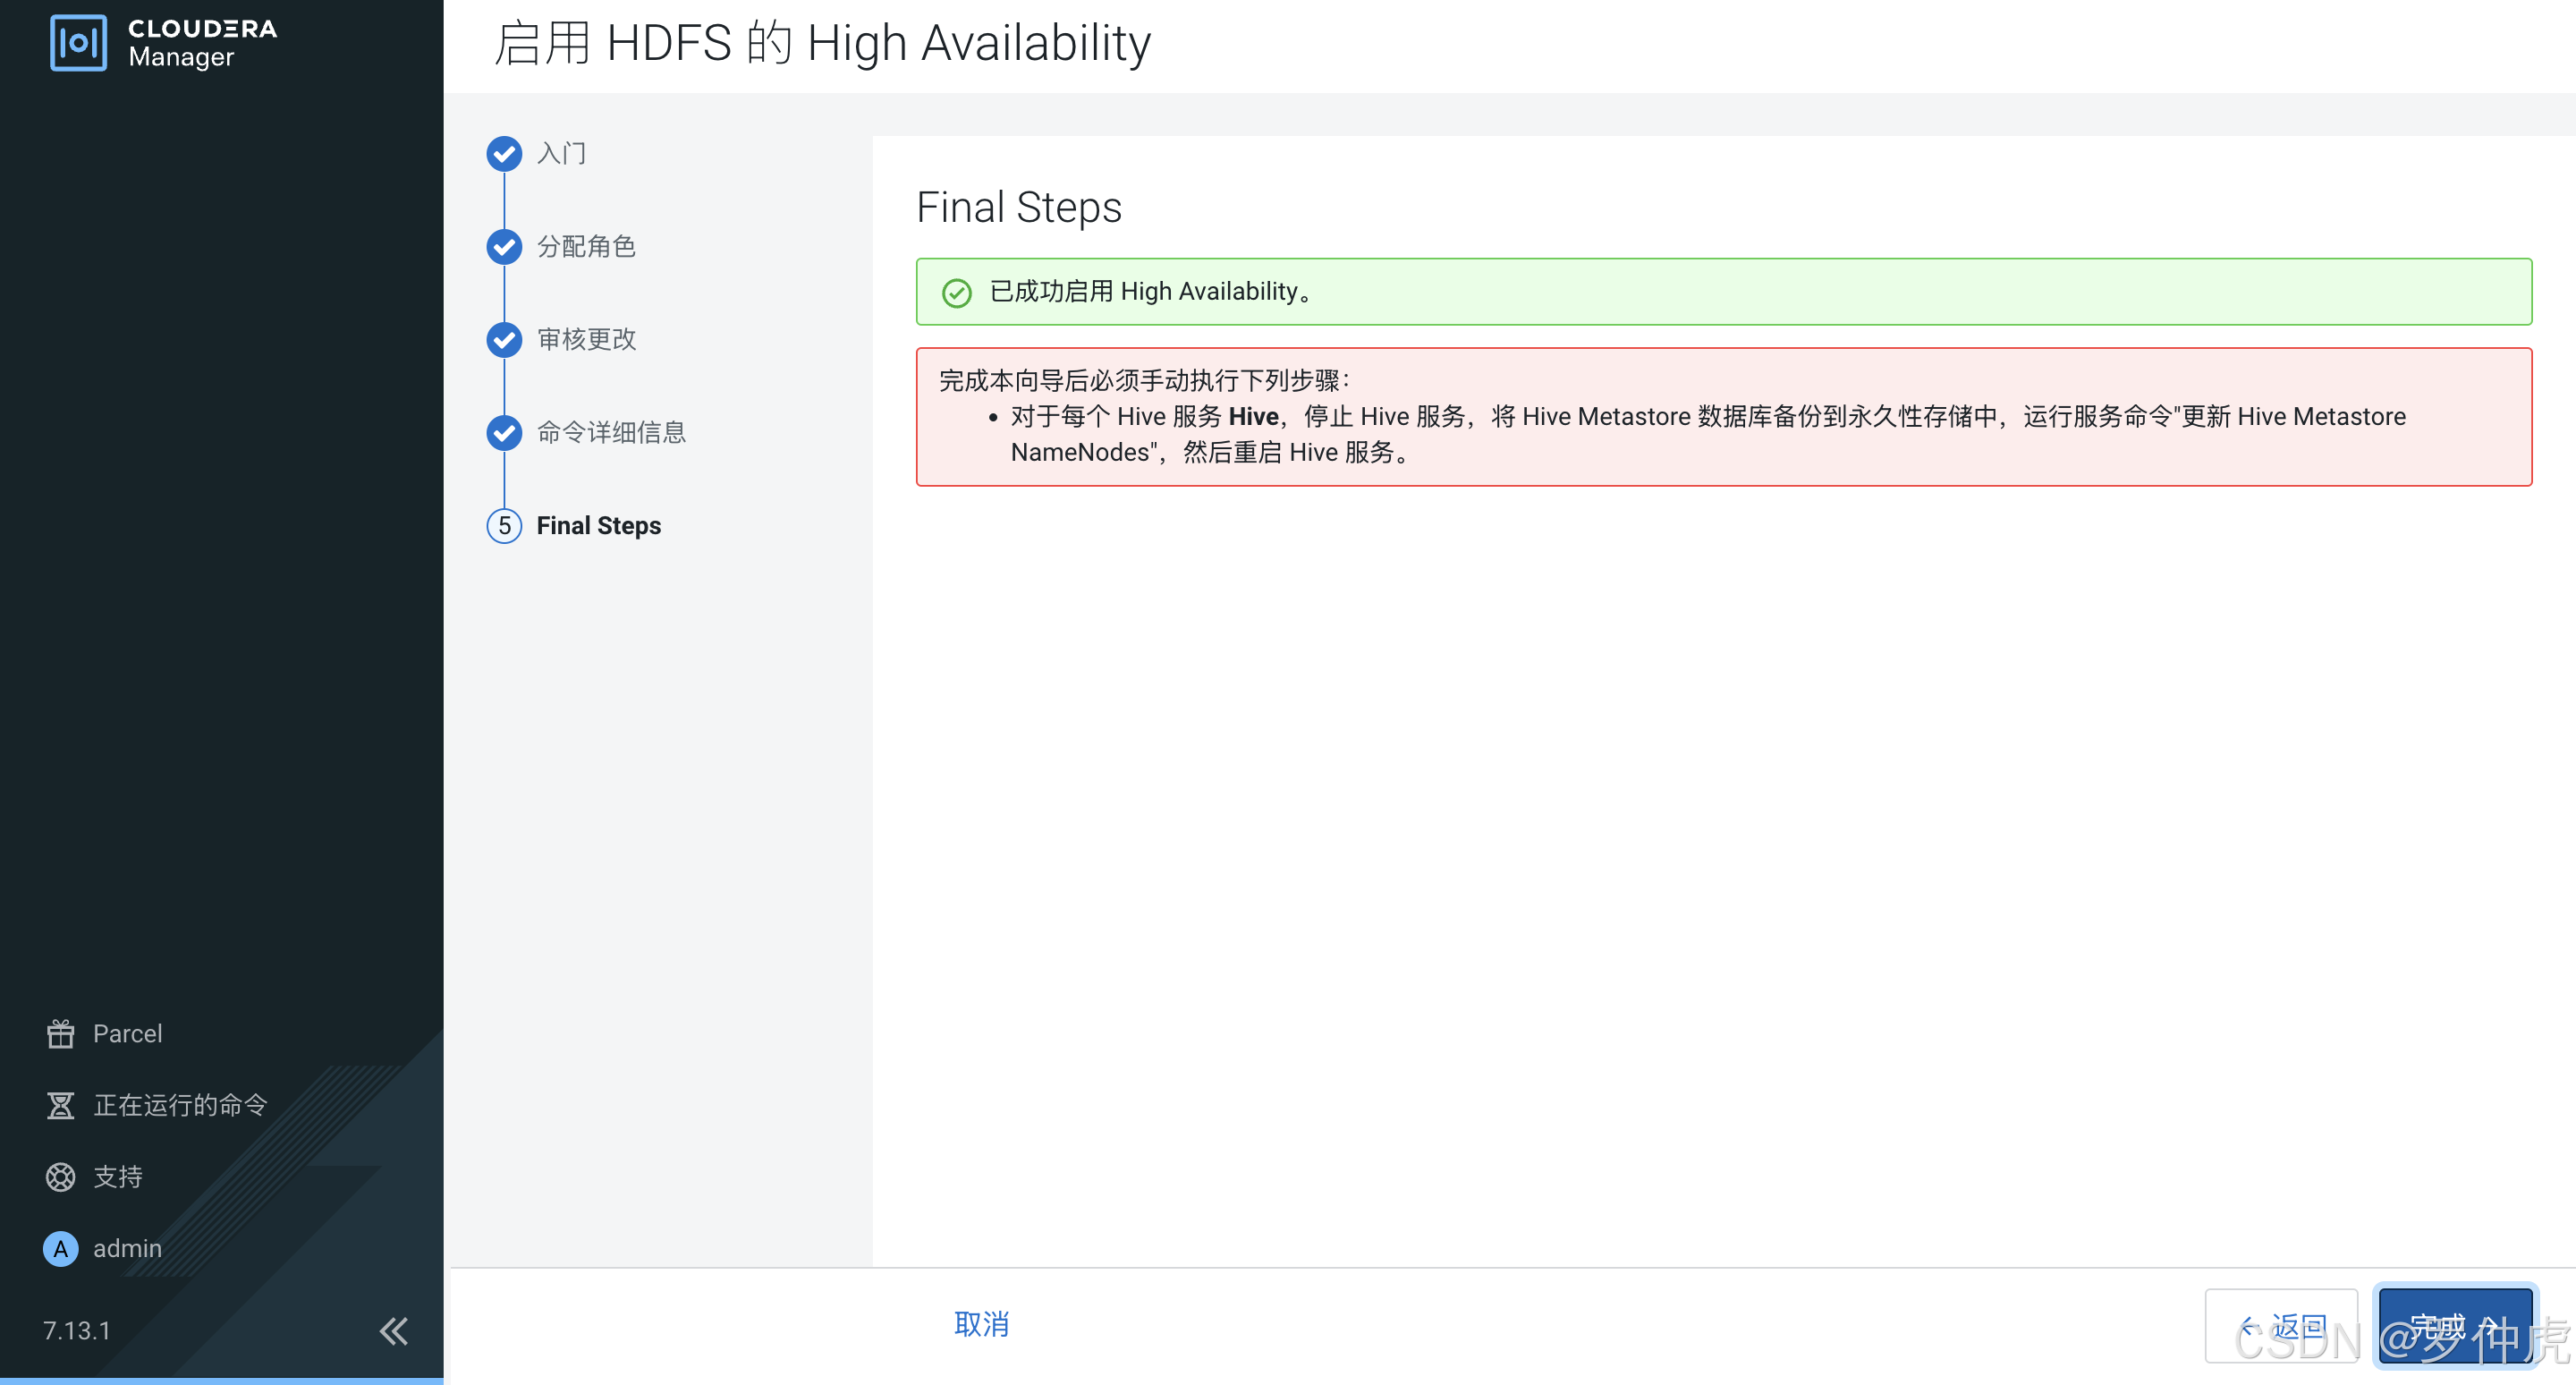
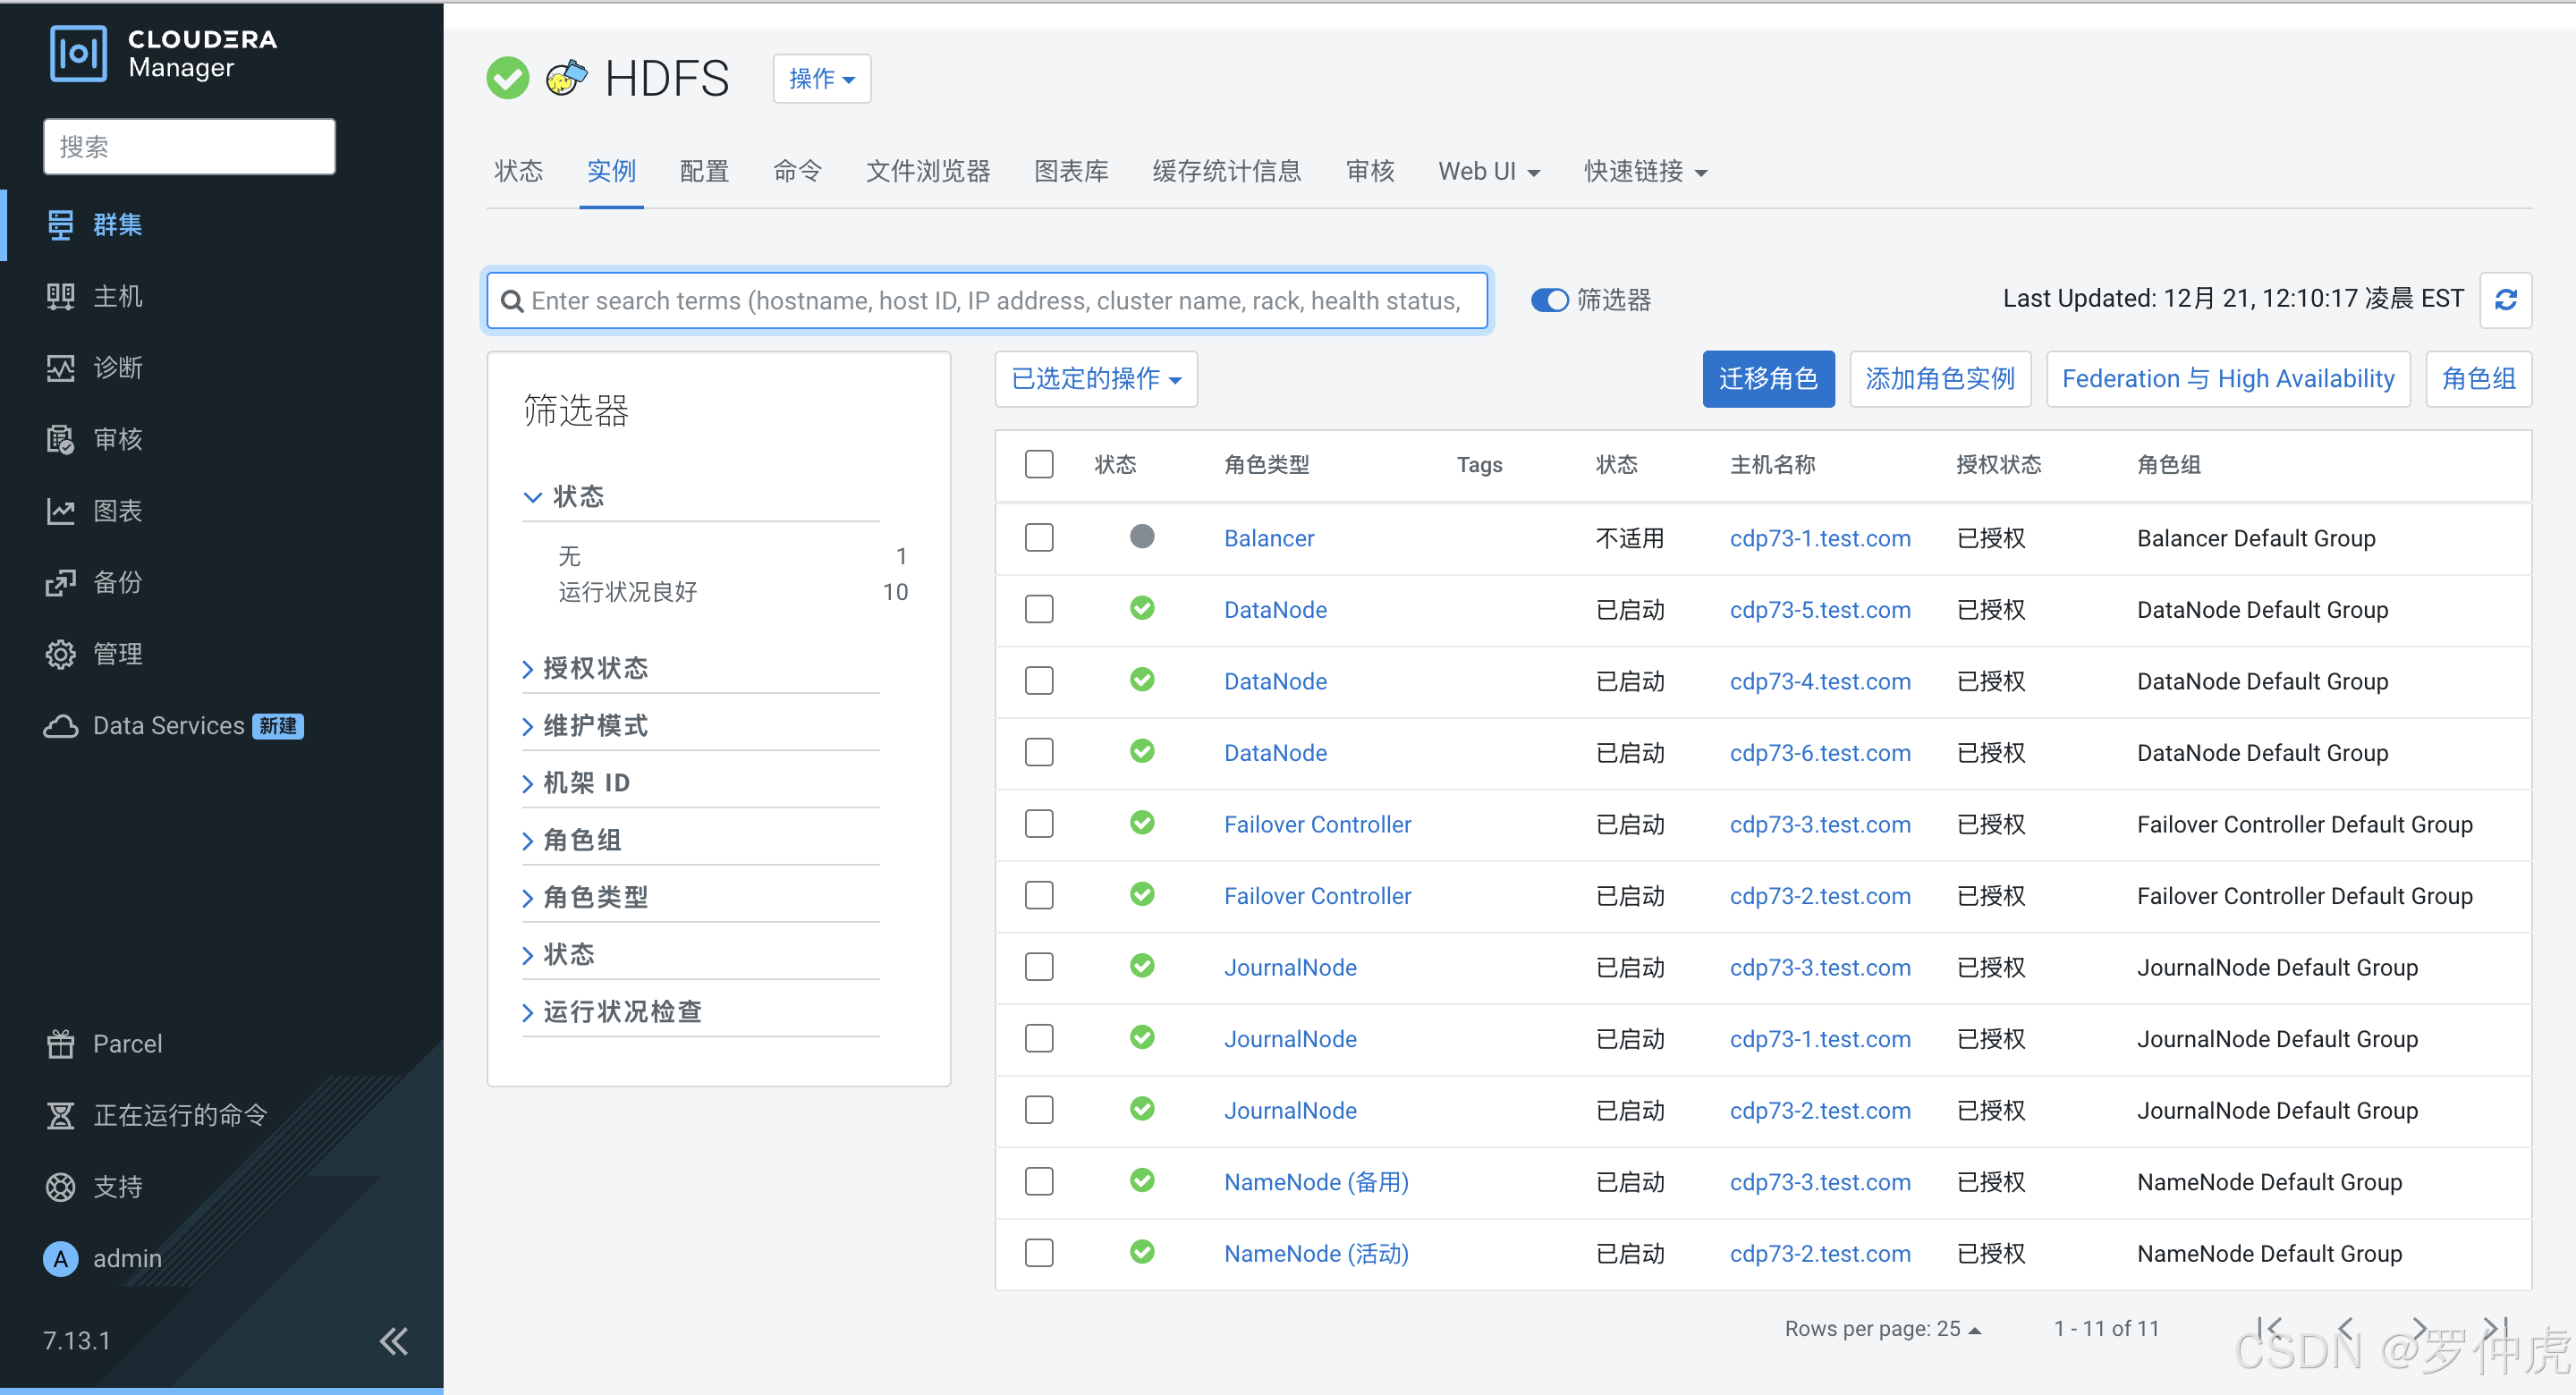
[十]配置高可用
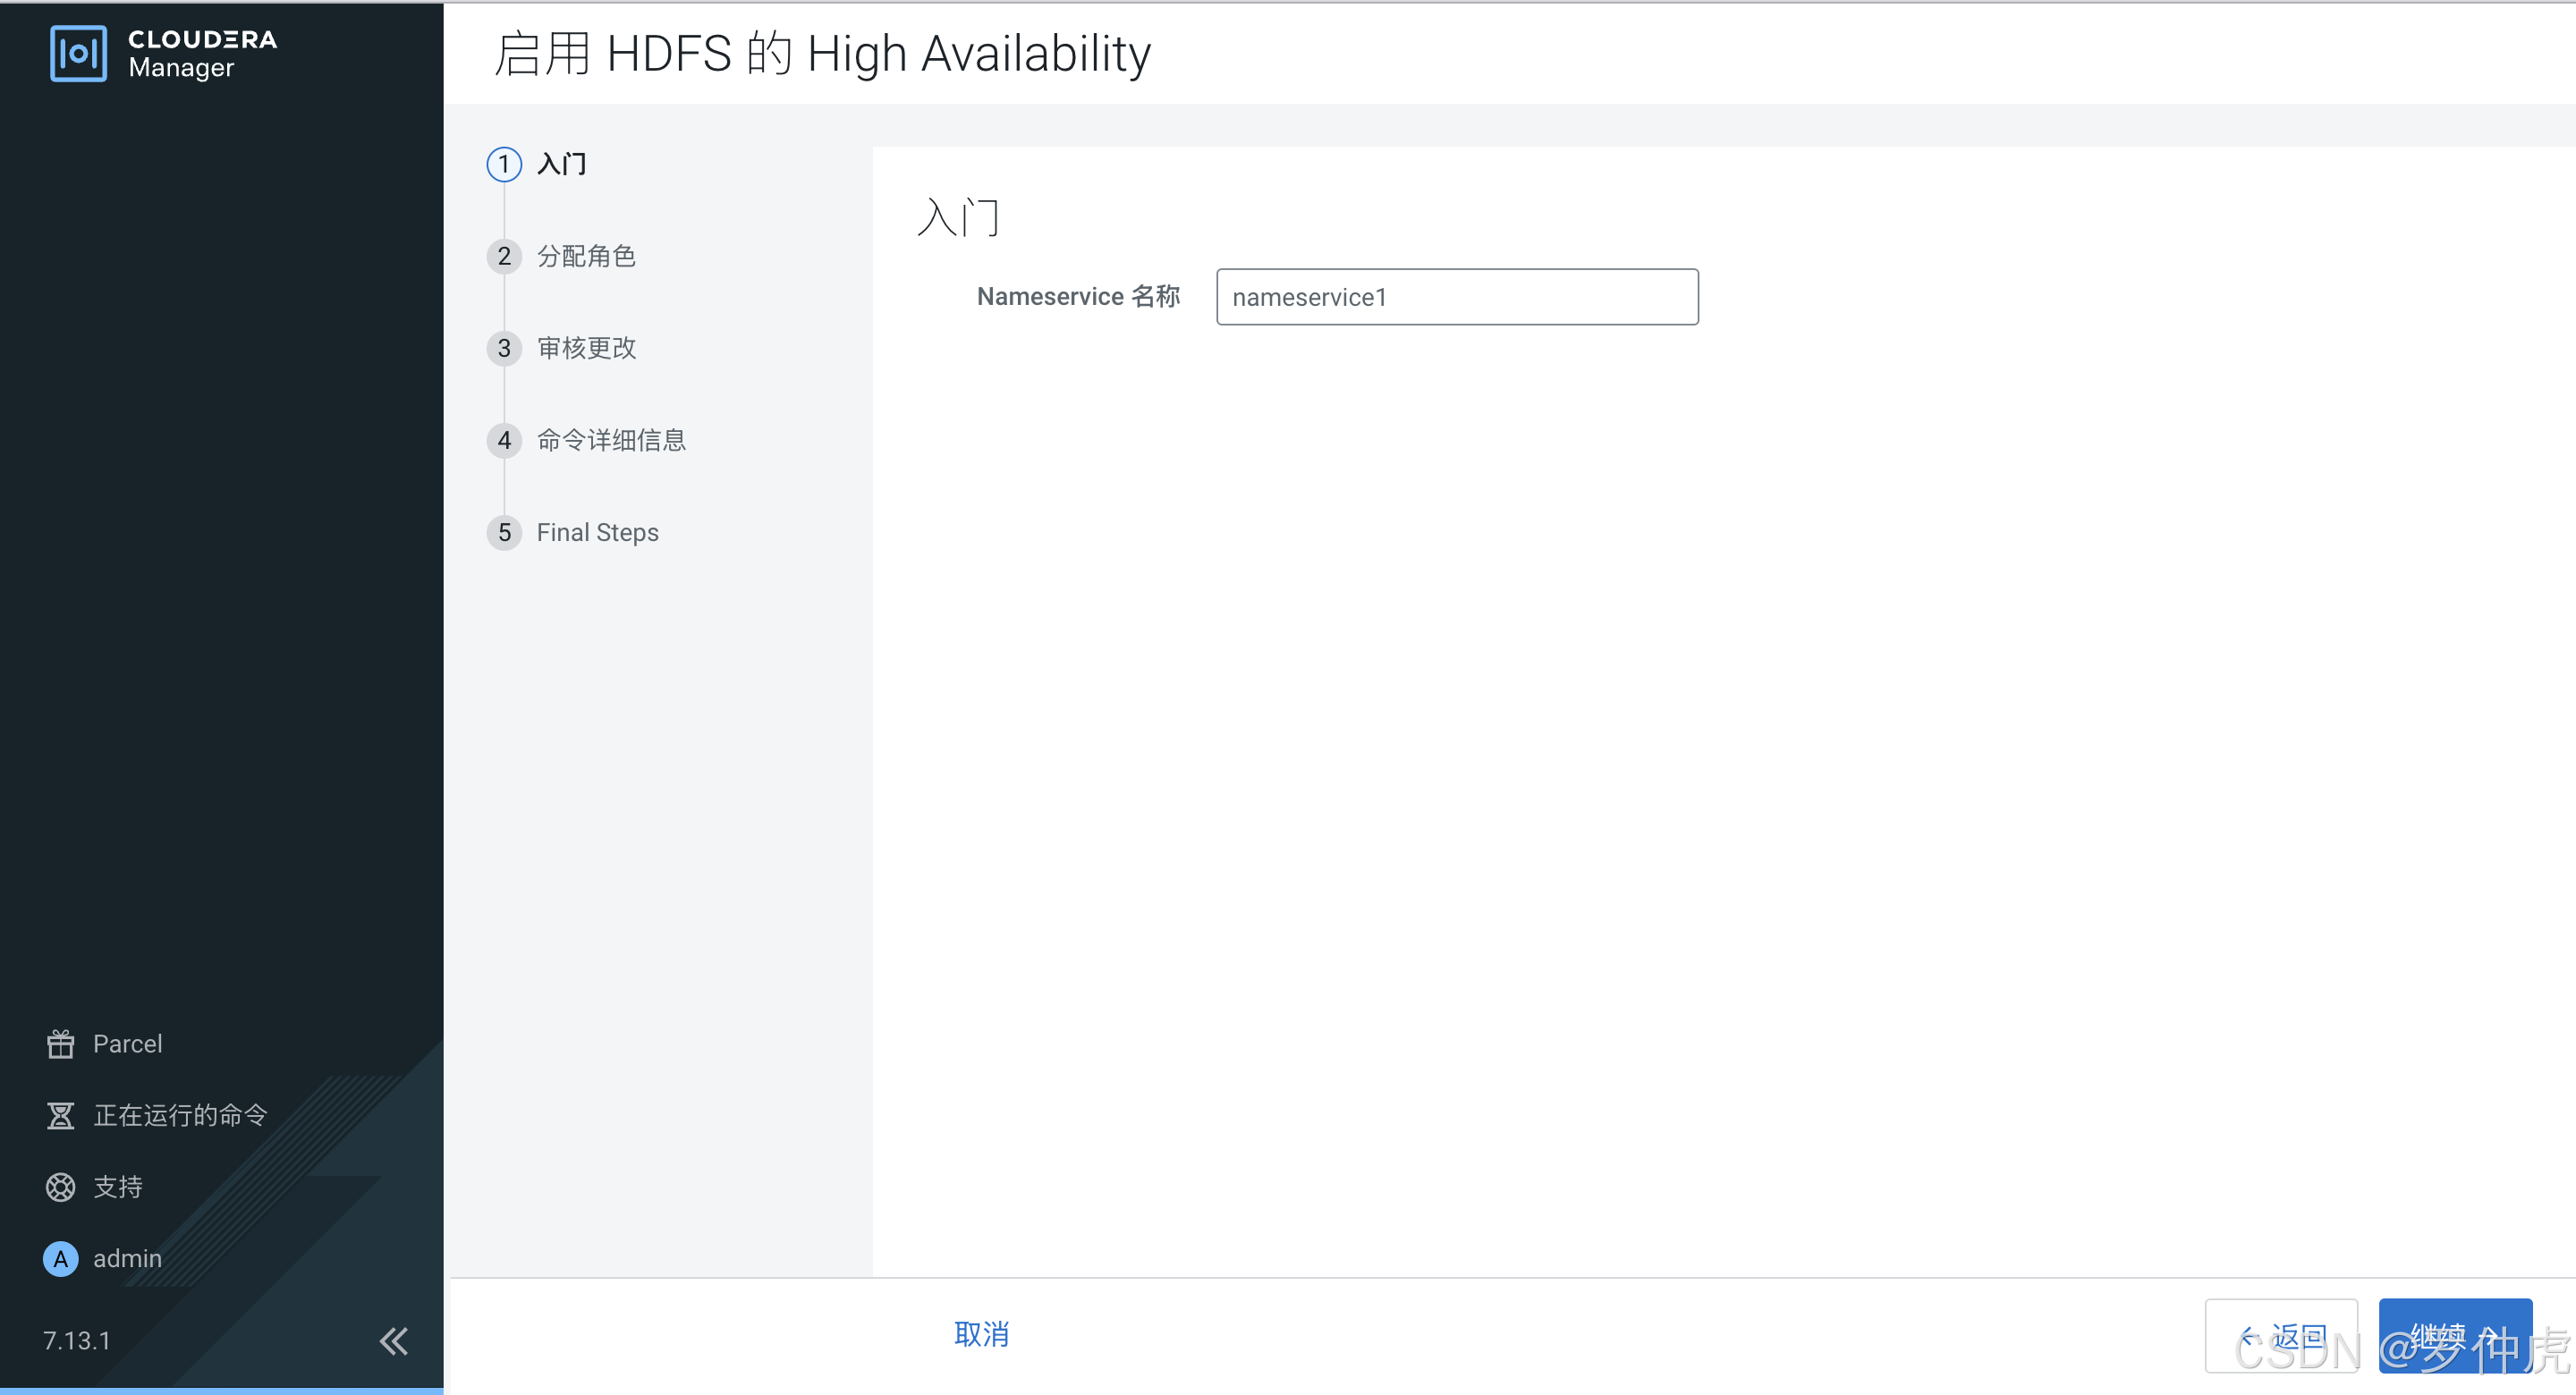
启用 HDFS 的 High Availability
入门
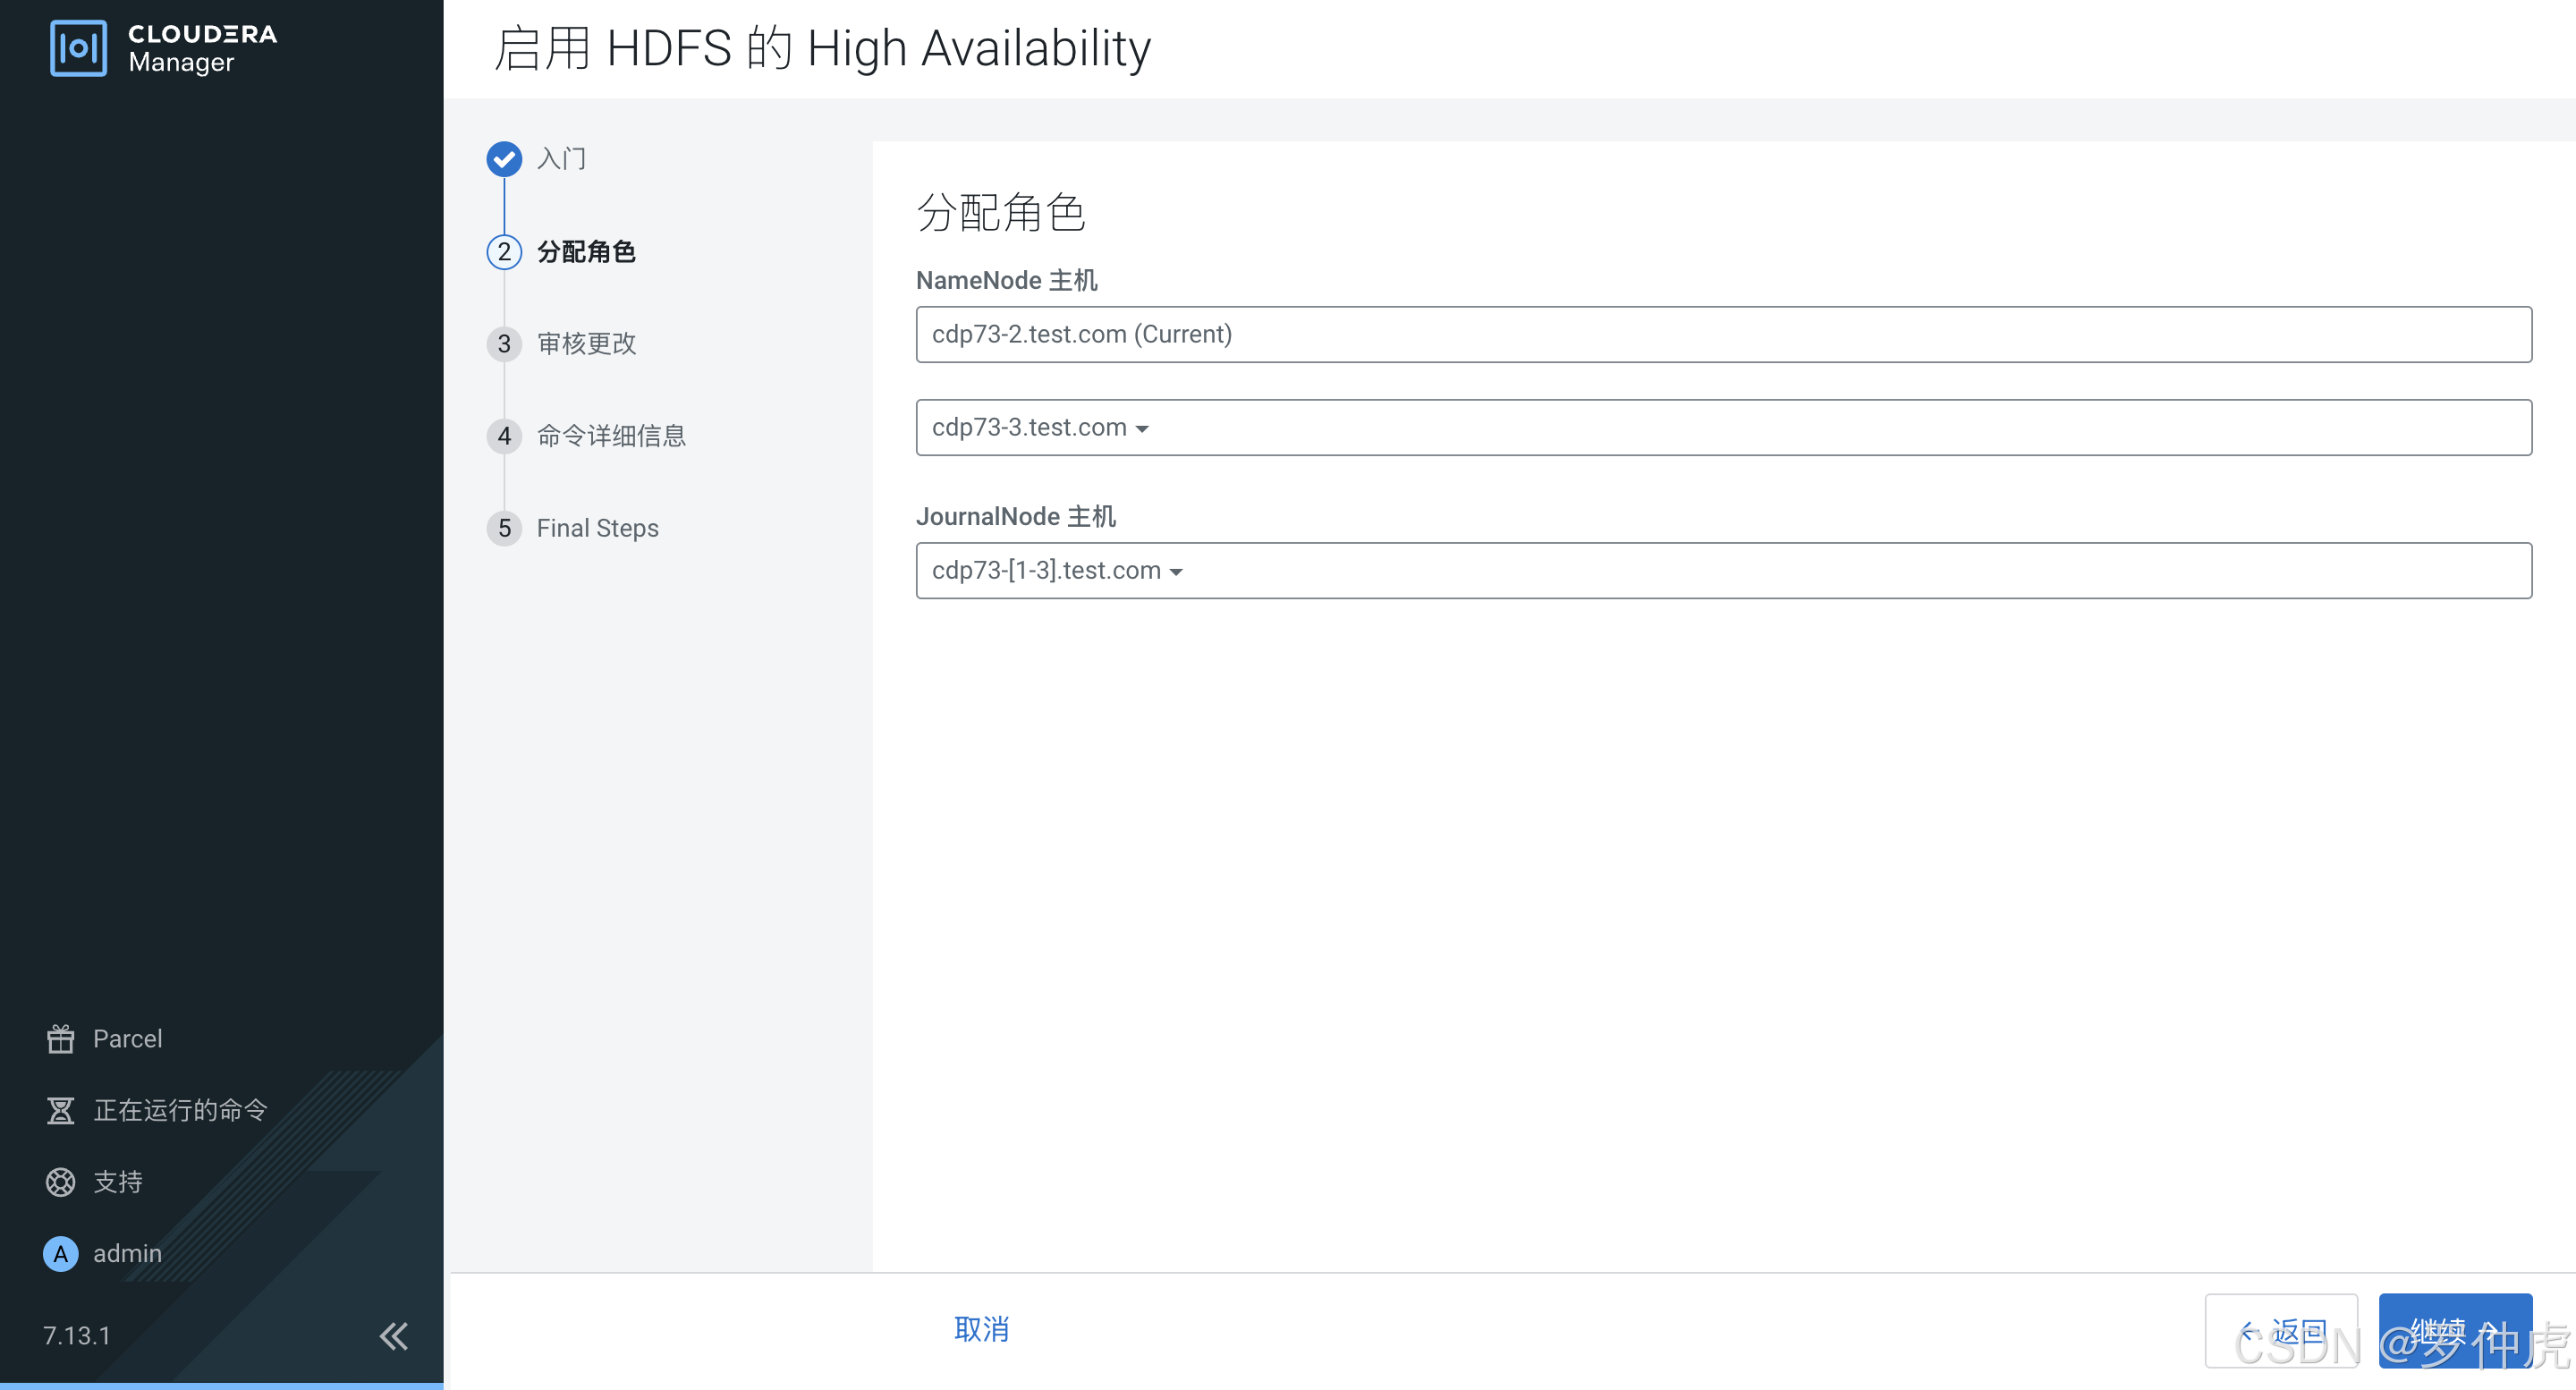
分配角色
审核更改
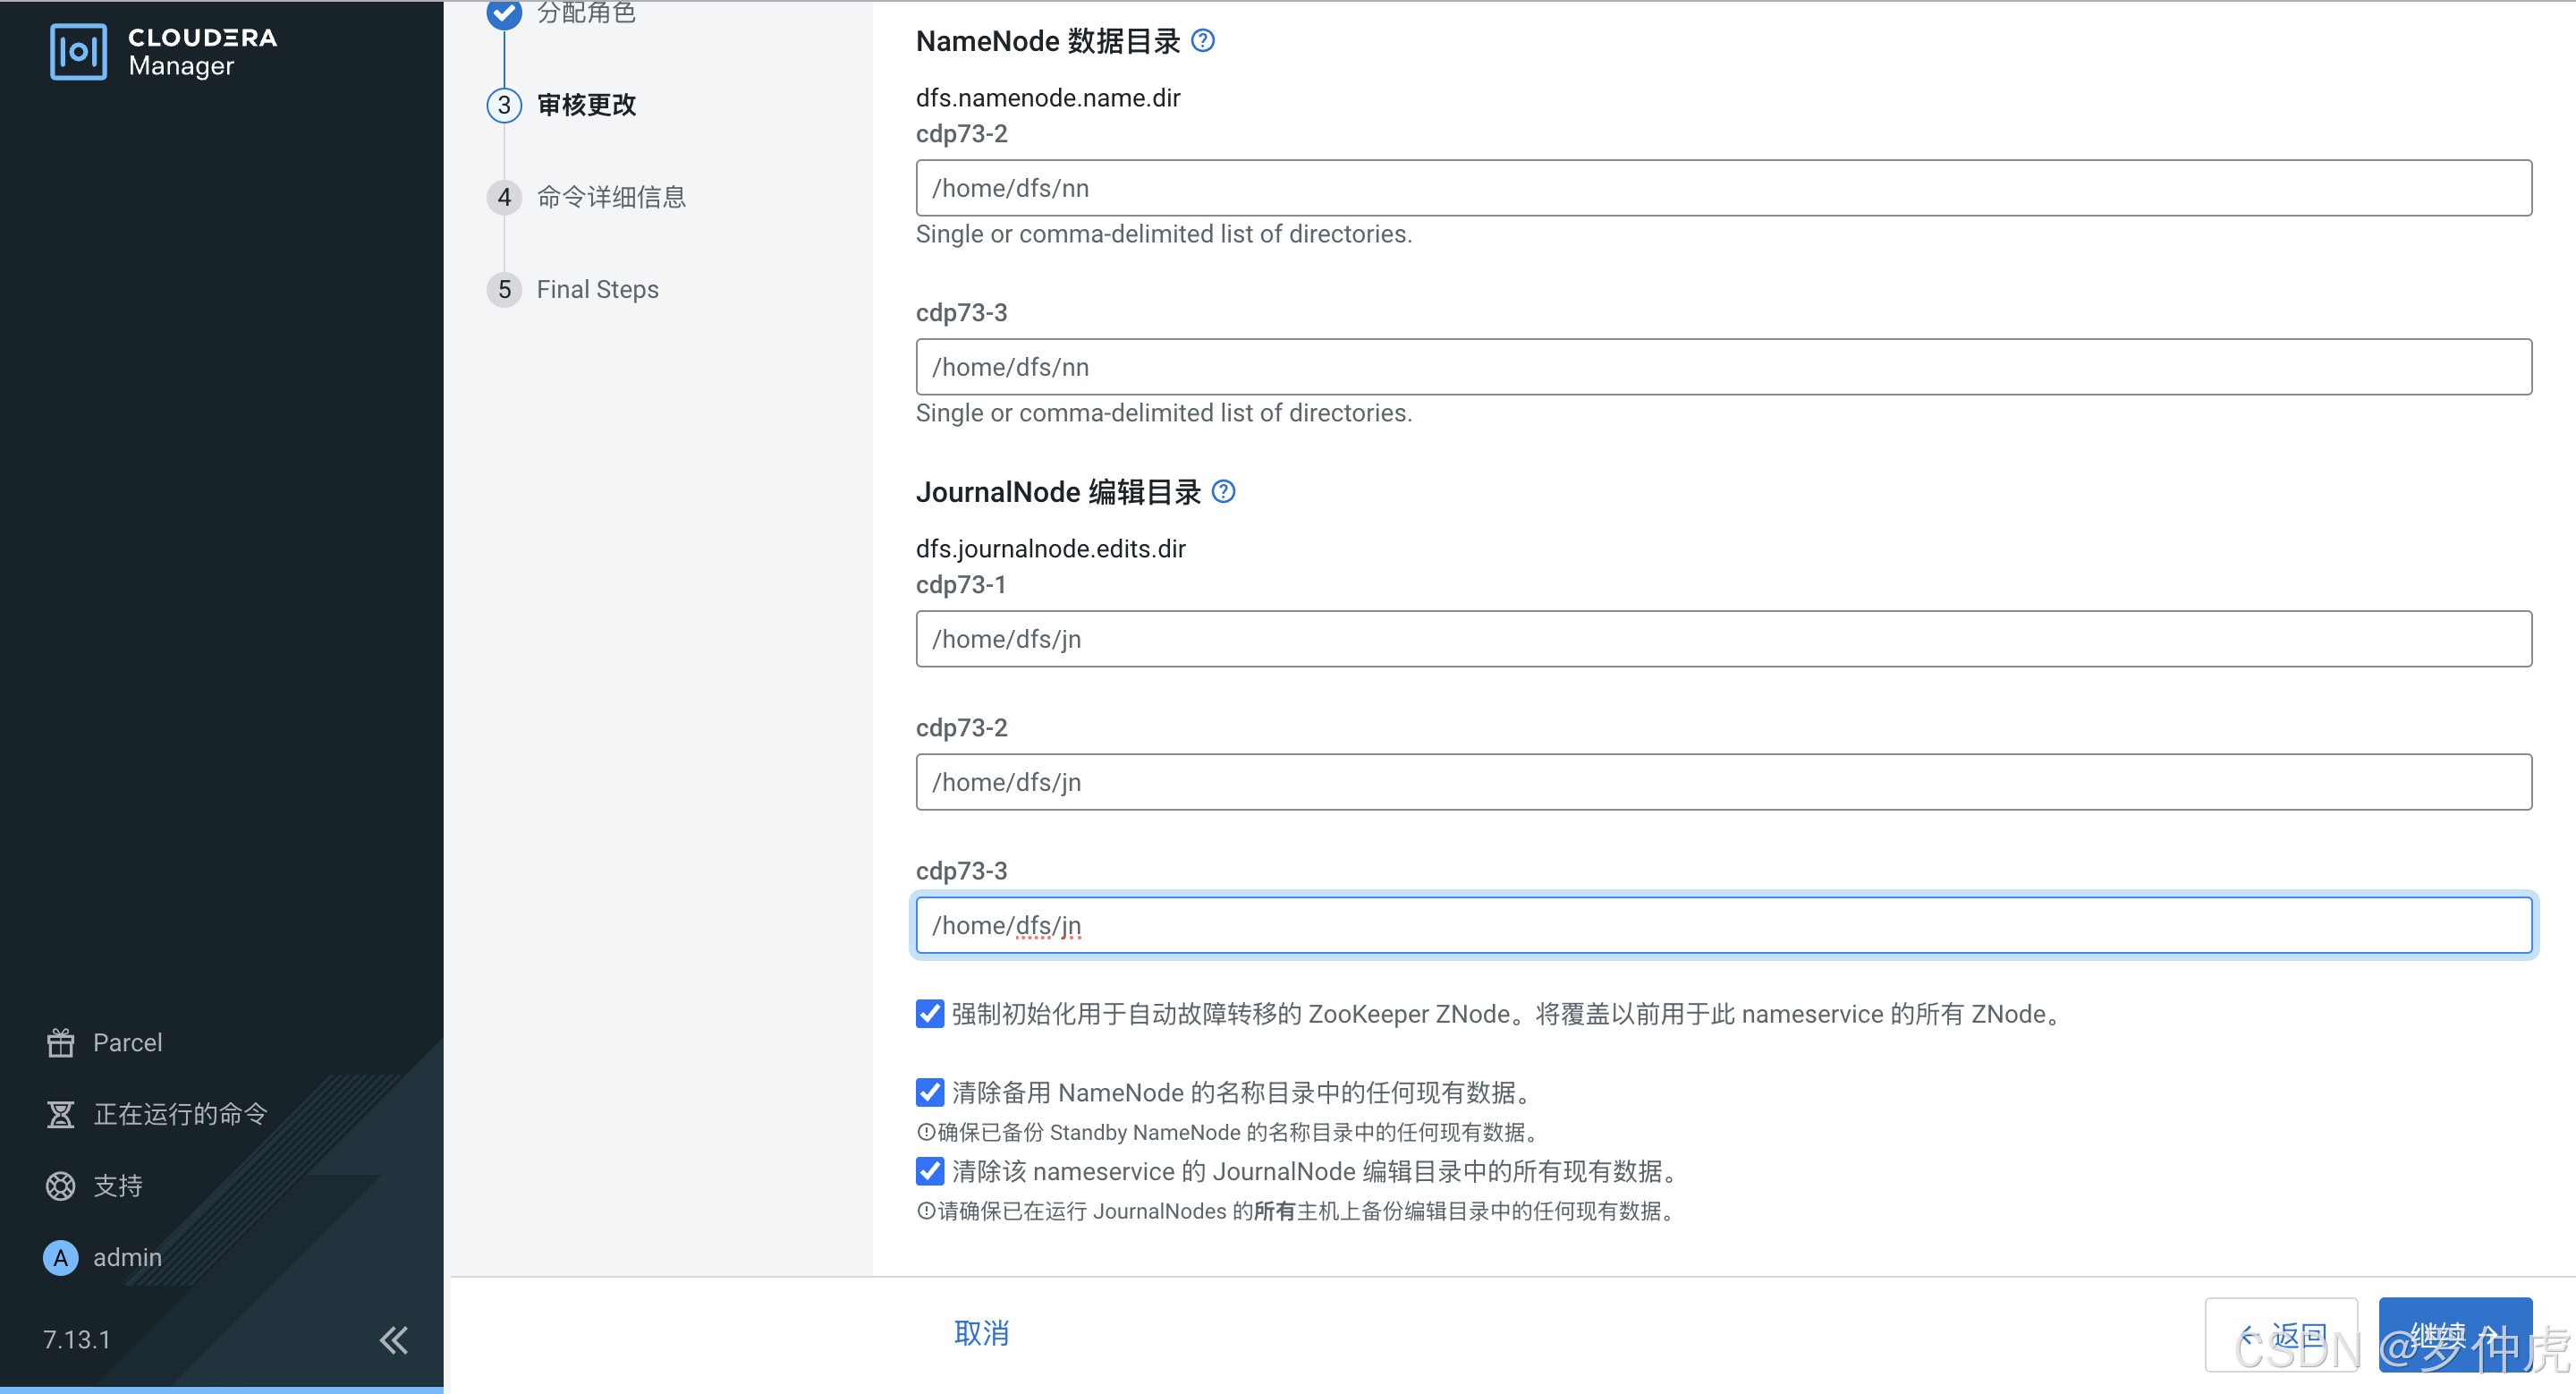
命令详细信息
步骤完成
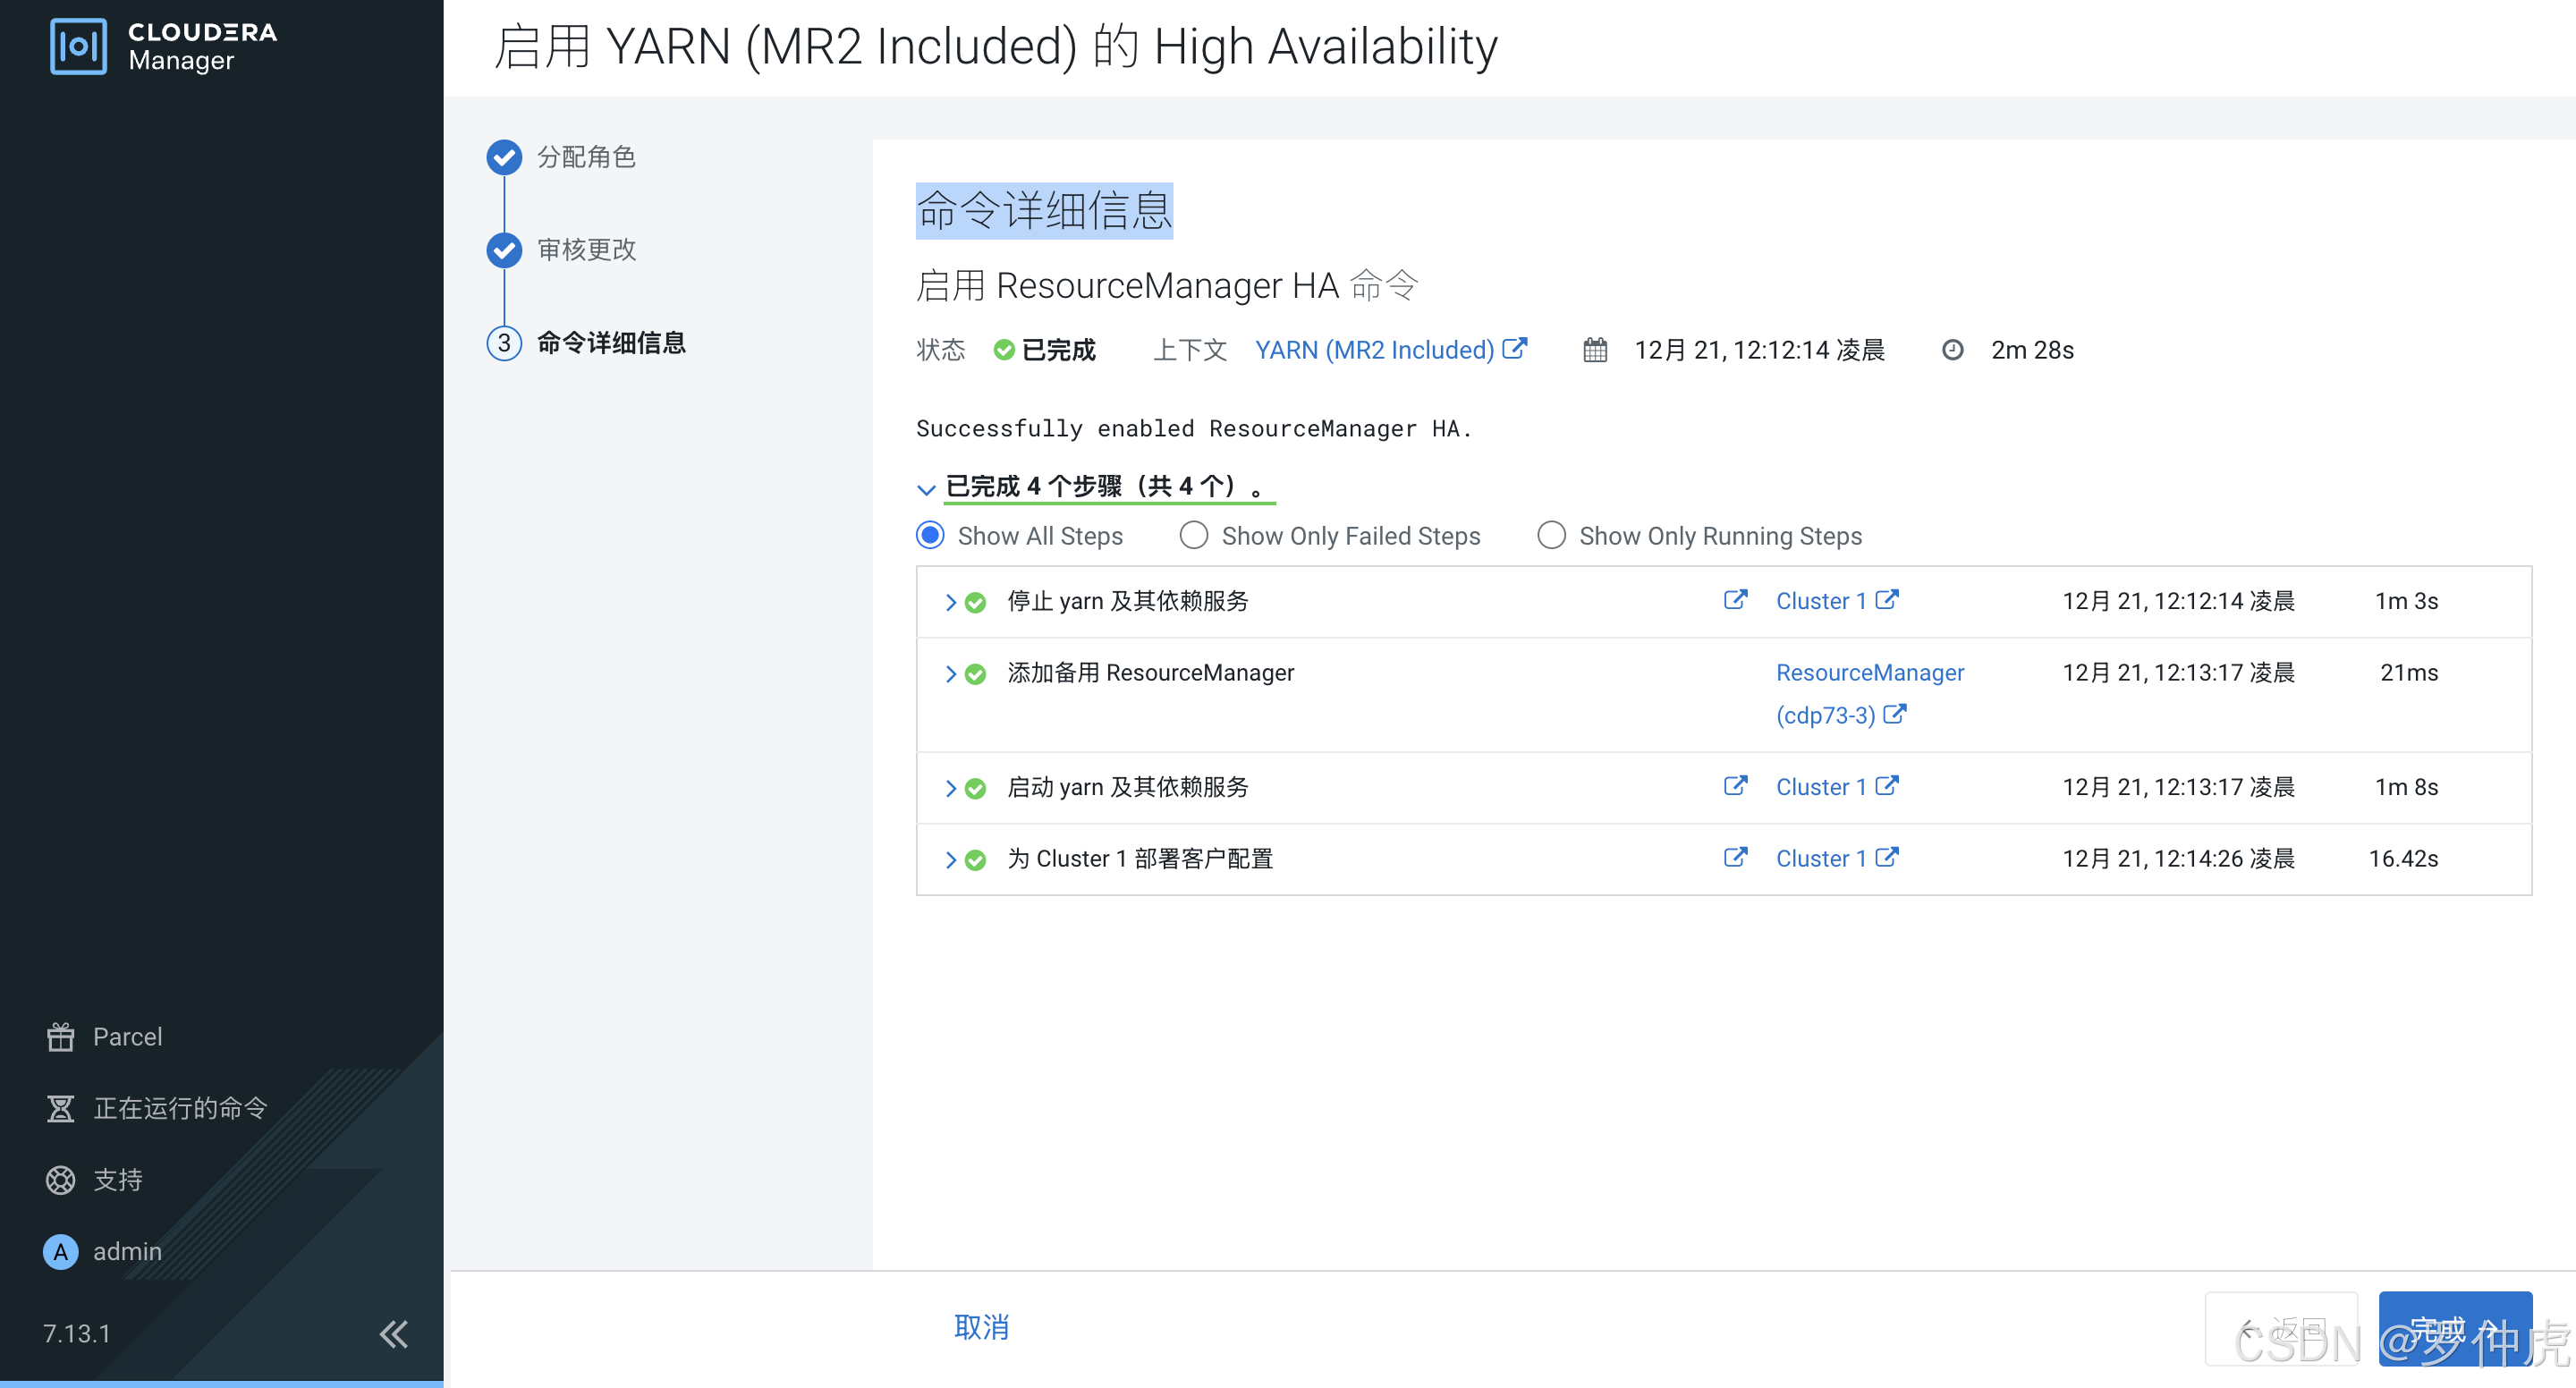
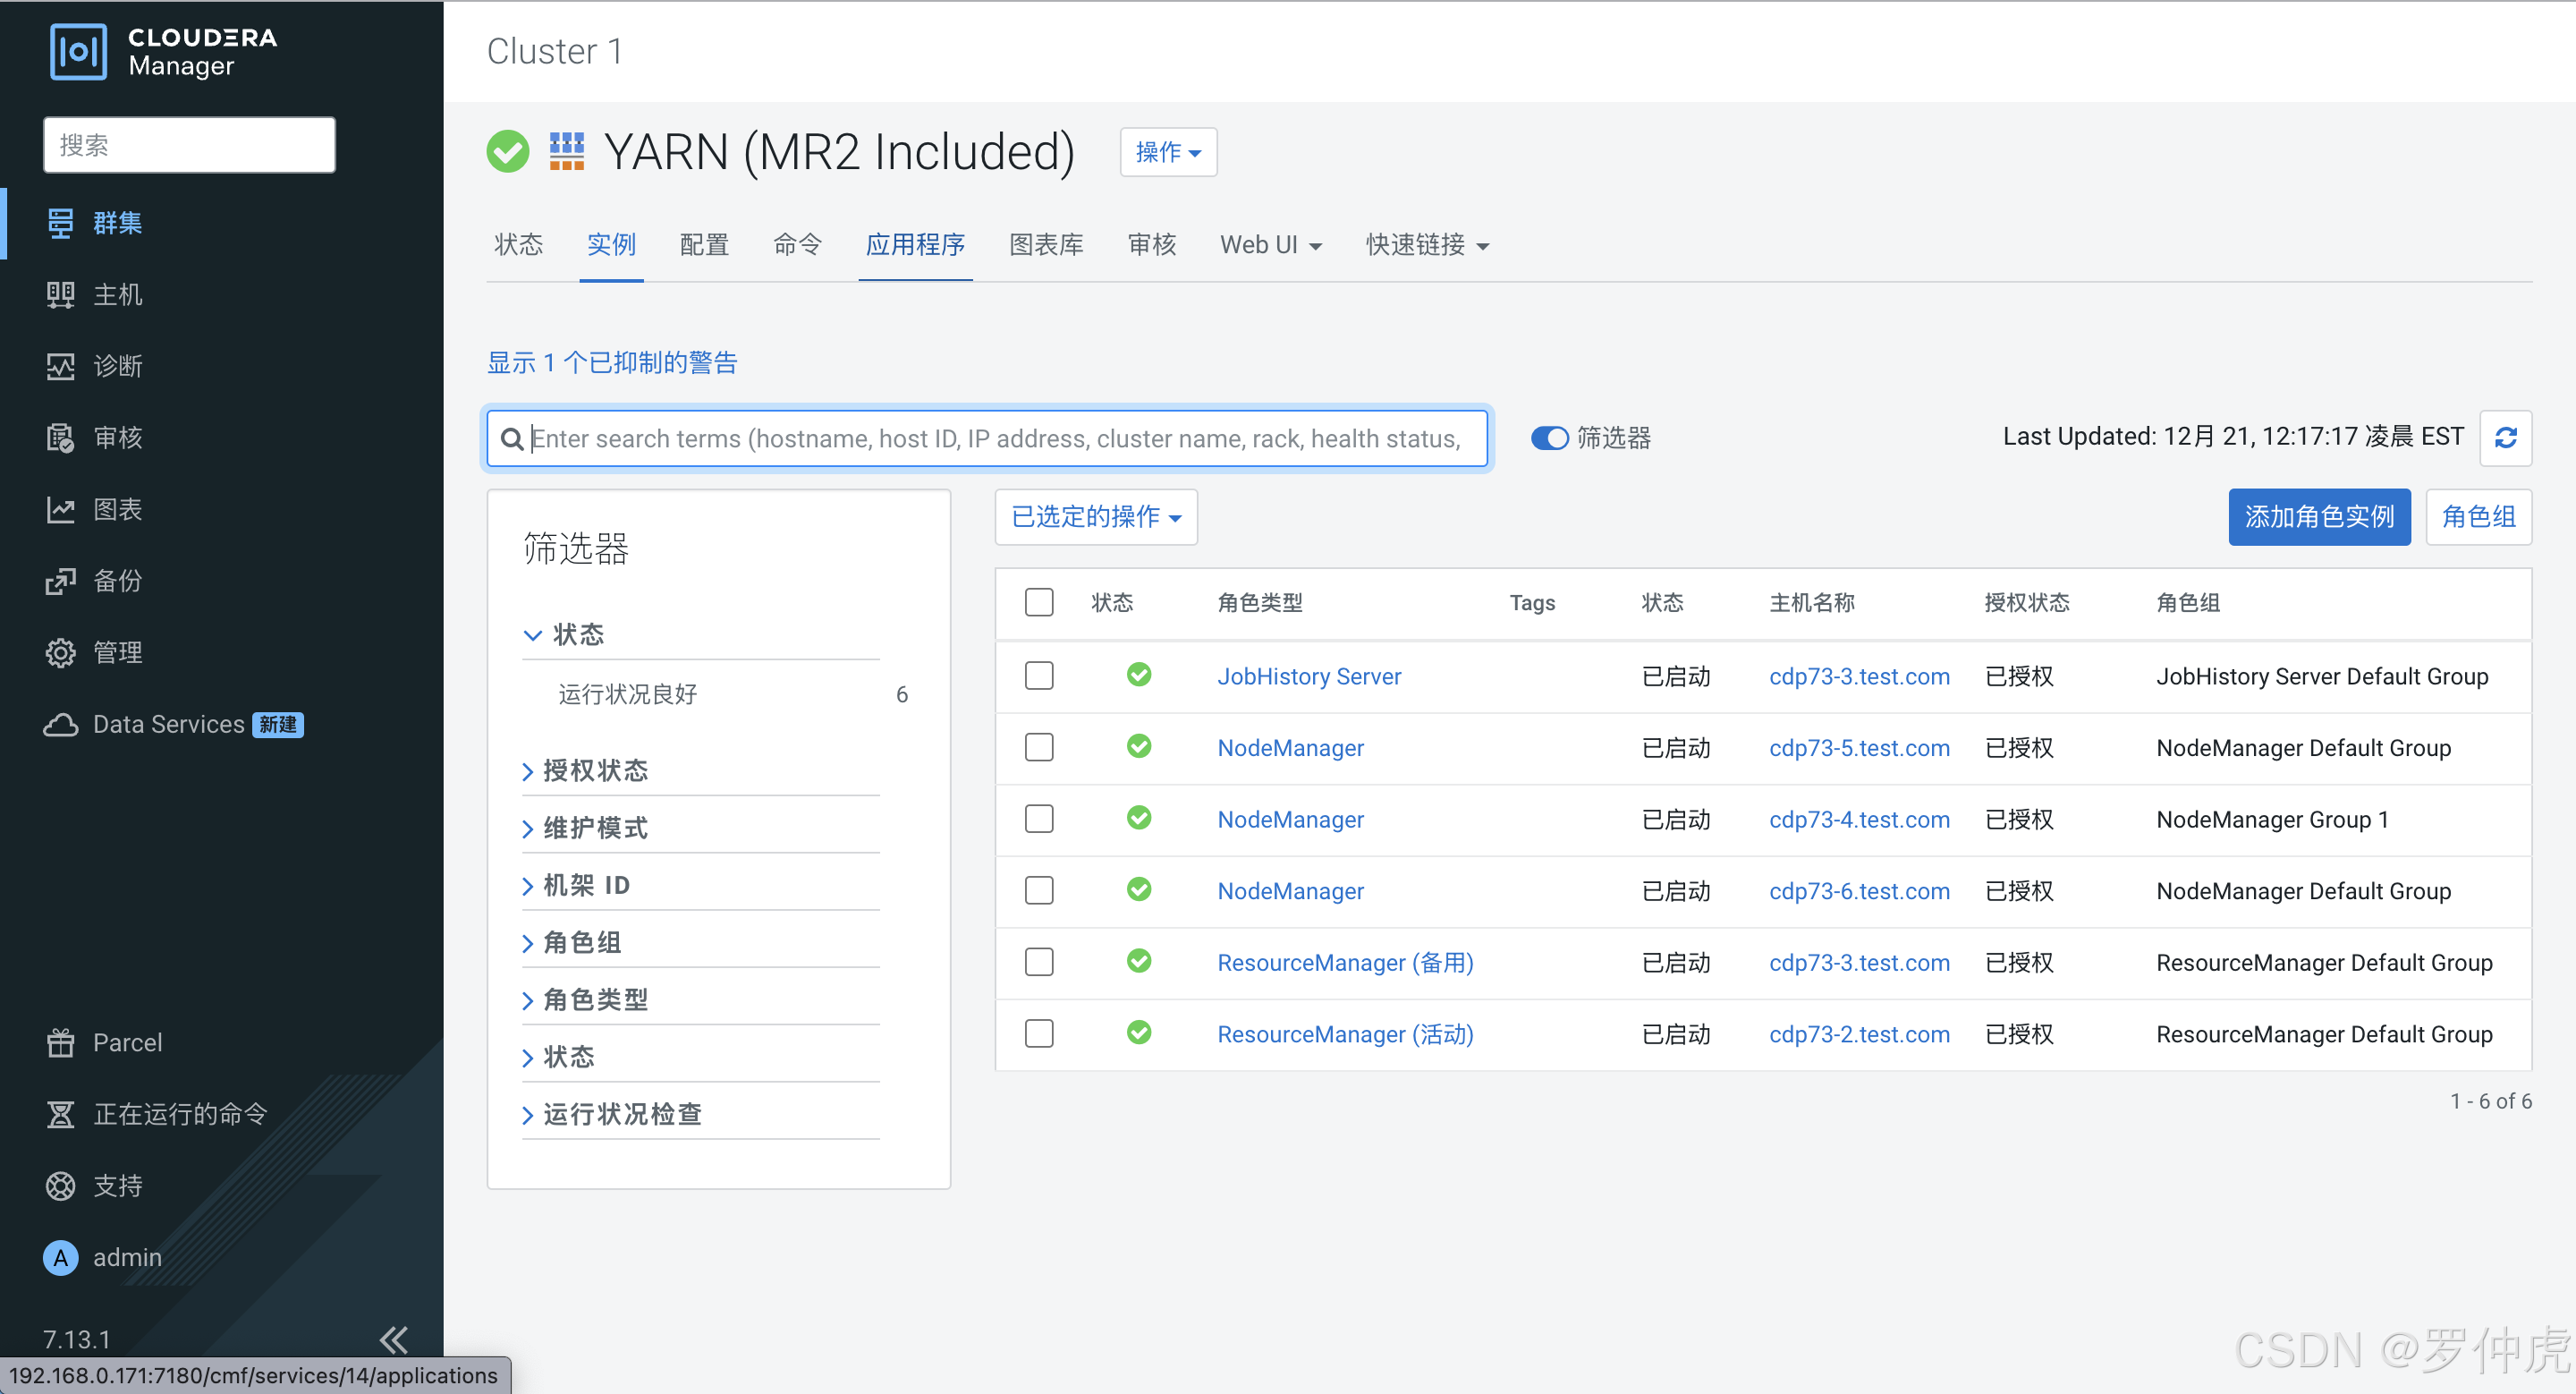
启用 YARN (MR2 Included) 的 High Availability
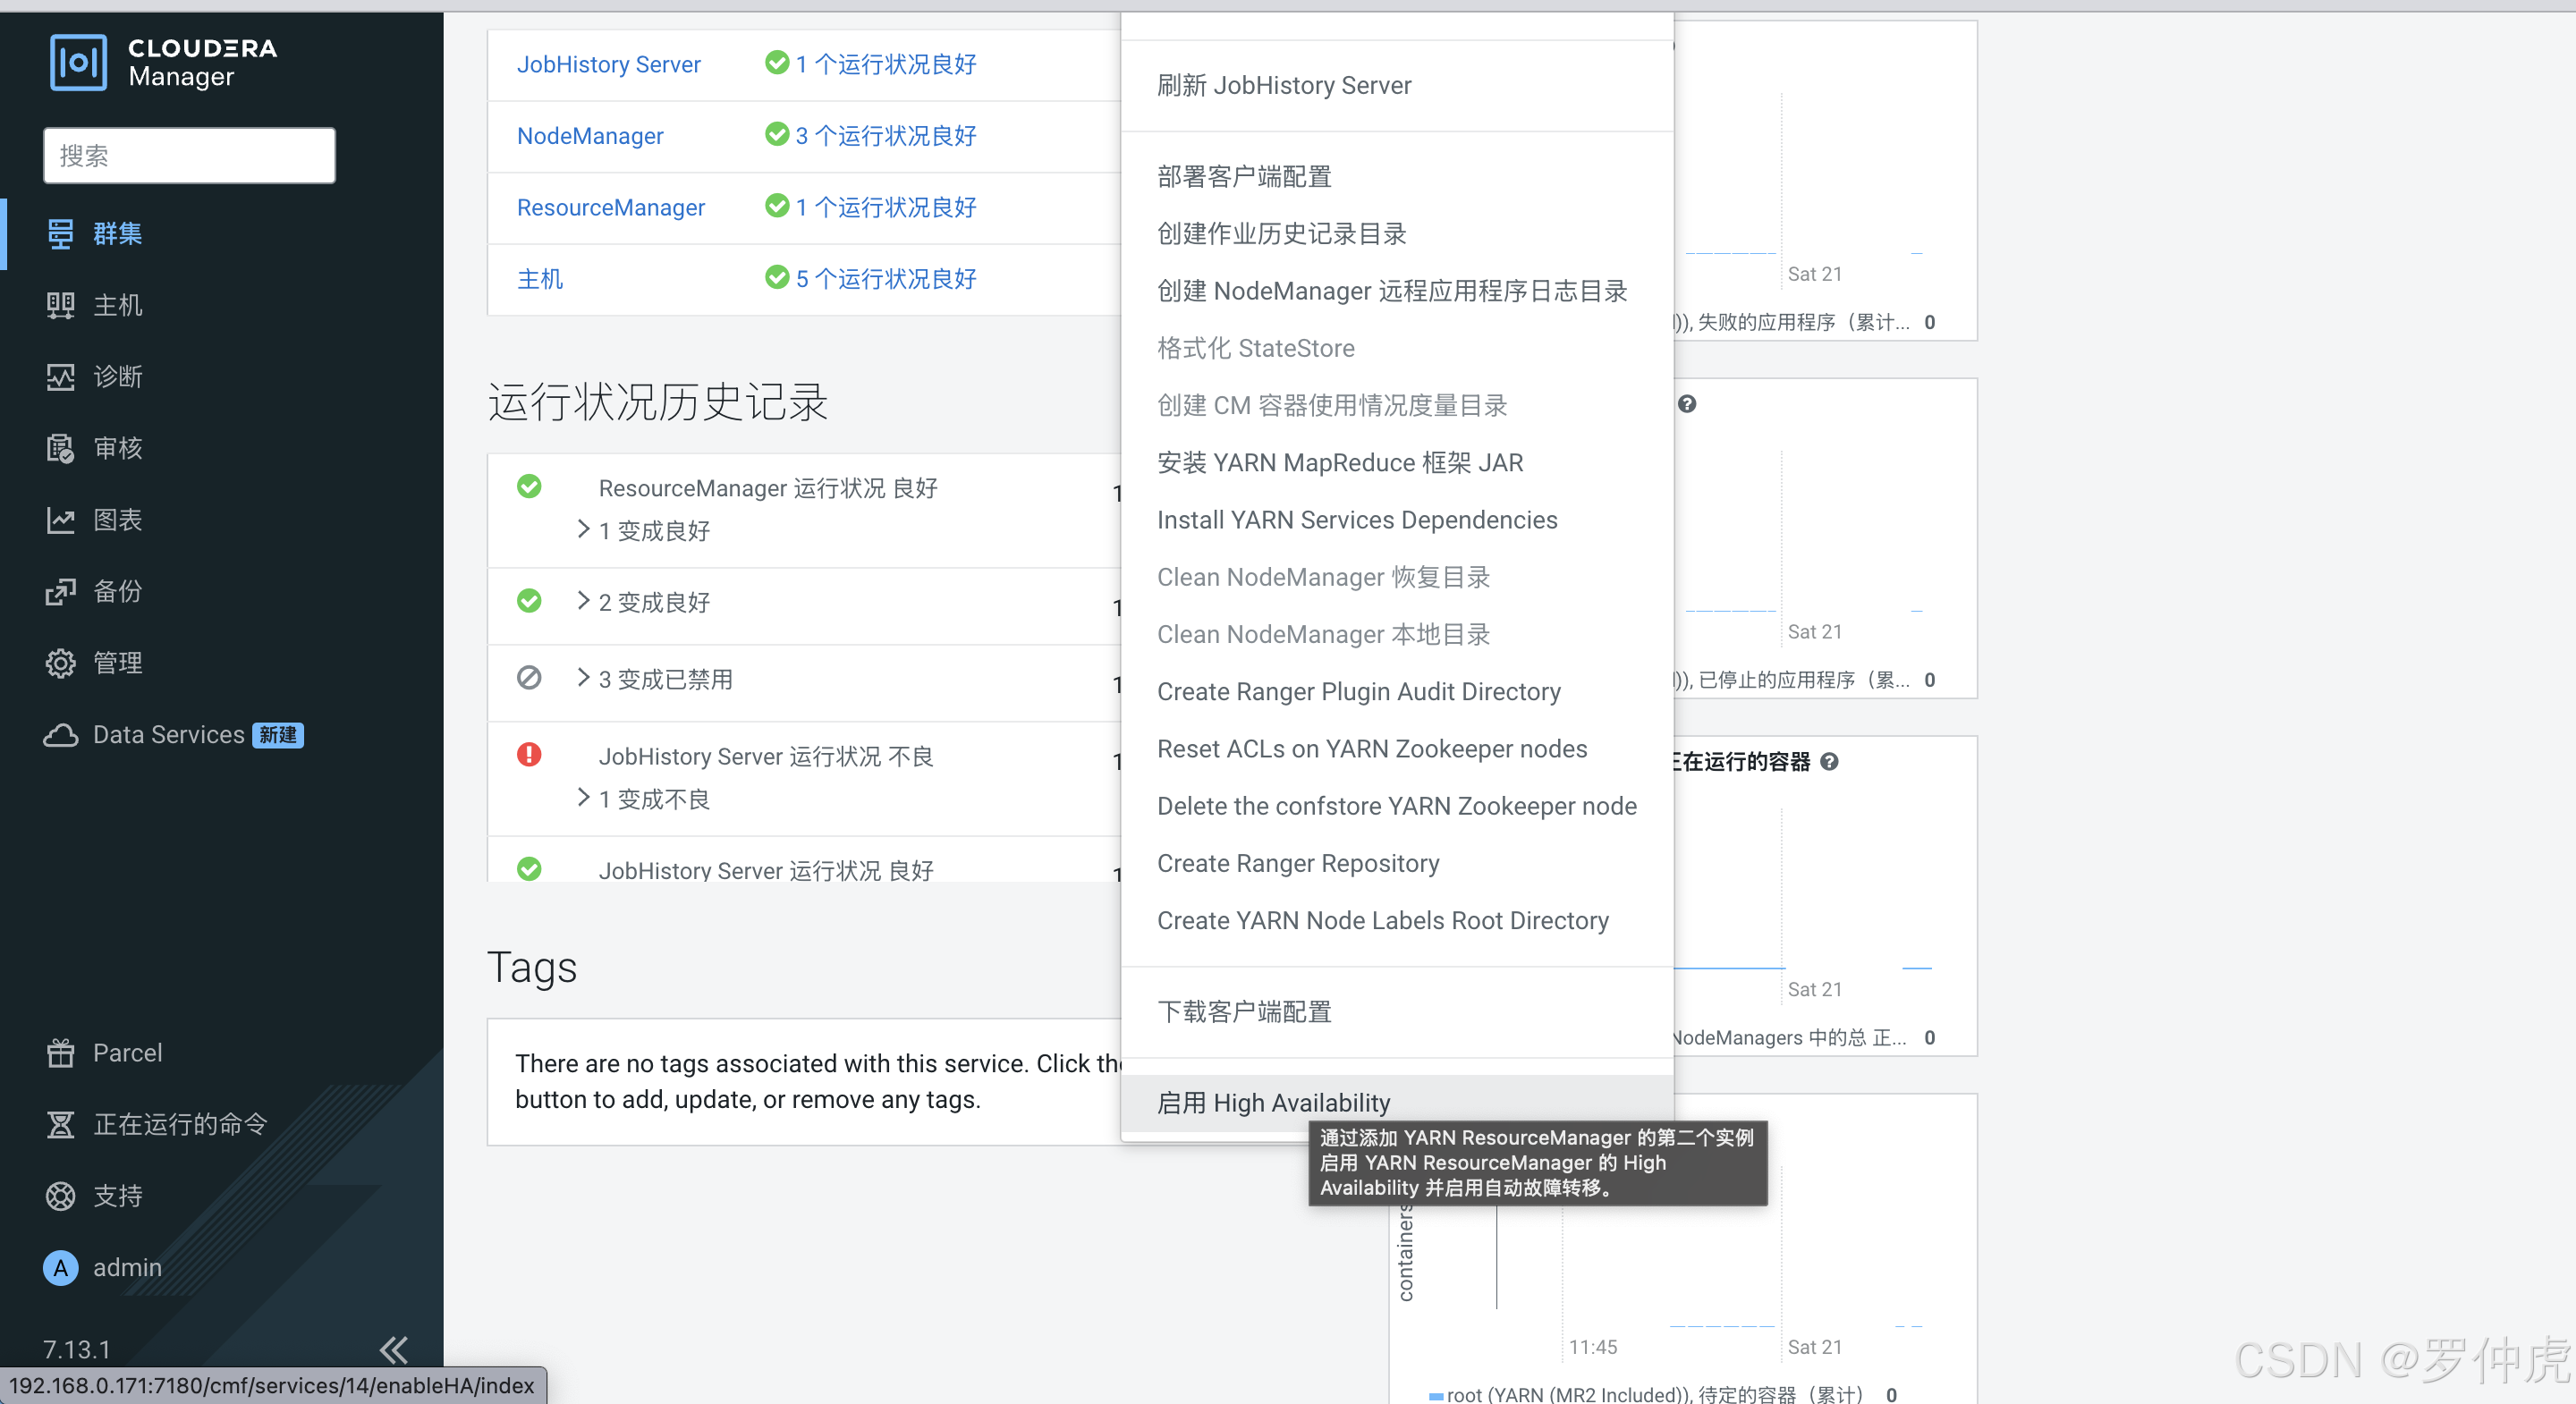
分配角色
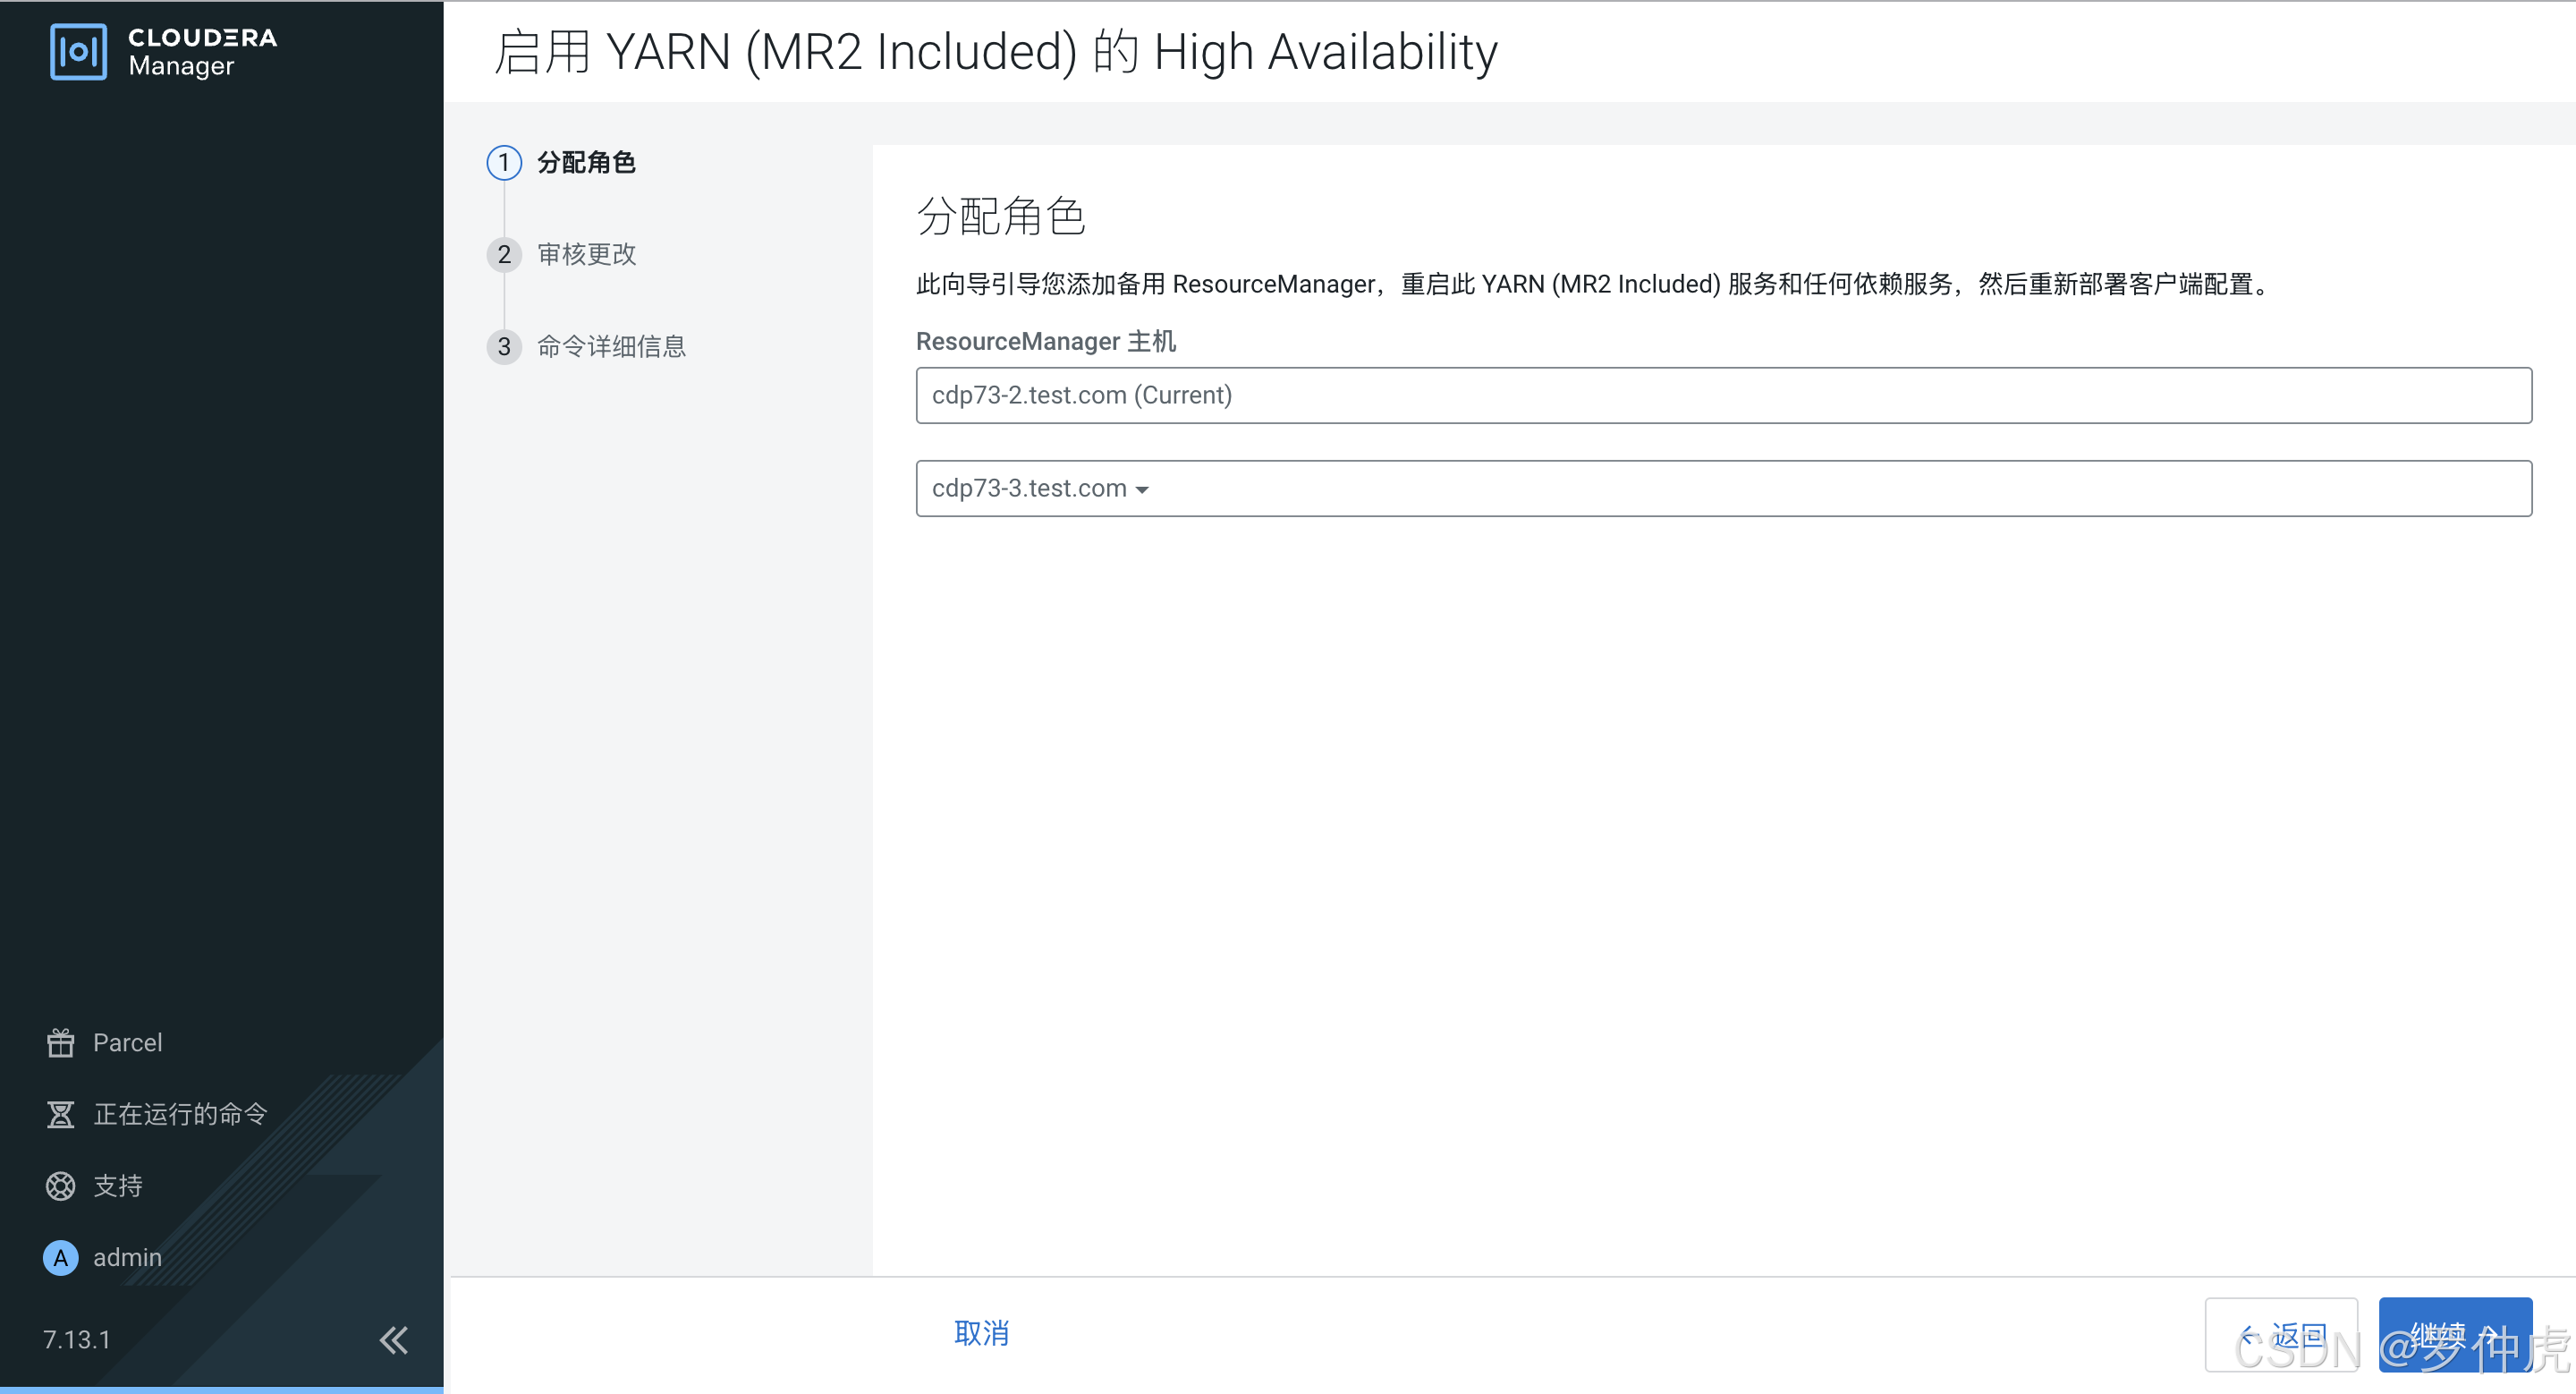
审核更改

命令详细信息
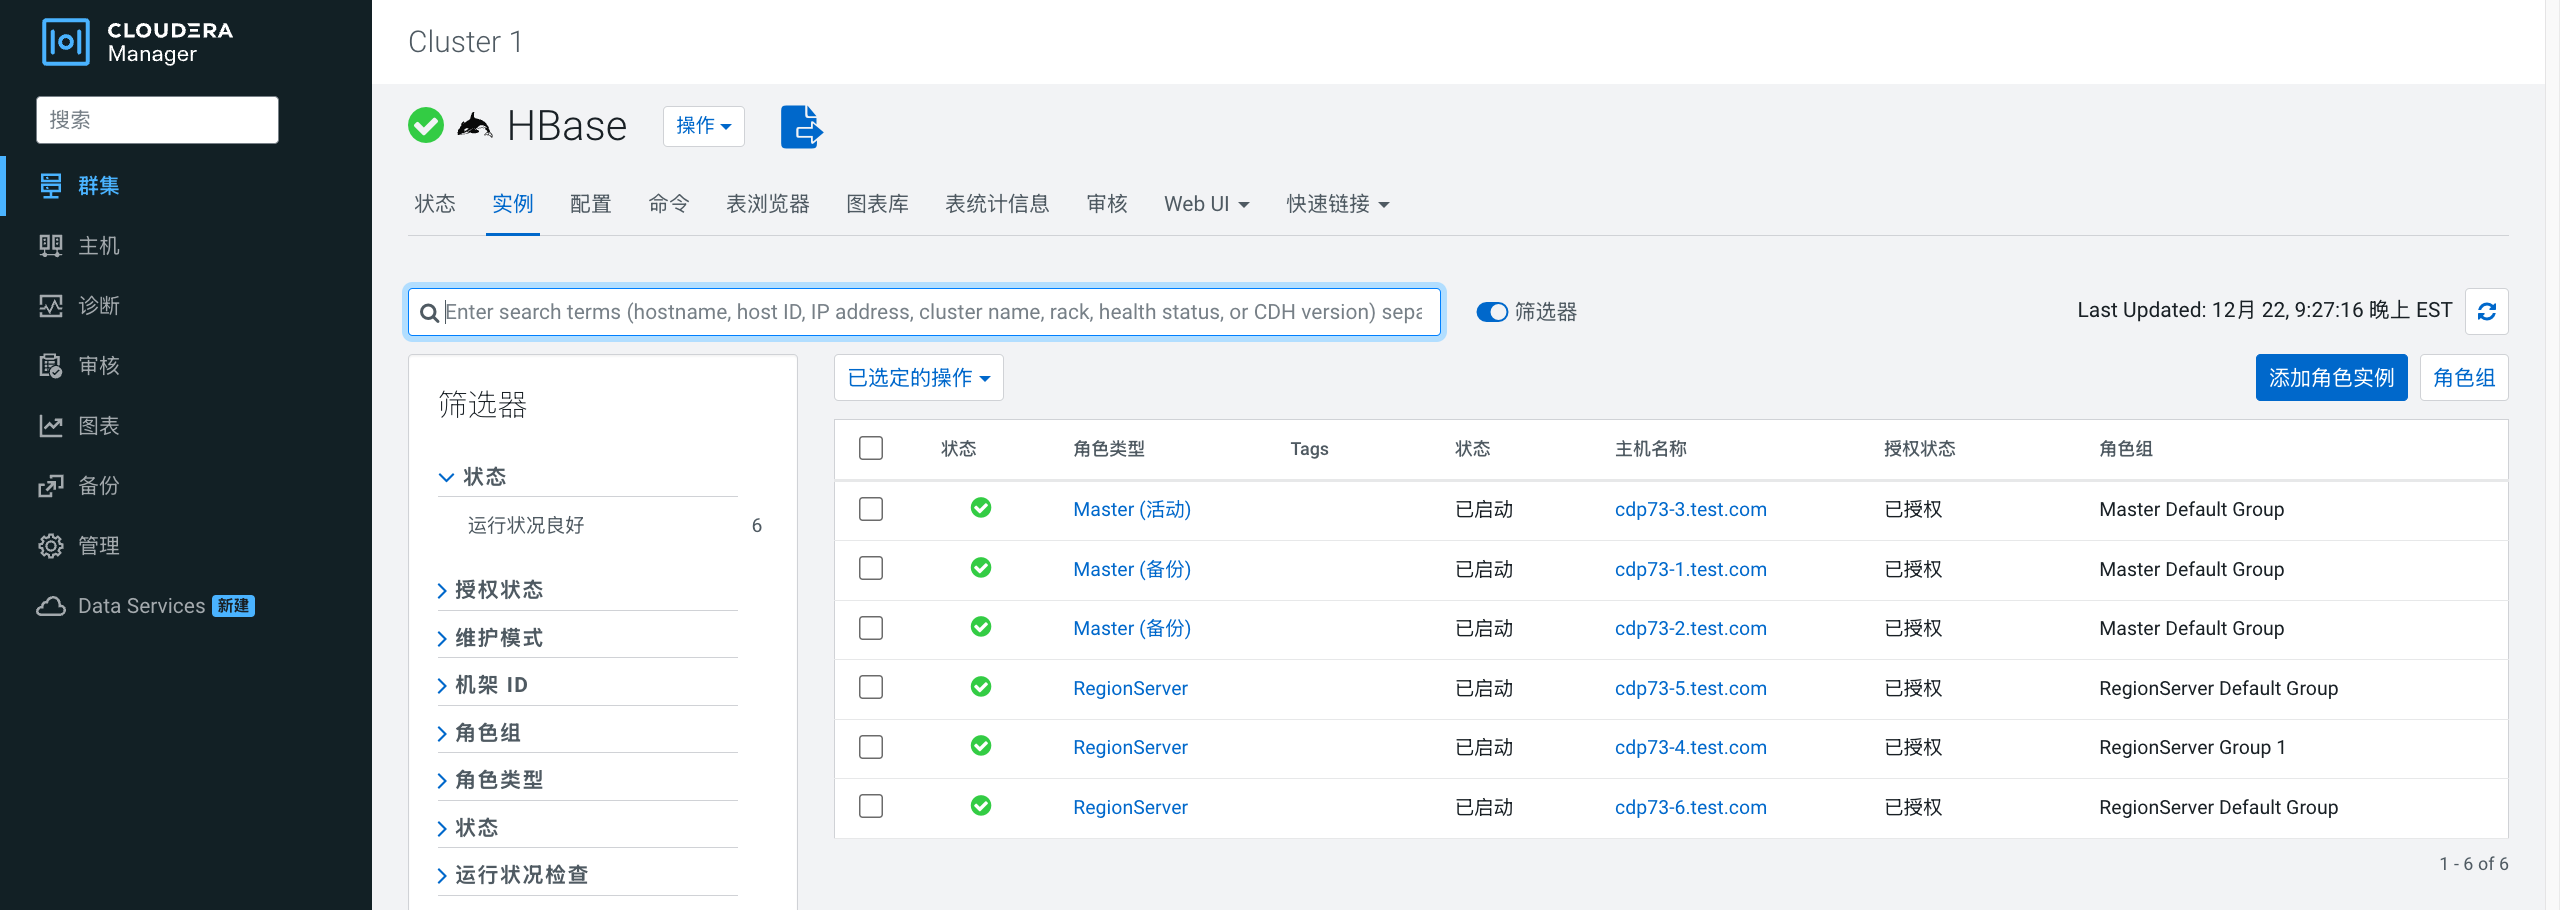
Hbase高可用
HBase 管理员可以配置具有高可用性(High Availability,简称 HA)的 HBase 集群。当 HBase 应用程序需要低延迟查询并且可以容忍读取操作的最小(接近零秒)陈旧性时,必须配置 HA。例如,远程传感器数据查询、分布式消息传递、对象存储和用户资料管理等场景。
在标准配置中,HBase 的大多数方面都是高度可用的。一个集群通常由一个 Master 和三个或更多的 RegionServer 组成。为了确保每个组件的高可用性,需要配置一个或多个备份 Master。备份 Master 运行在与活跃 Master 不同的主机上。
配置Hbase高可用非常简单,您需要按照添加角色实例的流程操作,并将备份 Master 添加到与活跃 Master 运行所在主机不同的主机上。因为我在安装时就安装了三个Master,故已经开启了高可用。

技术共进,成长同行——讯飞AI开发者社区
更多推荐
 28
28 0
0- 0


 已为社区贡献1条内容

所有评论(0)