
java web - springboot集成Keycloak + 前端开发环境
这篇文章将会包括建立一个Keycloak server,springboot怎样连接Keycloak,以及怎样跟Spring Security搭配使用。1.什么是Keycloak?Keycloak是一个面向现代应用和服务的开源的身份和访问管理解决方案。Keycloak提供了诸如单点登录(SSO)、身份代理和社交登录、用户联合、客户端适配器、管理控制台和帐户管理控制台等功能。想了解更多关于Keycl
目录
1.在application.properties文件中配置
这篇文章将会包括springboot集成Keycloak全部流程,包括建立一个Keycloak server,springboot怎样连接Keycloak,以及怎样跟Spring Security搭配使用。
1.什么是Keycloak?
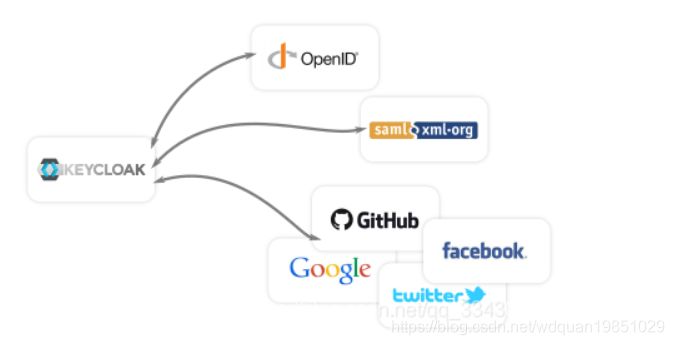
要与Keycloak集成,那么Keycloak是什么?Keycloak是一个面向现代应用和服务的开源的身份和访问管理解决方案,它使得应用和服务获得安全性变得容易,并且大大减少开发者的工作量。Keycloak提供了诸如单点登录(SSO)、身份代理和社交登录、用户联合、客户端适配器、管理控制台和帐户管理控制台等功能。想了解更多关于Keycloak的信息,请访问官方页面https://www.keycloak.org/。
本文将使用管理控制台做一些基本设置,并且使用keycloak 客户端适配器连接到spring boot。
2.设置Keycloak服务器
2.1 下载安装Keycloak
有多个发行版可以选择,本文中我们将使用Standalone版本。从官方源代码下载Keycloak-11.0.2独立发行版 https://www.keycloak.org/downloads.html。
下载完之后,解压并且运行keycloak。
做一下简单的配置,修改一下访问keycloak server的端口,在standalone.xml文件中将http访问端口设置为8082,将https访问端口设置为8443.

然后解压启动Keycloak server。
unzip keycloak-11.0.2.zip
cd keycloak-11.0.2/bin
./standalone.sh -Djboss.socket.binding.port-offset=100
在运行standalone.sh脚本后,keycloak将会启动它的服务,当控制台打印出类似“Keycloak 11.0.2 (WildFly Core 12.0.3.Final) started”,说明Keycloak启动成功。
打开浏览器,输入http://localhost:8082/,会自动跳转到http://localhost:8082/auth
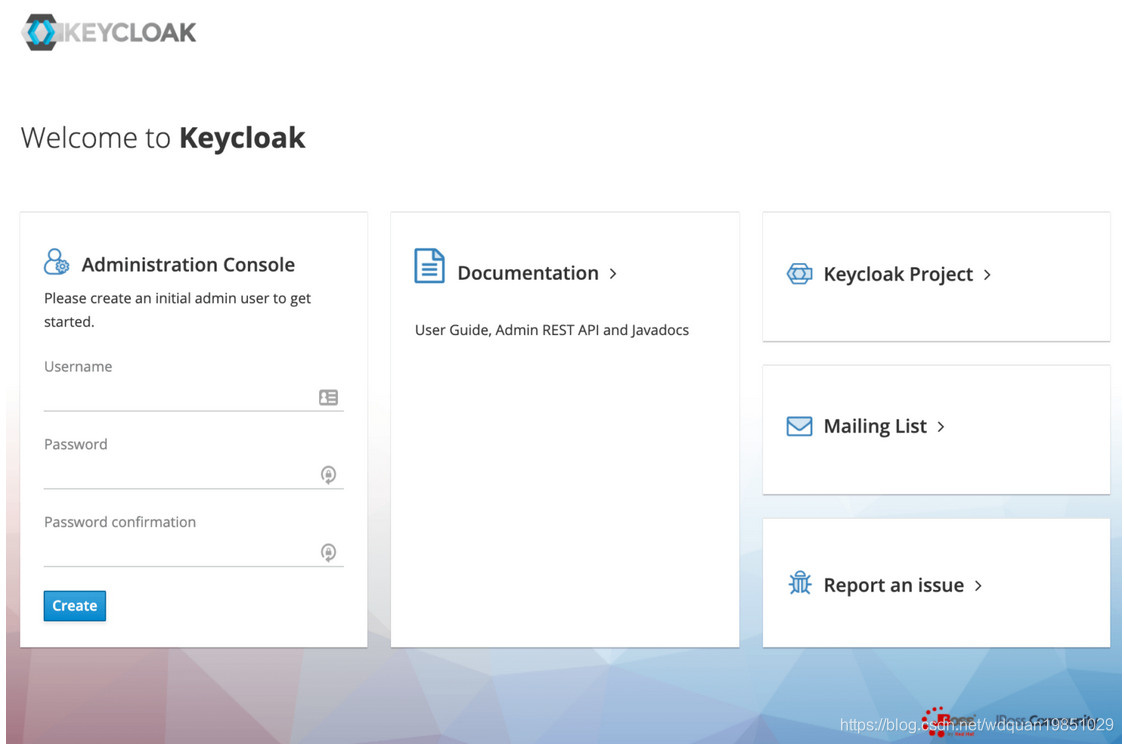
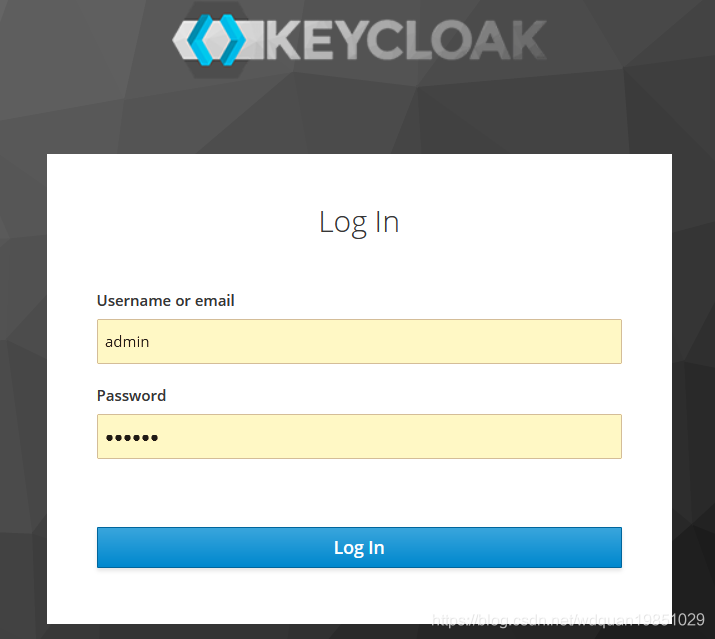
创建一个名为admin(也可以叫别的,用户自己设置)的初始管理用户,密码为newsys。单击Create,我们将看到用户创建成功的消息。然后我们可以进入管理控制台,在登录页面,我们将输入刚才创建的的admin账户和密码。
2.2 创建一个Realm
Realm是域的意思,如果有多个springboot应用,要想实现SSO功能,那么每个springboot应用将作为一个client,全部放到同一个Realm下。
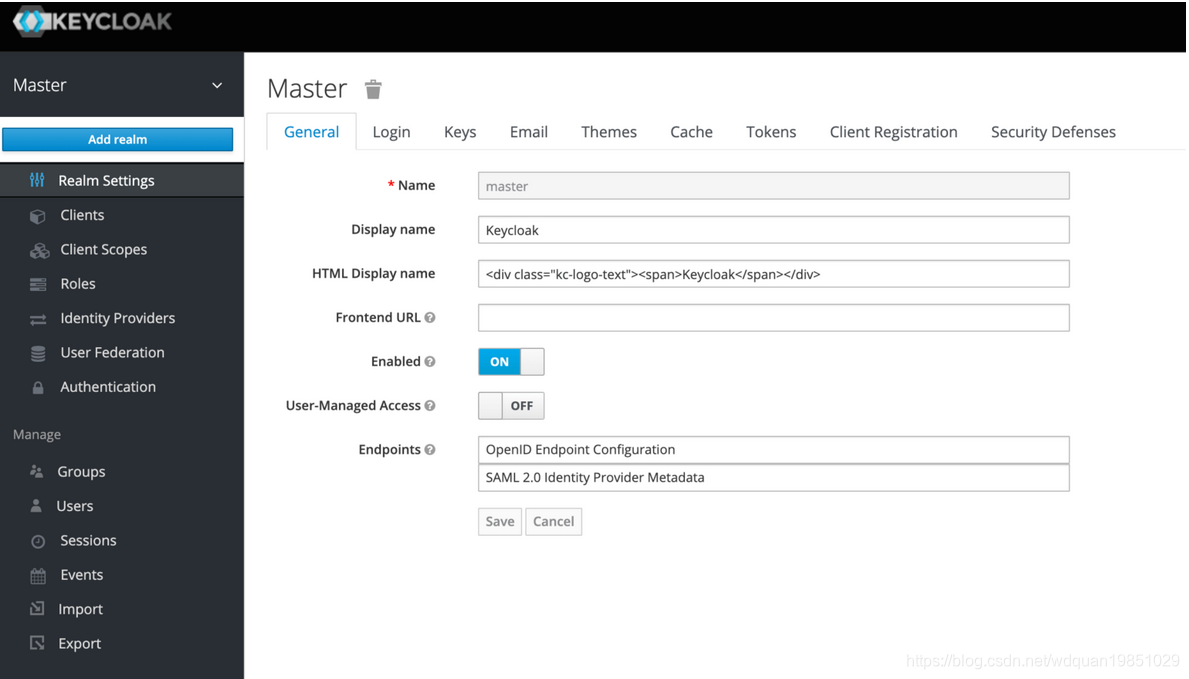
登录成功后将进入到管理控制台,首先看到的是打开默认的master realm。用户怎样添加realm呢?在界面左上角有一个"Add realm"按钮:
添加一个名为shenpi的新realm。
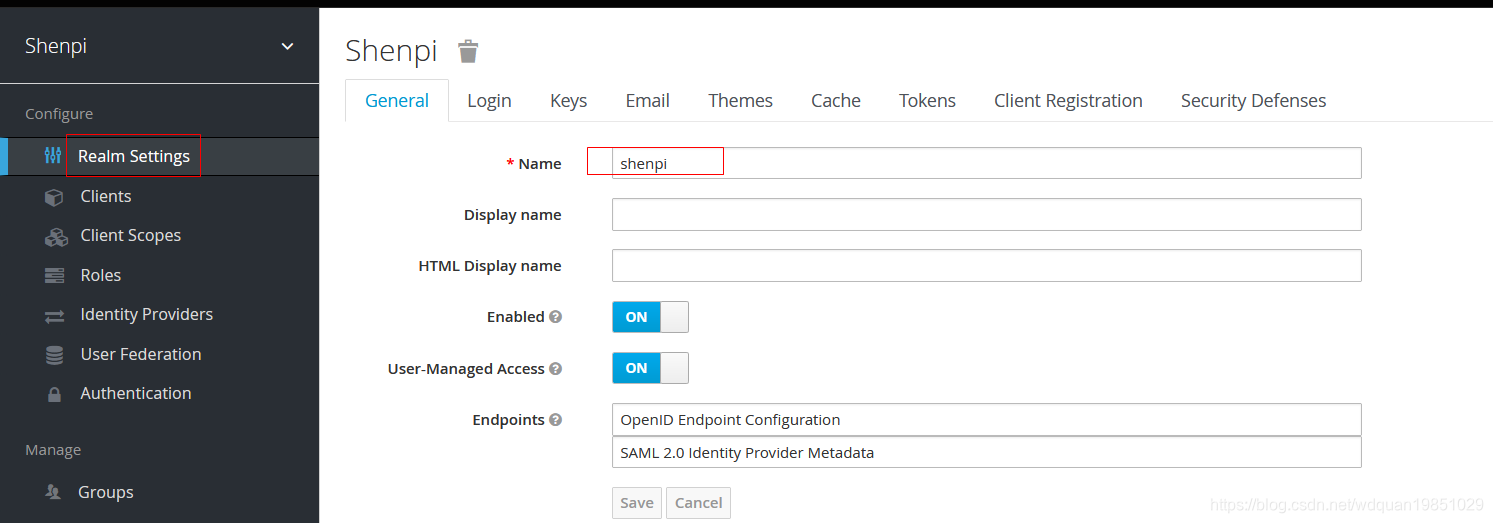
单击Create按钮后,将创建一个新的realm,我们将被重定向到这个realm。下面所有操作都将在这个新的shenpi realm中执行。
2.3 创建一个client
每个springboot应用对应一个client,多个springboot应用对应多个client,二者是一对一的关系。
点击左侧菜单栏的"Clients",我们将进入到Clients页面。从下图中可以看出,Keycloak已经内置了一些自带的clients。
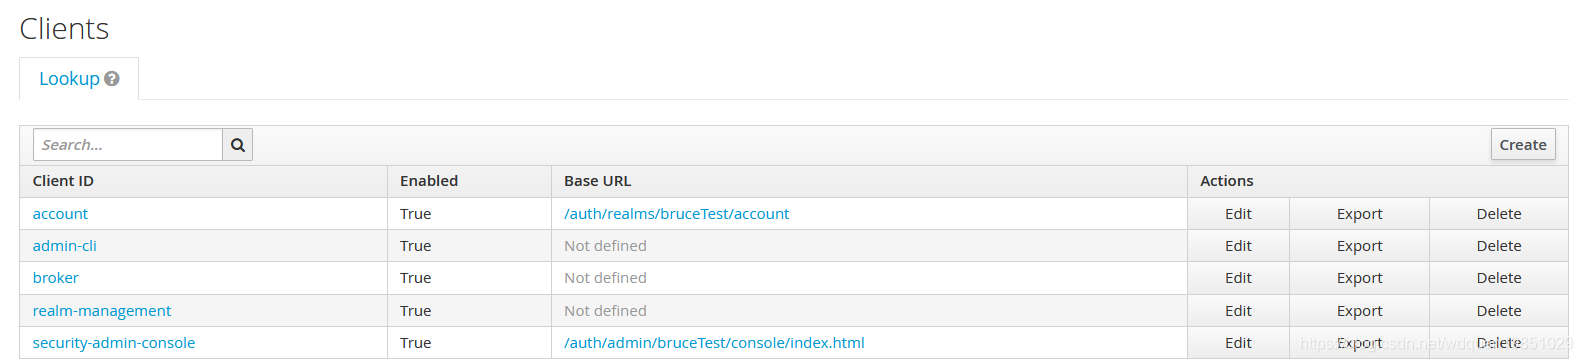
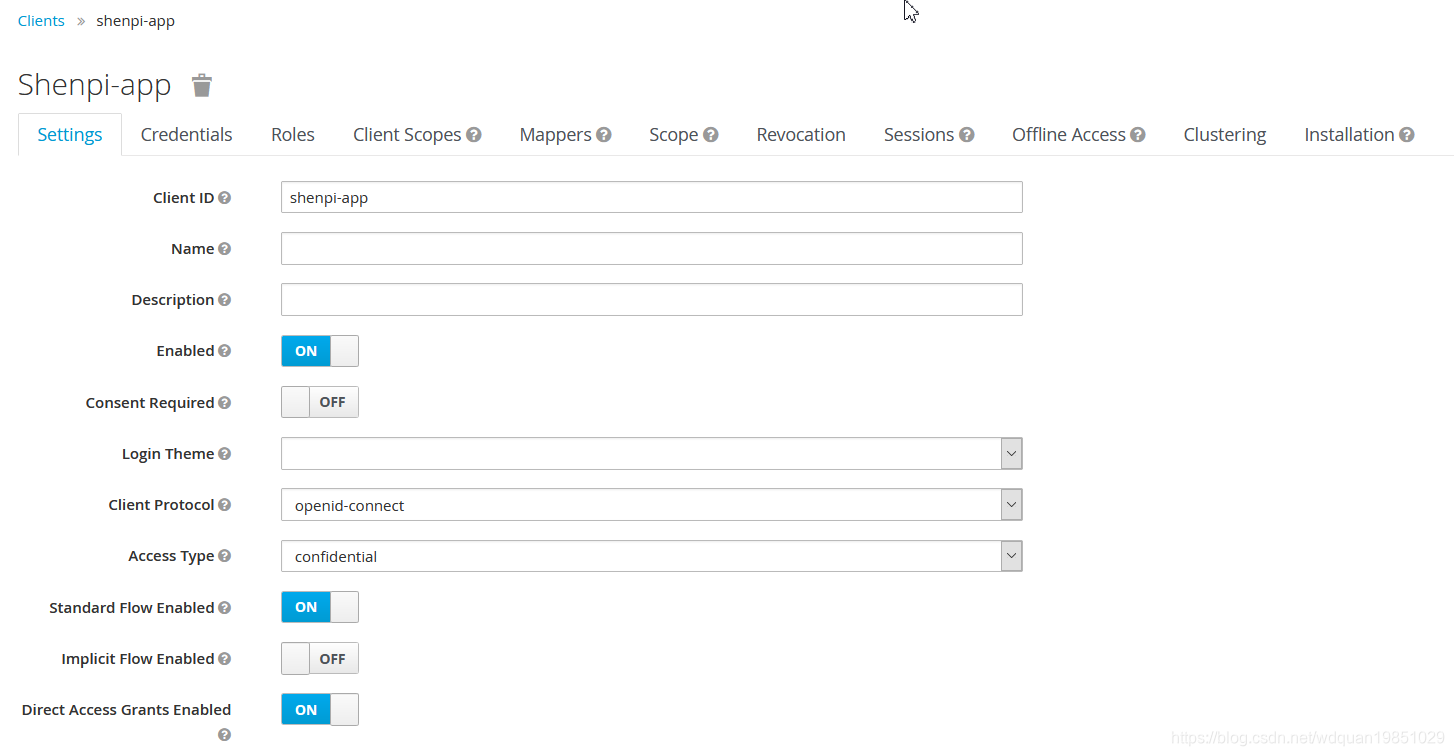
我们需要创建一个新的client,叫做shenpi-app。
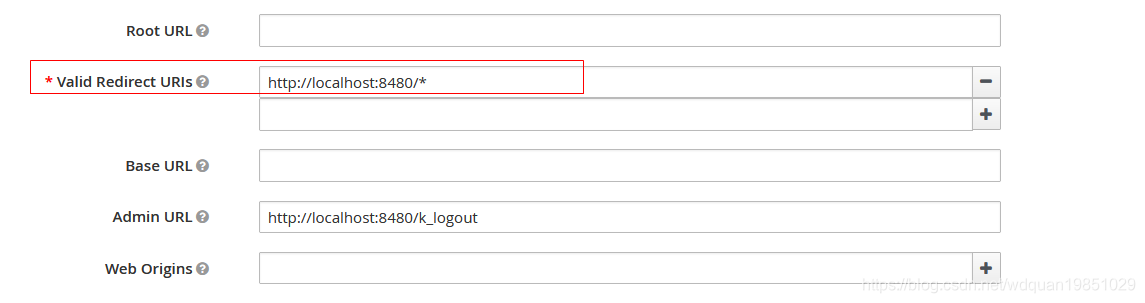
设置重定向地址"Valid Redirect URIs",必须将其设置为你的springboot应用程序的访问地址,后面我们会创建一个springboot工程使用这个client,并让这个springboot工程运行在8480端口,所以上面配置了一个redirect URL http://localhost:8480/*
2.4 创建角色和用户
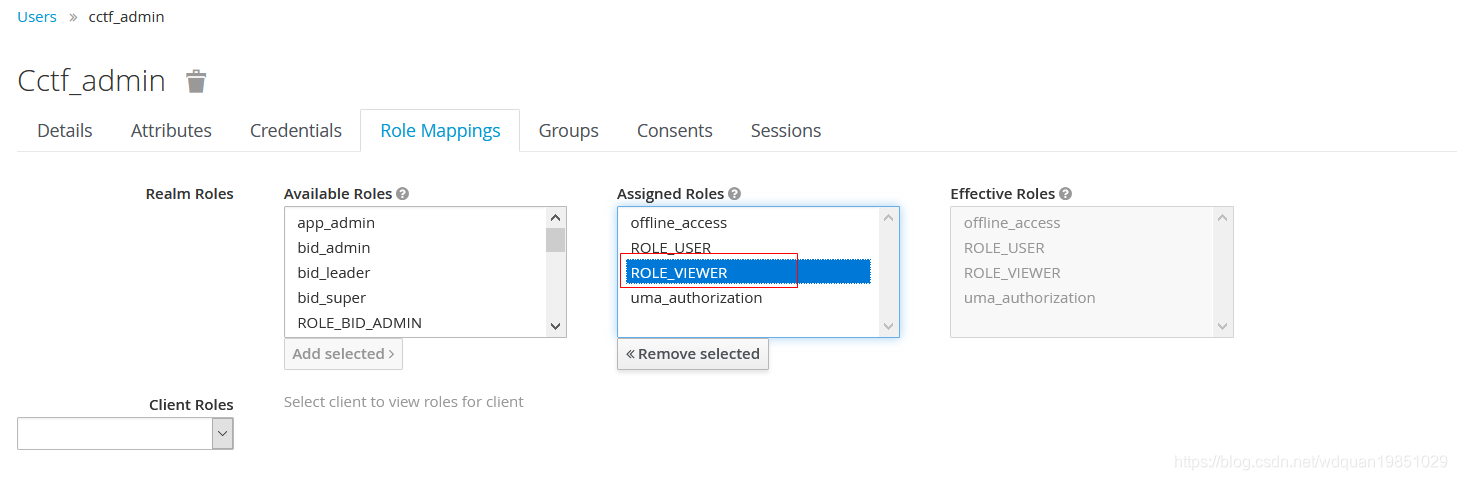
Keycloak使用基于role的访问控制,所以每个用户都要分配role。下面我们将创建一个Realm级别的role,只有这个Realm中的用户和组可以使用它。

然后创建一个用户,将刚才创建的role分配给它
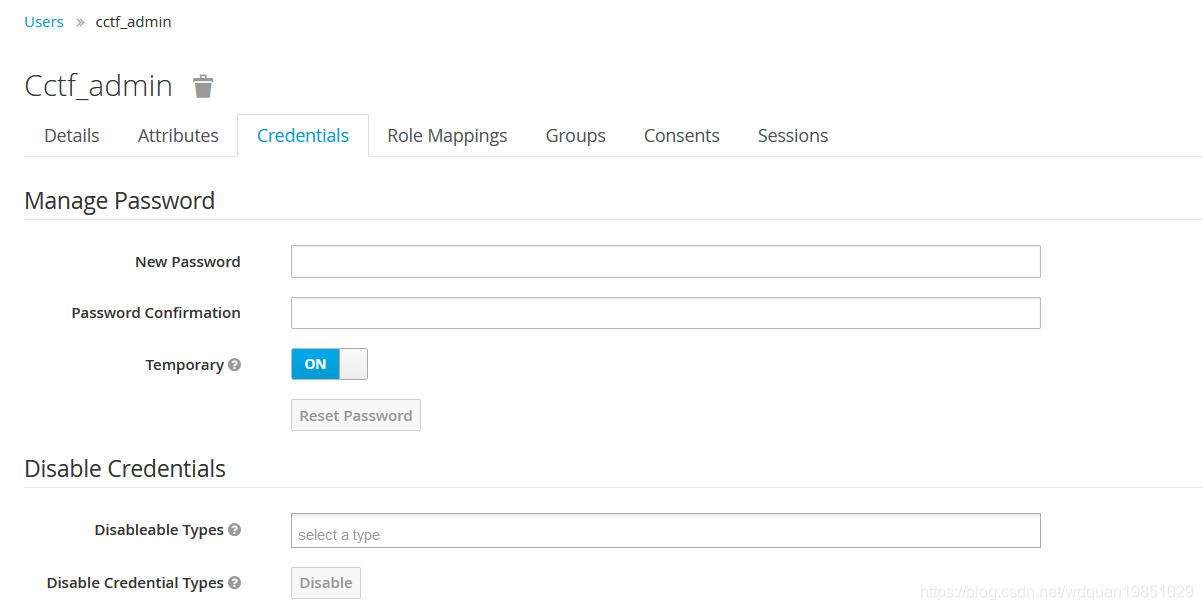
点击Tab页Credentials,给新创建的用户创建密码。
3.创建一个Springboot应用
3.1 添加Keycloak依赖以及基本配置
首先要将Keycloak相关的依赖添加到我们的pom.xml文件中。
<!-- Keycloak springboot客户端适配器使用了springboot的自动配置功能, 所以添加Keycloak Spring Boot starter 依赖 -->
<dependency>
    <groupId>org.keycloak</groupId>
    <artifactId>keycloak-spring-boot-starter</artifactId>
</dependency>
<!-- Keycloak springboot的客户端适配器导入到我们的工程中 -->
<dependencyManagement>
    <dependencies>
        <dependency>
            <groupId>org.keycloak.bom</groupId>
            <artifactId>keycloak-adapter-bom</artifactId>
            <version>11.0.2</version>
            <type>pom</type>
            <scope>import</scope>
        </dependency>
    </dependencies>
</dependencyManagement>
Springboot中内嵌了几种web容器,用户不需要再添加其它的依赖
- Tomcat
- Jetty
- UnderTow
因为使用了Springboot的自动配置功能,所以我们只需要在应用配置文件application.properties中,添加一些配置信息:
首先是Keycloak的一些基本信息,例如keycloak地址,realm, client等等。
keycloak.auth-server-url=http://localhost:8082/auth
keycloak.realm=shenpi
keycloak.resource=shenpi-app
keycloak.ssl-required=none
keycloak.public-client=true
然后是授权相关的配置,这些约束确保了对/api/authentication/*的每个请求只有在请求它的用户具有ROLE_VIEWER角色并且是经过身份认证的用户时,才会被授权。
注意:此时并没有与spring security整合,因此没有使用任何spring security的功能。
keycloak.security-constraints[0].authRoles[0]=ROLE_VIEWER
keycloak.security-constraints[0].securityCollections[0].patterns[0]=/api/keycloaktest/*
还可以将keycloak.principal-attribute定义为"preferred_username",这样可以将用户信息注入到Controller的Principal。
keycloak.principal-attribute=preferred_username3.2 Controller中打印用户信息
在用户登录成功后,会在Spring容器中创建一个新的java.security.Principal bean。
在Controller层的方法的参数中加入java.security.Principal,那么Spring 会将其自动注入,从中可以拿到当前登录用户的用户名。
没有集成Spring Security时的权限管理:
我们在之前配置了keycloak.security-constraints,所以需要有ROLE_VIEWER权限才能访问url /api/keycloaktest/*。如果我们以cctf_admin的用户登录,那么我们将能够访问下面的API。
@RestController
@RequestMapping(value = "/api/authentication")
public class KeycloakTestController {
    private final Logger logger = LoggerFactory.getLogger(KeycloakTestController.class);

    /**
     * @param id
     * @return
     */
    @RequestMapping(value = "/index", method = RequestMethod.GET)
    public String index() {
        return "external";
    }

    /**
     * 在控制器中获取用户,在@Controller 注解的bean里,有额外的选项。principal 可以直接作为方法参数,框架会自动注入。
     * @return
     */
    @RequestMapping(value = "/userinfo", method = RequestMethod.GET)
    public Map<String, Object> getuserInfo(Principal principal) {
    	Map<String, Object> map = new HashMap<String, Object>();
    	map.put("username", principal.getName());
    	System.out.println("Debug: the username is " + principal.getName());
    	return map;
    }
}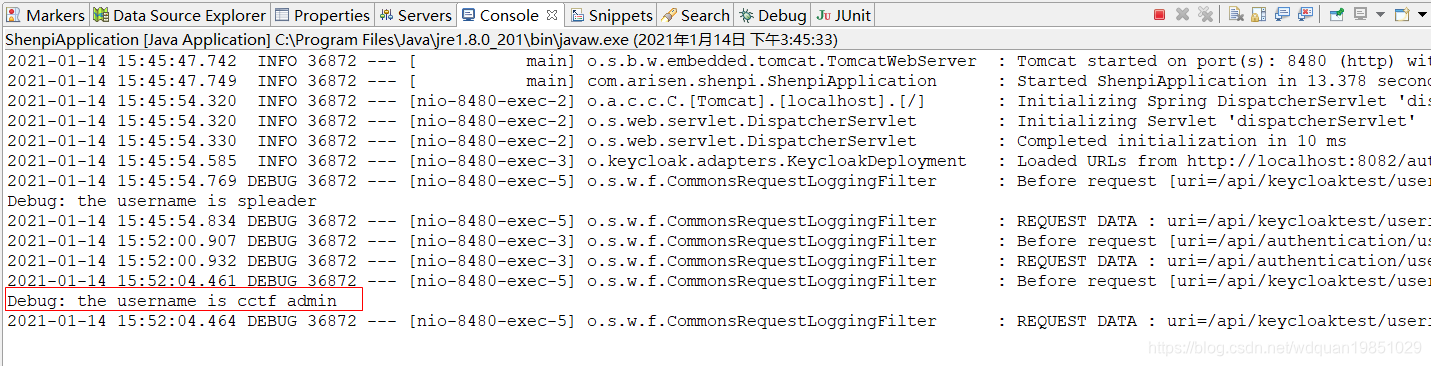
现在我们已经完成了连接Spring Boot中集成Keycloak的工作,并进行了成果演示。Spring Boot为我们无缝地处理了调用Keycloak授权服务器的整个过程。我们不需要自己调用Keycloak API来生成access token,也不需要在对受保护资源的请求中显式地发送授权头。
接下来,我们将研究怎样将Spring Security与我们现有的Springboot + keycloak应用程序结合使用。
4.集成Spring Security
Keycloak也提供了一个Spring Security客户端适配器,并且它已经被包含在了Spring Boot Keycloak Starter里面,所以无需添加这个依赖。下面我们将展示Spring security如何集成keycloak。
首先要导入依赖:
<dependency>
    <groupId>org.springframework.boot</groupId>
    <artifactId>spring-boot-starter-security</artifactId>
</dependency>
4.1 Spring Security配置类
Keycloak提供了一个KeycloakWebSecurityConfigurerAdapter作为一个方便的基类来创建一个WebSecurityConfigurer实例。
任何被Spring安全保护的应用程序都需要一个扩展了WebSecurityConfigurerAdapter的配置类:
@Configuration
@EnableWebSecurity
@ComponentScan(basePackageClasses = KeycloakSecurityComponents.class)
public class SecurityConfig extends KeycloakWebSecurityConfigurerAdapter{
    /**
     * Registers the KeycloakAuthenticationProvider with the authentication manager.
     */
    @Autowired
    public void configureGlobal(AuthenticationManagerBuilder auth) throws Exception {
	    KeycloakAuthenticationProvider keycloakAuthenticationProvider = keycloakAuthenticationProvider();
	    SimpleAuthorityMapper grantedAuthorityMapper = new SimpleAuthorityMapper();
	    keycloakAuthenticationProvider.setGrantedAuthoritiesMapper(grantedAuthorityMapper);
        auth.authenticationProvider(keycloakAuthenticationProvider());
    }


    @Bean
    public KeycloakSpringBootConfigResolver KeycloakConfigResolver() {
    	return new KeycloakSpringBootConfigResolver();
    }

    /**
     * Defines the session authentication strategy.
     */
    @Bean
    @Override
    protected SessionAuthenticationStrategy sessionAuthenticationStrategy() {
        return new RegisterSessionAuthenticationStrategy(new SessionRegistryImpl());
    }

    private static final String[] AUTH_WHITELIST = {
        // -- swagger ui
        "/swagger-resources/**",
        "/swagger-ui.html",
        "/v2/api-docs",
        "/webjars/**",
        "/images/**"
    };

    @Override
    protected void configure(HttpSecurity http) throws Exception
    {

        super.configure(http);
        http.authorizeRequests()
                .antMatchers("/**/*.js").permitAll()
                .antMatchers("/**/*.css").permitAll()
                .antMatchers("/images/**").permitAll()
                .antMatchers("/assets/**").permitAll()
//                .antMatchers("/sso/**").permitAll()
//                .antMatchers("/api/authentication/**").permitAll()
                .antMatchers("/api/authentication/**").hasRole("VIEWER")
                .antMatchers("/**").hasRole("USER")
                .antMatchers("/**").authenticated()
                .and().csrf().disable();

    }

    @Bean
    public FilterRegistrationBean keycloakAuthenticationProcessingFilterRegistrationBean(
            KeycloakAuthenticationProcessingFilter filter) {
        FilterRegistrationBean registrationBean = new FilterRegistrationBean(filter);
        registrationBean.setEnabled(false);
        return registrationBean;
    }

    @Bean
    public FilterRegistrationBean keycloakPreAuthActionsFilterRegistrationBean(
            KeycloakPreAuthActionsFilter filter) {
        FilterRegistrationBean registrationBean = new FilterRegistrationBean(filter);
        registrationBean.setEnabled(false);
        return registrationBean;
    }

    @Bean
    public FilterRegistrationBean keycloakAuthenticatedActionsFilterBean(
            KeycloakAuthenticatedActionsFilter filter) {
        FilterRegistrationBean registrationBean = new FilterRegistrationBean(filter);
        registrationBean.setEnabled(false);
        return registrationBean;
    }

    @Bean
    public FilterRegistrationBean keycloakSecurityContextRequestFilterBean(
        KeycloakSecurityContextRequestFilter filter) {
        FilterRegistrationBean registrationBean = new FilterRegistrationBean(filter);
        registrationBean.setEnabled(false);
        return registrationBean;
    }
}在上面的代码中,configureGlobal()方法要求SimpleAuthorityMapper确保角色没有以ROLE_作为前缀,这里配置了.antMatchers("/api/authentication/**").hasRole("VIEWER"),意思就是说如果过要访问url /api/authentication/*,那么必须要有VIEWER权限,Spring security会给role加一个"ROLE_"前缀,所以配置.antMatchers("/api/authentication/**").hasRole("VIEWER")的时候,将前缀ROLE_去掉,只需要VIEWER,Spring security会将其变成"ROLE_VIEWER",而keycloak 用户cctf_admin有"ROLE_VIEWER"这个role,所以这个用户登录后,就能够访问"/api/authentication/**"。
另一个方法keycloakConfigResolver定义了我们希望使用Spring引导属性文件支持,而不是默认的keycloak.json。
因为我们已经用Spring security设置了安全约束,所以我们可以删除或注释之前放在属性文件中的这些安全约束:
keycloak.security-constraints[0].authRoles[0]=ROLE_VIEWER
keycloak.security-constraints[0].securityCollections[0].patterns[0]=/api/keycloaktest/*
4.2 从Spring Security中获取用户信息
Spring security已经集成了keycloak,用户登录之后,用户信息将会被存入Spring security的SecurityContext中,可以从中取出。
/**
* 从keycloak得到登陆用户信息
* @param req
* @param response
* @return
*/
@ApiOperation(value="从keycloak得到登陆用户信息", notes = "从keycloak得到登陆用户信息")
@RequestMapping(value = "/keycloakuserinfo", method = RequestMethod.GET, produces = MediaType.APPLICATION_JSON_VALUE)
public Result<Map<String, Object>> userinfo(HttpServletRequest req, HttpServletResponse response) {
Map<String, Object> resultMap = new HashMap<String, Object>();
List<String> roles = new ArrayList<String>();
Authentication authentication = SecurityContextHolder.getContext().getAuthentication();
//首先检查是否存在认证用户
if (!(authentication instanceof AnonymousAuthenticationToken)) {
for (GrantedAuthority grantedAuthority: authentication.getAuthorities()) {
roles.add(grantedAuthority.getAuthority());
}
resultMap.put("roles", roles.toString());
resultMap.put("username", authentication.getName());
}
return new Result<Map<String, Object>>(200, "得到登陆用户信息", resultMap);
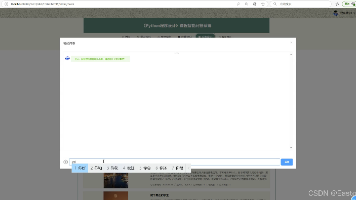
}将spring security与keycloak集成之后,启动springboot应用,在浏览器中输入http://localhost:8480/api/authentication/keycloakuserinfo,首先会跳转到keycloak登录页面,登录完成后,可以得到如下结果。

5.前端开发环境搭建
此时后端springboot + spring security + keycloak已经搭建完毕,前端在这种情况下,应该怎样进行开发呢?
5.1前端无法登录问题
采用前后端分离的方式,前端使用Angular,React或者Vue都可以,以使用Angular为例,在开发过程中,我们使用nodejs做为web服务器,程序启动后,在浏览器中输入http://localhost:4200/,浏览器加载前端代码后,发送request访问springboot后端。
Spring security keycloak适配器会放过无需任何权限的request,但是如果访问的资源需要有role授权,则会检测其有没有登录,如果没有登录,则跳转到keycloak登录页面,但是前端发出的请求如果是用jquery或者angular提供的httpClient所发出的,收到的reponse只是一些文本信息,登录页面将无法加载,这时候应该怎么办呢?可以在浏览器中输入一个后端的API,例如http://localhost:8480/api/authentication/userinfo,这个API访问的资源需要有权限,然后会跳转到keycloak登录页面进行登录,登录成功之后,信息将会保存到cookie中,详情请参考:https://blog.csdn.net/wdquan19851029/article/details/111887107
使用http://localhost:8480/api/authentication/userinfo,跳转到keycloak登录页面并且登录完成之后,再刷新http://localhost:4200/,所有的请求将自动带上cookie中的信息,后端认为其已经登录。
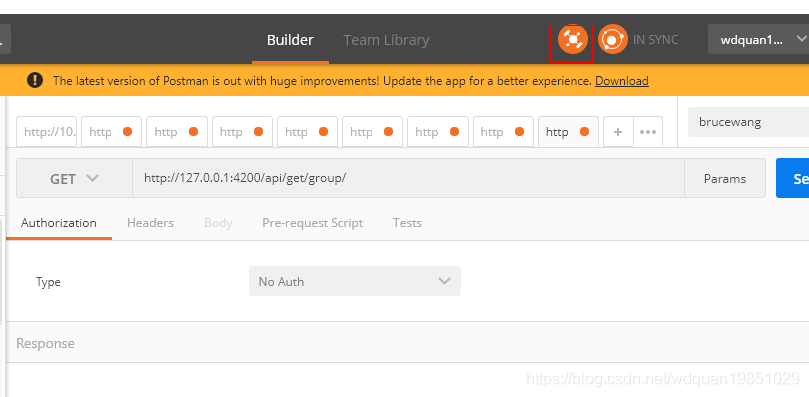
5.2测试后端API
如果我们使用chrome的postman去测试后端API,后端会要求进行登录,无法进行测试,怎样解决?在chrome的postman中安装插件"Postman Interceptor"(怎样安装,请自行百度),这样利用postman进行接口测试时,就可以发送带cookie请求的方法。然后用5.1章节中的方式,在chrome中进行登录,登录成功后,打开postman,在postman中发送的请求都会带上cookie信息,这种方式是基于Session的,至于cookie中的信息对于SSO的作用,请参考https://blog.csdn.net/wdquan19851029/article/details/111887107。
6.部署前后端代码
前端和后端在开发过程中是分开部署的,前端部署在nodejs服务器,后端springboot部署在tomcat或者jetty中(这个看开发人员自己具体设置),但是在生产环境中应该怎样部署呢?
我们知道如果分开部署的话,就会遇到上面第五章节中遇到的问题,即不能直接跳转到keycloak登录页面,所以应该将前后端代码一起部署,部署到后端服务器中(tomcat或者jetty),具体怎样操作呢?
将前端代码进行编译,然后将编译之后的代码放到springboot的某个目录中
Spring Boot提供了一个预配置的ResourceHttpRequestHandler实现,以方便提供静态资源。默认情况下,这个handler服务于类路径classpath中的/static、/public、/resources和/META-INF/resources目录中的静态内容。由于默认情况下src/main/resources通常位于类路径中,所以我们可以将这些目录中的任何一个放在类路径中,例如src/main/resources/static,src/main/resources/public,src/main/resources/resources等,这些都是默认地址(工程中没有的话,自己手动创建)。例如,如果我们在类路径中的/static目录中放置一个about.html文件,那么我们可以通过http://localhost:8080/about.html访问该文件。同样,我们可以通过将该文件添加到其他提到的目录中来达到同样的结果。
但并不是所有的springboot版本都支持这些默认的静态资源存放地址(ResourceHttpRequestHandler默认从中找静态资源),这时候我们就得自己去配置了
6.1. 在Springboot中配置静态资源:
1.在application.properties文件中配置
spring.resources.static-locations配置属性,可以用来改变默认的静态资源存放位置,这个属性可以配置多个以逗号分隔的静态资源存储位置,查找静态资源时依赖于配置的先后顺序依次进行,默认的官方配置如下:
spring.resources.static-locations = classpath:/static,classpath:/public,classpath:/resources,classpath:/META-INF/resources此外,Spring Boot可以从类路径之外提供静态文件:
spring.resources.static-locations = file:/opt/files/2.通过java API进行配置
Spring3.1开始引入了ResourceHandlerRegistry来配置ResourceHttpRequestHandlers,以便配置访问存储在classpath,WAR包或者文件系统中的静态资源,我们可以在web上下文配置类中以编程方式配置ResourceHandlerRegistry。
只要我们自定义了web上下文配置类"WebMvcConfig extends WebMvcConfigurerAdapter", 就会取代application.properties里面的mvc配置
@Configuration
@EnableWebMvc
@ComponentScan(basePackages = { "com.bruce.shenpi.controller" })
@EnableConfigurationProperties({ ResourceProperties.class })
public class WebMvcConfig extends WebMvcConfigurerAdapter {

    @Bean
    CharacterEncodingFilter characterEncodingFilter() {
        CharacterEncodingFilter filter = new CharacterEncodingFilter();
	filter.setEncoding("UTF-8");
	filter.setForceEncoding(true);
	return filter;
    }

    @Value("${shenpi.attachment.static.path}")
    String webStaticPath;

    @Value("${shenpi.web.static.path}")
    String webResource;

    //1.取代了application.properties里面的一下配置(注意是取代,不是在原来基础上增加)
    //**** 而且只要我们自定义了web上下文配置类"WebMvcConfig extends WebMvcConfigurerAdapter", 就会取代application.properties里面的mvc配置
    //spring.mvc.static-path-pattern = /static/**
    //spring.resources.static-locations=classpath:/META-INF/resources/,classpath:/resources/,classpath:/static/,classpath:/public/
    //2.使用Spring Boot的默认资源映射,一般够用了,那我们如何自定义目录?自定义静态资源映射目录(jar包内或者jar包外),不使用系统默认的META-INF/resources, resources, static, public(优先级META-INF/resources > resources > static > public)
    //这些静态资源都是打包在jar包中的,然而实际应用中,我们还有很多资源是在管理系统中动态维护的,并不可能在程序包中,对于这种随意指定目录的资源,如何访问?
    @Override
    public void addResourceHandlers(ResourceHandlerRegistry registry) {
    	//其中 addResourceLocations 的参数是动参,可以这样写 addResourceLocations(“classpath:/img1/”, “classpath:/img2/”, “classpath:/img3/”);

    	//1. 使用外部目录(jar包外)
    	//可以直接使用addResourceLocations 指定磁盘绝对路径,同样可以配置多个位置,注意路径写法需要加上file:
        if(webResource != null && webResource.length() >0) {
        	//因为是使用外部static路径,所以要加上"file:"前缀formatFilePath(....)
        	registry.addResourceHandler("/**").addResourceLocations(formatFilePath(webResource));
        }

        //2.使用内部目录(jar包内)
        registry.addResourceHandler("/myres/**").addResourceLocations("classpath:/myres/");
        super.addResourceHandlers(registry);
    }

    public void addViewControllers(ViewControllerRegistry registry) {
        registry.addRedirectViewController("/", "/index.html");
    }

    private String formatFilePath(String filePath) {
        if (!filePath.startsWith("/")) {
        	filePath = "/" + filePath;
        }

        if (!filePath.endsWith("/")) {
        	filePath += "/";
        }

        filePath = "file://" +  filePath;
        return filePath;
    }

技术共进,成长同行——讯飞AI开发者社区
更多推荐
 1
1 0
0- 0


 已为社区贡献4条内容

所有评论(0)