
使用 Milvus 搜索图像
本文介绍了如何使用Milvus和ResNet-34模型进行图像搜索。首先,通过下载和解压缩数据集,并安装必要的依赖项(如pymilvus、timm等)。接着,定义了一个特征提取器,使用ResNet-34模型从图像中提取嵌入信息。然后,创建了一个Milvus集合来存储这些嵌入数据,并通过ResNet-34模型提取训练集中每张图片的嵌入,将其插入Milvus。最后,通过查询图片进行搜索,结果显示大部分
使用 Milvus 搜索图像是一种高效且准确的方法,它基于向量数据库技术,将图像转化为向量表示,然后在向量空间中进行相似度搜索。以下是使用 Milvus 搜索图像的一般步骤:
一、准备工作
-
安装 Milvus:
- 可以从 Milvus 的官方网站下载并按照说明进行安装。
- 确保系统满足 Milvus 的最低要求。
-
安装依赖库:
- 通常需要安装 Python 3 和 pip,以及用于图像处理的库,如 OpenCV、Pillow 等。
- 如果使用深度学习模型进行特征提取,还需要安装相应的深度学习框架,如 PyTorch 或 TensorFlow。
-
准备数据集:
- 可以使用现有的图像数据集,如 PASCAL VOC、COCO 等。
- 也可以自己制作数据集,确保图像质量和标注的准确性。
二、图像特征提取
-
选择特征提取模型:
- 常用的深度学习模型包括 ResNet、VGG、CLIP 等。
- 这些模型可以将图像转化为固定长度的向量表示,捕捉图像的主要特征。
-
进行特征提取:
- 使用选定的模型对图像数据集进行特征提取。
- 提取到的向量将用于后续的搜索和比较。
三、向量存储与索引
-
存储向量:
- 将提取到的图像特征向量存储到 Milvus 数据库中。
- Milvus 会自动为每个向量生成一个唯一的 ID,并与原始图像数据建立关联。
-
创建索引:
- 为了提高搜索效率,可以为向量数据创建索引。
- Milvus 支持多种索引类型,如 Flat Index、Annoy Index、Faiss Index 等。
- 根据实际需求选择合适的索引类型,并设置相应的参数。
四、图像搜索
-
上传查询图像:
- 当用户上传一张新的图像进行查询时,系统需要将其转化为向量表示。
- 这通常通过与之前相同的特征提取模型实现。
-
执行搜索:
- 使用 Milvus 的 API 或 Python SDK 执行相似度搜索。
- 设置搜索的阈值、返回结果的数量等参数。
- Milvus 会在其存储的向量集合中查找与查询向量最相似的向量,并返回相应的 ID。
-
展示结果:
- 根据返回的向量 ID,在原始图像数据集中查找对应的图像。
- 将搜索结果展示给用户,通常按照相似度排序。
五、优化与调整
-
优化特征提取模型:
- 尝试不同的深度学习模型或调整模型参数,以提高特征提取的准确性和效率。
-
调整索引参数:
- 根据实际需求调整索引的类型和参数,以平衡搜索速度和召回率。
-
数据质量与标注:
- 确保图像数据的质量和标注的准确性,以提高搜索结果的可靠性。
数据集准备
首先,我们需要加载数据集并解压缩,以便进一步处理。
$ wget https://github.com/milvus-io/pymilvus-assets/releases/download/imagedata/reverse_image_search.zip
$ unzip -q -o reverse_image_search.zip
前提条件
要运行本笔记本,您需要安装以下依赖项:
- pymilvus>=2.4.2
- timm
- 火炬
- numpy
- sklearn
- 枕头
要运行 Colab,我们提供了安装必要依赖项的便捷命令。
$ pip install pymilvus --upgrade
$ pip install timm
如果您使用的是 Google Colab,要启用刚刚安装的依赖项,可能需要重启运行时。(点击屏幕上方的 "Runtime(运行时)"菜单,从下拉菜单中选择 "Restart session(重新启动会话)")。
定义特征提取器
然后,我们需要定义一个特征提取器,使用 timm 的 ResNet-34 模型从图像中提取嵌入信息。
import torch
from PIL import Image
import timm
from sklearn.preprocessing import normalize
from timm.data import resolve_data_config
from timm.data.transforms_factory import create_transform


class FeatureExtractor:
    def __init__(self, modelname):
        # Load the pre-trained model
        self.model = timm.create_model(
            modelname, pretrained=True, num_classes=0, global_pool="avg"
        )
        self.model.eval()

        # Get the input size required by the model
        self.input_size = self.model.default_cfg["input_size"]

        config = resolve_data_config({}, model=modelname)
        # Get the preprocessing function provided by TIMM for the model
        self.preprocess = create_transform(**config)

    def __call__(self, imagepath):
        # Preprocess the input image
        input_image = Image.open(imagepath).convert("RGB")  # Convert to RGB if needed
        input_image = self.preprocess(input_image)

        # Convert the image to a PyTorch tensor and add a batch dimension
        input_tensor = input_image.unsqueeze(0)

        # Perform inference
        with torch.no_grad():
            output = self.model(input_tensor)

        # Extract the feature vector
        feature_vector = output.squeeze().numpy()

        return normalize(feature_vector.reshape(1, -1), norm="l2").flatten()
创建 Milvus Collections
然后,我们需要创建一个 Milvus Collections 来存储图像嵌入信息
from pymilvus import MilvusClient

# Set up a Milvus client
client = MilvusClient(uri="example.db")
# Create a collection in quick setup mode
if client.has_collection(collection_name="image_embeddings"):
    client.drop_collection(collection_name="image_embeddings")
client.create_collection(
    collection_name="image_embeddings",
    vector_field_name="vector",
    dimension=512,
    auto_id=True,
    enable_dynamic_field=True,
    metric_type="COSINE",
)至于MilvusClient 的参数:
- 将
uri设置为本地文件,如./milvus.db,是最方便的方法,因为它会自动利用Milvus Lite将所有数据存储在此文件中。 - 如果数据规模较大,可以在docker 或 kubernetes 上设置性能更强的 Milvus 服务器。在此设置中,请使用服务器 uri,例如
http://localhost:19530,作为您的uri。 - 如果你想使用Zilliz Cloud(Milvus 的全托管云服务),请调整
uri和token,它们与 Zilliz Cloud 中的公共端点和 Api 密钥相对应。
将嵌入数据插入 Milvus
我们将使用 ResNet34 模型提取每张图片的嵌入,并将训练集中的图片插入 Milvus。
import os

extractor = FeatureExtractor("resnet34")

root = "./train"
insert = True
if insert is True:
    for dirpath, foldername, filenames in os.walk(root):
        for filename in filenames:
            if filename.endswith(".JPEG"):
                filepath = dirpath + "/" + filename
                image_embedding = extractor(filepath)
                client.insert(
                    "image_embeddings",
                    {"vector": image_embedding, "filename": filepath},
                )
from IPython.display import display
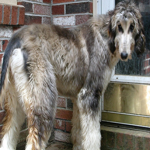
query_image = "./test/Afghan_hound/n02088094_4261.JPEG"
results = client.search(
"image_embeddings",
data=[extractor(query_image)],
output_fields=["filename"],
search_params={"metric_type": "COSINE"},
)
images = []
for result in results:
for hit in result[:10]:
filename = hit["entity"]["filename"]
img = Image.open(filename)
img = img.resize((150, 150))
images.append(img)
width = 150 * 5
height = 150 * 2
concatenated_image = Image.new("RGB", (width, height))
for idx, img in enumerate(images):
x = idx % 5
y = idx // 5
concatenated_image.paste(img, (x * 150, y * 150))
display("query")
display(Image.open(query_image).resize((150, 150)))
display("results")
display(concatenated_image)'query'
png
'results'

结果
我们可以看到,大部分图片都与搜索图片属于同一类别,即阿富汗猎犬。这说明我们找到了与搜索图片相似的图片。

技术共进,成长同行——讯飞AI开发者社区
更多推荐

 7
7 0
0- 0


 已为社区贡献32条内容

所有评论(0)