
在IDEA利用Maven和SpringBoot+SSM搭建Web后端项目
在该文档中,已经详细说明了如何使用IDEA结合Maven、Spring Boot、Spring MVC 和 MyBatis 构建一个简单的Web后端项目。
1.准备Maven
-
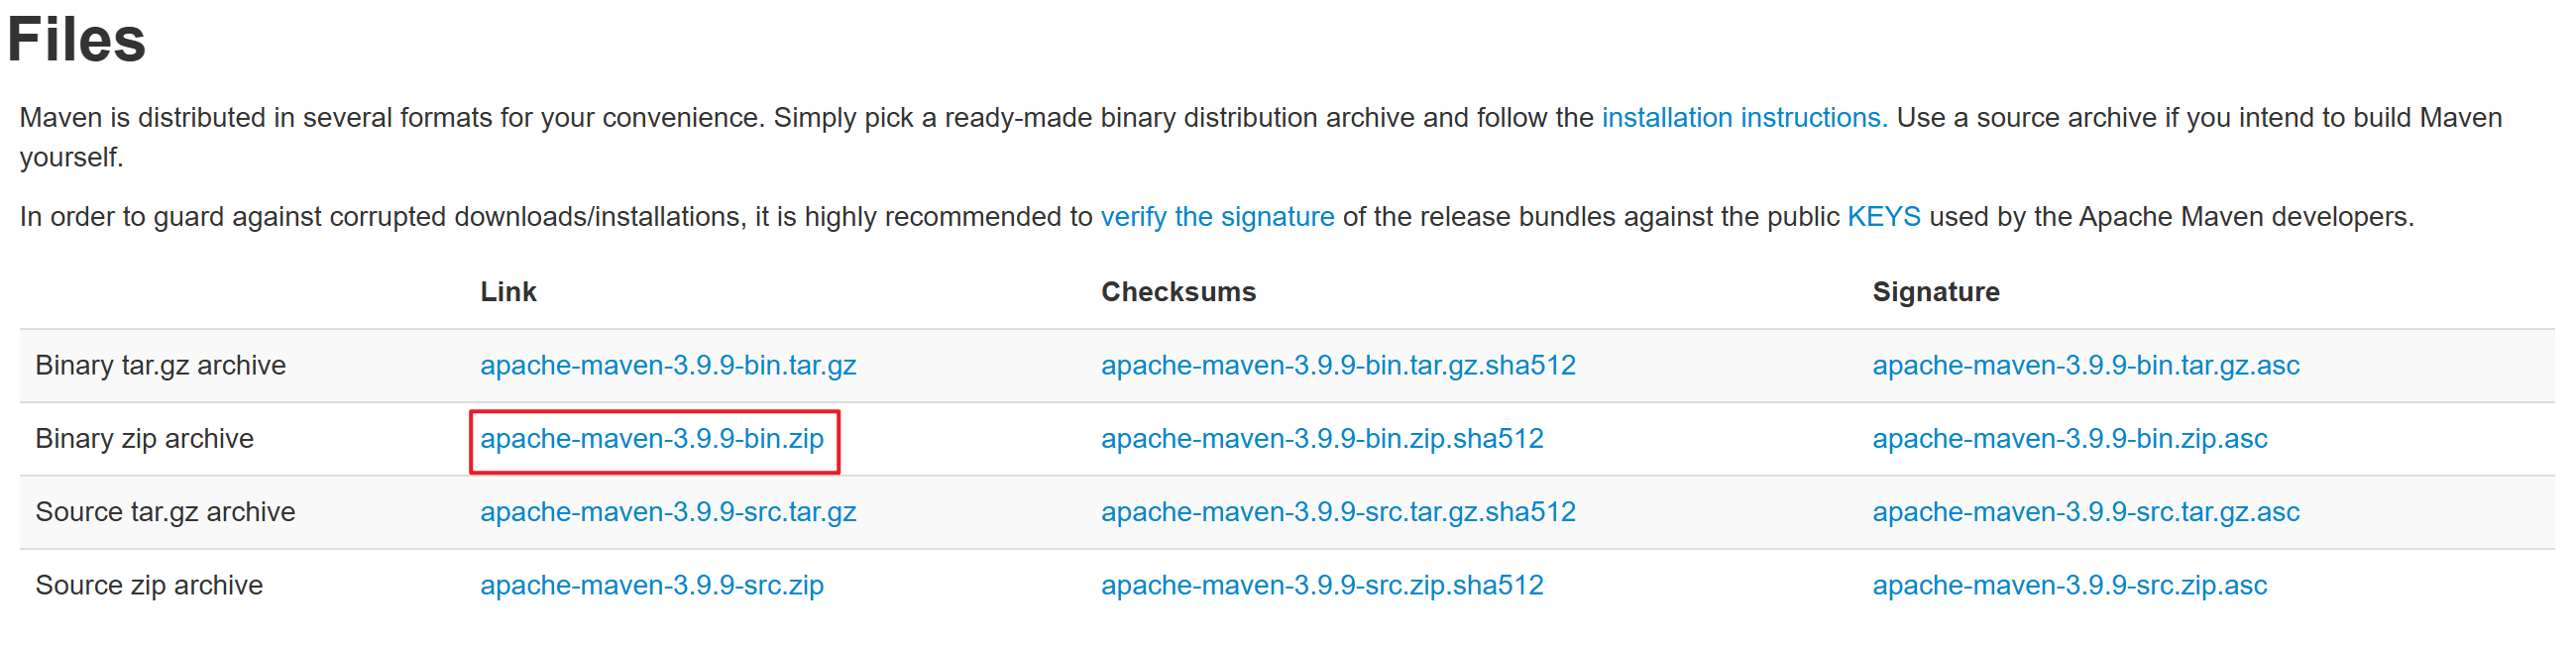
下载maven,可以到maven官网下载maven,也可以通过此网盘链接下载apache-maven-3.9.9。
-
将maven解压到任意目录,并在同一级目录下创建aven-respository目录作为本地仓库。

-
打开apache-maven-3.9.9-bin\apache-maven-3.9.9\conf下的settings.xml文件修改配置(可以用任意文本编辑器打开,如VsCode)。
-
localRepository即本地仓库路径配置,将路径修改为我们刚刚创建的文件夹,注:如果不配置的话,默认路径的位置在**${user.home}/.m2/repository**。
<localRepository>你的安装路径\apache-maven-3.9.9-bin\maven-respository</localRepository>
-
mirror即镜像配置,我们可以在这里添加aliyun镜像。
<mirror>
     <id>alimaven</id>
     <name>aliyun maven</name>
     <url>http://maven.aliyun.com/nexus/content/groups/public/</url>
     <mirrorOf>central</mirrorOf>
</mirror>
-
2.在IDEA中配置maven
-
打开IDEA,进入File->New Projects Setup->Setting For New Projects…
-
在接下来的界面中找到Maven配置在其中修改你自己刚刚准备好的Maven,具体操作和位置如下图所示

3.创建Web项目
-
依次进入File->New->Project…

-
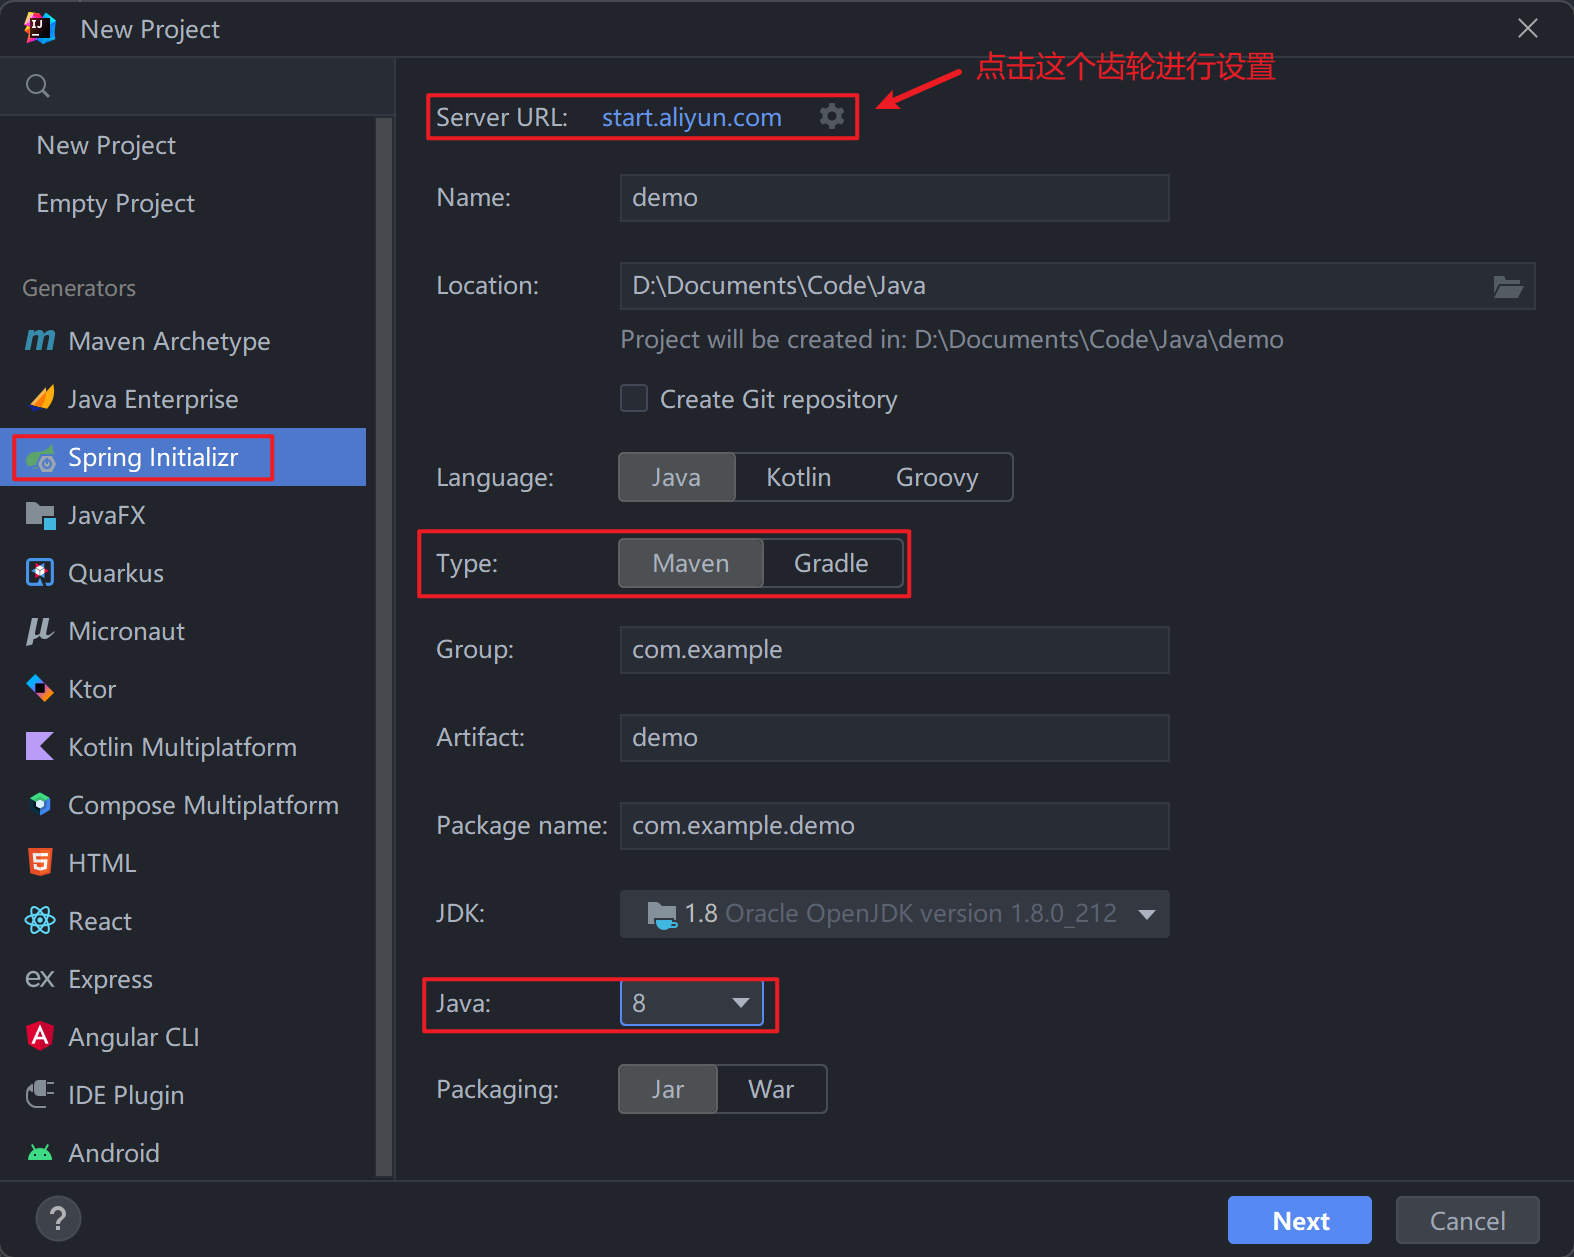
在这里选择创建Spring Initializr项目,其中要注意的点有,如果你用的是jdk1.8,下面的Java版本里却没有8,你需要Server URL修改为[https://start.aliyun.com]
-
在下面的Dependencies中搜索web,在出现的结果中添加Spring Web

4. 编写后端项目
- 在编写后端项目时,我们要着重注意以下几个文件:pom.xml即Maven项目中的核心配置文件,appliciation.properties即Spring Boot 的标准配置文件,用于集中管理应用程序的配置属性。
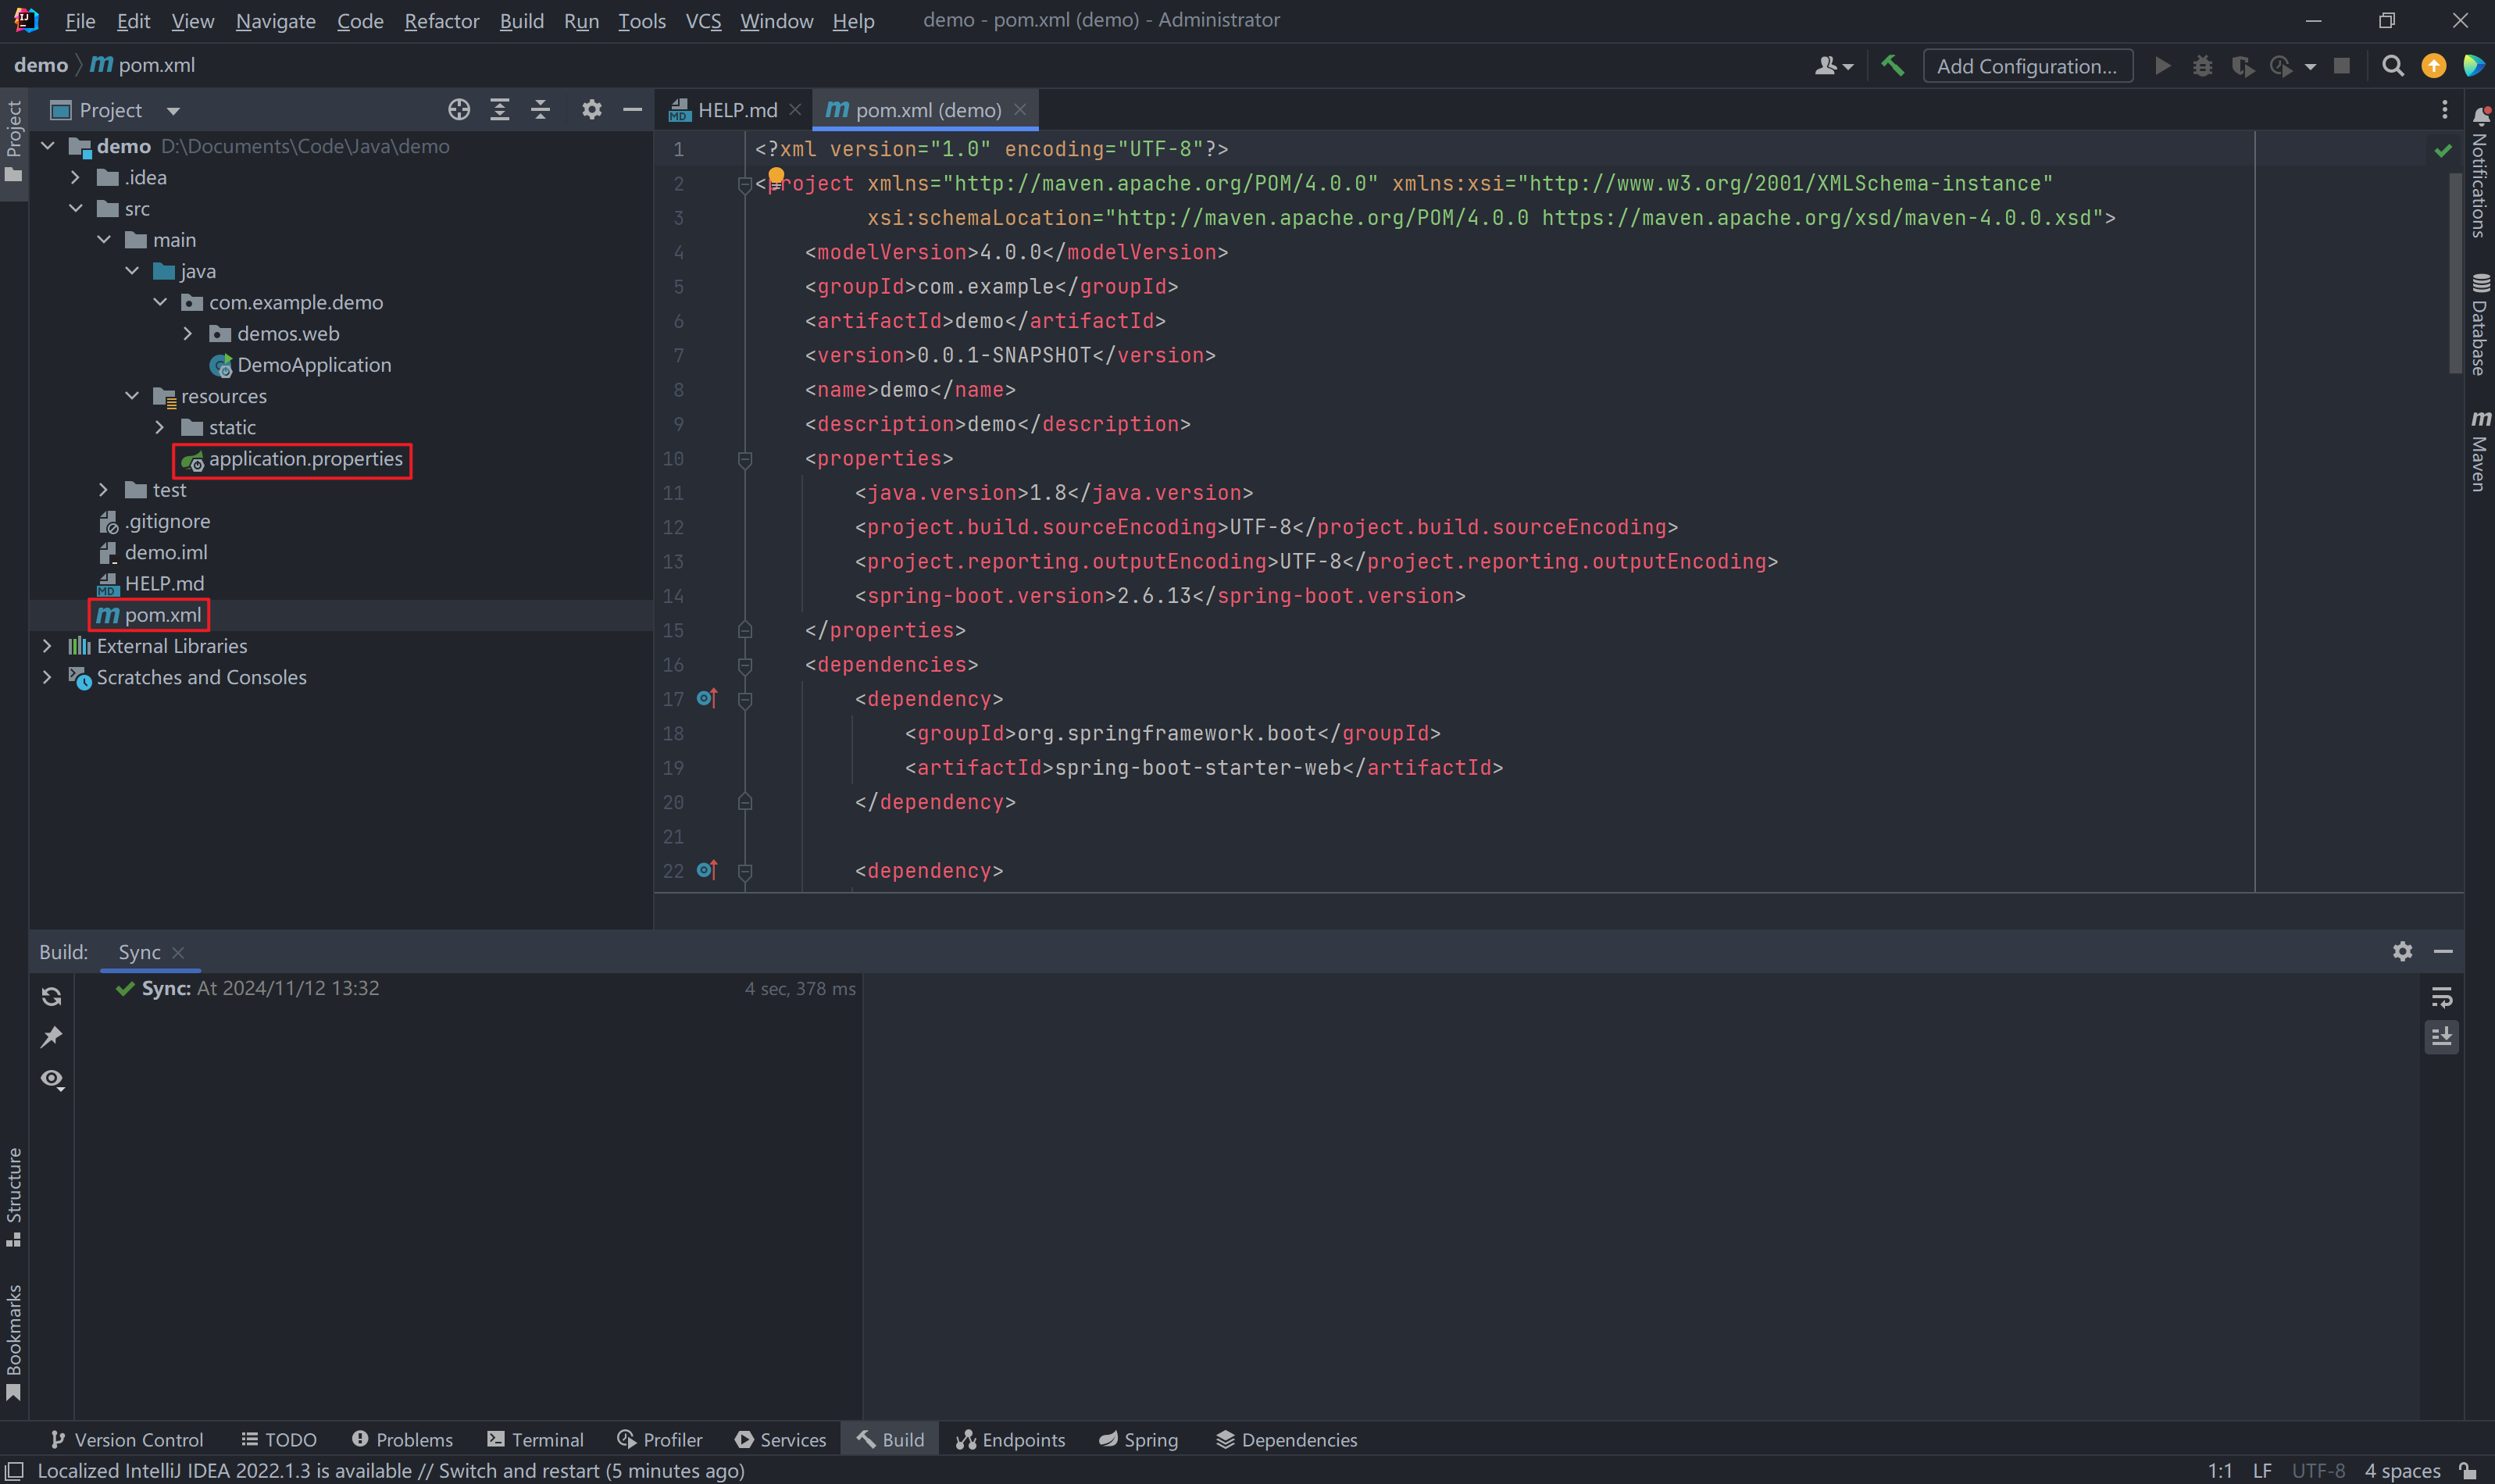
- pom.xml:我们可以在这个文件中管理和添加依赖和插件
- appliciation.properties:我们可以在这个文件中对项目进行配置应用程序,它允许我们以键值对的形式集中管理应用程序的配置属性,如数据库连接、服务器端口、日志级别等
5. 具体应用
-
以一个简单的CRUD项目来举例展示。
-
在pom.xml中添加Mybits和Mysql的依赖,点击右上角出现的maven图标加载依赖
<dependency>
    <groupId>mysql</groupId>
    <artifactId>mysql-connector-java</artifactId>
    <scope>runtime</scope>
</dependency>

<dependency>
    <groupId>org.mybatis.spring.boot</groupId>
    <artifactId>mybatis-spring-boot-starter</artifactId>
    <version>2.1.4</version>
</dependency>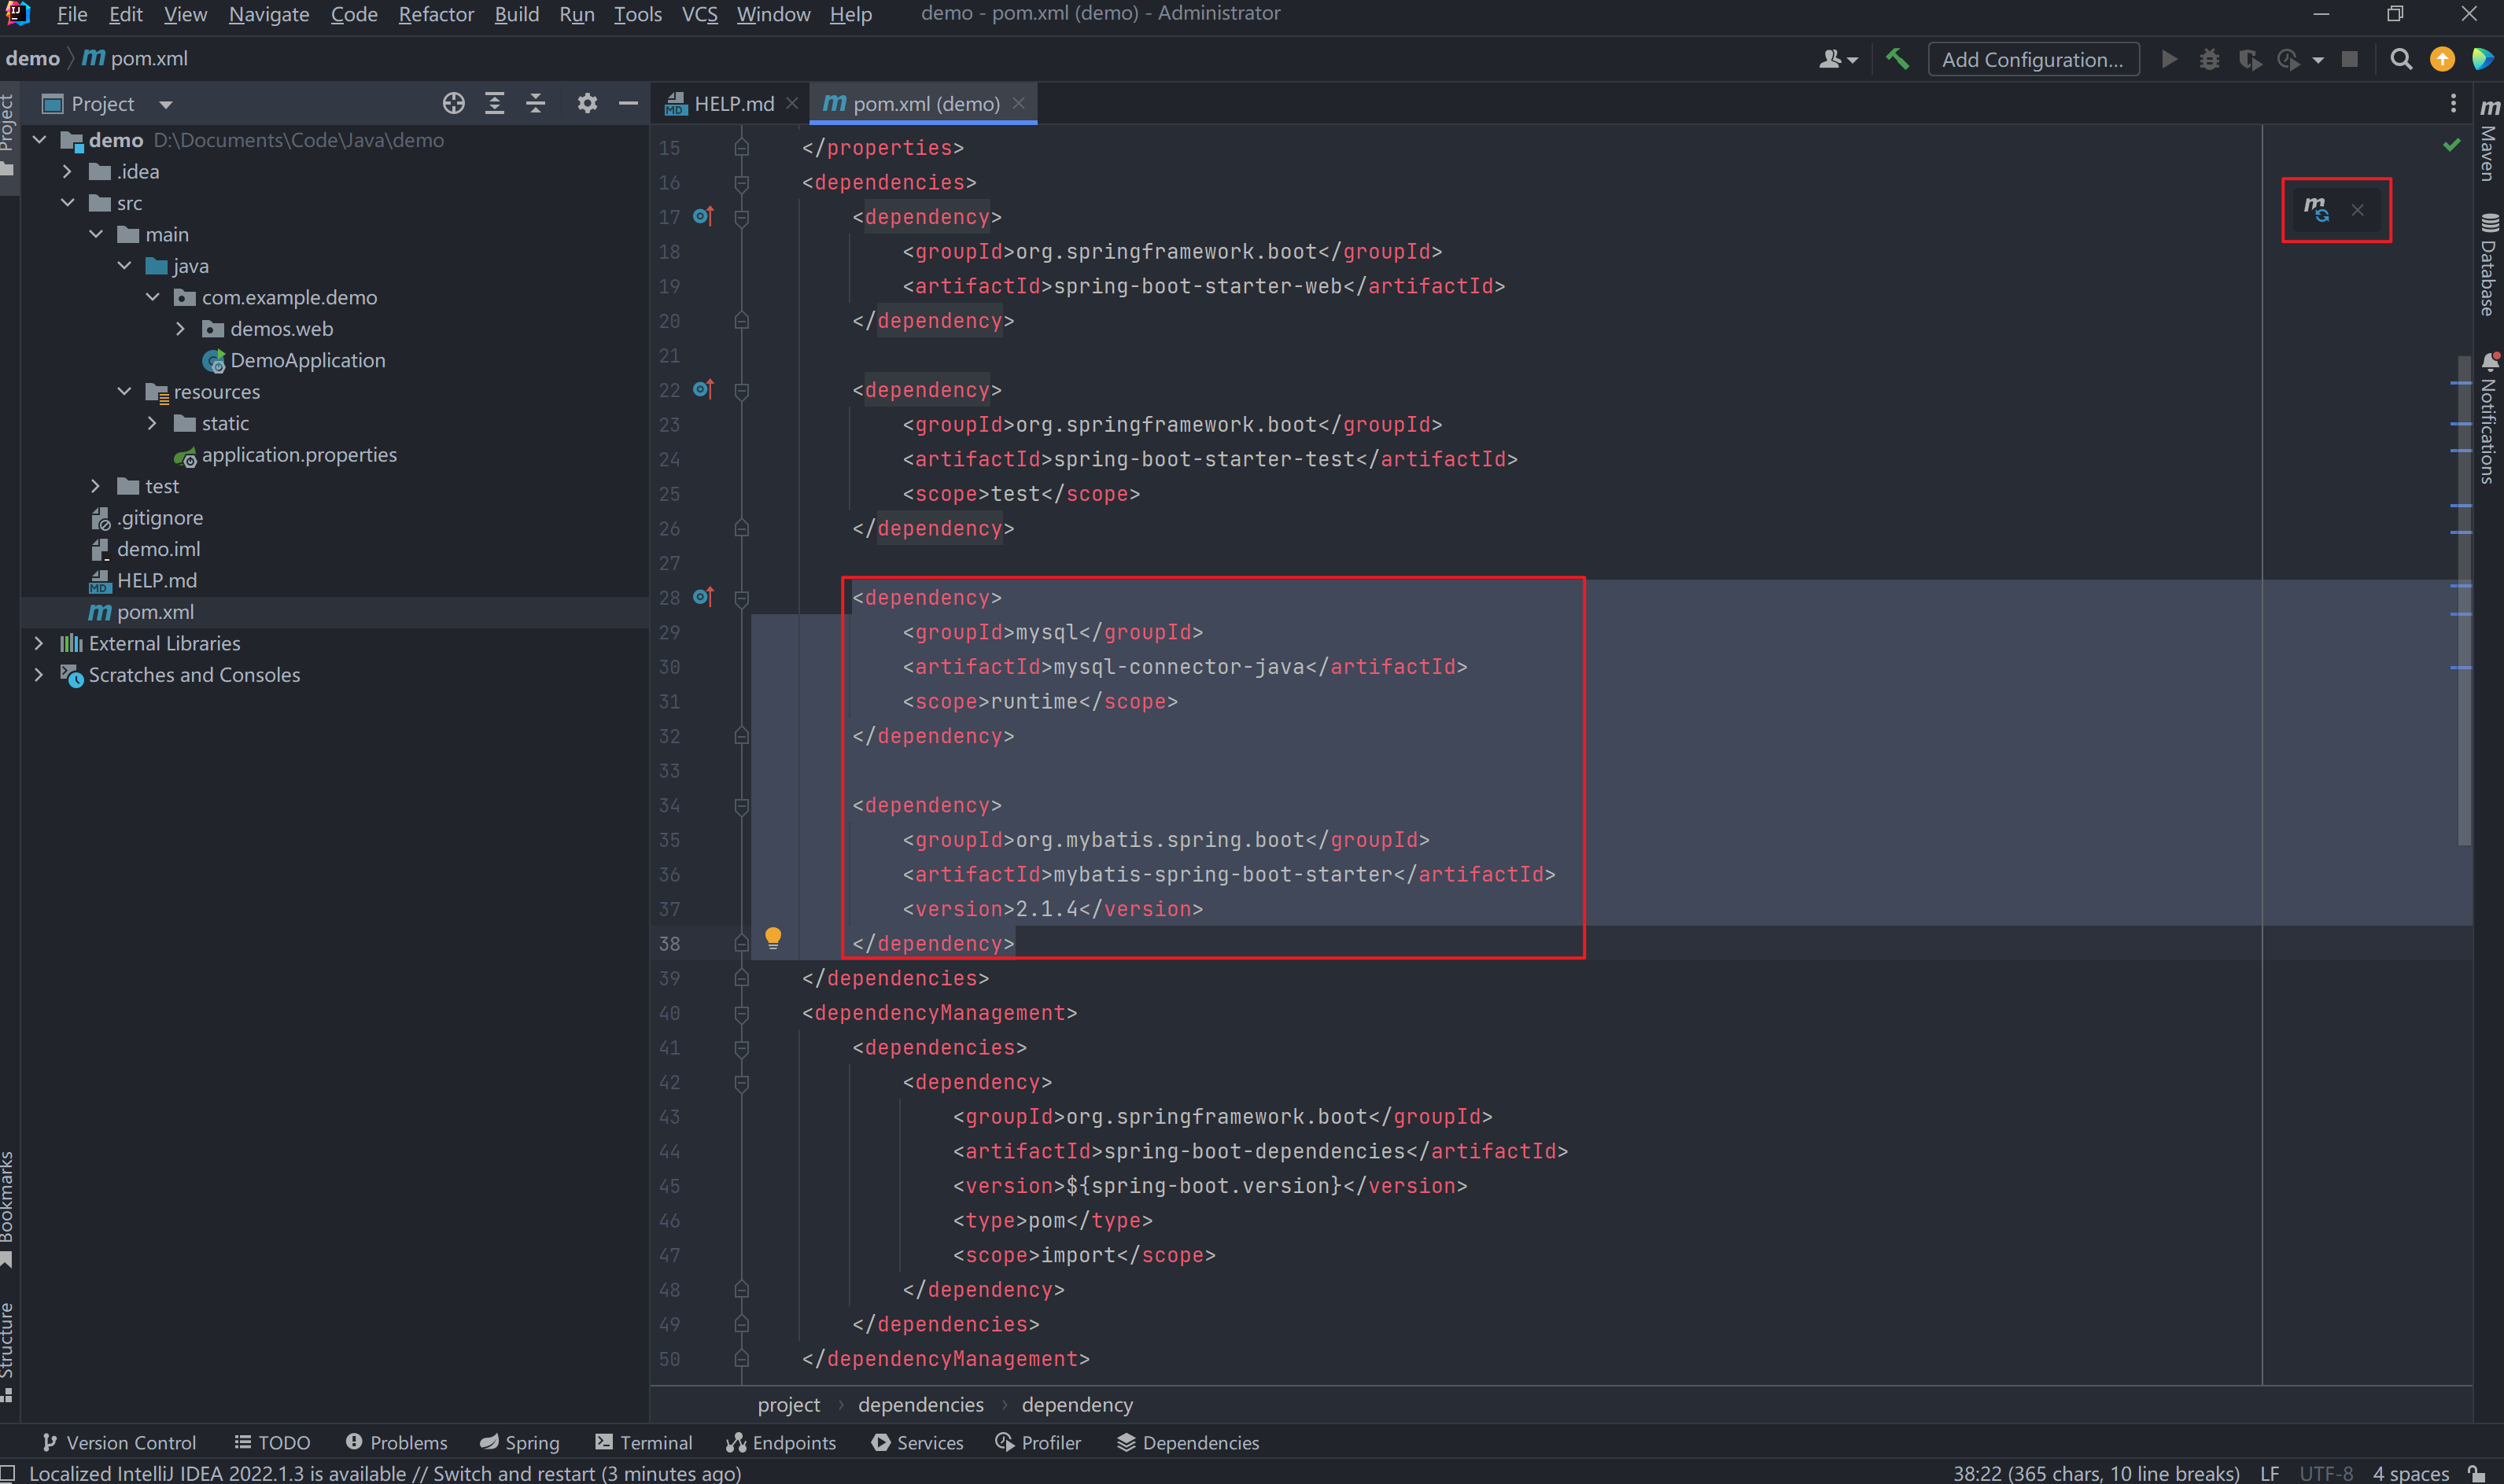
-
在appliciation.properties中对SpringBoot进行配置
server.port=8080 spring.datasource.url=jdbc:mysql://localhost:3306/数据库名?useSSL=false spring.datasource.username=账户名 spring.datasource.password=密码 spring.datasource.driver-class-name=com.mysql.cj.jdbc.Driver mybatis.mapper-locations=classpath:mapper/*.xml -
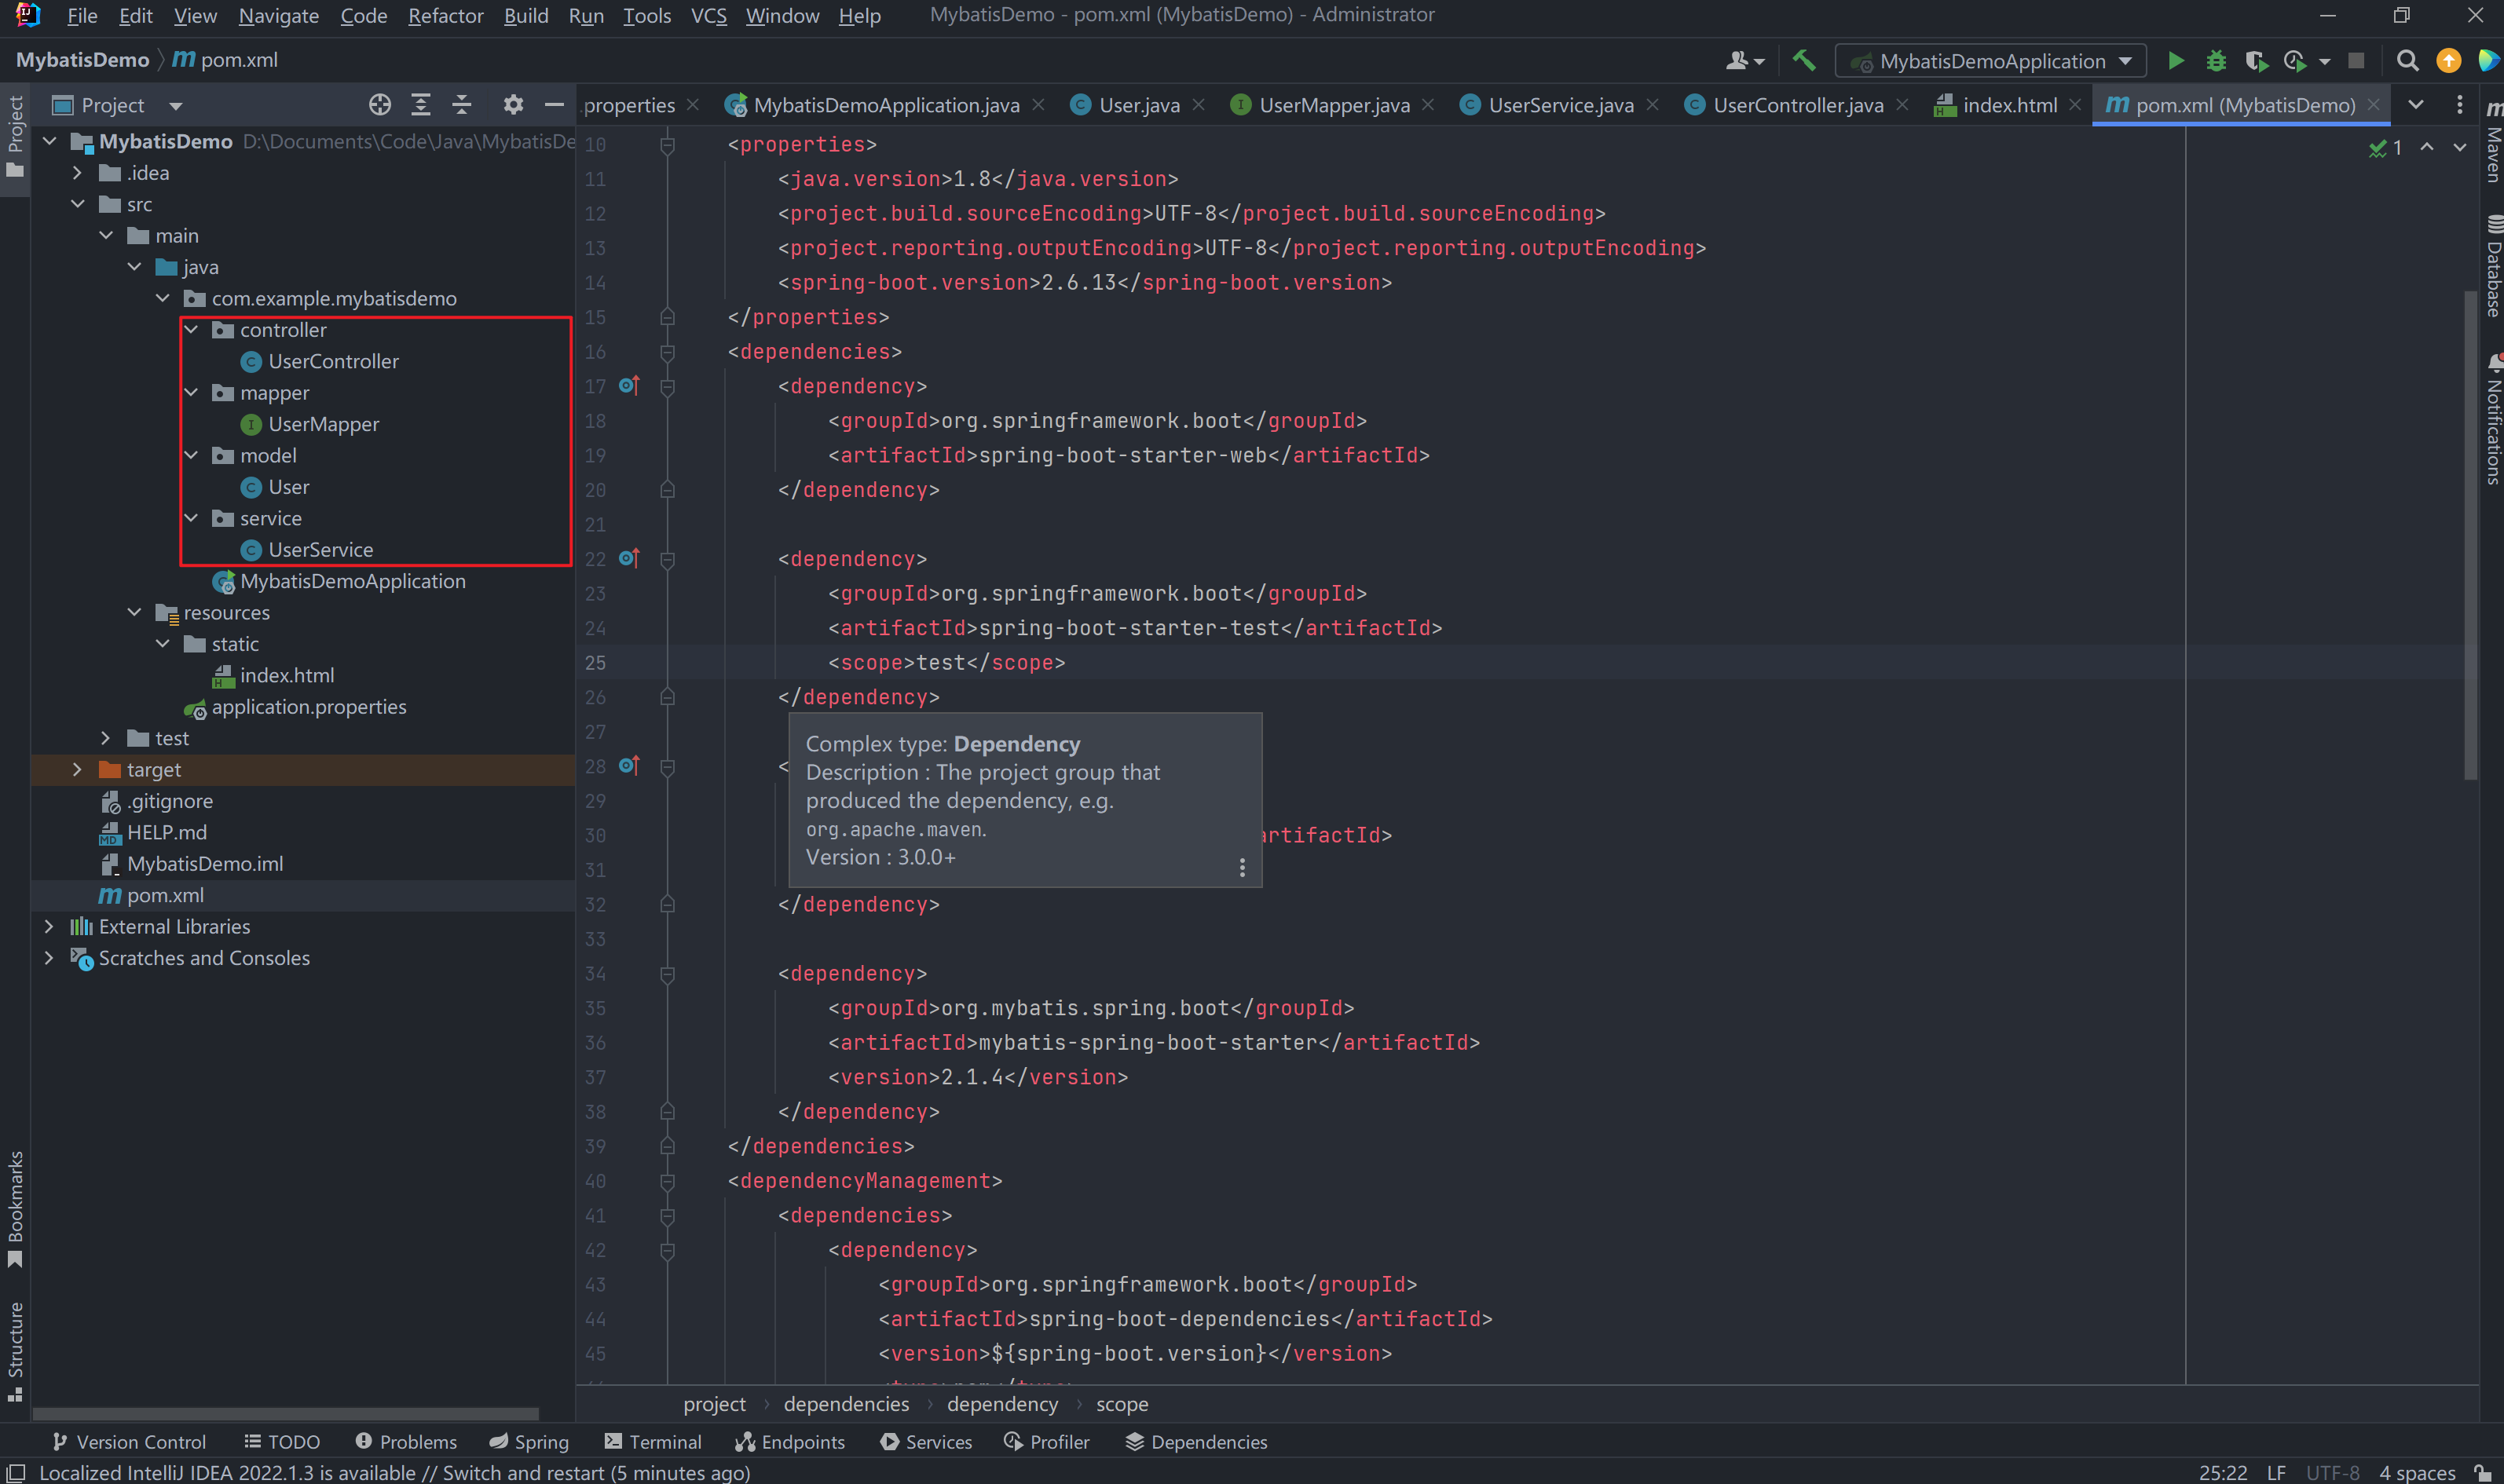
在项目下分别创建如下目录
- controller:controller通过接收前端传过来的参数进行业务操作,再返回一个指定的路径或者数据表。
- mapper:对数据库进行数据持久化操作,他的方法语句是直接针对数据库操作的。
- service:存放业务逻辑处理,也是一些关于数据库处理的操作,但不是直接和数据库打交道,他有接口还有接口的实现方法,在接口的实现方法中需要导入mapper层。
- model:存放我们的实体类,与数据库中的属性值基本保持一致。
-
在创建好文件夹和完成具体类后,我们在刚开始创建完项目后自动生成的Appliciation启动类中添加MapperScan注释。
@MapperScan("com.example.mybatisdemo.mapper")
-
-
具体代码展示:
-
MybatisDemoApplication.java:
package com.example.mybatisdemo; import org.mybatis.spring.annotation.MapperScan; import org.springframework.boot.SpringApplication; import org.springframework.boot.autoconfigure.SpringBootApplication; @SpringBootApplication @MapperScan("com.example.mybatisdemo.mapper") public class MybatisDemoApplication { public static void main(String[] args) { SpringApplication.run(MybatisDemoApplication.class, args); } } -
UserController.java:
package com.example.mybatisdemo.controller; import com.example.mybatisdemo.model.User; import com.example.mybatisdemo.service.UserService; import org.springframework.beans.factory.annotation.Autowired; import org.springframework.web.bind.annotation.*; import java.util.List; @RestController @RequestMapping("/api/users") public class UserController { @Autowired private UserService userService; @GetMapping public List<User> getAllUsers() { return userService.getAllUsers(); } @GetMapping("/{id}") public User getUserById(@PathVariable int id) { return userService.getUserById(id); } @PostMapping public int addUser(@RequestBody User user) { return userService.addUser(user); } @PutMapping("/{id}") public int updateUser(@PathVariable int id, @RequestBody User user) { user.setId(id); return userService.updateUser(user); } @DeleteMapping("/{id}") public int deleteUser(@PathVariable int id) { return userService.deleteUser(id); } @GetMapping("/search") public List<User> searchUsers(@RequestParam(required = false) String name, @RequestParam(required = false) String email) { System.out.println("name: " + name); // 输出参数检查 System.out.println("email: " + email); // 输出参数检查 return userService.searchUsers(name, email); } } -
UserMapper.java:
package com.example.mybatisdemo.mapper; import com.example.mybatisdemo.model.User; import org.apache.ibatis.annotations.*; import java.util.List; @Mapper public interface UserMapper { @Select("SELECT * FROM User") List<User> findAll(); @Select("SELECT * FROM User WHERE id = #{id}") User findById(int id); @Insert("INSERT INTO User(name, email) VALUES(#{name}, #{email})") int insert(User user); @Update("UPDATE User SET name=#{name}, email=#{email} WHERE id=#{id}") int update(User user); @Delete("DELETE FROM User WHERE id=#{id}") int delete(int id); // 查询用户,如果name和email都为空,则返回空列表 @Select("<script>" + "SELECT * FROM User " + "WHERE 1=1 " + "<if test='name != null and name != \"\"'>AND name LIKE CONCAT('%', #{name}, '%')</if>" + "<if test='email != null and email != \"\"'>AND email LIKE CONCAT('%', #{email}, '%')</if>" + "<if test='name == null and email == null'>AND 1=0</if>" + "</script>") List<User> findByNameAndEmail(@Param("name") String name, @Param("email") String email); } -
User.java:
package com.example.mybatisdemo.model; public class User { private Integer id; private String name; private String email; // Getter 和 Setter 方法 public Integer getId() { return id; } public void setId(Integer id) { this.id = id; } public String getName() { return name; } public void setName(String name) { this.name = name; } public String getEmail() { return email; } public void setEmail(String email) { this.email = email; } } -
UserService.java:
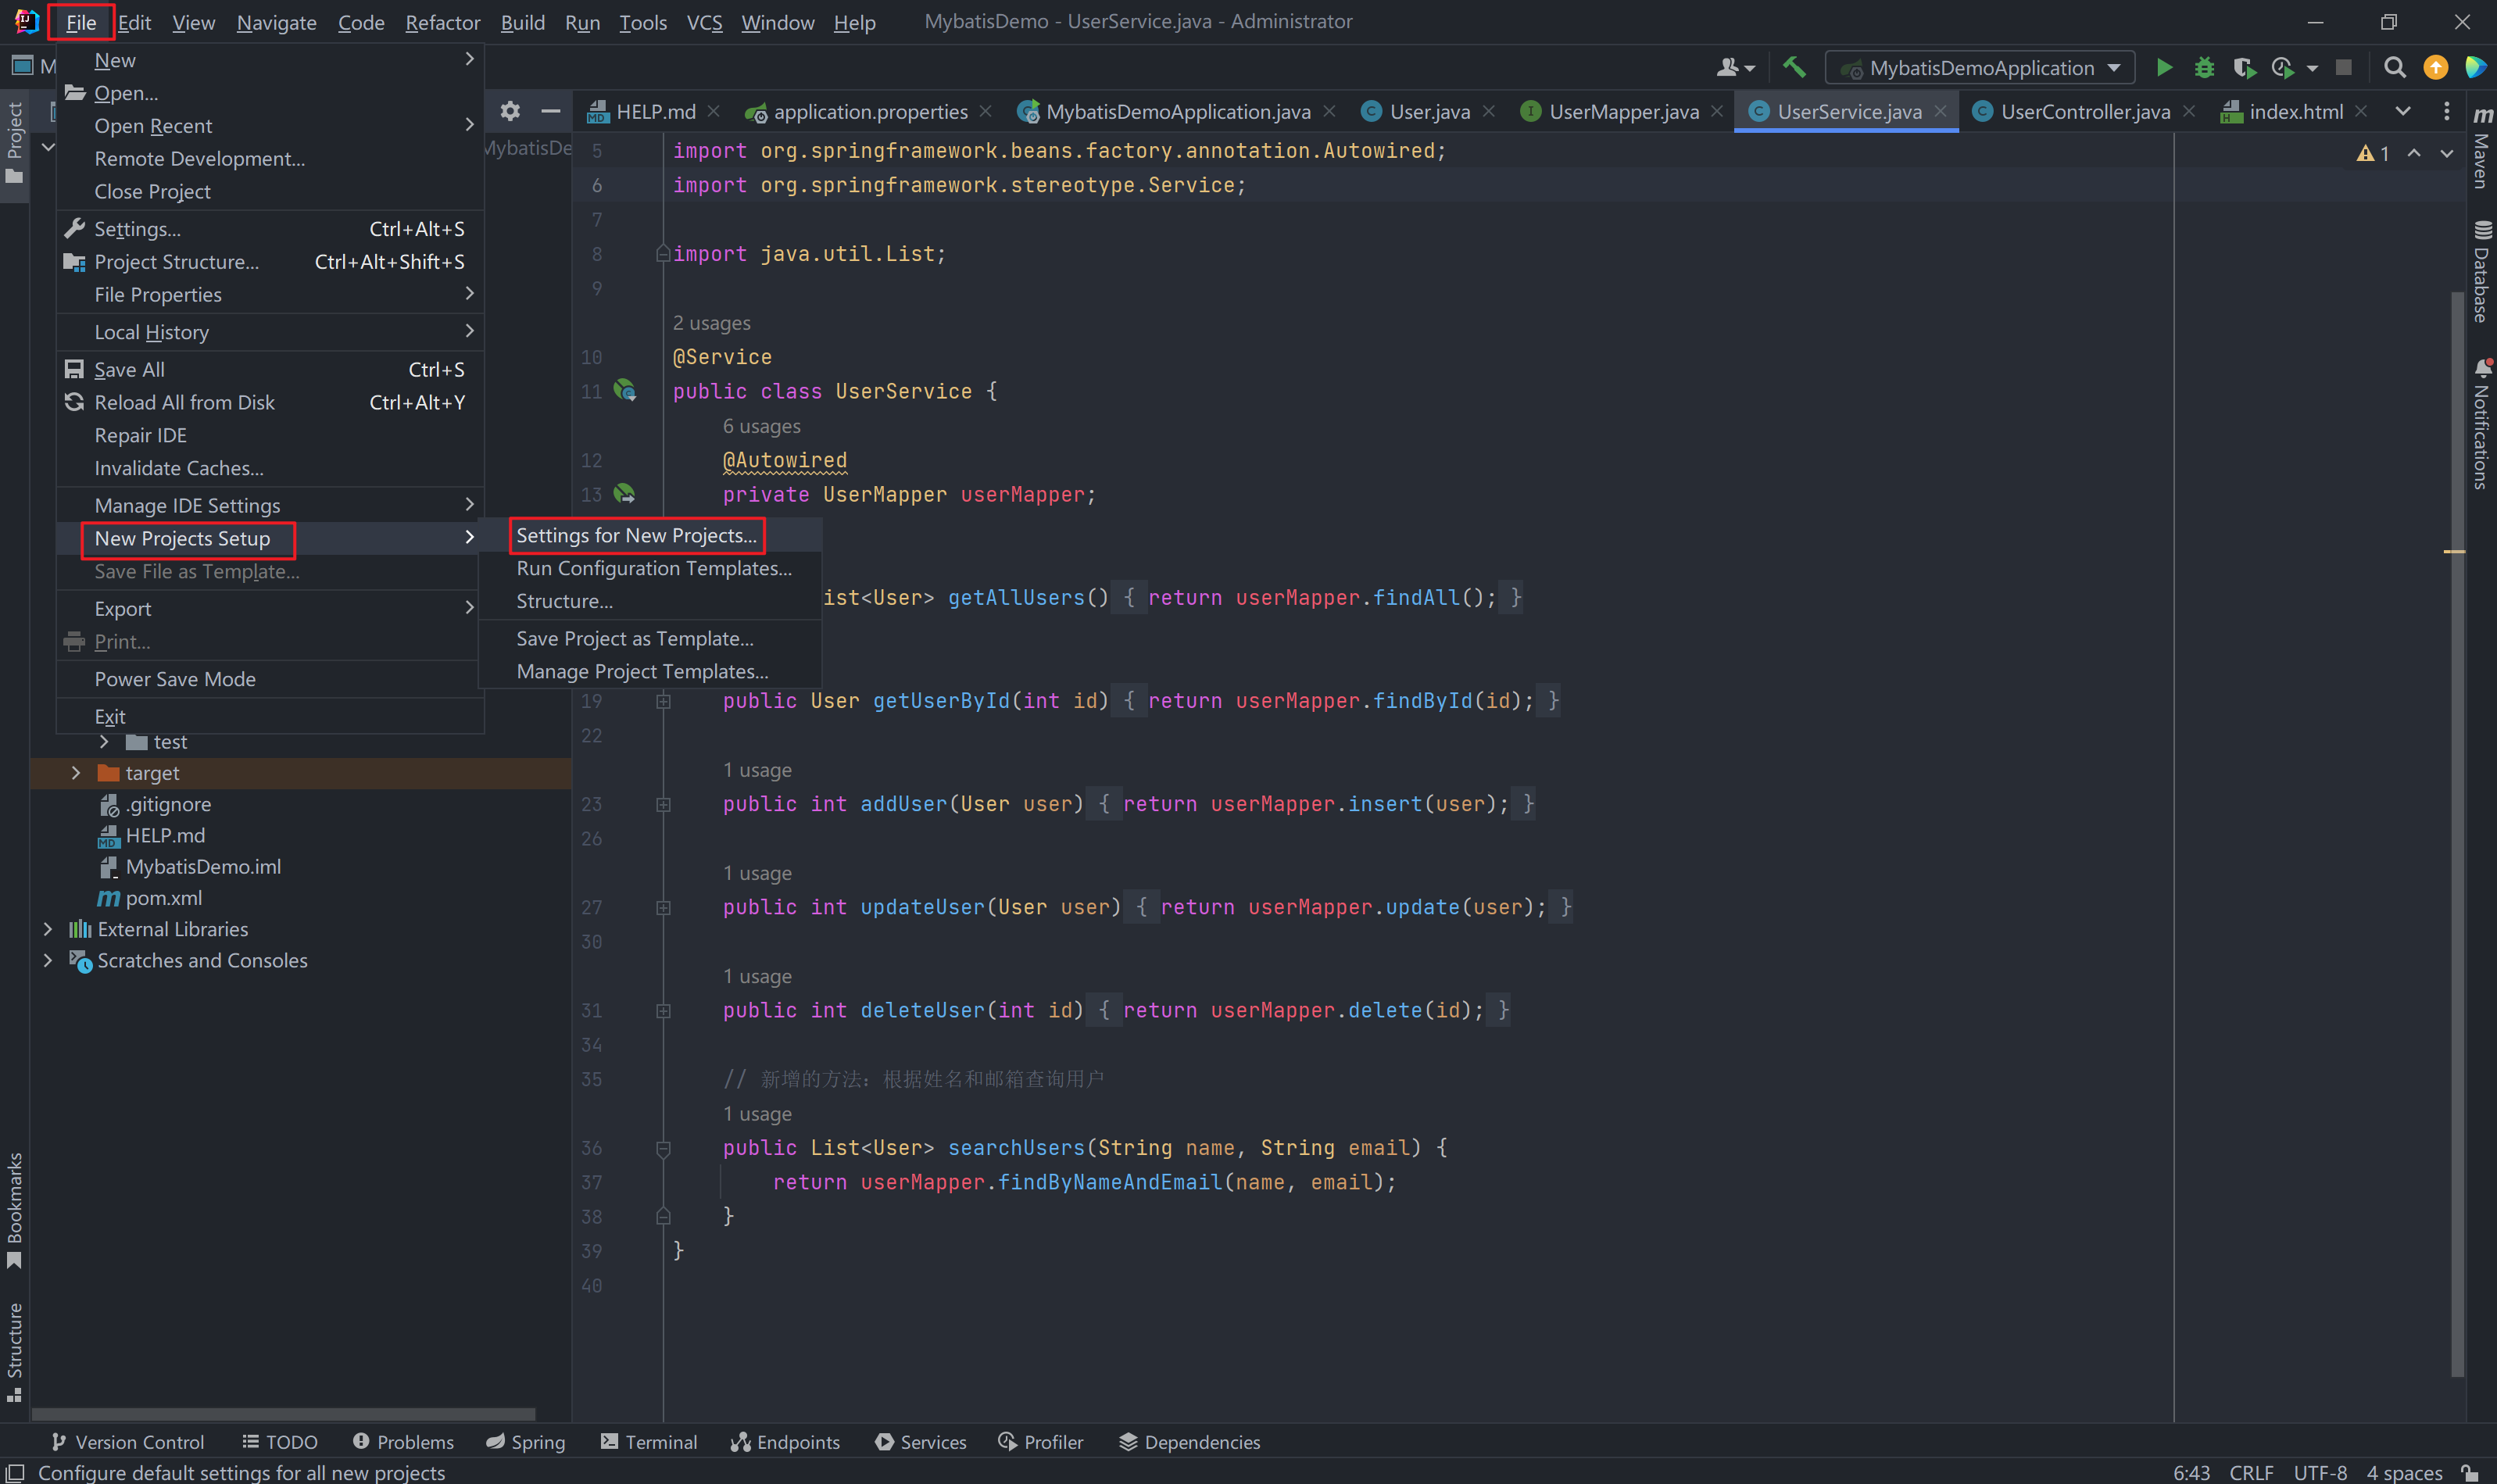
package com.example.mybatisdemo.service; import com.example.mybatisdemo.mapper.UserMapper; import com.example.mybatisdemo.model.User; import org.springframework.beans.factory.annotation.Autowired; import org.springframework.stereotype.Service; import java.util.List; @Service public class UserService { @Autowired private UserMapper userMapper; public List<User> getAllUsers() { return userMapper.findAll(); } public User getUserById(int id) { return userMapper.findById(id); } public int addUser(User user) { return userMapper.insert(user); } public int updateUser(User user) { return userMapper.update(user); } public int deleteUser(int id) { return userMapper.delete(id); } // 新增的方法:根据姓名和邮箱查询用户 public List<User> searchUsers(String name, String email) { return userMapper.findByNameAndEmail(name, email); } } -
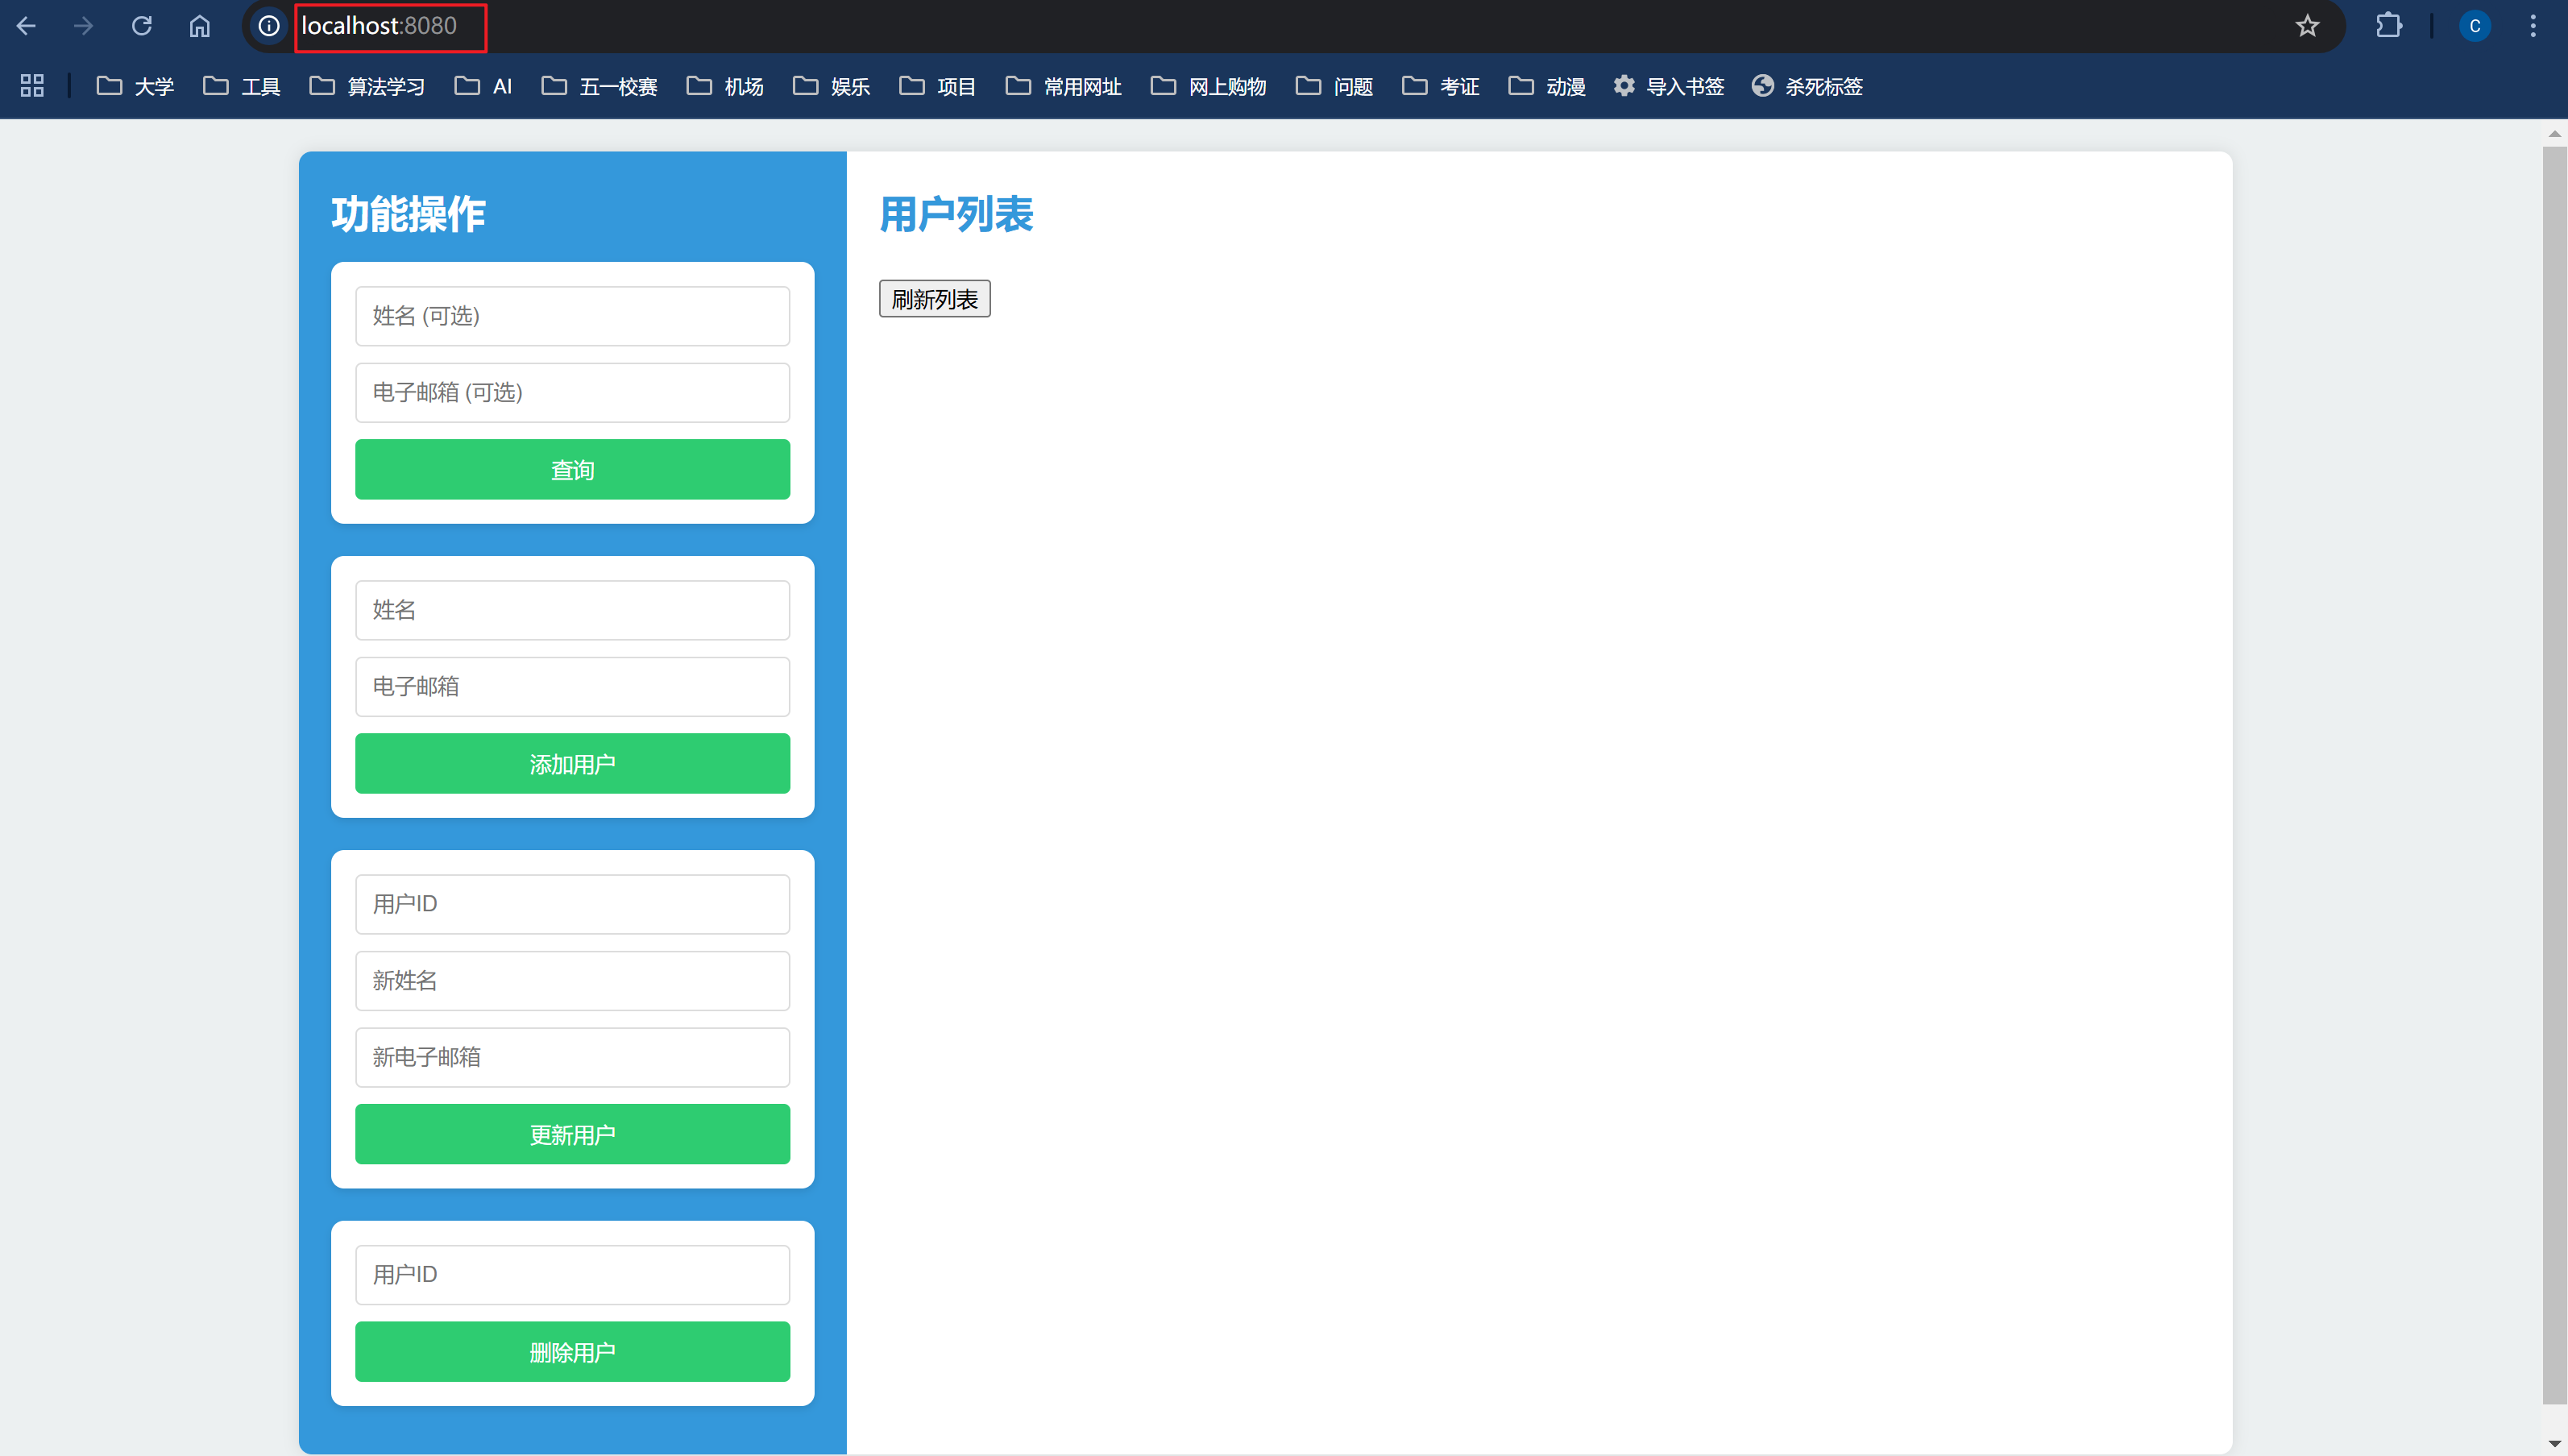
对于前端,最好是利用vue等框架做个独立的前端项目,但是由于此处是用于展示后端项目,只写了一个简单的Html用于测试index.html:
<!DOCTYPE html>
<html lang="en">
<head>
    <meta charset="UTF-8">
    <meta name="viewport" content="width=device-width, initial-scale=1.0">
    <title>信息查询系统</title>
    <style>
        :root {
            --primary-color: #3498db;
            --secondary-color: #2ecc71;
            --background-color: #ecf0f1;
            --text-color: #34495e;
            --error-color: #e74c3c;
        }

        body {
            font-family: 'Arial', sans-serif;
            line-height: 1.6;
            color: var(--text-color);
            background-color: var(--background-color);
            margin: 0;
            padding: 20px;
        }

        .container {
            display: flex;
            max-width: 1200px;
            margin: 0 auto;
            background-color: white;
            box-shadow: 0 0 10px rgba(0,0,0,0.1);
            border-radius: 8px;
            overflow: hidden;
        }

        /* 左侧功能区 */
        .sidebar {
            width: 300px;
            background-color: var(--primary-color);
            color: white;
            padding: 20px;
            display: flex;
            flex-direction: column;
            gap: 10px;
        }

        .sidebar h2 {
            color: white;
            margin: 0;
        }

        .section {
            background-color: white;
            padding: 15px;
            border-radius: 8px;
            box-shadow: 0 2px 5px rgba(0,0,0,0.1);
            margin-bottom: 10px;
        }

        .sidebar input[type="text"],
        .sidebar input[type="email"],
        .sidebar input[type="number"] {
            width: 100%;
            padding: 10px;
            margin-bottom: 10px;
            border: 1px solid #ddd;
            border-radius: 4px;
            box-sizing: border-box;
        }

        .sidebar button {
            background-color: var(--secondary-color);
            color: white;
            border: none;
            padding: 10px;
            border-radius: 4px;
            cursor: pointer;
            transition: background-color 0.3s;
            width: 100%;
            max-width: 300px;
        }

        .sidebar button:hover {
            background-color: #27ae60;
        }

        /* 右侧显示区 */
        .main-content {
            flex: 1;
            padding: 20px;
        }

        .main-content h2 {
            color: var(--primary-color);
            margin-top: 0;
        }

        .feedback {
            margin-top: 10px;
            padding: 10px;
            border-radius: 4px;
        }

        .success {
            background-color: var(--secondary-color);
            color: white;
        }

        .error {
            background-color: var(--error-color);
            color: white;
        }

        #user-list div {
            background-color: #f9f9f9;
            padding: 10px;
            margin-bottom: 5px;
            border-radius: 4px;
        }
    </style>
</head>
<body>
<div class="container">
    <!-- 左侧功能区 -->
    <div class="sidebar">
        <h2>功能操作</h2>

        <!-- 精细查询 -->
        <div class="section" id="search-section">
            <input type="text" id="search-name" placeholder="姓名 (可选)">
            <input type="email" id="search-email" placeholder="电子邮箱 (可选)">
            <button id="search-btn">查询</button>
        </div>

        <!-- 添加用户 -->
        <div class="section" id="add-section">
            <input type="text" id="add-name" placeholder="姓名">
            <input type="email" id="add-email" placeholder="电子邮箱">
            <button id="add-btn">添加用户</button>
        </div>

        <!-- 更新用户 -->
        <div class="section" id="update-section">
            <input type="number" id="update-id" placeholder="用户ID">
            <input type="text" id="update-name" placeholder="新姓名">
            <input type="email" id="update-email" placeholder="新电子邮箱">
            <button id="update-btn">更新用户</button>
        </div>

        <!-- 删除用户 -->
        <div class="section" id="delete-section">
            <input type="number" id="delete-id" placeholder="用户ID">
            <button id="delete-btn">删除用户</button>
        </div>
    </div>

    <!-- 右侧显示区 -->
    <div class="main-content">
        <h2>用户列表</h2>
        <button onclick="fetchUsers()">刷新列表</button>
        <div id="user-list"></div>
    </div>
</div>

<script>
    document.getElementById('search-btn').addEventListener('click', searchUsers);
    document.getElementById('add-btn').addEventListener('click', addUser);
    document.getElementById('update-btn').addEventListener('click', updateUser);
    document.getElementById('delete-btn').addEventListener('click', deleteUser);

    function fetchUsers() {
        fetch('/api/users')
            .then(response => response.json())
            .then(users => {
                let userList = document.getElementById('user-list');
                userList.innerHTML = '';
                users.forEach(user => {
                    userList.innerHTML += `<div>ID: ${user.id}, 姓名: ${user.name}, 邮箱: ${user.email}</div>`;
                });
            })
            .catch(error => alert('获取用户列表失败'));
    }

    function addUser() {
        let name = document.getElementById('add-name').value;
        let email = document.getElementById('add-email').value;
        fetch('/api/users', {
            method: 'POST',
            headers: { 'Content-Type': 'application/json' },
            body: JSON.stringify({ name, email })
        })
            .then(() => {
                fetchUsers();
                alert('用户添加成功');
            })
            .catch(error => alert('用户添加失败'));
    }

    function updateUser() {
        let id = document.getElementById('update-id').value;
        let name = document.getElementById('update-name').value;
        let email = document.getElementById('update-email').value;
        fetch(`/api/users/${id}`, {
            method: 'PUT',
            headers: { 'Content-Type': 'application/json' },
            body: JSON.stringify({ name, email })
        })
            .then(() => {
                fetchUsers();
                alert('用户更新成功');
            })
            .catch(error => alert('用户更新失败'));
    }

    function deleteUser() {
        let id = document.getElementById('delete-id').value;
        fetch(`/api/users/${id}`, { method: 'DELETE' })
            .then(() => {
                fetchUsers();
                alert('用户删除成功');
            })
            .catch(error => alert('删除用户失败'));
    }

    function searchUsers() {
        let name = document.getElementById('search-name').value;
        let email = document.getElementById('search-email').value;
        let queryParams = [];
        if (name) queryParams.push(`name=${name}`);
        if (email) queryParams.push(`email=${email}`);
        let queryString = queryParams.length ? '?' + queryParams.join('&') : '';

        fetch(`/api/users/search${queryString}`)  // 确保请求的 URL 是正确的
            .then(response => response.json())
            .then(users => {
                let userList = document.getElementById('user-list');
                userList.innerHTML = '';
                users.forEach(user => {
                    userList.innerHTML += `<div>ID: ${user.id}, 姓名: ${user.name}, 邮箱: ${user.email}</div>`;
                });
                alert('查询成功');
            })
            .catch(error => alert('查询失败'));
    }


    function showFeedback(elementId, message, type) {
        let feedbackElement = document.getElementById(elementId);
        feedbackElement.textContent = message;
        feedbackElement.className = `feedback ${type}`;

        setTimeout(() => {
            feedbackElement.textContent = '';
            feedbackElement.className = 'feedback';
        }, 3000);
    }
</script>
</body>
</html>
-
-
在IDEA启动项目后在浏览器输入localhost:8080后进入前端的测试界面

技术共进,成长同行——讯飞AI开发者社区
更多推荐

 18
18 0
0- 0


 已为社区贡献1条内容

所有评论(0)