
【机器学习】基于HOG+SVM的行人检测
【机器学习】基于HOG+SVM的行人检测
1.实现目标:使用opencv,skimage,Sklearn对包含行人的数据集进行训练,识别图像中行人的位置,并进行可视化。
2.行人检测
2.1HOG+SVM
方向梯度直方图(HOG)特征是一种在计算机视觉和图像处理中来进行物体检测的特征描述符,通过计算和统计图像局部区域的方向梯度直方图来构成特征。
SVM是一种常见的判别方法,再改实验中可以作为区分行人和非行人的分类器。
2.2检测流程
2.2.1准备训练样本集合,包括正样本集和负样本集。并分别放入两个文件夹中,并将所有的图片缩放至同样的大小,这里将所有图片的大小缩放为96*160。
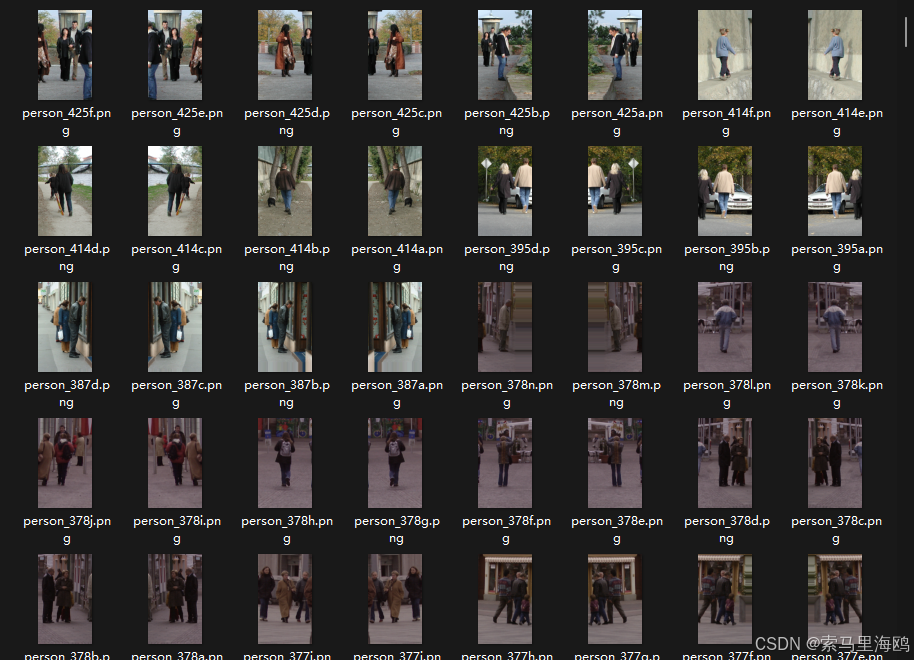
图1 正样本集
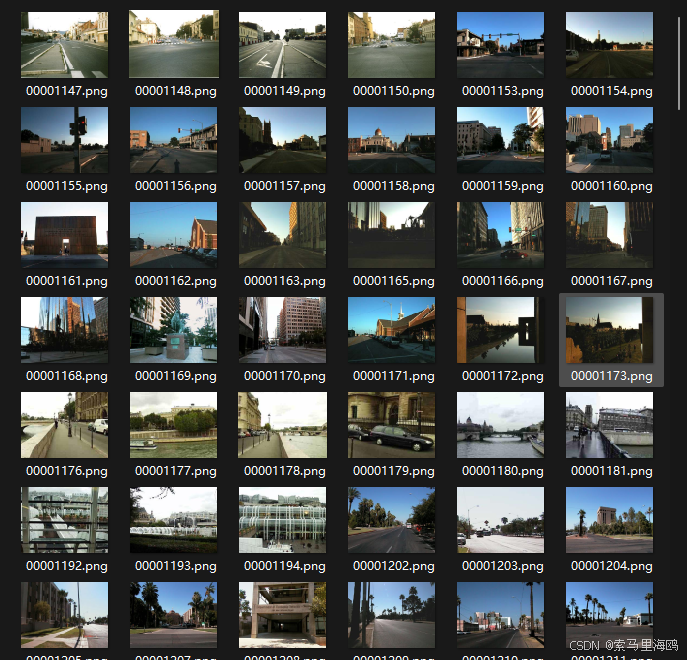
图2 负样本集
2.2.2提取正负样本图像的HOG特征,并将特征分别进行存储。本项目采用skimage中提供的HOG算法获取图像特征,生成对应的HOG特征向量,作为SVM模型的输入特征。
2.2.3对正负样本打标签,将正样本标记为1,负样本标记为0。
2.2.4对SVM模型进行训练。
2.2.5对行人检测处理(滑动窗口)。
3.滑动窗口
在一张真实的图像中,行人可能出现在图像的任意位置,且检测图像的尺寸要远远大于训练样本的尺寸。为了保证能够检测到图像中的任意位置中的行人,需要使用滑动窗口的方式来完成行人检测。且为了使检测的精度更高需要对较大的图像进行高斯金字塔(pyramid_gaussian(im, downscale))处理。
滑动窗口字面意思就是可以滑动的窗口,规定一个长*高为(96*160)的矩形(该矩形的大小为样本照片的大小),若你要检测的图片的尺寸大于(96*160),则将矩形在被检测图片上按一定的步长进行平移,直到被检测图片的所有像素点均被矩形框住过为止。
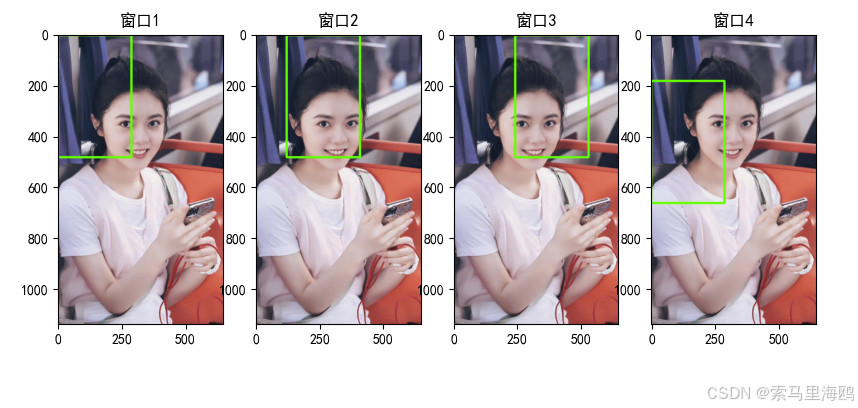
图3 滑动窗口
高斯金字塔是将图片按一定的比例缩小,并存储为一个图片矩阵,在本次实验中,该图片矩阵中的每一个图片均需要进行滑动窗口检测。
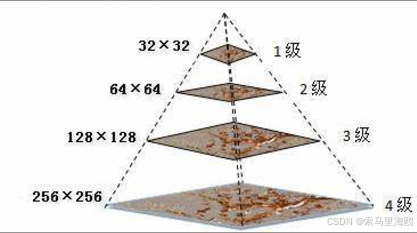
图4 高斯金字塔 pyramid_gaussian()
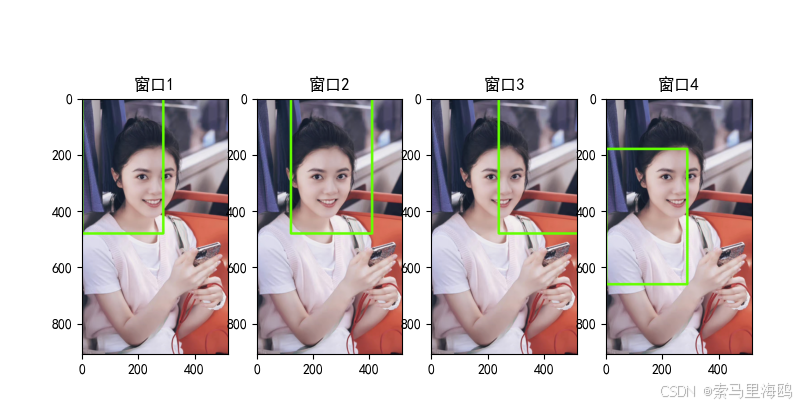
图5 pyramid_gaussian()将原始图像缩小为4/5再进行滑动窗口检测
4.非极大值抑制
在进行滑动卷积处理后,可以检测出很多疑似行人的边界框。边界框之间会存在很多重叠区域,这并不是我们想要的处理结果。这时需要使用非极大值抑制,保留最有可能的行人边界框。
在进行滑动窗口检测时,现在图像上生成很多候选框,然后将这些框的特征提取后送入分类器,一般会得出一个得分(score)。在相互重叠的滑动窗口中只保留得分最高的就足够了。
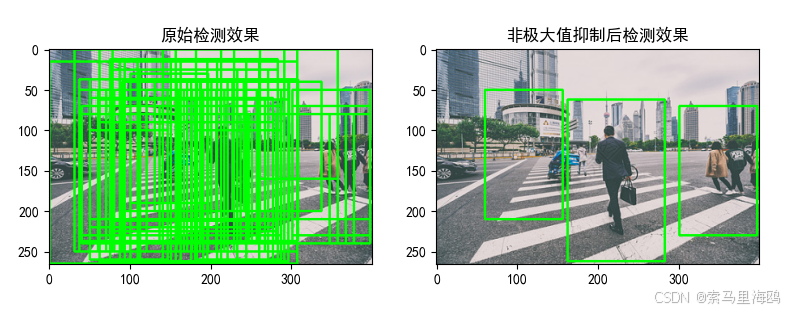
图6 非极大值抑制效果对比
5.案例实现
5.1环境搭建
库:scikit-learn,joblib,Opencv,PyQt5,Pillow,scikit-image,imutils。
资源:正负样本训练集。
5.2代码编写
5.2.1编写extract_features.py文件,提取训练图像特征并存储。
#导入模块
from skimage.feature import hog
from skimage.io import imread
import joblib
import os
import glob
import cv2
#设置数据初始化位置
#图像位置
pos_img_path = 'F:\python_cv\Pedestrian_detection\Data/Images/pos'
neg_img_path = 'F:\python_cv\Pedestrian_detection\Data/Images/neg'

#特征位置
pos_feat_path = 'F:\python_cv\Pedestrian_detection\Data/Features/pos_feat'
neg_feat_path = 'F:\python_cv\Pedestrian_detection\Data/Features/neg_feat'
#创建特征存储路径
#若不存在特征存贮路径,则先创建
if not os.path.isdir(pos_feat_path):
    os.makedirs(pos_feat_path)
if not os.path.isdir(neg_feat_path):
    os.makedirs(neg_feat_path)
print(glob.glob(os.path.join(pos_img_path, '*')))
#对训练图像行人特征进行保存
for img_path in glob.glob(os.path.join(pos_img_path, '*')):
    img = imread(img_path,as_gray=True)
    print(img.shape)
    '''orientation:指定bin的个数
        pixels_per_cell:每个cell的像素数
        cells_per_block:每个block的cell数
        visualize:是否输出HOG image
        transform_sqrt:是否对特征进行sqrt变换
    '''
    fd=hog(img, orientations=9, pixels_per_cell=(8, 8), cells_per_block=(2, 2), visualize=False, transform_sqrt=True)
    print(fd.shape)
    fd_name=os.path.split(img_path)[1].split('.')[0]+'.feat'
    fd_path=os.path.join(pos_feat_path,fd_name)
    joblib.dump(fd,fd_path)
print('特征提取完成!')
#对训练图像非行人特征进行保存
for img_path in glob.glob(os.path.join(neg_img_path, '*.png')):

    img = imread(img_path,as_gray=True)
    img=cv2.resize(img,(96,160))
    print(img.shape)
    '''orientation:指定bin的个数
        pixels_per_cell:每个cell的像素数
        cells_per_block:每个block的cell数
        visualize:是否输出HOG image
        transform_sqrt:是否对特征进行sqrt变换
    '''
    fd=hog(img, orientations=9, pixels_per_cell=(8, 8), cells_per_block=(2, 2), visualize=False, transform_sqrt=True)
    print(fd.shape)
    fd_name=os.path.split(img_path)[1].split('.')[0]+'.feat'
    fd_path=os.path.join(neg_feat_path,fd_name)
    joblib.dump(fd,fd_path)
print('特征提取完成!')
运行改代码后,得到包含正负样本集特征的文件夹。
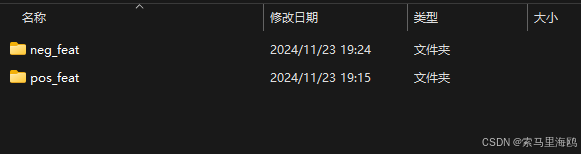
图7 正负样本集特征的文件夹
5.2.2 编写train_svm.py文件,训练和保存SVM模型。
from sklearn.svm import LinearSVC
from sklearn.model_selection import GridSearchCV
import joblib
import glob
import os
import warnings
warnings.filterwarnings("ignore")
#设置获取数据的地址
pos_feat_path = 'F:\python_cv\Pedestrian_detection\Data/Features/pos_feat'
neg_feat_path = 'F:\python_cv\Pedestrian_detection\Data/Features/neg_feat'
model_path = 'F:/python_cv/Pedestrian_detection/Data/Model'
fds,labels = [],[]
#加载正样本特征和负样本特征
for feat_path in glob.glob(os.path.join(pos_feat_path, '*.feat')):
    fd=joblib.load(feat_path)
    fds.append(fd)
    labels.append(1)
for feat_path in glob.glob(os.path.join(neg_feat_path, '*.feat')):
    fd=joblib.load(feat_path)
    fds.append(fd)
    labels.append(0)
#使用网络搜索交叉验证配合数据完成SVM模型的训练
print('开始训练SVM模型...,时间较长,耐心等待')
clf=LinearSVC()#是SVM的线性分类器,用于解决二分类和多分类问题
pg={'C':[0.1,0.2,0.5,0.8,1]}
model=GridSearchCV(clf,pg,cv=5)
model.fit(fds,labels)

print('model.best_params_:',model.best_params_)
#根据上述代码运行的最优模型参数,重新创建模型
clf=LinearSVC(C=model.best_params_['C'])
clf.fit(fds,labels)
#保存模型
if not os.path.isdir(os.path.split(model_path)[0]):
    os.makedirs(os.path.split(model_path)[0])
joblib.dump(clf,model_path)
print('SVM模型训练完成,模型已保存至',model_path)
运行该代码后会生成Model文件。
5.2.3 编写detector.py文件,测试图像获取结果。
import numpy as np
from skimage.transform import pyramid_gaussian
from imutils.object_detection import non_max_suppression
import imutils
from skimage.feature import hog
import joblib
import cv2
from skimage import color
import matplotlib.pyplot as plt
import os
import glob
import warnings
warnings.filterwarnings("ignore")

#调用SVM模型的路径
model_path = "Pedestrian_detection/Data/Model"
#创建函数,处理滑动窗口
def sliding_window(image, window_size, step_size):
    for y in range(0, image.shape[0]-window_size[1], step_size[1]):
        for x in range(0, image.shape[1]-window_size[0], step_size[0]):
            yield (x, y, image[y:y + window_size[1], x:x + window_size[0]])
#创建函数,完成检测功能
def detector(filename):
    print("detector")
    im=cv2.imread(filename)
    if im is None:
        print("can not open image")
        return
    im=imutils.resize(im,width=min(400,im.shape[1]))
    print("image shape:",im.shape)
    min_wdw_sz=(96,160)
    step_size=(10,10)
    downscale=1.25
    clf=joblib.load(model_path)
    detections=[]
    scale=0
    print("scale")
    for im_scaled in pyramid_gaussian(im, downscale=downscale):
        #如果数据小于训练图像大小(96x160),则跳过
        if im_scaled.shape[0] < min_wdw_sz[1] or im_scaled.shape[1] < min_wdw_sz[0]:
            break
        for (x, y, im_window) in sliding_window(im_scaled, min_wdw_sz, step_size):
            if im_window.shape[0] != min_wdw_sz[1] or im_window.shape[1] != min_wdw_sz[0]:
                continue
            im_window=color.rgb2gray(im_window)
            fd=hog(im_window,orientations=9,pixels_per_cell=(8,8),cells_per_block=(2,2),visualize=False,transform_sqrt=True)
            fd=fd.reshape(1,-1)
            pred=clf.predict(fd)
            if pred==1:
                if clf.decision_function(fd)>0.5:#  **表示幂运算
                    detections.append((int(x*(downscale**scale)),int(y*(downscale**scale)),clf.decision_function(fd),int(min_wdw_sz[0]*(downscale**scale)),int(min_wdw_sz[1]*(downscale**scale))))
        scale+=1
    clone=im.copy()


    for (x_tl, y_tl, _, w, h) in detections:
        cv2.rectangle(im, (x_tl, y_tl), (x_tl+w, y_tl+h), (0, 255, 0), 2)
    rects=np.array([[x,y,x+w,y+h] for (x, y, _, w, h) in detections])
    sc=[score[0] for (x, y, score, w, h) in detections]
    #print("sc:",sc)
    sc=np.array(sc)
    pick=non_max_suppression(rects,probs=sc,overlapThresh=0.3)


    for (xA,yA,xB,yB) in pick:
        cv2.rectangle(clone,(xA,yA),(xB,yB),(0,255,0),2)
    plt.rcParams['font.sans-serif']= ['SimHei']
    plt.axis("off")
    plt.subplot(121)
    plt.imshow(cv2.cvtColor(im,cv2.COLOR_BGR2RGB))
    plt.title('原始检测效果')

    plt.subplot(122)
    plt.imshow(cv2.cvtColor(clone,cv2.COLOR_BGR2RGB))
    plt.title('非极大值抑制后检测效果')
    plt.show()
#创建函数,读取图像完成检测功能
#运行函数
def test_folder(foldername):
    filenames=glob.iglob(os.path.join(foldername,'*.png'))
    print("test_folder")
    #print(filenames)
    for filename in filenames:
        print(filename)
        detector(filename)
#完成主函数的设置
if __name__=="__main__":
    foldername="Pedestrian_detection/test_image"
    test_folder(foldername)
检测结果: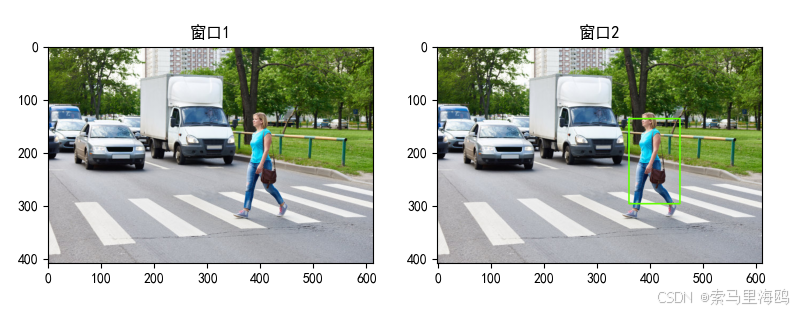

技术共进,成长同行——讯飞AI开发者社区
更多推荐

 18
18 0
0- 0


 已为社区贡献1条内容

所有评论(0)