
python+opencv+opencv-contrib 人脸识别
python+opencv+opencv-contrib 人脸识别1.环境安装①python3.7②opencv③opencv-contrib2.准备样本大概准备5-6个人的人脸图,每个人大概10-20副图这里我上网百度随便找了爱情公寓里面的人当材料,如若侵权,立刻删除3.训练样本def encode_face(path_name):# grab the paths ...
python+opencv+opencv-contrib 人脸识别
1.环境安装
①python3.7
②opencv
③opencv-contrib
2.准备样本
大概准备5-6个人的人脸图,每个人大概10-20副图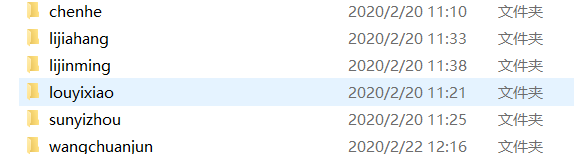
这里我上网百度随便找了爱情公寓里面的人当材料,如若侵权,立刻删除
3.训练样本
def encode_face(path_name):
    # grab the paths to the input images in our dataset
    print("[INFO] quantifying faces...")
    imagePaths = list(paths.list_images(path_name))
    # 这里我用了opencv提供lbpcascade的人脸级联分类器(这个可以减少一些头发干扰)
    detector = cv2.CascadeClassifier("./haarcascades/lbpcascade_frontalface_improved.xml")
    # initialize the list of known encodings and known names
    knownEncodings = []
    knownNames = []

    # loop over the image paths
    for (i, imagePath) in enumerate(imagePaths):
        # extract the person name from the image path
        print("[INFO] processing image {}/{}".format(i + 1, len(imagePaths)))
        name = imagePath.split(os.path.sep)[-2]

        image = cv2.imread(imagePath)
        image_gray = cv2.cvtColor(image, cv2.COLOR_BGR2GRAY)

        rects = detector.detectMultiScale(image_gray, scaleFactor=1.2, minNeighbors=3, minSize=(30, 30))
        # loop over the recognized faces
        if 2 > len(rects) > 0:
            for (x, y, w, h) in rects:
                encoding = image_gray[y:y + h, x:x + w]
                encoding = cv2.resize(encoding, (128, 128))

                cv2.imshow("样本图", encoding)
                cv2.waitKey(5)

                # add each encoding + name to our set of known names and
                # encodings
                knownEncodings.append(encoding)
                knownNames.append(name)

    cv2.destroyWindow("Frame")
    user_names = os.listdir(path_name)
    print(user_names)
    user_num = len(user_names)
    images = np.array(knownEncodings)
    print(images.shape)
    # 标签分类[a,b,c]->[1 2 3]
    labels = np.array([label_id(label, user_names, user_num) + 1 for label in knownNames])
    print(labels)
    return images, labels


# 为每一类数据赋予唯一的标签值
def label_id(label, user_names, user_num):
    for i in range(user_num):
        if label.endswith(user_names[i]):
            return i
        elif i == user_num - 1:
            return i
上面是人脸样本处理,主要是返回得到图片数组和标签数组
看到英文注释不要惊讶,不是我写的,从国外大神那里复制黏贴的,他用的方法是python提供的face-recognition来进行人脸识别的(cpu跑的话比较慢,gpu跑的比较快),附上链接地址https://www.pyimagesearch.com/2018/06/18/face-recognition-with-opencv-python-and-deep-learning/
我的这个用正常电脑cpu跑的话还可以,树莓派4B内存4G版本跑应该还行(这个我还没试)
def trainClass(face_src):
    # opencv提供了三种人脸识别训练方法(第三种LBPHFace会比较好)
    faceClass = cv2.face.EigenFaceRecognizer_create()
    fisherClass = cv2.face.FisherFaceRecognizer_create()
    lpbhClass = cv2.face.LBPHFaceRecognizer_create()
    # 获取图片和标签数据
    images, labels = encode_face(face_src)
    # 开始训练
    faceClass.train(images, labels)
    fisherClass.train(images, labels)
    lpbhClass.train(images, labels)
    # 保存训练模型
    faceClass.write("./faceClass.xml")
    fisherClass.write("./fisherClass.xml")
    lpbhClass.write("./lpbhClass.xml")
上面的代码是利用图片和标签来训练模型
4.人脸识别
def cameraOpen():
    # load the known faces and embeddings
    print("[INFO] loading encodings...")
    detector = cv2.CascadeClassifier("../haarcascades/lbpcascade_frontalface_improved.xml")
    # 人脸标签
    users = os.listdir("./dataset")
    # initialize the pointer to the video file and the video writer
    print("[INFO] processing video...")
    stream = cv2.VideoCapture(0)
    cv2.namedWindow('Frame')
    # 创建一个滑动轴来控制置信度
    cv2.createTrackbar('confindence', 'Frame', 0, 200, nothing)
    # 加载训练好的模型
    faceClass = cv2.face.EigenFaceRecognizer_create()
    fisherClass = cv2.face.FisherFaceRecognizer_create()
    lpbhClass = cv2.face.LBPHFaceRecognizer_create()
    faceClass.read("./faceClass.xml")
    fisherClass.read("./fisherClass.xml")
    lpbhClass.read("./lpbhClass.xml")

    while True:
        # grab the next frame
        (grabbed, frame) = stream.read()

        if not grabbed:
            break

        start = time.time()
        # convert the input frame from BGR to GRAY then resize it to have
        gray = cv2.cvtColor(frame, cv2.COLOR_BGR2GRAY)
        # 人脸检测
        rects = detector.detectMultiScale(gray, scaleFactor=1.2, minNeighbors=5, minSize=(30, 30))
        # loop over the recognized faces
        for (x, y, w, h) in rects:
            # draw the predicted face name on the image
            cv2.rectangle(frame, (x, y), (x + w, y + h), (0, 255, 0), 2)
            # 将人脸抠出来
            face_img = gray[y:y + h, x:x + w]
            face_img = cv2.resize(face_img, (128, 128))

            # opencv三种模型的人脸识别
            # faceResult = faceClass.predict(face_img);
            # print(faceResult)
            # faceResult = fisherClass.predict(face_img);
            # print(faceResult)
            faceResult = lpbhClass.predict(face_img)
            # print(faceResult)
            confidence = ":{0}".format(faceResult[1])
            con_threhold = cv2.getTrackbarPos('confindence', 'Frame')
            if faceResult[1] < con_threhold:
                cv2.putText(frame, users[faceResult[0] - 1] + confidence, (x + 30, y + 30), cv2.FONT_HERSHEY_SIMPLEX,
                            0.5, (255, 0, 255))

        key = cv2.waitKey(1) & 0xFF

        # if the `q` key was pressed, break from the loop
        if key == ord("q"):
            break

        # 帧率显示
        end = time.time()
        seconds = end - start
        fps = 1 / seconds
        label = "fps:{0}".format(int(fps))
        cv2.putText(frame, label, (0, 15), cv2.FONT_HERSHEY_SIMPLEX, 0.5, (0, 0, 255))
        # 显示视频
        cv2.imshow("Frame", frame)

    # close the video file pointers
    stream.release()
    cv2.destroyWindow("Frame")


# 滑动轴一定要个函数
def nothing(x):
    pass
上面的代码就是利用训练好的模型进行人脸识别
5.完整代码
(我先试一下自己可不可以)
import os
import time
import cv2
from imutils import paths
import numpy as np


def encode_face(path_name):
    # grab the paths to the input images in our dataset
    print("[INFO] quantifying faces...")
    imagePaths = list(paths.list_images(path_name))
    # 这里我用了opencv提供lbpcascade的人脸级联分类器(这个可以减少一些头发干扰)
    detector = cv2.CascadeClassifier("./haarcascades/lbpcascade_frontalface_improved.xml")
    # initialize the list of known encodings and known names
    knownEncodings = []
    knownNames = []

    # loop over the image paths
    for (i, imagePath) in enumerate(imagePaths):
        # extract the person name from the image path
        print("[INFO] processing image {}/{}".format(i + 1, len(imagePaths)))
        name = imagePath.split(os.path.sep)[-2]

        image = cv2.imread(imagePath)
        image_gray = cv2.cvtColor(image, cv2.COLOR_BGR2GRAY)

        rects = detector.detectMultiScale(image_gray, scaleFactor=1.2, minNeighbors=3, minSize=(30, 30))
        # loop over the recognized faces
        if 2 > len(rects) > 0:
            for (x, y, w, h) in rects:
                encoding = image_gray[y:y + h, x:x + w]
                encoding = cv2.resize(encoding, (128, 128))

                cv2.imshow("样本图", encoding)
                cv2.waitKey(5)

                # add each encoding + name to our set of known names and
                # encodings
                knownEncodings.append(encoding)
                knownNames.append(name)

    cv2.destroyWindow("Frame")
    user_names = os.listdir(path_name)
    print(user_names)
    user_num = len(user_names)
    images = np.array(knownEncodings)
    print(images.shape)
    # 标签分类[a,b,c]->[1 2 3]
    labels = np.array([label_id(label, user_names, user_num) + 1 for label in knownNames])
    print(labels)
    return images, labels


# 为每一类数据赋予唯一的标签值
def label_id(label, user_names, user_num):
    for i in range(user_num):
        if label.endswith(user_names[i]):
            return i
        elif i == user_num - 1:
            return i


def trainClass(face_src):
    # opencv提供了三种人脸识别训练方法(第三种LBPHFace会比较好)
    faceClass = cv2.face.EigenFaceRecognizer_create()
    fisherClass = cv2.face.FisherFaceRecognizer_create()
    lpbhClass = cv2.face.LBPHFaceRecognizer_create()
    # 获取图片和标签数据
    images, labels = encode_face(face_src)
    # 开始训练
    faceClass.train(images, labels)
    fisherClass.train(images, labels)
    lpbhClass.train(images, labels)
    # 保存训练模型
    faceClass.write("./faceClass.xml")
    fisherClass.write("./fisherClass.xml")
    lpbhClass.write("./lpbhClass.xml")


def cameraOpen():
    # load the known faces and embeddings
    print("[INFO] loading encodings...")
    detector = cv2.CascadeClassifier("../haarcascades/lbpcascade_frontalface_improved.xml")
    # 人脸标签
    users = os.listdir("./dataset")
    # initialize the pointer to the video file and the video writer
    print("[INFO] processing video...")
    stream = cv2.VideoCapture(0)
    cv2.namedWindow('Frame')
    # 创建一个滑动轴来控制置信度
    cv2.createTrackbar('confindence', 'Frame', 0, 200, nothing)
    # 加载训练好的模型
    faceClass = cv2.face.EigenFaceRecognizer_create()
    fisherClass = cv2.face.FisherFaceRecognizer_create()
    lpbhClass = cv2.face.LBPHFaceRecognizer_create()
    faceClass.read("./faceClass.xml")
    fisherClass.read("./fisherClass.xml")
    lpbhClass.read("./lpbhClass.xml")

    while True:
        # grab the next frame
        (grabbed, frame) = stream.read()

        if not grabbed:
            break

        start = time.time()
        # convert the input frame from BGR to GRAY then resize it to have
        gray = cv2.cvtColor(frame, cv2.COLOR_BGR2GRAY)
        # 人脸检测
        rects = detector.detectMultiScale(gray, scaleFactor=1.2, minNeighbors=5, minSize=(30, 30))
        # loop over the recognized faces
        for (x, y, w, h) in rects:
            # draw the predicted face name on the image
            cv2.rectangle(frame, (x, y), (x + w, y + h), (0, 255, 0), 2)
            # 将人脸抠出来
            face_img = gray[y:y + h, x:x + w]
            face_img = cv2.resize(face_img, (128, 128))

            # opencv三种模型的人脸识别
            # faceResult = faceClass.predict(face_img);
            # print(faceResult)
            # faceResult = fisherClass.predict(face_img);
            # print(faceResult)
            faceResult = lpbhClass.predict(face_img)
            # print(faceResult)
            confidence = ":{0}".format(faceResult[1])
            con_threhold = cv2.getTrackbarPos('confindence', 'Frame')
            if faceResult[1] < con_threhold:
                cv2.putText(frame, users[faceResult[0] - 1] + confidence, (x + 30, y + 30), cv2.FONT_HERSHEY_SIMPLEX,
                            0.5, (255, 0, 255))

        key = cv2.waitKey(1) & 0xFF

        # if the `q` key was pressed, break from the loop
        if key == ord("q"):
            break

        # 帧率显示
        end = time.time()
        seconds = end - start
        fps = 1 / seconds
        label = "fps:{0}".format(int(fps))
        cv2.putText(frame, label, (0, 15), cv2.FONT_HERSHEY_SIMPLEX, 0.5, (0, 0, 255))
        # 显示视频
        cv2.imshow("Frame", frame)

    # close the video file pointers
    stream.release()
    cv2.destroyWindow("Frame")


# 滑动轴一定要个函数
def nothing(x):
    pass


if __name__ == '__main__':
    # 人脸样本的文件夹
    image_src = "./dataset"
    # 训练模型
    trainClass(image_src)
    # 打开摄像头
    cameraOpen()
效果图我就不展示了
补充一下
opencv提供的三种人脸识别方法都会返回置信度,这里我只说lbph方法那个,如果50-60置信度还是OK的,最好就是50以下
剩下出现什么问题的可以自己百度总能解决的
写一篇文章好累啊
所以
这篇文章结束
谢谢大家,不喜勿喷(/狗头保命)

技术共进,成长同行——讯飞AI开发者社区
更多推荐

 2
2 0
0- 0


 已为社区贡献4条内容

所有评论(0)